iOS开发:一个无限滚动自动播放图片的Demo(Swift语言编码)
很久以前就想写这么一个无限滚动的Demo了,最近学习了下Swift,手中没有可以用来练手的Demo,所以才将它实现了。
Github地址(由于使用了UIView+AutoLayout第三方进行布局,所以Github判断主要语言是OC):https://github.com/wzpziyi1/DisplayingImage
使用UICollectionView来实现的,不同于UIScrollView实现的一点是,就是不需要再手动实现缓存池功能,因为UICollectionView中的cell本就是循环利用的,我只是需要处理好无限滚动以及定时器的移除与添加即可。
这里需要注意下,MJExtension框架,并不能完美支持Swift,我在编写的过程中,利用它解析一个plist文件,并未成功,然后自己写了个KVC解析的,希望MJ老师尽快将它升级为Swift版本吧。
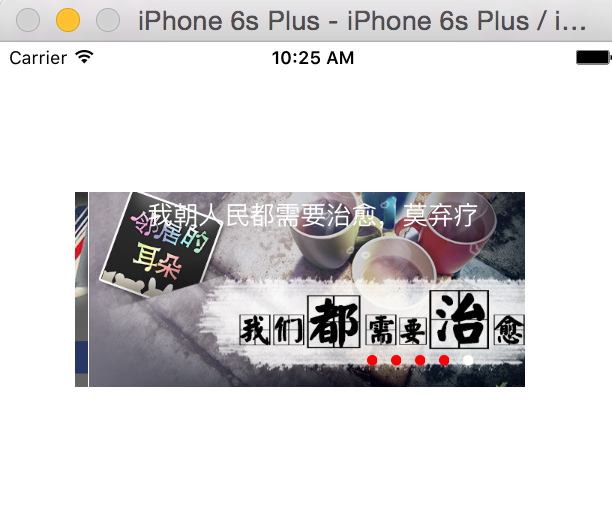
示例图片:

在编写过程中,遇到的问题还是比较多的,是因为我不是那么熟悉Swift导致的,个人觉得Swift现在最不好的一点,就是还没有一个统一的规范。我是从OC转Swift的,所以代码中基本是使用OC的那一套规范,但是从其他语言转过来的,可能就会有很大差异了。
-
- 这是一个从plist里面读取数据,并将之存储到数组里面的代码:
class ZYNew: NSObject { var icon: String! var title: String! init(dict: Dictionary<String, String>) { super.init() self.setValuesForKeysWithDictionary(dict) } class func getNews() -> Array<ZYNew> { let path = NSBundle.mainBundle().pathForResource("newses.plist", ofType: nil) let originArray: NSArray? = NSArray(contentsOfFile: path!) var news = Array<ZYNew>() originArray?.enumerateObjectsUsingBlock({ (obj: AnyObject, index: Int, stop: UnsafeMutablePointer<ObjCBool>) -> Void in let tmp = ZYNew(dict: obj as! Dictionary<String, String>) news.append(tmp) }) return news } }这里有个极为坑的地方,Swift中的Array类型竟然没有contentsOfFile方法,也就是说,使用Array是不能从一个文件路径中读取一个plist,然后将之转化为数组的。好吧,没有那就算了,反正也是可以使用NSArray,那么我用NSArray转化就好,然后就掉进坑里了。
在Swift里面,OC中的NSArray/NSDictionary等里面装的对象它是全部将之认为是anyObject类型的,这就意味着,你在将NSArray强制转化为Array<ZYNew>的时候,是错误的。比如说,在上面的代码,我就使用如下代码强制转化过:
let originArray: NSArray? = NSArray(contentsOfFile: path!)
let news: Array<ZYNew> = originArray as! [ZYNew]
这样转,在这里是错误的,因为anyObject的真正类型是字典,然后我修改成上面的代码了。
- 自定义UICollectionViewCell的代码:
import UIKit class ZYNewCell: UICollectionViewCell { //Mark:- 存储属性 var new: ZYNew? { didSet{ // print(new?.icon) self.imageView.image = UIImage(named: (new?.icon)!) self.titleLabel.text = new?.title } } //MARK:- 计算属性 //MARK:- UI属性 private weak var imageView: UIImageView! private weak var titleLabel: UILabel! override init(frame: CGRect) { super.init(frame: frame) self.commitInit() } required init?(coder aDecoder: NSCoder) { super.init(coder: aDecoder) self.commitInit() } private func commitInit() { let imageView = UIImageView() imageView.contentMode = UIViewContentMode.ScaleAspectFill imageView.clipsToBounds = true self.addSubview(imageView) self.imageView = imageView let titleLabel = UILabel() titleLabel.textAlignment = NSTextAlignment.Center titleLabel.textColor = UIColor.whiteColor() self.addSubview(titleLabel) self.titleLabel = titleLabel } override func layoutSubviews() { super.layoutSubviews() self.imageView.autoPinEdgesToSuperviewEdgesWithInsets(UIEdgeInsetsZero) self.titleLabel.autoPinEdgesToSuperviewEdgesWithInsets(UIEdgeInsetsZero, excludingEdge: ALEdge.Bottom) self.titleLabel.autoSetDimension(ALDimension.Height, toSize: 30) } }这里倒是编写得很顺利,由于OC的编码习惯,我喜欢将类的属性进行分层,这样方便我后期开发中快速查找问题所在,代码看过去也是一目了然。
Swift中的属性有两种:
存储属性:它有willSet和didSet方法
计算属性:它有set和get方法
感觉就是对应OC中的getter和setter方法,可以进行重写。
- 主要代码ZYImageDisplayingView:
import UIKit class ZYImageDisplayingView: UIView, UICollectionViewDelegate, UICollectionViewDataSource { //MARK:- 常量 private let identifier = "ZYNewCell" //MARK:- 存储属性 override var frame: CGRect{ didSet{ if (self.collectionView != nil) { self.collectionView?.removeFromSuperview() } if (frame.width == 0.0 && frame.height == 0.0 && frame.origin.x == 0.0 && frame.origin.y == 0.0) { return } let layout = UICollectionViewFlowLayout() layout.itemSize = frame.size layout.scrollDirection = UICollectionViewScrollDirection.Horizontal layout.minimumLineSpacing = 0 let collectionView = UICollectionView(frame: CGRectMake(0, 0, frame.width, frame.height), collectionViewLayout: layout) collectionView.registerClass(ZYNewCell.self, forCellWithReuseIdentifier: identifier) collectionView.showsHorizontalScrollIndicator = false self.addSubview(collectionView) self.collectionView = collectionView self.collectionView!.delegate = self self.collectionView!.dataSource = self self.collectionView!.backgroundColor = UIColor.whiteColor() self.collectionView!.pagingEnabled = true self.collectionView!.scrollToItemAtIndexPath(NSIndexPath(forItem: 0, inSection: ZYImageGroups / 2), atScrollPosition: UICollectionViewScrollPosition.None, animated: false) self.bringSubviewToFront(pageControl) self.addTimer() } } var news = ZYNew.getNews() var timer: NSTimer? //MARK:- 计算属性 //MARK:- UI控件 weak var collectionView: UICollectionView? weak var pageControl: UIPageControl! //MARK:- 初始化方法 override init(frame: CGRect) { super.init(frame: frame) self.commitInit() } required init?(coder aDecoder: NSCoder) { super.init(coder: aDecoder) self.commitInit() } private func commitInit(){ self.backgroundColor = UIColor.yellowColor() var pageControl = UIPageControl() pageControl.numberOfPages = self.news.count pageControl.pageIndicatorTintColor = UIColor.redColor() pageControl.currentPageIndicatorTintColor = UIColor.whiteColor() self.addSubview(pageControl) self.pageControl = pageControl } //MARK:- UICollectionViewDataSource func numberOfSectionsInCollectionView(collectionView: UICollectionView) -> Int { return ZYImageGroups } func collectionView(collectionView: UICollectionView, numberOfItemsInSection section: Int) -> Int { return self.news.count } func collectionView(collectionView: UICollectionView, cellForItemAtIndexPath indexPath: NSIndexPath) -> UICollectionViewCell { var cell:ZYNewCell? = collectionView.dequeueReusableCellWithReuseIdentifier(self.identifier, forIndexPath: indexPath) as? ZYNewCell if (cell == nil) { cell = ZYNewCell() } // print(self.news[indexPath.row]) cell?.new = self.news[indexPath.row] return cell! } //MARK:- UIScrollViewDelegate func scrollViewWillBeginDragging(scrollView: UIScrollView) { self.removeTimer() } //当scrollView减速完毕时调用,最好是在这个时候添加定时器 func scrollViewDidEndDecelerating(scrollView: UIScrollView) { self.addTimer() } func scrollViewDidScroll(scrollView: UIScrollView) { let size = scrollView.contentOffset // print(size) self.pageControl.currentPage = Int(size.x / (self.collectionView?.frame.width)! + 0.5) % self.news.count } //MARK:- 定时器处理 func addTimer() { self.removeTimer() self.timer = NSTimer(timeInterval: 2, target: self, selector: Selector("updateTimer"), userInfo: nil, repeats: true) NSRunLoop.mainRunLoop().addTimer(self.timer!, forMode: NSRunLoopCommonModes) } func removeTimer() { self.timer?.invalidate() self.timer = nil } func updateTimer() { let currentIndexPath = self.resetIndexPath() var section = currentIndexPath.section var row = currentIndexPath.row + 1 if (row == self.news.count) { row = 0 section++ } self.collectionView?.scrollToItemAtIndexPath(NSIndexPath(forItem: row, inSection: section), atScrollPosition: UICollectionViewScrollPosition.None, animated: true) } func resetIndexPath() -> NSIndexPath { let currentIndexPath = self.collectionView?.indexPathsForVisibleItems().first self.collectionView?.scrollToItemAtIndexPath(NSIndexPath(forItem: (currentIndexPath?.row)!, inSection: ZYImageGroups / 2), atScrollPosition: UICollectionViewScrollPosition.None, animated: false) return NSIndexPath(forItem: (currentIndexPath?.row)!, inSection: ZYImageGroups / 2) } override func layoutSubviews() { super.layoutSubviews() self.pageControl.autoPinEdgeToSuperviewEdge(ALEdge.Bottom, withInset: 8) self.pageControl.autoPinEdgeToSuperviewEdge(ALEdge.Right, withInset: 20) self.pageControl.autoSetDimensionsToSize(CGSizeMake(100, 20)) } }这部分代码更多的是逻辑处理吧。plist里面只有5个具体的model,我是假设collectionViewCell有100组(也就是section等于100),每一组有5行(也就是row等于5),每一次要滚动到下一个cell的时候,我会先让它滚动到sectio等于50的地方,然后row不变,在开始滚动到下一张,也就是row+1,如果row超过plist中model的个数,那么相应的,section++,row清零。
这里值得说的一点的是,我是重写了父类的frame属性,当ZYImageDisplayingView的frame发生改变的时候,就会触发这个属性的didSet方法,我在这个方法里面初始化了UICollectionView,并做了相应的设置。个人认为这里写的不是很好,我不应该在这个方法里面初始化UICollectionView,这要有这样几点考虑:
如果我是用autoLayout来布局这个控件,是不会触发frame的didSet方法的。
如果我需要更改ZYImageDisplayingView的位置,那么为了避免重复创建UICollectionView,
我必须先把以前创建的UICollectionView移除,再
创建新的collectionView。
其他的,OC中的[ZYImageDisplayingView class]对应Swift中的ZYImageDisplayingView.self
OC中的#pragma mark 对应Swift中的 //MARK:-
- ViewController里面的代码:
import UIKit class ViewController: UIViewController { weak var displayingView: ZYImageDisplayingView! override func viewDidLoad() { super.viewDidLoad() // Do any additional setup after loading the view, typically from a nib. self.view.backgroundColor = UIColor.whiteColor() let displayingView = ZYImageDisplayingView() self.view.addSubview(displayingView) self.displayingView = displayingView self.displayingView.frame = CGRectMake(50, 100, 300, 130) // self.displayingView.autoPinEdgeToSuperviewEdge(ALEdge.Left, withInset: 50) // self.displayingView.autoPinEdgeToSuperviewEdge(ALEdge.Top, withInset: 100) // self.displayingView.autoSetDimensionsToSize(CGSizeMake(300, 130)) } }这里需要注意的是,不要使用autoLayout对displayingView进行布局,否则会导致collectionView的frame为CGRectZero。
当然,这是我的Swift还不怎么熟练所导致的,后续会进行一定的更改。
- 这是一个从plist里面读取数据,并将之存储到数组里面的代码:
正文到此结束
热门推荐


相关文章


Loading...
![[HBLOG]公众号](http://www.liuhaihua.cn/img/qrcode_gzh.jpg)

