iOS视频录制、压缩导出、取帧
概述
花了点时间研究了一下常用的视频获取、录制、压缩、取帧图功能,分享给大家了!相信阅读完本篇文章,会对你有很大的帮助的!
本篇文章研究几下以个功能:
需要真机测试,才能录制视频!
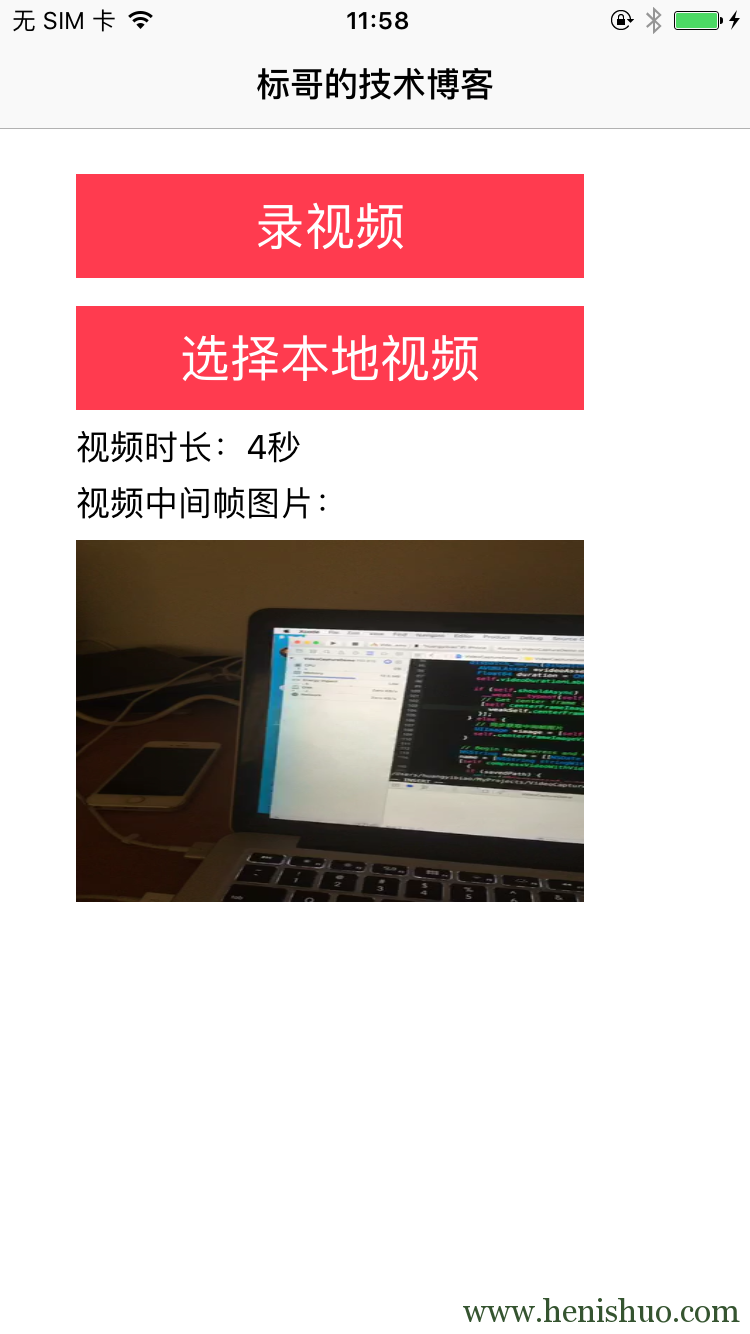
效果图
视频录制
首先,我们弹出系统的视频录制界面,也就是UIImagePickerController控制器来实现,但是我们需要验证用户授权,只有有录制视频的权限,才能继续往下。
我们还需要判断UIImagePickerControllerSourceTypeCamera是否支持,比如模拟器就不支持,当然真机是否有不支持的并不知道,不过更安全的写法是要这么写的。视频录制可以设置录制的视频的质量,也就是分辨率的高低,通过videoQuality属性来设置。我们还可以设置录制视频的最大时长,通过videoMaximumDuration属性设置,比如这里设置为5分钟。
// 7.0 AVAuthorizationStatus authStatus = [AVCaptureDeviceauthorizationStatusForMediaType:AVMediaTypeVideo]; if (authStatus == AVAuthorizationStatusRestricted || authStatus == AVAuthorizationStatusDenied) { NSLog(@"摄像头已被禁用,您可在设置应用程序中进行开启"); return; } if ([UIImagePickerControllerisSourceTypeAvailable:UIImagePickerControllerSourceTypeCamera]) { UIImagePickerController *picker = [[UIImagePickerController alloc]init]; picker.delegate = self; picker.allowsEditing = YES; picker.sourceType = UIImagePickerControllerSourceTypeCamera; picker.videoQuality = UIImagePickerControllerQualityType640x480; //录像质量 picker.videoMaximumDuration = 5 * 60.0f; // 限制视频录制最多不超过5分钟 picker.mediaTypes = @[(NSString *)kUTTypeMovie]; [selfpresentViewController:pickeranimated:YEScompletion:NULL]; self.shouldAsync = YES; } else { NSLog(@"手机不支持摄像"); } 然后实现代理,就可以拿到录制的视频了。
从相册选择视频
从相册选择视频与弹出录制视频的代码差不多,只是sourceType不一样而已。我们一样要求先判断权限,用户是否授权,若不允许,就没有办法了。
指定sourceType为UIImagePickerControllerSourceTypeSavedPhotosAlbum就是获取保存到相册中的media。我们还要指定mediaTypes,只需要设置为kUTTypeMovie就可以了。
AVAuthorizationStatus authStatus = [AVCaptureDeviceauthorizationStatusForMediaType:AVMediaTypeVideo]; if (authStatus == AVAuthorizationStatusRestricted || authStatus == AVAuthorizationStatusDenied) { NSLog(@"摄像头已被禁用,您可在设置应用程序中进行开启"); return; } if ([UIImagePickerControllerisSourceTypeAvailable:UIImagePickerControllerSourceTypeSavedPhotosAlbum]) { UIImagePickerController *picker = [[UIImagePickerController alloc]init]; picker.delegate = self; picker.allowsEditing = YES; picker.sourceType = UIImagePickerControllerSourceTypeSavedPhotosAlbum; picker.mediaTypes = @[(NSString *)kUTTypeMovie]; [selfpresentViewController:pickeranimated:YEScompletion:NULL]; self.shouldAsync = NO; } else { NSLog(@"手机不支持摄像"); } 同样,实现代理方法,就可以取到所选择的视频了。
保存视频到相册
写入相册可以通过ALAssetsLibrary类来实现,它提供了写入相册的API,异步写入,完成是要回到主线程更新UI:
NSURL *videoURL = [infoobjectForKey:UIImagePickerControllerMediaURL]; ALAssetsLibrary *library = [[ALAssetsLibrary alloc]init]; dispatch_async(dispatch_get_global_queue(0, 0), ^{ // 判断相册是否兼容视频,兼容才能保存到相册 if ([libraryvideoAtPathIsCompatibleWithSavedPhotosAlbum:videoURL]) { [librarywriteVideoAtPathToSavedPhotosAlbum:videoURLcompletionBlock:^(NSURL *assetURL, NSError *error) { dispatch_async(dispatch_get_main_queue(), ^{ // 写入相册 if (error == nil) { NSLog(@"写入相册成功"); } else { NSLog(@"写入相册失败"); } } }]; } }); 获取视频帧图
同步获取帧图
同步获取中间帧,需要指定哪个时间点的帧,当获取到以后,返回来的图片对象是CFRetained过的,需要外面手动CGImageRelease一下,释放内存。通过AVAsset来访问具体的视频资源,然后通过AVAssetImageGenerator图片生成器来生成某个帧图片:
// Get the video's center frame as video poster image - (UIImage *)frameImageFromVideoURL:(NSURL *)videoURL { // result UIImage *image = nil; // AVAssetImageGenerator AVAsset *asset = [AVAssetassetWithURL:videoURL]; AVAssetImageGenerator *imageGenerator = [[AVAssetImageGenerator alloc]initWithAsset:asset]; imageGenerator.appliesPreferredTrackTransform = YES; // calculate the midpoint time of video Float64 duration = CMTimeGetSeconds([assetduration]); // 取某个帧的时间,参数一表示哪个时间(秒),参数二表示每秒多少帧 // 通常来说,600是一个常用的公共参数,苹果有说明: // 24 frames per second (fps) for film, 30 fps for NTSC (used for TV in North America and // Japan), and 25 fps for PAL (used for TV in Europe). // Using a timescale of 600, you can exactly represent any number of frames in these systems CMTime midpoint = CMTimeMakeWithSeconds(duration / 2.0, 600); // get the image from NSError *error = nil; CMTime actualTime; // Returns a CFRetained CGImageRef for an asset at or near the specified time. // So we should mannully release it CGImageRef centerFrameImage = [imageGeneratorcopyCGImageAtTime:midpoint actualTime:&actualTime error:&error]; if (centerFrameImage != NULL) { image = [[UIImage alloc]initWithCGImage:centerFrameImage]; // Release the CFRetained image CGImageRelease(centerFrameImage); } return image; } 异步获取帧图
异步获取某个帧的图片,与同步相比,只是调用API不同,可以传多个时间点,然后计算出实际的时间并返回图片,但是返回的图片不需要我们手动再release了。有可能取不到图片,所以还需要判断是否是AVAssetImageGeneratorSucceeded,是才转换图片:
// 异步获取帧图片,可以一次获取多帧图片 - (void)centerFrameImageWithVideoURL:(NSURL *)videoURLcompletion:(void (^)(UIImage *image))completion { // AVAssetImageGenerator AVAsset *asset = [AVAssetassetWithURL:videoURL]; AVAssetImageGenerator *imageGenerator = [[AVAssetImageGenerator alloc]initWithAsset:asset]; imageGenerator.appliesPreferredTrackTransform = YES; // calculate the midpoint time of video Float64 duration = CMTimeGetSeconds([assetduration]); // 取某个帧的时间,参数一表示哪个时间(秒),参数二表示每秒多少帧 // 通常来说,600是一个常用的公共参数,苹果有说明: // 24 frames per second (fps) for film, 30 fps for NTSC (used for TV in North America and // Japan), and 25 fps for PAL (used for TV in Europe). // Using a timescale of 600, you can exactly represent any number of frames in these systems CMTime midpoint = CMTimeMakeWithSeconds(duration / 2.0, 600); // 异步获取多帧图片 NSValue *midTime = [NSValuevalueWithCMTime:midpoint]; [imageGeneratorgenerateCGImagesAsynchronouslyForTimes:@[midTime]completionHandler:^(CMTime requestedTime, CGImageRef _Nullableimage, CMTime actualTime, AVAssetImageGeneratorResult result, NSError * _Nullableerror) { if (result == AVAssetImageGeneratorSucceeded && image != NULL) { UIImage *centerFrameImage = [[UIImage alloc]initWithCGImage:image]; dispatch_async(dispatch_get_main_queue(), ^{ if (completion) { completion(centerFrameImage); } }); } else { dispatch_async(dispatch_get_main_queue(), ^{ if (completion) { completion(nil); } }); } }]; } 压缩并导出视频
压缩视频是因为视频分辨率过高所生成的视频的大小太大了,对于移动设备来说,内存是不能太大的,如果不支持分片上传到服务器,或者不支持流上传、文件上传,而只能支持表单上传,那么必须要限制大小,压缩视频。
就像我们在使用某平台的视频的上传的时候,到现在还没有支持流上传,也不支持文件上传,只支持表单上传,导致视频大一点就会闪退。流上传是上传成功了,但是人家后台不识别,这一次让某平台坑坏了。直接用file上传,也传过去了,上传进度100%了,但是人家那边还是作为失败处理,无奈!
言归正传,压缩、导出视频,需要通过AVAssetExportSession来实现,我们需要指定一个preset,并判断是否支持这个preset,只有支持才能使用。
我们这里设置的preset为AVAssetExportPreset640x480,属于压缩得比较厉害的了,这需要根据服务器视频上传的支持程度而选择的。然后通过调用异步压缩并导出视频:
- (void)compressVideoWithVideoURL:(NSURL *)videoURL savedName:(NSString *)savedName completion:(void (^)(NSString *savedPath))completion { // Accessing video by URL AVURLAsset *videoAsset = [[AVURLAsset alloc]initWithURL:videoURLoptions:nil]; // Find compatible presets by video asset. NSArray *presets = [AVAssetExportSessionexportPresetsCompatibleWithAsset:videoAsset]; // Begin to compress video // Now we just compress to low resolution if it supports // If you need to upload to the server, but server does't support to upload by streaming, // You can compress the resolution to lower. Or you can support more higher resolution. if ([presetscontainsObject:AVAssetExportPreset640x480]) { AVAssetExportSession *session = [[AVAssetExportSession alloc]initWithAsset:videoAsset presetName:AVAssetExportPreset640x480]; NSString *doc = [NSHomeDirectory()stringByAppendingPathComponent:@"Documents"]; NSString *folder = [docstringByAppendingPathComponent:@"HYBVideos"]; BOOL isDir = NO; BOOL isExist = [[NSFileManager defaultManager]fileExistsAtPath:folderisDirectory:&isDir]; if (!isExist || (isExist && !isDir)) { NSError *error = nil; [[NSFileManager defaultManager]createDirectoryAtPath:folder withIntermediateDirectories:YES attributes:nil error:&error]; if (error == nil) { NSLog(@"目录创建成功"); } else { NSLog(@"目录创建失败"); } } NSString *outPutPath = [folderstringByAppendingPathComponent:savedName]; session.outputURL = [NSURLfileURLWithPath:outPutPath]; // Optimize for network use. session.shouldOptimizeForNetworkUse = true; NSArray *supportedTypeArray = session.supportedFileTypes; if ([supportedTypeArraycontainsObject:AVFileTypeMPEG4]) { session.outputFileType = AVFileTypeMPEG4; } else if (supportedTypeArray.count == 0) { NSLog(@"No supported file types"); return; } else { session.outputFileType = [supportedTypeArrayobjectAtIndex:0]; } // Begin to export video to the output path asynchronously. [sessionexportAsynchronouslyWithCompletionHandler:^{ if ([sessionstatus] == AVAssetExportSessionStatusCompleted) { dispatch_async(dispatch_get_main_queue(), ^{ if (completion) { completion([session.outputURLpath]); } }); } else { dispatch_async(dispatch_get_main_queue(), ^{ if (completion) { completion(nil); } }); } }]; } } 解决iOS8上录视频引起的偏移bug
在iOS8上有这么一样bug:弹出录制视频页面,再回来发现整个view都往下移动了,可能网上有很多解决办法,下面只是其中一种:
[pickerdismissViewControllerAnimated:YEScompletion:^{ // for fixing iOS 8.0 problem that frame changed when open camera to record video. self.tabBarController.view.frame = [[UIScreen mainScreen]bounds]; [self.tabBarController.viewlayoutIfNeeded]; }]; Tip:记得在选择或者取消的代理中都调用!
小结
做每种需求,都可能会遇到坑,不过再多的坑也抵不过一颗对技术执着追求的心,必定荡平一切的坑。以前也没有怎么弄过视频类的需求,而别人超过的路,即使有坑也不会告诉后来的人坑在哪里,往往只是心里记着有个坑就算了。
今天给大家分享出来,是帮助有困难的同志们,这里立了一个牌:坑,请大家不要再跳到坑里了。看完本篇文章,是否有所了解了呢?如果您正在做这方面的需求,代码完全可以直接Copy过去使用哦!
源代码
下载源代码,记得star一下,分享出去:
标哥的技术博客:【 VideoCaptureDemo 】
关注标哥
| 联系方式 | 关注 | 备注 |
|---|---|---|
| 合作联系群 | 347363861 | 接项目、私活 |
| iOS直播音视频技术 | 256239496 | 实名制且群规严,定期清理 |
| 标哥博客iOS交流群 | 552095943(新) | 群里很活跃,定期清理 |
| 标哥博客iOS交流群 | 324400294(满)|494669518(满)|494669518(满)|250351140(满) | 群里很活跃,定期清理 |
| 微信公众号 | iOSDevShares或者iOS开发技术分享 | 关注公众号阅读好文章 |
| 新浪微博 | @标哥的技术博客 | 关注微博动态 |
| GITHUB | CoderJackyHuang | 文章Demo都在GITHUB |
| 联系标哥 | 关于标哥 | 保持活跃在最前线 |
版权声明:本文为【标哥的技术博客】原创出品,欢迎转载,转载时请注明出处!


正文到此结束
热门推荐


相关文章

近期评论
-
你这基本没有更新呀,最近文章显示还是2019年的文章。不符合要求哈
-
关键词:慕云博客 链接:https://www.lilun.me 描述:分享原创文字的个人博客
-
-
-
可以提供一下源码吗
-
不是商业站,鸡娃学习笔记
-
-
-
-
听他们说很厉害的样子
Loading...
![[HBLOG]公众号](http://www.liuhaihua.cn/img/qrcode_gzh.jpg)

