使用 NativeScript 和 Angular2 构建跨平台 APP
作者 周林 ,陆金所前端程序员,专注 Hybrid APP 性能优化和新技术探索。欢迎任何形式的提问和讨论,我的微博。
相比于 ReactNative ,NativeScript 能够摆脱对原生代码的依赖,真正实现跨平台开发,非常适合小团队或个人开发者。写了这个教程,帮主大家快速上手。
前言
“一次构建,多处运行”,跨平台 APP 带着这股风潮把火烧到了前端,为开发者带来无尽的遐想。现有的流行跨平台框架有以下:
- 基于单 WebView 的开发框架。开发者可以使用现有的最新 web 技术,开发出单页面 web 应用。同时利用 JSBridge ,又能获取原生的 API ,从而使 web 应用具有了原生应用的功能。Cordova+IONIC 可以说是这个潮流的代表,也是跨平台 APP 的先锋。然而这类跨平台应用的缺点是不流畅,在安卓手机上体验较差。
- Hybrid方向。也就是原生应用配合 HTML5 技术,让 APP 具有了部分跨平台的功能。Hybrid 也是现在各大互联网企业采用较多的跨平台开发方式。这类 APP 在体验上优于单 WebView 的 APP ,并且能够极大提高开发效率。然而这种方式离“一次构建,多处运行”的设想还是有很大距离,毕竟依然需要针对不同的移动平台进行原生开发。
- 使用 JavaScript 开发纯原生应用。既然单 WebView 性能有缺憾,Hybrid 技术栈又比较高,那么 JavaScript 开发纯原生应用就孕育而生。这个方向的代表有 ReactNative , Weex 和我们今天的主角– NativeScript 。
和 ReactNative 相比,NativeScript 最大的特点是可以获得100%的原生 API 。也就是说,开发者可以通过 JavaScript 获取和原生开发语言同样多的原生接口。下面,我们通过实现一个简单的计算器,来体会一下 NativeScript 的开发思想。同时,我们能体会到“获取所有原生 API ”带来的巨大好处。 你可以先在 这里 看到最终的结果。 注意输入的数字的字体会随着文本长度逐渐变小,想想这个功能怎么实现。
Why NativeScript?
大家定会好奇,ReactNative 这么火,大家都在谈论它,大有一统天下的感觉,为什么还要讨论 NativeScript 呢?这是因为 ReactNative 依然不能真正统一编程语言。ReactNative 基于平台抽象,不可能暴露100%的原生 API ,因此需要使用原生编程语言进行扩展,提高了技术栈。所以,一个 ReactNative 的开发团队里面必须同时具备 JavaScript ,Java 还有 ObjectiveC 开发技术。 相比之下,NativeScript 的技术栈则要简单的多,开发者只需要使用 JavaScript 就能进行开发。这里列出了几个 NativeScript 的核心功能:
- 使用 JavaScript 直接访问 所有 原生 API
- 系统新功能 0延时 支持
- 第三方原生库 全部 支持
准备
首先需要搭建开发环境,请参考官方的 文档 。你可以使用下面的命令来检测 NativeScript 是否安转完成:
> tns doctor NativeScript支持纯 JavaScript,同时也支持 Angular2 。我们选择 Angular2 和 Typescript 进行开发,体会一下 Angular2 带来的开发便利。
创建我们的项目
>tns create NSCalculator --ng 这个命令会在当前目录下新建 NSCalculator 文件夹,同时安装好所需的第三方依赖。其实这个命令还给你新建一个 Demo ,运行下面的命令,你就会看到你的第一个 NativeScript 应用
> tns platform add ios >tns run ios --emulator 拆分
使用 Visual Studio Code 打开文件,有如下的文件夹结构
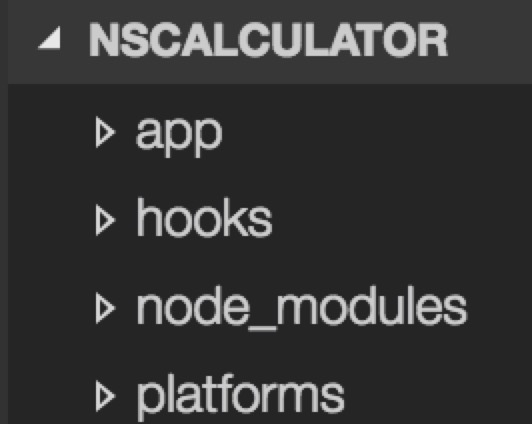
我们的代码将会组织在 app 目录下,所以只需考虑这个文件夹。main.ts 是整个应用的启动文件,我们现在不需要更改它。我们看到 main.ts 里面引入了 app.component 模块,app.component 将会被改造成我们的计算器组件。在改造 app.component.ts 前,我们先考虑一下如何将计算器拆分成一个个组件。
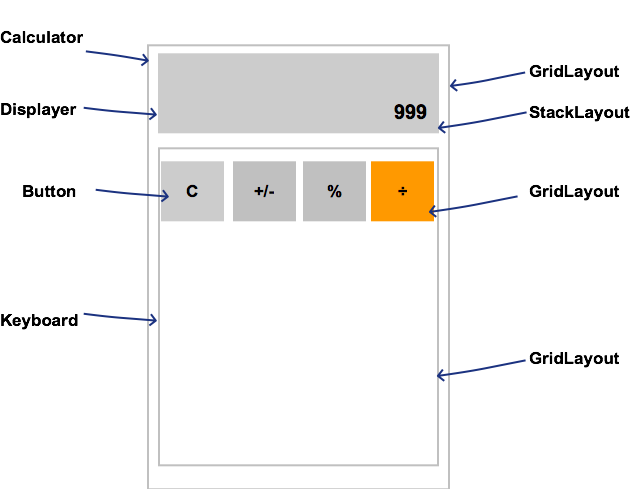
首先从功能上对计算器进行拆分。计算器由 Displayer 和 Keyboard 两个部分,Keyboard 由 Button 组成。基于此,我们在 app 目录下新增三个文件夹:Displayer,Keyboard,NSButton。
布局
组件化开发有两种常用方式,一种是由大到小开发,也就是 Calculator -> Displayer -> Keyboard -> Button ,一种是由小到大开发,也就是 Button -> Keyboard -> Displayer -> Calculator 。当然你也可以混合开发。本例采用由大到小的开发方式。 删除 app.component.ts 里面的内容,用以下代替:
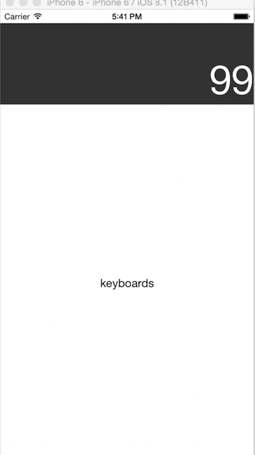
// app.component.ts import { Component, } from "@angular/core"; @Component({ selector: "calculator", template: ` <GridLayout rows="auto,*" columns="*"> <StackLayout row="0" style="font-size:60;color:#fff;height:120;background-color:rgba(0,0,0,0.8);text-align:right;vertical-align:bottom;"> <Label text="99" ></Label> </StackLayout> <GridLayout row="1" style="background-color:#fff;text-align:center;"> <Label text="keyboards" ></Label> </GridLayout> </GridLayout> `, }) export class AppComponent { public counter: string = ''; } 运行以下命令,你就能看到效果
> tns livesync ios --emulator --watch 和 tns run ios 命令不同,这个命令会监视你的文件变化并自动构建部署新的应用。
NativeScript 的布局方式和安卓原生的布局方式非常类似。对于计算器,我们的 Displayer 需要一个固定的高度,Keyboard 需要占据全部剩余的空间。因此,Calculator 的第一级布局使用了 GridLayout 。rows=”auto,*” 表示 Gridlayout 为两行,第一行高度由内容(auto)决定,第二行高度占据全部剩余空间(*)。columns=”*“表示 Gridlayout 分为一列布局,这一列的宽度占据全部空间。 我们为 Displayer 选择了 StackLayout 布局,这是因为我们需要把 Label 靠右下角对齐。我们为 Keyboard 选择了 GridLayout 布局,这很好理解,因为我们需要一个5x4的格子用来放置计算器的按钮。 熟悉 ReactNative 的同学可能知道,ReactNative 使用 Flex 布局,非常便于 web 开发者掌握。NativeScript 则使用和原生开发非常相似的布局方式,然而这种布局方式其实也很容易掌握。 注意我们还使用了行内 CSS 来装饰 NativeScript 的组件。NativeScript 支持的 CSS 属性是 web CSS 属性的一个子集。你可以在 这里 看到 NativeScript 支持的 CSS 种类,总的来说,有限但是够用。
组件
目前为止我们的 APP 只有一个组件 AppComponent,这非常不利于项目的扩展。幸运的是 NativeScript 支持 Angular2.0 的全部功能,我们可以使用 Angular 来实现 Displayer 和 Keyboard 组件。 在 app目录下新建 Keyboard 文件夹,在 Keyboard 文件里新增 keyboard.component.ts,keyboard.html,以及 keyboard.css 文件。内容如下:
<code><span>//keyboard.component.ts</span> <span>import</span> <span>{</span> <span>Component</span><span>,</span> <span>}</span> <span>from</span> <span><a href="/cdn-cgi/l/email-protection" data-cfemail="4d6a0d2c232a38212c3f">[email protected]</a> <script data-cfhash="f9e31" type="text/javascript">/* <![CDATA[ */!function(t,e,r,n,c,a,p){try{t=document.currentScript||function(){for(t=document.getElementsByTagName('script'),e=t.length;e--;)if(t[e].getAttribute('data-cfhash'))return t[e]}();if(t&&(c=t.previousSibling)){p=t.parentNode;if(a=c.getAttribute('data-cfemail')){for(e='',r='0x'+a.substr(0,2)|0,n=2;a.length-n;n+=2)e+='%'+('0'+('0x'+a.substr(n,2)^r).toString(16)).slice(-2);p.replaceChild(document.createTextNode(decodeURIComponent(e)),c)}p.removeChild(t)}}catch(u){}}()/* ]]> */ </script>/core'</span><span>;</span> <span>@</span><span>Component</span><span>({</span> <span>selector</span><span>:</span><span>'keyboard'</span><span>,</span> <span>templateUrl</span><span>:</span><span>'Keyboard/keyboard.html'</span><span>,</span> <span>styleUrls</span><span>:[</span><span>'Keyboard/keyboard.css'</span><span>]</span> <span>})</span> <span>export</span> <span>class</span> <span>Keyboard</span><span>{</span> <span>}</span> </code> <!--keyboard.html--> <GridLayout row="1" columns="1*,1*,1*,1*" rows="1*,1*,1*,1*,1*"> <!--第一行--> <StackLayout row="0" col="0"> <Label class="keyboard-item gray" text="C"></Label> </StackLayout> <StackLayout row="0" col="1"> <Label class="keyboard-item gray" text="+/-"></Label> </StackLayout> <StackLayout row="0" col="2"> <Label class="keyboard-item gray" text="%"></Label> </StackLayout> <StackLayout row="0" col="3"> <Label class="keyboard-item yellow" text="÷"></Label> </StackLayout> <!--第二行--> <StackLayout row="1" col="0"> <Label class="keyboard-item gray" text="7"></Label> </StackLayout> <StackLayout row="1" col="1"> <Label class="keyboard-item gray" text="8"></Label> </StackLayout> <StackLayout row="1" col="2"> <Label class="keyboard-item gray" text="9"></Label> </StackLayout> <StackLayout row="1" col="3"> <Label class="keyboard-item yellow" text="x"></Label> </StackLayout> <!--第三行--> <StackLayout row="2" col="0"> <Label class="keyboard-item gray" text="4"></Label> </StackLayout> <StackLayout row="2" col="1"> <Label class="keyboard-item gray" text="5"></Label> </StackLayout> <StackLayout row="2" col="2"> <Label class="keyboard-item gray" text="6"></Label> </StackLayout> <StackLayout row="2" col="3"> <Label class="keyboard-item yellow" text="-"></Label> </StackLayout> <!--第四行--> <StackLayout row="3" col="0"> <Label class="keyboard-item gray" text="1"></Label> </StackLayout> <StackLayout row="3" col="1"> <Label class="keyboard-item gray" text="2"></Label> </StackLayout> <StackLayout row="3" col="2"> <Label class="keyboard-item gray" text="3"></Label> </StackLayout> <StackLayout row="3" col="3"> <Label class="keyboard-item yellow" text="+"></Label> </StackLayout> <!--第五行--> <StackLayout row="4" col="0" colSpan="2"> <Label class="keyboard-item gray" text="0"></Label> </StackLayout> <StackLayout row="4" col="2"> <Label class="keyboard-item gray" text="."></Label> </StackLayout> <StackLayout row="4" col="3"> <Label class="keyboard-item yellow" text="="></Label> </StackLayout> </GridLayout> // keyboard.css .keyboard-item { border-width: 0.5; border-color: rgb(123,123,123); font-family: monospace; width:100%; height: 100%; text-align: center; } .gray { background-color: rgb(205,205,205); color:rgb(22,22,22); font-size: 25; } .yellow { background-color:rgb(242,127,38); color:#fff; font-size: 30; } 在 Keyboard 组件里,我们把 HTML 模板和 CSS 都拆分到了独立文件里面,又回到了那个干干净净的 web 世界。而这两者 ReactNative 都不能支持!所以在组件复用性和易用性上,NativeScript 其实技高一筹。 然而现在应用界面并没有任何变化,我们还需要在 app.component.ts 中引入 Keyboard 组件。修改后的 app.component.ts 文件如下
//app.component.ts import { Component, } from "@angular/core"; //引入外部组件 import { Keyboard } from './Keyboard/keyboard.component'; @Component({ selector: "calculator", template: ` <GridLayout rows="auto,*" columns="*"> <!--Dispalyer--> <StackLayout row="0" style="font-size:60;color:#fff;height:120;background-color:rgba(0,0,0,0.8);text-align:right;vertical-align:bottom;"> <Label text="99" ></Label> </StackLayout> <!--引入Keyboard组件--> <keyboard row="1"></keyboard> </GridLayout> `, directives:[Keyboard] //声明对Keyboard组件的依赖 }) export class AppComponent { public counter: string = ''; } 现在我们的计算器有点样子了:
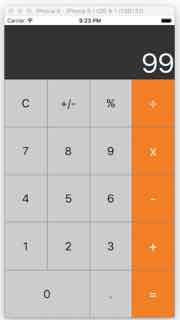
似乎有点简单。但是请注意,这个界面是完全的 原生界面 ,完全由原生组件构成。然而,由于 NativeScript 的支持,我们确可以像开发 web 应用一般轻松的开发原生应用了。 但是现在的 Keyboard 还不能提供任何功能,Keyboard 不能响应点击事件,也不能把数据传递给 Displayer 。接下来我们就要为 Keyboard 加上这些功能。
交互
NativeScript 提供了原生的 手势事件 ,你可以在应用中直接使用。由于 touch 事件会返回手指的状态:向下,移动,向上等,满足键盘交互的需求,因此我们监听 touch 事件。 要监听 Keyboard 的点击事件,最直观的答案就是为每个按钮设置 touch 事件监听器,在这个计算器应用中我们需要设置19次!而且我们的监听逻辑不能复用,虽然他们的功能很相似!这是不可接受的。所以,我们应该把按钮也做成一个 Angular 组件,因为组件是可以复用的。 那么这个按钮组件需要哪些功能呢? 当点击按钮时,按钮的背景色需要改变,并且需要把这个点击事件告知其他组件。 在 app 目录下新建 NSButton 文件夹,同时在 NSButton 文件夹里新增一下文件: nsbutton.component.ts, nsbutton.css 。
<code><span>//nsbutton.component.ts</span> <span>import</span> <span>{</span> <span>Component</span><span>,</span> <span>ElementRef</span><span>,</span> <span>ViewChild</span><span>,</span> <span>AfterViewInit</span><span>,</span> <span>Input</span><span>,</span> <span>OnInit</span> <span>}</span> <span>from</span> <span><a href="/cdn-cgi/l/email-protection" data-cfemail="eec9ae8f80899b828f9c">[email protected]</a> <script data-cfhash="f9e31" type="text/javascript">/* <![CDATA[ */!function(t,e,r,n,c,a,p){try{t=document.currentScript||function(){for(t=document.getElementsByTagName('script'),e=t.length;e--;)if(t[e].getAttribute('data-cfhash'))return t[e]}();if(t&&(c=t.previousSibling)){p=t.parentNode;if(a=c.getAttribute('data-cfemail')){for(e='',r='0x'+a.substr(0,2)|0,n=2;a.length-n;n+=2)e+='%'+('0'+('0x'+a.substr(n,2)^r).toString(16)).slice(-2);p.replaceChild(document.createTextNode(decodeURIComponent(e)),c)}p.removeChild(t)}}catch(u){}}()/* ]]> */ </script>/core'</span><span>;</span> <span>import</span> <span>{</span> <span>Label</span> <span>}</span> <span>from</span> <span>'ui/label'</span><span>;</span> <span>import</span> <span>{</span> <span>GestureTypes</span><span>,</span> <span>TouchGestureEventData</span> <span>}</span> <span>from</span> <span>'ui/gestures'</span><span>;</span> <span>import</span> <span>{</span> <span>Color</span> <span>}</span> <span>from</span> <span>'color'</span><span>;</span> <span>@</span><span>Component</span><span>({</span> <span>selector</span><span>:</span> <span>'nsbutton'</span><span>,</span> <span>template</span><span>:</span> <span>`</span><span><</span><span>Label</span> <span>class</span><span>=</span><span>"keyboard-item"</span> <span>#</span><span>nsbutton</span> <span>[</span><span>text</span><span>]</span><span>=</span><span>"text"</span> <span>(</span><span>touch</span><span>)</span><span>=</span><span>"onTouch($event)"</span><span>></span> <span><</span><span>/Label>`</span><span>, </span> <span>styleUrls</span><span>:[</span><span>'NSButton/nsbutton.css'</span><span>]</span> <span>})</span> <span>export</span> <span>class</span> <span>NSButton</span> <span>implements</span> <span>AfterViewInit</span><span>{</span> <span>@</span><span>ViewChild</span><span>(</span><span>'nsbutton'</span><span>)</span> <span>nsBtnRef</span> <span>:</span> <span>ElementRef</span><span>;</span> <span>@</span><span>Input</span><span>(</span><span>'text'</span><span>)</span> <span>text</span><span>:</span> <span>string</span><span>;</span> <span>@</span><span>Input</span><span>(</span><span>'normalBg'</span><span>)</span> <span>normalBg</span><span>:</span><span>string</span><span>;</span> <span>@</span><span>Input</span><span>(</span><span>'activeBg'</span><span>)</span> <span>activeBg</span><span>:</span><span>string</span><span>;</span> <span>private</span> <span>nsBtnView</span> <span>:</span> <span>Label</span><span>;</span> <span>ngAfterViewInit</span><span>()</span> <span>{</span> <span>this</span><span>.</span><span>nsBtnView</span> <span>=</span> <span><</span><span>Label</span><span>></span> <span>this</span><span>.</span><span>nsBtnRef</span><span>.</span><span>nativeElement</span><span>;</span> <span>this</span><span>.</span><span>changeBg</span><span>(</span><span>this</span><span>.</span><span>nsBtnView</span><span>,</span><span>this</span><span>.</span><span>normalBg</span> <span>||</span> <span>'#D0D0D0'</span><span>);</span> <span>}</span> <span>changeBg</span><span>(</span><span>component</span><span>:</span><span>Label</span><span>,</span><span>bgColor</span><span>:</span><span>string</span><span>)</span> <span>{</span> <span>component</span><span>.</span><span>backgroundColor</span> <span>=</span> <span>new</span> <span>Color</span><span>(</span><span>bgColor</span><span>);</span> <span>}</span> <span>onTouch</span><span>(</span><span>event</span><span>)</span> <span>{</span> <span>this</span><span>.</span><span>onTouchEvent</span><span>(</span><span>event</span><span>.</span><span>action</span><span>);</span> <span>}</span> <span>onTouchEvent</span><span>(</span><span>type</span><span>:</span><span>string</span><span>)</span> <span>{</span> <span>switch</span><span>(</span><span>type</span><span>)</span> <span>{</span> <span>case</span> <span>'down'</span><span>:</span> <span>case</span> <span>'move'</span><span>:</span> <span>this</span><span>.</span><span>changeBg</span><span>(</span><span>this</span><span>.</span><span>nsBtnView</span><span>,</span><span>this</span><span>.</span><span>activeBg</span> <span>||</span> <span>'#A3A3A3'</span><span>);</span> <span>break</span><span>;</span> <span>default</span><span>:</span> <span>this</span><span>.</span><span>changeBg</span><span>(</span><span>this</span><span>.</span><span>nsBtnView</span><span>,</span><span>this</span><span>.</span><span>normalBg</span> <span>||</span> <span>'#D0D0D0'</span><span>);</span> <span>break</span><span>;</span> <span>}</span> <span>}</span> <span>}</span> </code> 请注意,这里我们没有使用 ngStyle 的方式来改变按钮的背景,而是用了更底层一级的 API 。主要是为了像你展示在 NativeScript 中使用原生 API 是多么轻松的一件事。
//nsbutton.css .keyboard-item { border-width: 0.5; border-color: rgb(123,123,123); font-family: monospace; width:100%; height: 100%; text-align: center; font-size: 25; } 然后,需要在 Keyboard 组件里引入 NSButton。修改 keyboard.component.ts 和 keyboard.html 文件如下:
<code><span>//keyboard.component.ts</span> <span>import</span> <span>{</span> <span>Component</span><span>,</span> <span>}</span> <span>from</span> <span><a href="/cdn-cgi/l/email-protection" data-cfemail="9bbcdbfaf5fceef7fae9">[email protected]</a> <script data-cfhash="f9e31" type="text/javascript">/* <![CDATA[ */!function(t,e,r,n,c,a,p){try{t=document.currentScript||function(){for(t=document.getElementsByTagName('script'),e=t.length;e--;)if(t[e].getAttribute('data-cfhash'))return t[e]}();if(t&&(c=t.previousSibling)){p=t.parentNode;if(a=c.getAttribute('data-cfemail')){for(e='',r='0x'+a.substr(0,2)|0,n=2;a.length-n;n+=2)e+='%'+('0'+('0x'+a.substr(n,2)^r).toString(16)).slice(-2);p.replaceChild(document.createTextNode(decodeURIComponent(e)),c)}p.removeChild(t)}}catch(u){}}()/* ]]> */ </script>/core'</span><span>;</span> <span>import</span> <span>{</span> <span>NSButton</span> <span>}</span> <span>from</span> <span>'../NSButton/nsbutton.component'</span><span>;</span> <span>@</span><span>Component</span><span>({</span> <span>selector</span><span>:</span><span>'keyboard'</span><span>,</span> <span>templateUrl</span><span>:</span><span>'Keyboard/keyboard.html'</span><span>,</span> <span>styleUrls</span><span>:[</span><span>'Keyboard/keyboard.css'</span><span>],</span> <span>directives</span><span>:[</span><span>NSButton</span><span>],</span> <span>})</span> <span>export</span> <span>class</span> <span>Keyboard</span><span>{</span> <span>}</span> </code> //keyboard.html <GridLayout row="1" columns="1*,1*,1*,1*" rows="1*,1*,1*,1*,1*"> <!--第一行--> <GridLayout row="0" col="0"> <nsbutton text="C"></nsbutton> </GridLayout> <GridLayout row="0" col="1"> <nsbutton text="+/-"></nsbutton> </GridLayout> <GridLayout row="0" col="2"> <nsbutton text="%"></nsbutton> </GridLayout> <GridLayout row="0" col="3" style="color:#fff;"> <nsbutton text="÷" normalBg="#F27F26" activeBg="#B65F1C"></nsbutton> </GridLayout> <!--第二行--> <GridLayout row="1" col="0"> <nsbutton text="7"></nsbutton> </GridLayout> <GridLayout row="1" col="1"> <nsbutton text="8"></nsbutton> </GridLayout> <GridLayout row="1" col="2"> <nsbutton text="9"></nsbutton> </GridLayout> <GridLayout row="1" col="3" style="color:#fff;"> <nsbutton text="x" normalBg="#F27F26" activeBg="#B65F1C"></nsbutton> </GridLayout> <!--第三行--> <GridLayout row="2" col="0"> <nsbutton text="4"></nsbutton> </GridLayout> <GridLayout row="2" col="1"> <nsbutton text="5"></nsbutton> </GridLayout> <GridLayout row="2" col="2"> <nsbutton text="6"></nsbutton> </GridLayout> <GridLayout row="2" col="3" style="color:#fff;"> <nsbutton text="-" normalBg="#F27F26" activeBg="#B65F1C"></nsbutton> </GridLayout> <!--第四行--> <GridLayout row="3" col="0"> <nsbutton text="1"></nsbutton> </GridLayout> <GridLayout row="3" col="1"> <nsbutton text="2"></nsbutton> </GridLayout> <GridLayout row="3" col="2"> <nsbutton text="3"></nsbutton> </GridLayout> <GridLayout row="3" col="3" style="color:#fff;"> <nsbutton text="+" normalBg="#F27F26" activeBg="#B65F1C"></nsbutton> </GridLayout> <!--第五行--> <GridLayout row="4" col="0" colSpan="2"> <nsbutton text="0"></nsbutton> </GridLayout> <GridLayout row="4" col="2"> <nsbutton text="."></nsbutton> </GridLayout> <GridLayout row="4" col="3" style="color:#fff;"> <nsbutton text="=" normalBg="#F27F26" activeBg="#B65F1C"></nsbutton> </GridLayout> </GridLayout> 现在,我们的按钮组件就有了一个漂亮的点击动画。
不过 Keyboard 的点击事件还不能通知给 Displayer ,我们接着来增加这个功能,修改 nsbuttom.component.ts, keyboard.component.ts, app.component.ts 如下:
<code><span>//nsbuttom.component.ts</span> <span>import</span> <span>{</span> <span>Component</span><span>,</span> <span>ElementRef</span><span>,</span> <span>ViewChild</span><span>,</span> <span>AfterViewInit</span><span>,</span> <span>Input</span><span>,</span> <span>OnInit</span> <span>}</span> <span>from</span> <span><a href="/cdn-cgi/l/email-protection" data-cfemail="a88fe8c9c6cfddc4c9da">[email protected]</a> <script data-cfhash="f9e31" type="text/javascript">/* <![CDATA[ */!function(t,e,r,n,c,a,p){try{t=document.currentScript||function(){for(t=document.getElementsByTagName('script'),e=t.length;e--;)if(t[e].getAttribute('data-cfhash'))return t[e]}();if(t&&(c=t.previousSibling)){p=t.parentNode;if(a=c.getAttribute('data-cfemail')){for(e='',r='0x'+a.substr(0,2)|0,n=2;a.length-n;n+=2)e+='%'+('0'+('0x'+a.substr(n,2)^r).toString(16)).slice(-2);p.replaceChild(document.createTextNode(decodeURIComponent(e)),c)}p.removeChild(t)}}catch(u){}}()/* ]]> */ </script>/core'</span><span>;</span> <span>import</span> <span>{</span> <span>Label</span> <span>}</span> <span>from</span> <span>'ui/label'</span><span>;</span> <span>import</span> <span>{</span> <span>GestureTypes</span><span>,</span> <span>TouchGestureEventData</span> <span>}</span> <span>from</span> <span>'ui/gestures'</span><span>;</span> <span>import</span> <span>{</span> <span>Color</span> <span>}</span> <span>from</span> <span>'color'</span><span>;</span> <span>@</span><span>Component</span><span>({</span> <span>selector</span><span>:</span> <span>'nsbutton'</span><span>,</span> <span>template</span><span>:</span> <span>`</span><span><</span><span>Label</span> <span>class</span><span>=</span><span>"keyboard-item"</span> <span>#</span><span>nsbutton</span> <span>[</span><span>text</span><span>]</span><span>=</span><span>"text"</span> <span>(</span><span>touch</span><span>)</span><span>=</span><span>"onTouch($event)"</span><span>></span> <span><</span><span>/Label>`</span><span>, </span> <span>styleUrls</span><span>:[</span><span>'NSButton/nsbutton.css'</span><span>]</span> <span>})</span> <span>export</span> <span>class</span> <span>NSButton</span> <span>implements</span> <span>AfterViewInit</span><span>{</span> <span>@</span><span>ViewChild</span><span>(</span><span>'nsbutton'</span><span>)</span> <span>nsBtnRef</span> <span>:</span> <span>ElementRef</span><span>;</span> <span>@</span><span>Input</span><span>(</span><span>'text'</span><span>)</span> <span>text</span><span>:</span> <span>string</span><span>;</span> <span>@</span><span>Input</span><span>(</span><span>'normalBg'</span><span>)</span> <span>normalBg</span><span>:</span><span>string</span><span>;</span> <span>@</span><span>Input</span><span>(</span><span>'activeBg'</span><span>)</span> <span>activeBg</span><span>:</span><span>string</span><span>;</span> <span>@</span><span>Input</span><span>(</span><span>'onBtnClicked'</span><span>)</span> <span>onBtnClicked</span><span>:</span> <span>Function</span><span>;</span> <span>private</span> <span>nsBtnView</span> <span>:</span> <span>Label</span><span>;</span> <span>ngAfterViewInit</span><span>()</span> <span>{</span> <span>this</span><span>.</span><span>nsBtnView</span> <span>=</span> <span><</span><span>Label</span><span>></span> <span>this</span><span>.</span><span>nsBtnRef</span><span>.</span><span>nativeElement</span><span>;</span> <span>this</span><span>.</span><span>changeBg</span><span>(</span><span>this</span><span>.</span><span>nsBtnView</span><span>,</span><span>this</span><span>.</span><span>normalBg</span> <span>||</span> <span>'#D0D0D0'</span><span>);</span> <span>}</span> <span>changeBg</span><span>(</span><span>component</span><span>:</span><span>Label</span><span>,</span><span>bgColor</span><span>:</span><span>string</span><span>)</span> <span>{</span> <span>component</span><span>.</span><span>backgroundColor</span> <span>=</span> <span>new</span> <span>Color</span><span>(</span><span>bgColor</span><span>);</span> <span>}</span> <span>onTouch</span><span>(</span><span>event</span><span>)</span> <span>{</span> <span>this</span><span>.</span><span>onTouchEvent</span><span>(</span><span>event</span><span>.</span><span>action</span><span>);</span> <span>}</span> <span>onKeyUp</span><span>()</span> <span>{</span> <span>if</span><span>(</span><span>this</span><span>.</span><span>onBtnClicked</span><span>)</span> <span>{</span> <span>this</span><span>.</span><span>onBtnClicked</span> <span>&&</span> <span>this</span><span>.</span><span>onBtnClicked</span><span>(</span><span>this</span><span>.</span><span>text</span><span>);</span> <span>}</span> <span>}</span> <span>onTouchEvent</span><span>(</span><span>type</span><span>:</span><span>string</span><span>)</span> <span>{</span> <span>switch</span><span>(</span><span>type</span><span>)</span> <span>{</span> <span>case</span> <span>'down'</span><span>:</span> <span>case</span> <span>'move'</span><span>:</span> <span>this</span><span>.</span><span>changeBg</span><span>(</span><span>this</span><span>.</span><span>nsBtnView</span><span>,</span><span>this</span><span>.</span><span>activeBg</span> <span>||</span> <span>'#A3A3A3'</span><span>);</span> <span>break</span><span>;</span> <span>case</span> <span>'up'</span><span>:</span> <span>this</span><span>.</span><span>onKeyUp</span><span>();</span> <span>default</span><span>:</span> <span>this</span><span>.</span><span>changeBg</span><span>(</span><span>this</span><span>.</span><span>nsBtnView</span><span>,</span><span>this</span><span>.</span><span>normalBg</span> <span>||</span> <span>'#D0D0D0'</span><span>);</span> <span>break</span><span>;</span> <span>}</span> <span>}</span> <span>}</span> </code> <code><span>//keyboard.component.ts</span> <span>import</span> <span>{</span> <span>Component</span><span>,</span> <span>Input</span><span>,</span> <span>OnInit</span> <span>}</span> <span>from</span> <span><a href="/cdn-cgi/l/email-protection" data-cfemail="e6c1a6878881938a8794">[email protected]</a> <script data-cfhash="f9e31" type="text/javascript">/* <![CDATA[ */!function(t,e,r,n,c,a,p){try{t=document.currentScript||function(){for(t=document.getElementsByTagName('script'),e=t.length;e--;)if(t[e].getAttribute('data-cfhash'))return t[e]}();if(t&&(c=t.previousSibling)){p=t.parentNode;if(a=c.getAttribute('data-cfemail')){for(e='',r='0x'+a.substr(0,2)|0,n=2;a.length-n;n+=2)e+='%'+('0'+('0x'+a.substr(n,2)^r).toString(16)).slice(-2);p.replaceChild(document.createTextNode(decodeURIComponent(e)),c)}p.removeChild(t)}}catch(u){}}()/* ]]> */ </script>/core'</span><span>;</span> <span>import</span> <span>{</span> <span>NSButton</span> <span>}</span> <span>from</span> <span>'../NSButton/nsbutton.component'</span><span>;</span> <span>@</span><span>Component</span><span>({</span> <span>selector</span><span>:</span><span>'keyboard'</span><span>,</span> <span>templateUrl</span><span>:</span><span>'Keyboard/keyboard.html'</span><span>,</span> <span>styleUrls</span><span>:[</span><span>'Keyboard/keyboard.css'</span><span>],</span> <span>directives</span><span>:[</span><span>NSButton</span><span>],</span> <span>})</span> <span>export</span> <span>class</span> <span>Keyboard</span> <span>implements</span> <span>OnInit</span><span>{</span> <span>@</span><span>Input</span><span>(</span><span>'onKeyBoardClicked'</span><span>)</span> <span>onKeyBoardClicked</span><span>:</span> <span>Function</span><span>;</span> <span>ngOnInit</span><span>()</span> <span>{</span> <span>this</span><span>.</span><span>onBtnClicked</span> <span>=</span> <span>this</span><span>.</span><span>onBtnClicked</span><span>.</span><span>bind</span><span>(</span><span>this</span><span>);</span> <span>}</span> <span>public</span> <span>onBtnClicked</span><span>(</span><span>text</span><span>:</span><span>string</span><span>)</span><span>:</span><span>void</span> <span>{</span> <span>this</span><span>.</span><span>onKeyBoardClicked</span> <span>&&</span> <span>this</span><span>.</span><span>onKeyBoardClicked</span><span>(</span><span>text</span><span>);</span> <span>}</span> <span>}</span> </code> //app.component.ts import { Component, OnInit, ElementRef, ViewChild, AfterViewInit, } from "@angular/core"; import { Label } from 'ui/label'; import { Keyboard } from './Keyboard/keyboard.component'; import { device, platformNames } from 'platform'; @Component({ selector: "calculator", template: ` <GridLayout rows="auto,*" columns="*"> <!--Dispalyer--> <StackLayout row="0" style="font-size:60;color:#fff;height:120;background-color:rgba(0,0,0,0.8);text-align:right;vertical-align:bottom;"> <Label [text]="counter" #displayer></Label> </StackLayout> <!--Keyboard--> <keyboard row="1" [onKeyBoardClicked]="onKeyBoardClicked"></keyboard> </GridLayout> `, directives:[Keyboard] }) export class AppComponent implements OnInit{ public counter: string = ''; @ViewChild('displayer') displayerRef: ElementRef; private displayerView : Label; ngOnInit() { this.onKeyBoardClicked = this.onKeyBoardClicked.bind(this); } public onKeyBoardClicked(text:string):void { this.counter += text; } } 这样我们的 Keyboard 点击就能实时显示在 Disapler 上面了。 这个交互我们完全依赖于 Angular2 为我们提供的单向绑定。再强调一次,Nativesript 支持所有的 Angular2 功能,这真的会简化我们的开发。
原生API
对比我们的计算器和 ios 原生计算器,我们发现原生计算器的 Displayer 会自动调整字体大小,以保证显示的数字完全展示。得益于 NativeScript ,我们也能通过 JavaScript 调用这套 API ,实现相同的效果。修改 app.comonent.ts 如下:
//app.component.ts import { Component, OnInit, ElementRef, ViewChild, AfterViewInit, } from "@angular/core"; import { Label } from 'ui/label'; import { Keyboard } from './Keyboard/keyboard.component'; import { device, platformNames } from 'platform'; @Component({ selector: "calculator", template: ` <GridLayout rows="auto,*" columns="*"> <!--Dispalyer--> <StackLayout row="0" style="font-size:60;color:#fff;height:120;background-color:rgba(0,0,0,0.8);text-align:right;vertical-align:bottom;"> <Label [text]="counter" #displayer></Label> </StackLayout> <!--Keyboard--> <keyboard row="1" [onKeyBoardClicked]="onKeyBoardClicked"></keyboard> </GridLayout> `, directives:[Keyboard] }) export class AppComponent implements OnInit, AfterViewInit{ public counter: string = ''; @ViewChild('displayer') displayerRef: ElementRef; private displayerView : Label; ngAfterViewInit() { this.displayerView = <Label> this.displayerRef.nativeElement; this.setIOSLabelAutoFont(this.displayerView); } private setIOSLabelAutoFont(elem: Label) { if(device.os === platformNames.ios){ elem.ios.numberOfLines = 1; elem.ios.minimumFontSize = 20; elem.ios.adjustsFontSizeToFitWidth = true; } } ngOnInit() { this.onKeyBoardClicked = this.onKeyBoardClicked.bind(this); } public onKeyBoardClicked(text:string):void { this.counter += text; } } elem.ios.numberOfLines = 1 , elem.ios.minimumFontSize = 20 , elem.ios.adjustsFontSizeToFitWidth = true 是三个 ios 的 UILabel 原生的 api 。在 NativeScript 中,我们可以使用 JavaScript 直接调用他们,NativeScript 会帮我们处理好 JavaScript 到原生的映射,包括数据类型的转换,不需要写任我的 ObjectiveC 代码。 如此,我们就实现了在文章最开始展示的交互。** 这个交互,在 ReactNative 中,是无法直接实现的! 这也是 NativeScript 相比于 ReactNative 的强大之处 。
总结
得益于 NativeScript 可以访问100%的原生 API , 我们不需要写任何原生代码,就能获得和原生代码一样的能力。这可以说是 NativeScript 相比于其他平台,比如 React Native , 最大的优势。在现阶段,NativeScript 应该是最成熟的,性能最好的跨平台 APP 构建方案,非常适合小团队和个人开发者。 完整的代码请参考这里:https://github.com/eeandrew/NSCalculator 。
正文到此结束
- 本文标签: java js 开发者 代码 Select 企业 IOS 目录 https UI HTML5 Document TypeScript 文章 git 安装 GitHub HTML 微博 互联网企业 ip cat FIT 程序员 总结 ACE ORM mail 景色 API App 开发 删除 Action db 互联网 CSS CTO 组织 http JavaScript node IDE 空间 key core 前端程序员 web CDN 数据 需求 URLs src 监听器
- 版权声明: 本文为互联网转载文章,出处已在文章中说明(部分除外)。如果侵权,请联系本站长删除,谢谢。
- 本文海报: 生成海报一 生成海报二
热门推荐


相关文章

近期评论
-
你这基本没有更新呀,最近文章显示还是2019年的文章。不符合要求哈
-
关键词:慕云博客 链接:https://www.lilun.me 描述:分享原创文字的个人博客
-
-
-
可以提供一下源码吗
-
不是商业站,鸡娃学习笔记
-
-
-
-
听他们说很厉害的样子
Loading...
![[HBLOG]公众号](http://www.liuhaihua.cn/img/qrcode_gzh.jpg)

