详解 SiriKit - SiriKit 教程(Part 2)
作者:Jameson Quave, 原文链接 ,原文日期:2016-06-20
译者: Crystal Sun ;校对: numbbbbb ;定稿: CMB
这篇教程写于 2016 年 6 月 20 日,使用 Xcode 8 Beta 1 和 Swift 3 开发。
此文章是 SiriKit 教程系列的第二篇,建议先去阅读第一篇。
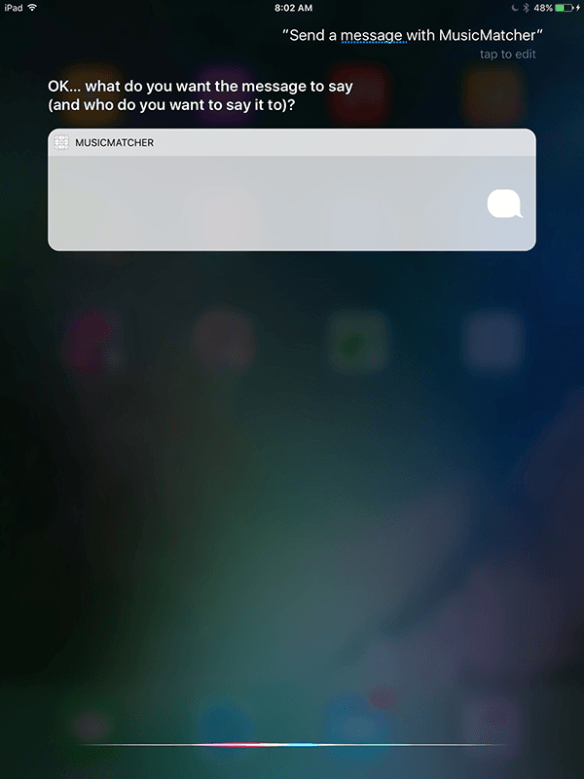
处理 SiriKit 请求
为了让集成的 Siri 更有用,可以使用 INSendMessageIntentHandling 协议的回调方法增加信息内容。协议有以下可选方法:
resolveRecipients(forSendMessage intent: INSendMessageIntent, with completion: ([INPersonResolutionResult]) -> Swift.Void)

resolveContent(forSendMessage intent: INSendMessageIntent, with completion: (INStringResolutionResult) -> Swift.Void)

resolveGroupName(forSendMessage intent: INSendMessageIntent, with completion: (INStringResolutionResult) -> Swift.Void)

resolveServiceName(forSendMessage intent: INSendMessageIntent, with completion: (INStringResolutionResult) -> Swift.Void)

resolveSender(forSendMessage intent: INSendMessageIntent, with completion: (INPersonResolutionResult) -> Swift.Void)
只要实现这些方法,就可以给 SiriKit 提供更多信息,例如接收者(recipients)、内容(content)、小组名字(group name)、服务名字(service name)或者发送者(sender)。
本例的标题内容使用静态数据,主要是为了展示如何使用上面的方法。
首先实现 resolveContent 协议方法。
func resolveContent(forSendMessage intent: INSendMessageIntent, with completion: (INStringResolutionResult) -> Void) {
    let message = "My message body!"
    let response = INStringResolutionResult.success(with: message)
    completion(response)
}
这里我们创建了一个字符串并调用 success 函数。你也可以调用 disambiguation 、 confirmationRequired 或 unsupported 。后面会详细说明区别,现在先介绍如何使用 Siri 提供的数据。
Siri 传入的 intent 对象包含文字版的消息内容。我们只对 content 属性感兴趣,把它嵌入字符串中。
func resolveContent(forSendMessage intent: INSendMessageIntent, with completion: (INStringResolutionResult) -> Void) {
    let message = "Dictated text: /(content!)"
    let response = INStringResolutionResult.success(with: message)

    completion(response)
}
内容属性是可选值,如此一来,需要确保 Siri 真的提供了文字内容。如果没有文字,那消息就没什么用,这时需要告知 Siri 当前信息缺失,需要提供内容值。可以调用 INStringResolutionResult 的 needsValue 类方法来请求值。
func resolveContent(forSendMessage intent: INSendMessageIntent, with completion: (INStringResolutionResult) -> Void) {
    if let content = intent.content {
        let message = "Dictated text: /(content)"
        let response = INStringResolutionResult.success(with: message)
        completion(response)
    }
    else {
        let response = INStringResolutionResult.needsValue()
        completion(response)
    }
}
现在当我们尝试发送消息时,SiriKit 就明白必须要提供内容值。接收方也要实现同样的功能。在本例中,接收方可以有多个值,可以使用多种方法从中查询目标值。如果你有一个聊天应用,那可以检查传入的 INPerson 对象,判断应该发送给哪个用户。
不过这些已经超出本教程的范围,留给你自己实现吧。你可以在自己的应用中实现 resolveRecipients 方法。如果需要示例代码,可以查看苹果的 示例 。
更多 iOS 10 教程
我会继续研究 iOS 10,之后也会继续发布 iOS 10 教程。你可以 订阅我们的 newsletter 并 在 Twitter 上关注我 。
本文由 SwiftGG 翻译组翻译,已经获得作者翻译授权,最新文章请访问http://swift.gg。
正文到此结束
热门推荐


相关文章

近期评论
-
你这基本没有更新呀,最近文章显示还是2019年的文章。不符合要求哈
-
关键词:慕云博客 链接:https://www.lilun.me 描述:分享原创文字的个人博客
-
-
-
可以提供一下源码吗
-
不是商业站,鸡娃学习笔记
-
-
-
-
听他们说很厉害的样子
Loading...
![[HBLOG]公众号](http://www.liuhaihua.cn/img/qrcode_gzh.jpg)

