聊聊 Spring Cloud Config
一般服务器的应用都有以下几种类型,
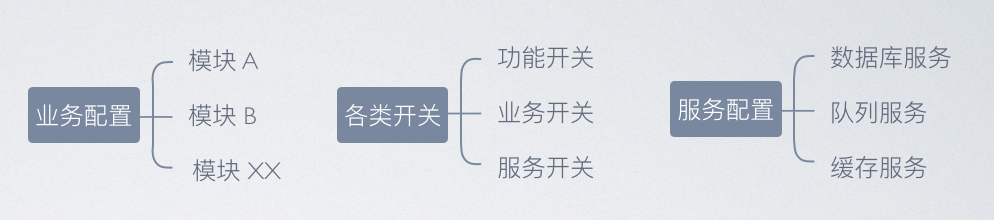
其中当属业务部分最多也最繁杂。
当应用越来越庞大和复杂时,单机就肯定不能满足需求了,然后就要考虑分布式了,接下可能会应用不同的语言来开发应用。
比如 nginx 毫无疑问的是用的最多的反向代理组件,使用 OpenResty 便要用到 lua,再比如前端要 seo ,一个解决办法就是使用 nodejs,到了后端分布式,那就更繁多了,可能会需要把业务一个个拆分成不同的服务单独运行...

然后就发现散落一地的配置文件:***properties***、***yml***、***json*** …
为了解决这个问题,我们采取了这么一种模式,通过 etcd 我们的项目就是这样,来收集所有的配置,然后统一的写到一个文件中去,任何应用都来访问这一个文件来找到自己的配置并应用。
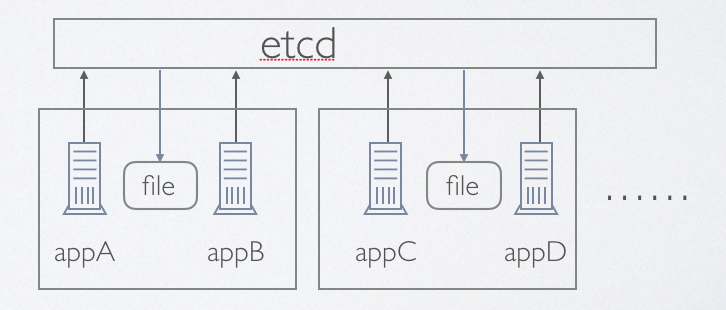
这很好的解决了配置散落的问题,可以集中管理了,但是又存在另一个问题,各种类型的配置在一个文件里看起来好乱,而且在初始化时必须要完成这个文件才能启动应用。
所以下一个解决方案便想到用一个配置中心来解决问题。
Spring Cloud Config 项目
- 提供 服务端 和 客户端 支持
- 集中式 管理分布式环境下的应用配置
- 基于 Spring 环境,无缝 与 Spring 应用集成
- 可用于 任何 语言开发的程序
- 默认实现基于 git 仓库,可以进行 版本管理
- 可替换 自定义实现
Spring Cloud Config Server 作为配置中心服务端
- 拉取配置时更新 git 仓库副本,保证是最新结果
- 支持数据结构丰富,yml, json, properties 等
- 配合 eureke 可实现服务发现,配合 cloud bus 可实现配置推送更新
- 配置存储基于 git 仓库,可进行版本管理
- 简单可靠,有丰富的配套方案
Spring Cloud Config Client 默认客户端实现
- SpringBoot 项目不需要改动任何代码,加入一个启动配置文件指明使用 ConfigServer 上哪个配置文件即可
简单使用示例
新建一个 git 仓库,添加一个配置文件。例如想要一个 billing的服务,性质是开发,运行环境是测试环境。
那么就新建一个 testing 的分支,然后提交一个 billing-dev.properties 的文件
devMode = true spring.application.name = billing spring.jdbc.host = localhost spring.jdbc.port = 3306 spring.jdbc.user = root spring.jdbc.password = 123qwe loging.file = demo
然后新建一个标准 maven 项目
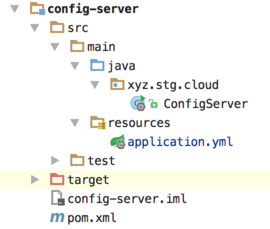
ConfigServer.java
@SpringBootApplication
@EnableConfigServer
public class ConfigServer {
    public static void main(String[] args) {
        SpringApplication.run(ConfigServer.class, args);
    }
}
application.yml
server:
  port: 8888
spring:
  cloud:
    config:
      server:
        git:
          uri:https://git.coding.net/tiangao/demo-config-server.git
          clone-on-start: true
pom.xml
<?xml version="1.0" encoding="UTF-8"?>
<project xmlns="http://maven.apache.org/POM/4.0.0"
         xmlns:xsi="http://www.w3.org/2001/XMLSchema-instance"
         xsi:schemaLocation="http://maven.apache.org/POM/4.0.0 http://maven.apache.org/xsd/maven-4.0.0.xsd">
    <parent>
        <artifactId>spring-cloud-demo</artifactId>
        <groupId>xyz.stg.cloud</groupId>
        <version>1.0-SNAPSHOT</version>
    </parent>
    <modelVersion>4.0.0</modelVersion>
    <artifactId>config-server</artifactId>
	<parent>
        <groupId>org.springframework.boot</groupId>
        <artifactId>spring-boot-starter-parent</artifactId>
        <version>1.4.1.RELEASE</version>
    </parent>
    <dependencies>
        <!-- https://mvnrepository.com/artifact/org.springframework.cloud/spring-cloud-config-server -->
        <dependency>
            <groupId>org.springframework.cloud</groupId>
            <artifactId>spring-cloud-config-server</artifactId>
            <version>1.2.1.RELEASE</version>
        </dependency>
    </dependencies>
</project>
好了,配置中心已经可以启动了,配最简单的可以用浏览器来访问。
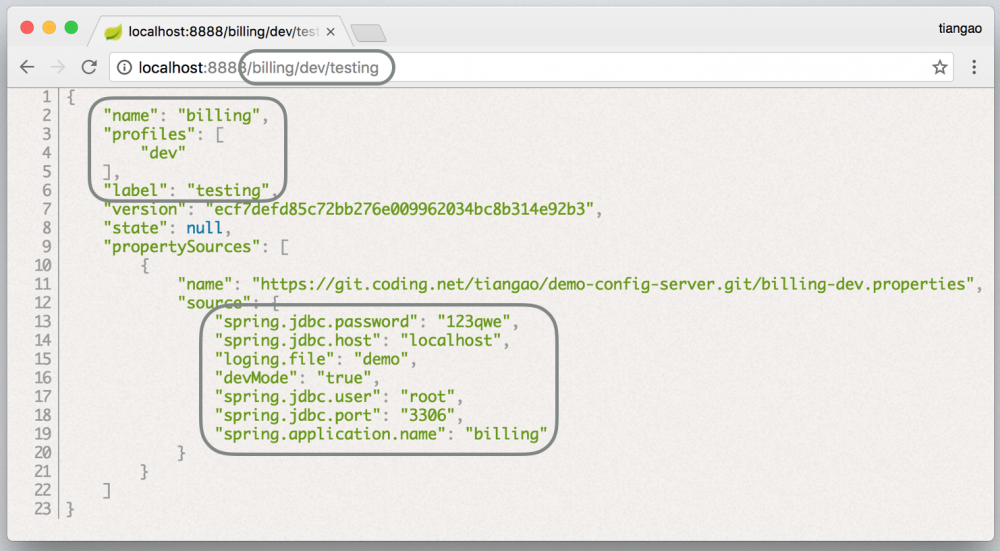
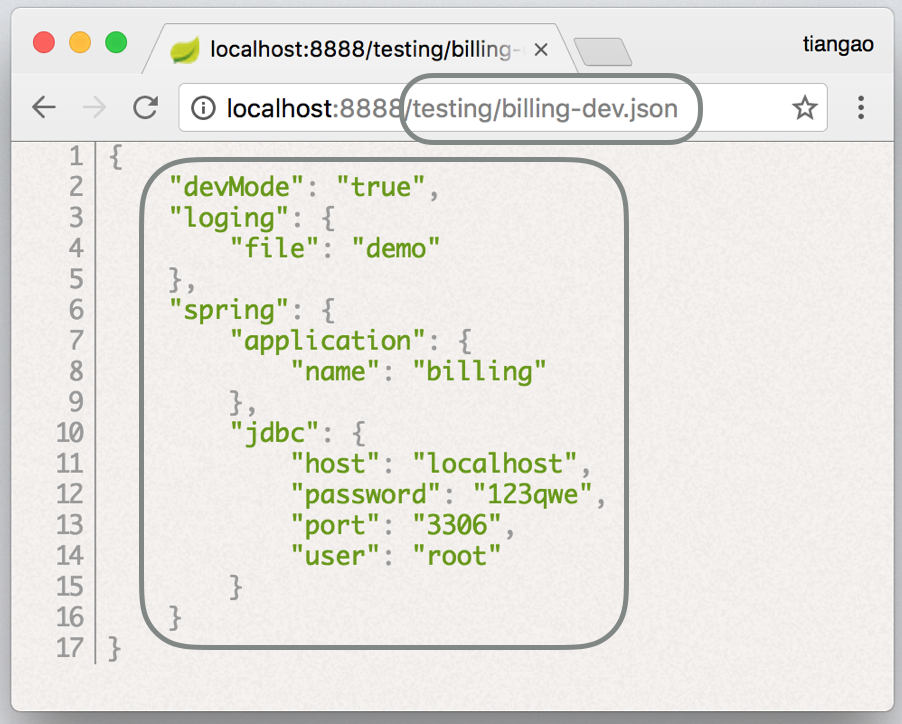
想要 json 格式的怎么办呢?
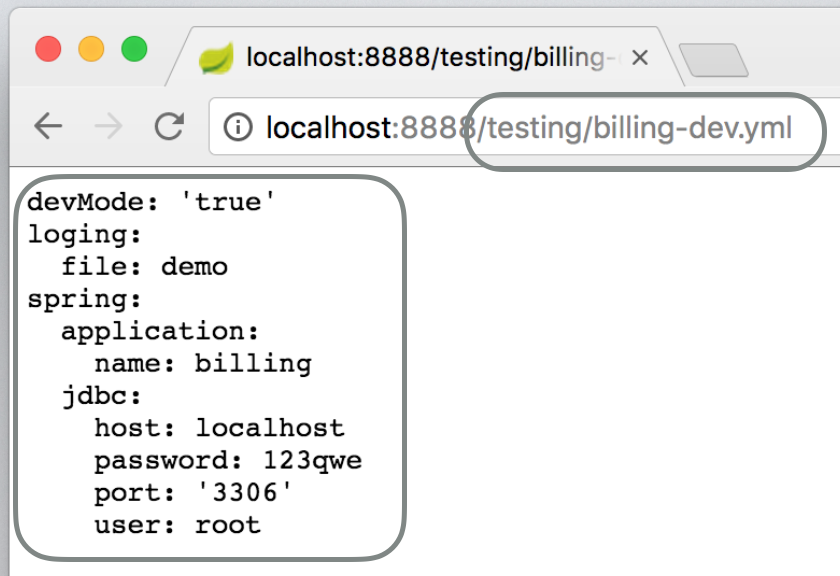
还有 yml, properties
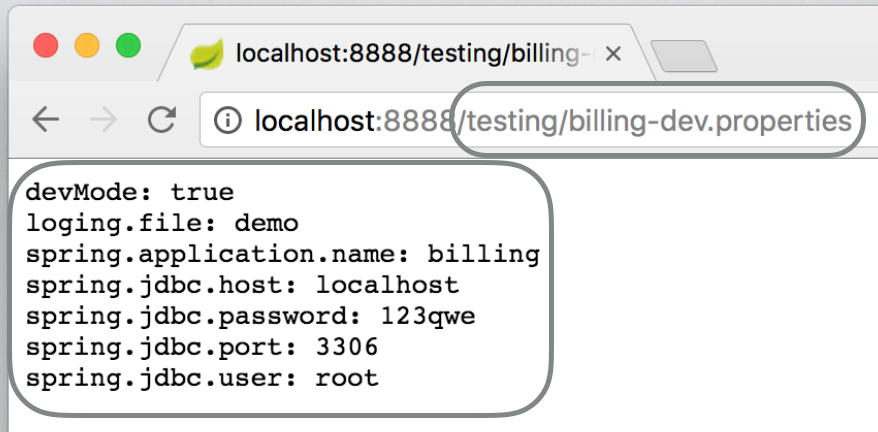
OK, 就是这样简单。不过直接就能通过 url 得到,是不是有点不安全,这也不难,加上依赖。
java <dependency> <groupId>org.springframework.boot</groupId> <artifactId>spring-boot-starter-security</artifactId> </dependency>
然后在 application.yml 配置用户名和密码,user 便是用户名。
security:
  user:
    password: db1ab002-1fba-476d-a421-22113355
再访问就能看到如下的效果
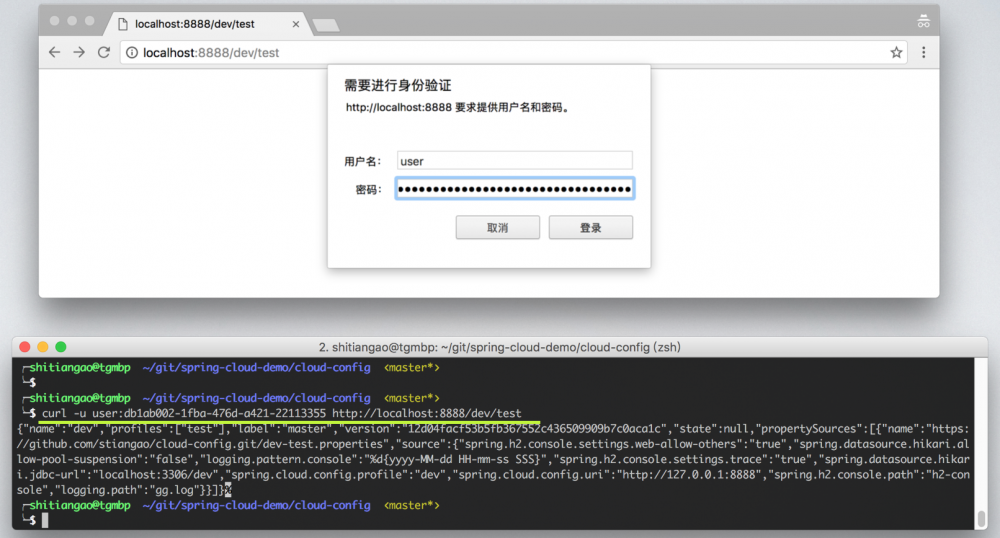
这是 ConfigSever 默认实现的基本的 HttpBasic 的认证。
服务端好了现在来看看 SpringBoot 客户端
只需要添加一个启动配置文件:
java cloud: config: uri: http://127.0.0.1:8888 profile: dev label: testing name: billing password: db1ab002-1fba-476d-a421-22113355 username: user
当启动时看到下面标示的内容是即表示加载成功。
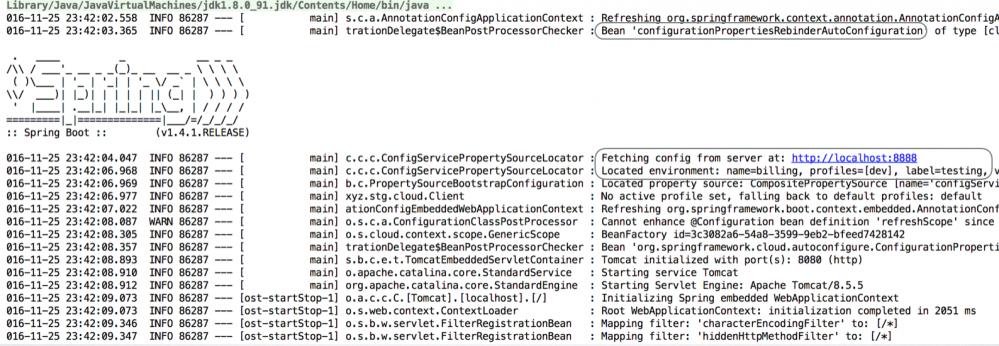
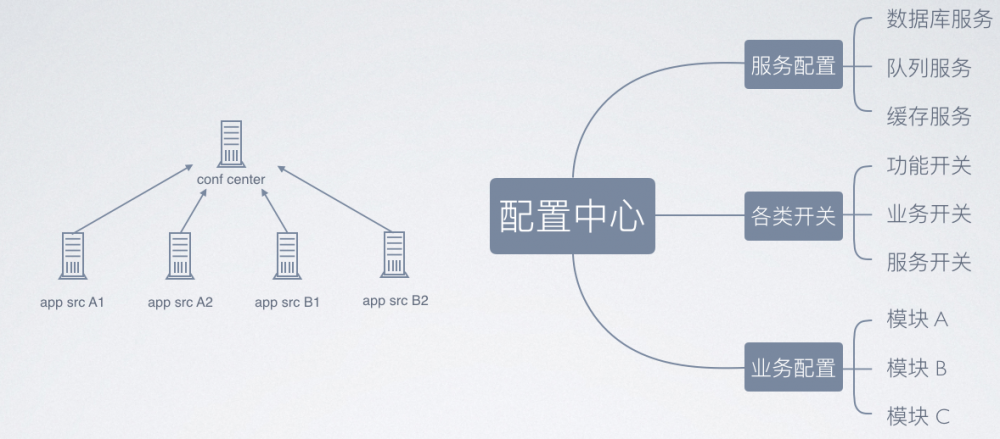
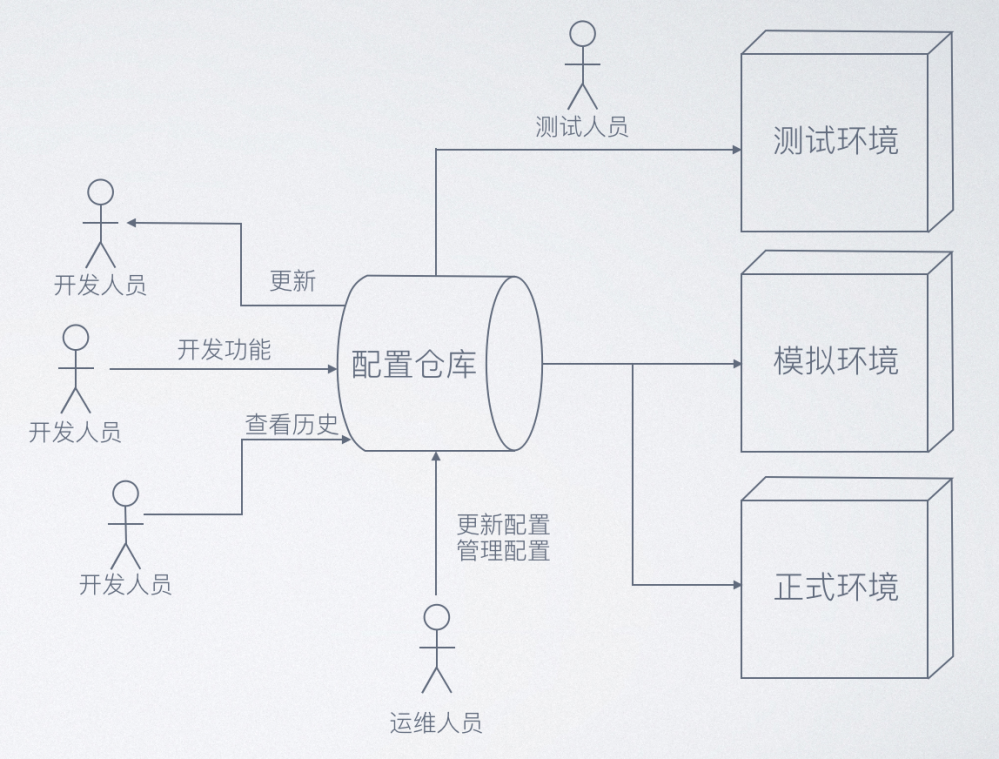
简单示例就这样,下面便是 Config 的使用示意图。
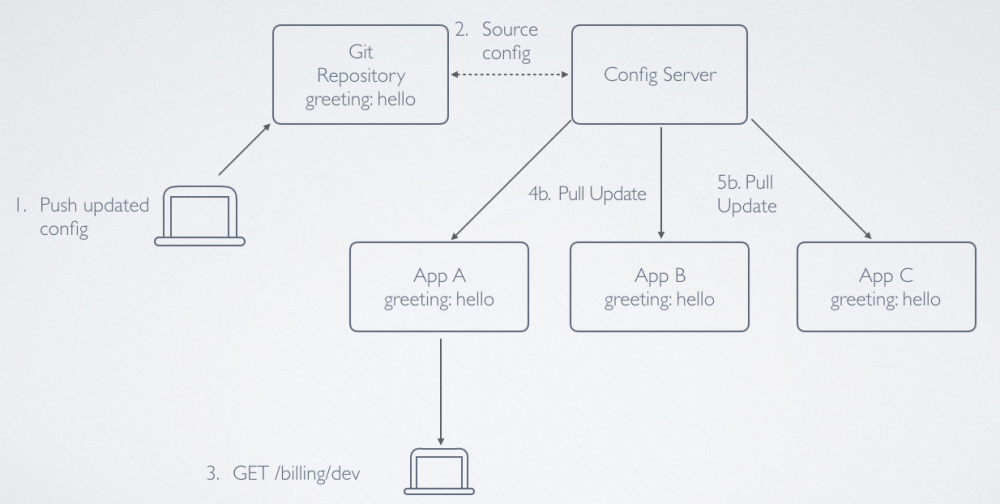
呐,就是这样,所有的配置都通过仓库来管理,应用启动时访问配置中心能拿到自己的配置就OK,再接下来就是各自的事情了。
仓库也不仅仅只能用 git, 还有 svn 和本地目录可以选择
- svn:///${user.home}/config-repo
- file://${user.home}/config-repo
从简单的示例里可以看出,我们只要提交一种格式的配置文件,通过不同的方式访问即可得到不同格式的配置文件,这在ConfigServer里是如何实现的呢?
先看一共有多少种访问方式
- /{name}/{profiles:.*[^-].*}
- /{name}/{profiles}/{label:.*}
- /{name}-{profiles}.properties
- /{label}/{name}
- /{profiles}.properties
- /{name}-{profiles}.json
- /{label}/{name}-{profiles}.json
然后就能发现有这么一个类,里面有各种资源类型的转换操作。EnvironmentController 的所有方法如下所示:
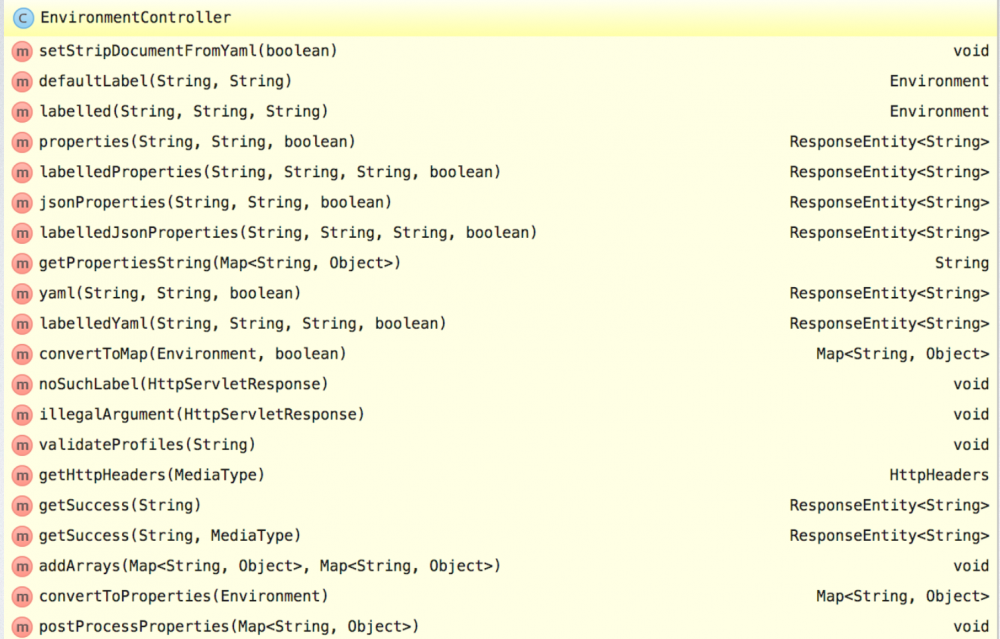
原来内部只存在一种资源抽象,所有的资源对象都是由这种类型转换而来。
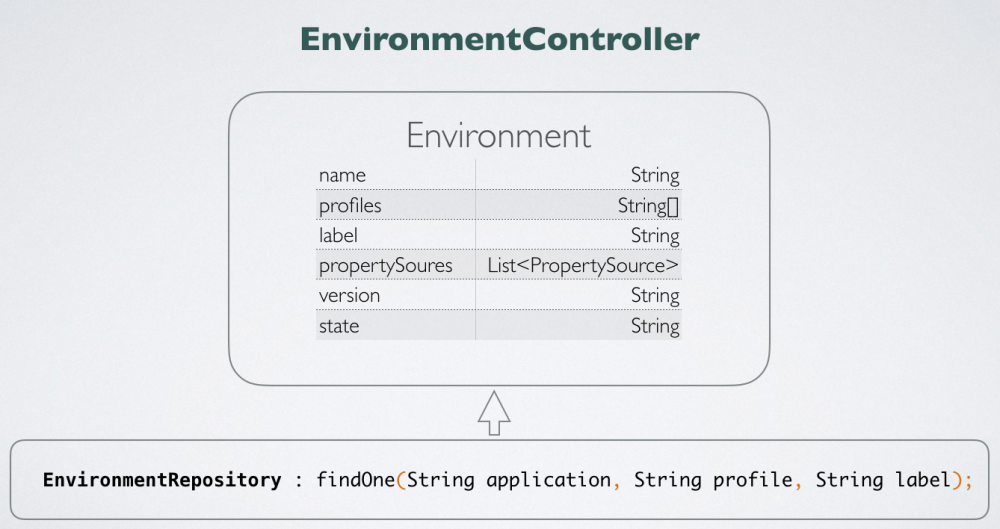
一个应用的配置只需要应用名、属性和标签就可以定位到。嗯,原来这么简单,那 EnvironmentReposiroty 又是哪里实现呢?
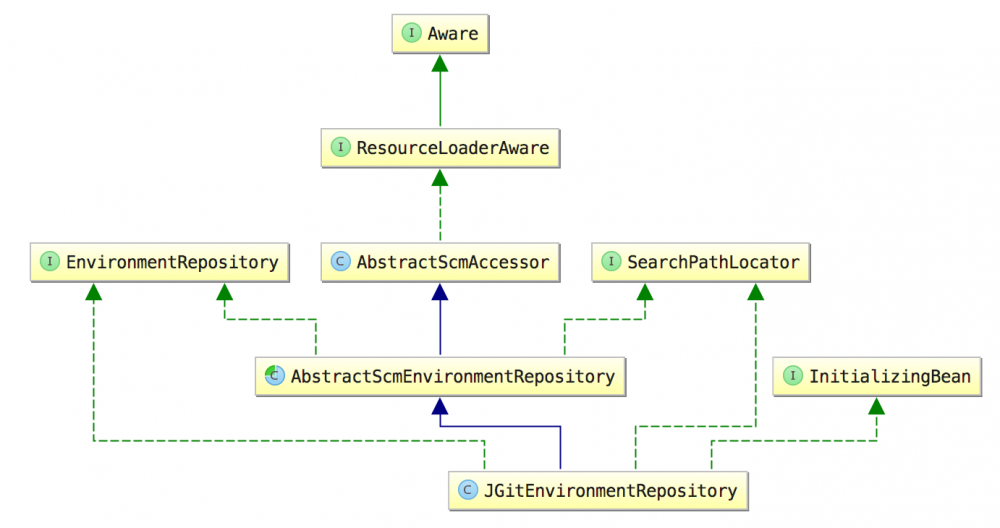
findOne 方式在 AbstractScmEnvironmentRepository 中可以找到。
java @Override public synchronized Environment findOne(String application, String profile, String label) { NativeEnvironmentRepository delegate = new NativeEnvironmentRepository( getEnvironment()); Locations locations = getLocations(application, profile, label); delegate.setSearchLocations(locations.getLocations()); Environment result = delegate.findOne(application, profile, ""); result.setVersion(locations.getVersion()); result.setLabel(label); return this.cleaner.clean(result, getWorkingDirectory().toURI().toString(), getUri()); }
这其中又由 SearcPathLocator 接口的 getLocations() 来实际加载内容,这个方法就由具体的实现类来完成。
Spring Cloud Config Server 内部除了 JGitEnvironmentRepository 实现外还有另外三种实现。
- SvnKitEnvironmentRepository
- NativeEnvironmentRepository
- MultipleJGitEnvironmentRepository
见名知其意,分别是 svn 本地目录以及多 git 仓库的实现。
来到客户端这边,SpringBoot
项目只需要加载依赖就可以使用到远程配置,现有项目迁移过去也不用改动任何代码,感觉好神奇。
达到这样的效果依赖于 springMVC 的抽象以及 springboot 的自动配置类加载。
```java
@Configuration
public class ConfigClientAutoConfiguration {
@Bean
public ConfigClientProperties configClientProperties(
       Environment environment,
       ApplicationContext context) {...}
...
@Bean
public ConfigServerHealthIndicator configServerHealthIndicator(
       ConfigServicePropertySourceLocator locator,
       ConfigClientHealthProperties properties, Environment environment) {
    return new ConfigServerHealthIndicator(locator, environment, properties);
}
...
}
**ConfigClientAutoConfiguration** 这个是 ConfigClient 的自动配置类,加载时触发新建一个 ConfigServicePropertySourceLocator 的 bean, java
@Order (0)
public class ConfigServicePropertySourceLocator
implements PropertySourceLocator {
private RestTemplate restTemplate;
private ConfigClientProperties defaultProperties;
...
@Override
@Retryable(interceptor = "configServerRetryInterceptor")
public org.springframework.core.env.PropertySource<?> locate(
       org.springframework.core.env.Environment environment) {
    ...
       // Try all the labels until one works
       for (String label : labels) {
         Environment result = getRemoteEnvironment(restTemplate,
              properties, label.trim(), state);
              ...
}
```
然后在 ApplicationContextInitializer 的 initialize 方法中被调用 locate 方法从 ConfigServer 拉取配置文件,注入到 ConfigurableEnvironment 中,
@Configuration
@EnableConfigurationProperties(PropertySourceBootstrapProperties.class)
public class PropertySourceBootstrapConfiguration implements
		ApplicationContextInitializer<ConfigurableApplicationContext>, Ordered {
	...
	@Override
	public void initialize(ConfigurableApplicationContext applicationContext) {
		...
		ConfigurableEnvironment environment = applicationContext.getEnvironment();
		for (PropertySourceLocator locator : this.propertySourceLocators) {
			PropertySource<?> source = null;
			source = locator.locate(environment);
			if (source == null) {
				continue;
			}
			...
		}
		...
	}
}
接着才是应用的初始化过程。
从这个过程可以看到,其他任何应用需要使用 ConfigServer 时只需要在应用初始化之前通过 http 拉取到配置文件即可。
了解了大致原理,便可以看到集中式管理的优点。
-
没有记忆负担:大家都使用一个仓库保存所有配置文件,方便查看。
-
降低冲突沟通成本:开发新功能是凡是有配置变动均向仓库的提交,在合并后其他人碰到配置问题时也不用到处找人问,看看仓库历史就知道什么发生了变化。
-
方便测试:测试环境下,测试人员也不用老是问开发环境配置的问题了,所有配置一目了然,更改配置也有记录,有问题向开发反馈也能帮助快速定位问题范围。
-
方便管理: 在模拟环境和生产环境下,通过分支保护和权限管理管理线上配置文件,由运维人员来管理。
正文到此结束
- 本文标签: 测试 ip 安全 需求 开发 Security 服务器 SVN cat 代码 dependencies Word id Nginx pom find 管理 REST http root maven tar Bootstrap SpringMVC core 服务端 apache db IDE XML src IO java node js 数据 json client bean spring remote https UI App schema Service 目录 认证 git 配置 CTO OpenResty Property
- 版权声明: 本文为互联网转载文章,出处已在文章中说明(部分除外)。如果侵权,请联系本站长删除,谢谢。
- 本文海报: 生成海报一 生成海报二
热门推荐


相关文章


Loading...
![[HBLOG]公众号](http://www.liuhaihua.cn/img/qrcode_gzh.jpg)

