Windows下MySQL 5.7.17压缩版安装过程的坑
Windows下MySQL 5.7.17压缩版安装过程的坑
2016.12.15 14:27:13

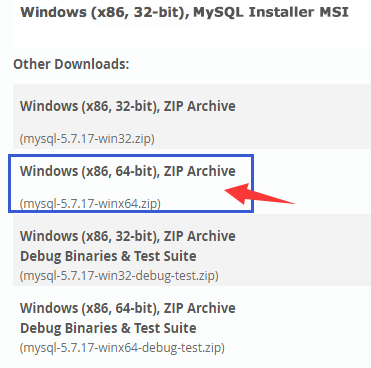
幺蛾子,原来好端端的MySQL突然间不能用了。于是重新下载了最新的MySQL 5.7.17 Community 压缩版 for Windows 64-bit:
http://dev.mysql.com/downloads/mysql/
然后解压到安装目录(如C:/Prog/MySQL/)。接下来复制 my-default.ini 为 my.ini ,修改 my.ini 如下:
[mysql]
default-character-set=utf8

[mysqld]
basedir = C:/Prog/MySQL
datadir = C:/Prog/MySQL/data
port = 3306
max_connections=200
character-set-server=utf8
default-storage-engine=INNODB
join_buffer_size = 128M
sort_buffer_size = 2M
read_rnd_buffer_size = 2M
sql_mode=NO_ENGINE_SUBSTITUTION,STRICT_TRANS_TABLES
之后用 “管理员身份” 打开cmd——“管理员身份”这很重要,进入安装目录安装MySQL服务:
C:/Prog/MySQL/bin>mysqld install
Service successfully installed.
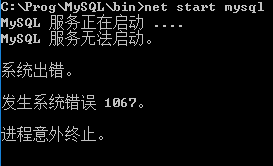
然后启动MySQL服务:
net start mysql
刚开始以为就这么简单,可是幺蛾子的却报错了:
如果是通过Windows系统的 “服务” 启动,则提示:
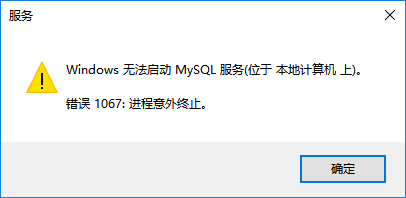
问题出得实在是心塞不已,查了许久,原来是:
If you installed MySQL using the Noinstall package, you may need to initialize the data directory:
-
Windows distributions prior to MySQL 5.7.7 include a data directory with a set of preinitialized accounts in the mysql database.
-
As of 5.7.7, Windows installation operations performed using the Noinstall package do not include a data directory. To initialize the data directory, use the instructions at Section 2.10.1.1, “Initializing the Data Directory Manually Using mysqld ”.
具体可参考这两个链接:
- 2.3.5.4 Initializing the Data Directory
- 2.10.1.1 Initializing the Data Directory Manually Using mysqld
原因找到了,那我们来手动Initialize Data Directory一下啊:
mysqld --defaults-file=C:/Prog/MySQL/my.ini --initialize-insecure

然后依次:
net start mysql
mysql -u root -p
熟悉的 mysql> 应该就出来了。
希望对遇到类似坑的人有所帮助,究其原因就是5.7.7及以后的压缩包版本,需要手动Initialize Data Directory了。
技无一招鲜,坑要一路填。
我的环境:
- Windows 10 64-bit
- MySQL Community Server 5.7.17 for Windows (x86, 64-bit), ZIP Archive
正文到此结束
热门推荐


相关文章

近期评论
-
你这基本没有更新呀,最近文章显示还是2019年的文章。不符合要求哈
-
关键词:慕云博客 链接:https://www.lilun.me 描述:分享原创文字的个人博客
-
-
-
可以提供一下源码吗
-
不是商业站,鸡娃学习笔记
-
-
-
-
听他们说很厉害的样子
Loading...
![[HBLOG]公众号](http://www.liuhaihua.cn/img/qrcode_gzh.jpg)

