每日一博 | Spring-Boot & ZXing 搭建二维码服务
使用zxing提供二维码生成解析服务
搭建一个二维码的生成 & 解析服务, 使用java web对外提供http调用,返回base64格式的二维码图片
1. 背景&准备
二维码生成场景实在是太多了,背景都没啥好说的...
采用的技术
- zxing : 实现二维码的生成 & 解析
- spring-boot: 提供http服务接口
- jdk base64 : 对图片进行base64编码返回
- awt : 插入logo
测试case
二维码生成除了传入基本的内容之外,有很多可以配置的参数,比如背景色,前置色,大小,logo,边框...,显然这种多参数配置的情况,我们会采用Builder设计模式来处理,可以看下最终的测试代码如下
/**
 * 测试二维码
 */
@Test
public void testGenQrCode() {
    String msg = "https://my.oschina.net/u/566591/blog/1359432";

    try {

        boolean ans = QrCodeGenWrapper.of(msg).asFile("src/test/qrcode/gen.png");
        System.out.println(ans);
    } catch (Exception e) {
        System.out.println("create qrcode error! e: " + e);
        Assert.assertTrue(false);
    }


    //生成红色的二维码 300x300, 无边框
    try {
        boolean ans = QrCodeGenWrapper.of(msg)
                .setW(300)
                .setPreColor(0xffff0000)
                .setBgColor(0xffffffff)
                .setPadding(0)
                .asFile("src/test/qrcode/gen_300x300.png");
        System.out.println(ans);
    } catch (Exception e) {
        System.out.println("create qrcode error! e: " + e);
        Assert.assertTrue(false);
    }


    // 生成带logo的二维码
    try {
        String logo = "https://static.oschina.net/uploads/user/283/566591_100.jpeg";
        boolean ans = QrCodeGenWrapper.of(msg)
                .setW(300)
                .setPreColor(0xffff0000)
                .setBgColor(0xffffffff)
                .setPadding(0)
                .setLogo(logo)
                .setLogoStyle(QrCodeOptions.LogoStyle.ROUND)
                .asFile("src/test/qrcode/gen_300x300_logo.png");
        System.out.println(ans);
    } catch (Exception e) {
        System.out.println("create qrcode error! e: " + e);
        Assert.assertTrue(false);
    }


    // 根据本地文件生成待logo的二维码
    try {
        String logo = "logo.jpg";
        boolean ans = QrCodeGenWrapper.of(msg)
                .setW(300)
                .setPreColor(0xffff0000)
                .setBgColor(0xffffffff)
                .setPadding(0)
                .setLogo(logo)
                .asFile("src/test/qrcode/gen_300x300_logo_v2.png");
        System.out.println(ans);
    } catch (Exception e) {
        System.out.println("create qrcode error! e: " + e);
        Assert.assertTrue(false);
    }
}
2. 设计与实现
1. 配置参数: QrCodeOptions
根据最常用的规则,目前提供以下可选的配置项
- 输入内容
- logo
- logo的样式
- 宽高
- 前置色,背景色
- 输出图片格式
- 内容编码
@Data
public class QrCodeOptions {
    /**
     * 塞入二维码的信息
     */
    private String msg;


    /**
     * 二维码中间的logo
     */
    private String logo;


    /**
     * logo的样式, 目前支持圆角+普通
     */
    private LogoStyle logoStyle;


    /**
     * 生成二维码的宽
     */
    private Integer w;


    /**
     * 生成二维码的高
     */
    private Integer h;


    /**
     * 生成二维码的颜色
     */
    private MatrixToImageConfig matrixToImageConfig;


    private Map<EncodeHintType, Object> hints;


    /**
     * 生成二维码图片的格式 png, jpg
     */
    private String picType;


    public enum LogoStyle {
        ROUND,
        NORMAL;
    }
}
从上面的配置来看,有较多其实是与zxing进行打交道的,直接对使用者而言,有点不太友好,下面可以看下我们的包装类
2. 包装类: QrCodeGenWrapper
对外提供二维码生成的主要入口,从我们的设计来看,通过 of(content) 来创建一个builder对象,并设置二维码的内容,然后可以设置builder中的参数,来选择最终的二维码配置规则
提供三中输出方式:
- BufferImage 对象 : 适用于对二维码进行再次处理的场景
- 二维码图片文件 : 适用于本地生成
- base64编码的二维码字符串 : 适用于网络接口调用
下面的实现比较简单,唯一需要注意的就是组装 QrCodeOptions 参数的默认值问题
public class QrCodeGenWrapper {
    public static Builder of(String content) {
        return new Builder().setMsg(content);
    }


    private static BufferedImage asBufferedImage(QrCodeOptions qrCodeConfig) throws WriterException, IOException {
        BitMatrix bitMatrix = QrCodeUtil.encode(qrCodeConfig);
        return QrCodeUtil.toBufferedImage(qrCodeConfig, bitMatrix);
    }

    private static String asString(QrCodeOptions qrCodeOptions) throws WriterException, IOException {
        BufferedImage bufferedImage = asBufferedImage(qrCodeOptions);
        ByteArrayOutputStream outputStream = new ByteArrayOutputStream();
        ImageIO.write(bufferedImage, qrCodeOptions.getPicType(), outputStream);
        return Base64Util.encode(outputStream);
    }

    private static boolean asFile(QrCodeOptions qrCodeConfig, String absFileName) throws WriterException, IOException {
        File file = new File(absFileName);
        FileUtil.mkDir(file);

        BufferedImage bufferedImage = asBufferedImage(qrCodeConfig);
        if (!ImageIO.write(bufferedImage, qrCodeConfig.getPicType(), file)) {
            throw new IOException("save qrcode image error!");
        }

        return true;
    }


    @ToString
    public static class Builder {
        private static final MatrixToImageConfig DEFAULT_CONFIG = new MatrixToImageConfig();

        /**
         * The message to put into QrCode
         */
        private String msg;


        /**
         * qrcode center logo
         */
        private String logo;


        /**
         * logo的样式
         */
        private QrCodeOptions.LogoStyle logoStyle = QrCodeOptions.LogoStyle.NORMAL;


        /**
         * qrcode image width
         */
        private Integer w;


        /**
         * qrcode image height
         */
        private Integer h;


        /**
         * qrcode bgcolor, default white
         */
        private Integer bgColor;


        /**
         * qrcode msg color, default black
         */
        private Integer preColor;


        /**
         * qrcode message's code, default UTF-8
         */
        private String code = "utf-8";


        /**
         * 0 - 4
         */
        private Integer padding;


        /**
         * error level, default H
         */
        private ErrorCorrectionLevel errorCorrection = ErrorCorrectionLevel.H;


        /**
         * output qrcode image type, default png
         */
        private String picType = "png";


        public String getMsg() {
            return msg;
        }

        public Builder setMsg(String msg) {
            this.msg = msg;
            return this;
        }

        public Builder setLogo(String logo) {
            this.logo = logo;
            return this;
        }


        public Builder setLogoStyle(QrCodeOptions.LogoStyle logoStyle) {
            this.logoStyle = logoStyle;
            return this;
        }


        public Integer getW() {
            return w == null ? (h == null ? 200 : h) : w;
        }

        public Builder setW(Integer w) {
            if (w != null && w <= 0) {
                throw new IllegalArgumentException("生成二维码的宽必须大于0");
            }
            this.w = w;
            return this;
        }

        public Integer getH() {
            return h == null ? (w == null ? 200 : w) : h;
        }

        public Builder setH(Integer h) {
            if (h != null && h <= 0) {
                throw new IllegalArgumentException("生成功能二维码的搞必须大于0");
            }
            this.h = h;
            return this;
        }

        public Integer getBgColor() {
            return bgColor == null ? MatrixToImageConfig.WHITE : bgColor;
        }

        public Builder setBgColor(Integer bgColor) {
            this.bgColor = bgColor;
            return this;
        }

        public Integer getPreColor() {
            return preColor == null ? MatrixToImageConfig.BLACK : preColor;
        }

        public Builder setPreColor(Integer preColor) {
            this.preColor = preColor;
            return this;
        }

        public Builder setCode(String code) {
            this.code = code;
            return this;
        }

        public Integer getPadding() {
            if (padding == null) {
                return 1;
            }

            if (padding < 0) {
                return 0;
            }

            if (padding > 4) {
                return 4;
            }

            return padding;
        }

        public Builder setPadding(Integer padding) {
            this.padding = padding;
            return this;
        }

        public Builder setPicType(String picType) {
            this.picType = picType;
            return this;
        }

        public void setErrorCorrection(ErrorCorrectionLevel errorCorrection) {
            this.errorCorrection = errorCorrection;
        }

        private void validate() {
            if (msg == null || msg.length() == 0) {
                throw new IllegalArgumentException("生成二维码的内容不能为空!");
            }
        }


        private QrCodeOptions build() {
            this.validate();

            QrCodeOptions qrCodeConfig = new QrCodeOptions();
            qrCodeConfig.setMsg(getMsg());
            qrCodeConfig.setH(getH());
            qrCodeConfig.setW(getW());
            qrCodeConfig.setLogo(logo);
            qrCodeConfig.setLogoStyle(logoStyle);
            qrCodeConfig.setPicType(picType);

            Map<EncodeHintType, Object> hints = new HashMap<>(3);
            hints.put(EncodeHintType.ERROR_CORRECTION, errorCorrection);
            hints.put(EncodeHintType.CHARACTER_SET, code);
            hints.put(EncodeHintType.MARGIN, this.getPadding());
            qrCodeConfig.setHints(hints);


            MatrixToImageConfig config;
            if (getPreColor() == MatrixToImageConfig.BLACK
                    && getBgColor() == MatrixToImageConfig.WHITE) {
                config = DEFAULT_CONFIG;
            } else {
                config = new MatrixToImageConfig(getPreColor(), getBgColor());
            }
            qrCodeConfig.setMatrixToImageConfig(config);


            return qrCodeConfig;
        }


        public String asString() throws IOException, WriterException {
            return QrCodeGenWrapper.asString(build());
        }


        public BufferedImage asBufferedImage() throws IOException, WriterException {
            return QrCodeGenWrapper.asBufferedImage(build());
        }


        public boolean asFile(String absFileName) throws IOException, WriterException {
            return QrCodeGenWrapper.asFile(build(), absFileName);
        }
    }
}
二维码生成工具类 : QrCodeUtil
下面这个工具类看着比较复杂,其实大部分代码是从 com.google.zxing.qrcode.QRCodeWriter#encode(String, BarcodeFormat, int, int, Map) 抠出来的
主要是为了解决二维码的白边问题,关于这个大白边问题,可以参看我之前的一篇博文 《zxing 二维码大白边一步一步修复指南》
@Slf4j
public class QrCodeUtil {

    private static final int QUIET_ZONE_SIZE = 4;


    /**
     * 对 zxing 的 QRCodeWriter 进行扩展, 解决白边过多的问题
     * <p/>
     * 源码参考 {@link com.google.zxing.qrcode.QRCodeWriter#encode(String, BarcodeFormat, int, int, Map)}
     */
    public static BitMatrix encode(QrCodeOptions qrCodeConfig) throws WriterException {
        ErrorCorrectionLevel errorCorrectionLevel = ErrorCorrectionLevel.L;
        int quietZone = 1;
        if (qrCodeConfig.getHints() != null) {
            if (qrCodeConfig.getHints().containsKey(EncodeHintType.ERROR_CORRECTION)) {
                errorCorrectionLevel = ErrorCorrectionLevel.valueOf(qrCodeConfig.getHints().get(EncodeHintType.ERROR_CORRECTION).toString());
            }
            if (qrCodeConfig.getHints().containsKey(EncodeHintType.MARGIN)) {
                quietZone = Integer.parseInt(qrCodeConfig.getHints().get(EncodeHintType.MARGIN).toString());
            }

            if (quietZone > QUIET_ZONE_SIZE) {
                quietZone = QUIET_ZONE_SIZE;
            } else if (quietZone < 0) {
                quietZone = 0;
            }
        }

        QRCode code = Encoder.encode(qrCodeConfig.getMsg(), errorCorrectionLevel, qrCodeConfig.getHints());
        return renderResult(code, qrCodeConfig.getW(), qrCodeConfig.getH(), quietZone);
    }


    /**
     * 对 zxing 的 QRCodeWriter 进行扩展, 解决白边过多的问题
     * <p/>
     * 源码参考 {@link com.google.zxing.qrcode.QRCodeWriter#renderResult(QRCode, int, int, int)}
     *
     * @param code
     * @param width
     * @param height
     * @param quietZone 取值 [0, 4]
     * @return
     */
    private static BitMatrix renderResult(QRCode code, int width, int height, int quietZone) {
        ByteMatrix input = code.getMatrix();
        if (input == null) {
            throw new IllegalStateException();
        }

        // xxx 二维码宽高相等, 即 qrWidth == qrHeight
        int inputWidth = input.getWidth();
        int inputHeight = input.getHeight();
        int qrWidth = inputWidth + (quietZone * 2);
        int qrHeight = inputHeight + (quietZone * 2);


        // 白边过多时, 缩放
        int minSize = Math.min(width, height);
        int scale = calculateScale(qrWidth, minSize);
        if (scale > 0) {
            if (log.isDebugEnabled()) {
                log.debug("qrCode scale enable! scale: {}, qrSize:{}, expectSize:{}x{}", scale, qrWidth, width, height);
            }

            int padding, tmpValue;
            // 计算边框留白
            padding = (minSize - qrWidth * scale) / QUIET_ZONE_SIZE * quietZone;
            tmpValue = qrWidth * scale + padding;
            if (width == height) {
                width = tmpValue;
                height = tmpValue;
            } else if (width > height) {
                width = width * tmpValue / height;
                height = tmpValue;
            } else {
                height = height * tmpValue / width;
                width = tmpValue;
            }
        }

        int outputWidth = Math.max(width, qrWidth);
        int outputHeight = Math.max(height, qrHeight);

        int multiple = Math.min(outputWidth / qrWidth, outputHeight / qrHeight);
        int leftPadding = (outputWidth - (inputWidth * multiple)) / 2;
        int topPadding = (outputHeight - (inputHeight * multiple)) / 2;

        BitMatrix output = new BitMatrix(outputWidth, outputHeight);

        for (int inputY = 0, outputY = topPadding; inputY < inputHeight; inputY++, outputY += multiple) {
            // Write the contents of this row of the barcode
            for (int inputX = 0, outputX = leftPadding; inputX < inputWidth; inputX++, outputX += multiple) {
                if (input.get(inputX, inputY) == 1) {
                    output.setRegion(outputX, outputY, multiple, multiple);
                }
            }
        }

        return output;
    }


    /**
     * 如果留白超过15% , 则需要缩放
     * (15% 可以根据实际需要进行修改)
     *
     * @param qrCodeSize 二维码大小
     * @param expectSize 期望输出大小
     * @return 返回缩放比例, <= 0 则表示不缩放, 否则指定缩放参数
     */
    private static int calculateScale(int qrCodeSize, int expectSize) {
        if (qrCodeSize >= expectSize) {
            return 0;
        }

        int scale = expectSize / qrCodeSize;
        int abs = expectSize - scale * qrCodeSize;
        if (abs < expectSize * 0.15) {
            return 0;
        }

        return scale;
    }


    /**
     * 根据二维码配置 & 二维码矩阵生成二维码图片
     *
     * @param qrCodeConfig
     * @param bitMatrix
     * @return
     * @throws IOException
     */
    public static BufferedImage toBufferedImage(QrCodeOptions qrCodeConfig, BitMatrix bitMatrix) throws IOException {
        int qrCodeWidth = bitMatrix.getWidth();
        int qrCodeHeight = bitMatrix.getHeight();
        BufferedImage qrCode = new BufferedImage(qrCodeWidth, qrCodeHeight, BufferedImage.TYPE_INT_RGB);

        for (int x = 0; x < qrCodeWidth; x++) {
            for (int y = 0; y < qrCodeHeight; y++) {
                qrCode.setRGB(x, y,
                        bitMatrix.get(x, y) ?
                                qrCodeConfig.getMatrixToImageConfig().getPixelOnColor() :
                                qrCodeConfig.getMatrixToImageConfig().getPixelOffColor());
            }
        }

        // 插入logo
        if (!(qrCodeConfig.getLogo() == null || "".equals(qrCodeConfig.getLogo()))) {
            ImageUtil.insertLogo(qrCode, qrCodeConfig.getLogo(), qrCodeConfig.getLogoStyle());
        }

        // 若二维码的实际宽高和预期的宽高不一致, 则缩放
        int realQrCodeWidth = qrCodeConfig.getW();
        int realQrCodeHeight = qrCodeConfig.getH();
        if (qrCodeWidth != realQrCodeWidth || qrCodeHeight != realQrCodeHeight) {
            BufferedImage tmp = new BufferedImage(realQrCodeWidth, realQrCodeHeight, BufferedImage.TYPE_INT_RGB);
            tmp.getGraphics().drawImage(
                    qrCode.getScaledInstance(realQrCodeWidth, realQrCodeHeight,
                            Image.SCALE_SMOOTH), 0, 0, null);
            qrCode = tmp;
        }

        return qrCode;
    }

}
4. logo的插入辅助类: ImageUtil
zxing本身是不支持生成待logo的二维码的,这里我们借用awt对将logo绘制在生成的二维码图片上
这里提供了圆角图片生成,边框生成,插入logo三个功能
涉及到绘图的逻辑,也没啥可说的,基本上的套路都一样
public class ImageUtil {

    /**
     * 在图片中间,插入圆角的logo
     *
     * @param qrCode 原图
     * @param logo   logo地址
     * @throws IOException
     */
    public static void insertLogo(BufferedImage qrCode, String logo, QrCodeOptions.LogoStyle logoStyle) throws IOException {
        int QRCODE_WIDTH = qrCode.getWidth();
        int QRCODE_HEIGHT = qrCode.getHeight();

        // 获取logo图片
        BufferedImage bf = getImageByPath(logo);
        int size = bf.getWidth() > QRCODE_WIDTH * 2 / 10 ? QRCODE_WIDTH * 2 / 50 : bf.getWidth() / 5;
        bf = ImageUtil.makeRoundBorder(bf, logoStyle, size, Color.BLUE); // 边距为二维码图片的1/10

        // logo的宽高
        int w = bf.getWidth() > QRCODE_WIDTH * 2 / 10 ? QRCODE_WIDTH * 2 / 10 : bf.getWidth();
        int h = bf.getHeight() > QRCODE_HEIGHT * 2 / 10 ? QRCODE_HEIGHT * 2 / 10 : bf.getHeight();

        // 插入LOGO
        Graphics2D graph = qrCode.createGraphics();

        int x = (QRCODE_WIDTH - w) / 2;
        int y = (QRCODE_HEIGHT - h) / 2;

        graph.drawImage(bf, x, y, w, h, null);
        graph.dispose();
        bf.flush();
    }


    /**
     * 根据路径获取图片
     *
     * @param path 本地路径 or 网络地址
     * @return 图片
     * @throws IOException
     */
    public static BufferedImage getImageByPath(String path) throws IOException {
        if (path.startsWith("http")) { // 从网络获取logo
//            return ImageIO.read(new URL(path));
            return ImageIO.read(HttpUtil.downFile(path));
        } else if (path.startsWith("/")) { // 绝对地址获取logo
            return ImageIO.read(new File(path));
        } else { // 从资源目录下获取logo
            return ImageIO.read(ImageUtil.class.getClassLoader().getResourceAsStream(path));
        }
    }


    /**
     * fixme 边框的计算需要根据最终生成logo图片的大小来定义,这样才不会出现不同的logo原图,导致边框不一致的问题
     *
     * 生成圆角图片 & 圆角边框
     *
     * @param image        原图
     * @param logoStyle 圆角的角度
     * @param size         边框的边距
     * @param color        边框的颜色
     * @return 返回带边框的圆角图
     */
    public static BufferedImage makeRoundBorder(BufferedImage image, QrCodeOptions.LogoStyle logoStyle, int size, Color color) {
        // 将图片变成圆角
        int cornerRadius = 0;
        if (logoStyle == QrCodeOptions.LogoStyle.ROUND) {
            cornerRadius = 30;
            image = makeRoundedCorner(image, cornerRadius);
        }

        int borderSize = size;
        int w = image.getWidth() + borderSize;
        int h = image.getHeight() + borderSize;
        BufferedImage output = new BufferedImage(w, h,
                BufferedImage.TYPE_INT_ARGB);

        Graphics2D g2 = output.createGraphics();
        g2.setComposite(AlphaComposite.Src);
        g2.setRenderingHint(RenderingHints.KEY_ANTIALIASING,
                RenderingHints.VALUE_ANTIALIAS_ON);
        g2.setColor(color == null ? Color.WHITE : color);
        g2.fill(new RoundRectangle2D.Float(0, 0, w, h, cornerRadius,
                cornerRadius));

        // ... then compositing the image on top,
        // using the white shape from above as alpha source
        g2.setComposite(AlphaComposite.SrcAtop);
        g2.drawImage(image, size, size, null);
        g2.dispose();

        return output;
    }


    /**
     * 生成圆角图片
     *
     * @param image        原始图片
     * @param cornerRadius 圆角的弧度
     * @return 返回圆角图
     */
    public static BufferedImage makeRoundedCorner(BufferedImage image,
                                                  int cornerRadius) {
        int w = image.getWidth();
        int h = image.getHeight();
        BufferedImage output = new BufferedImage(w, h,
                BufferedImage.TYPE_INT_ARGB);

        Graphics2D g2 = output.createGraphics();

        // This is what we want, but it only does hard-clipping, i.e. aliasing
        // g2.setClip(new RoundRectangle2D ...)

        // so instead fake soft-clipping by first drawing the desired clip shape
        // in fully opaque white with antialiasing enabled...
        g2.setComposite(AlphaComposite.Src);
        g2.setRenderingHint(RenderingHints.KEY_ANTIALIASING,
                RenderingHints.VALUE_ANTIALIAS_ON);
        g2.setColor(Color.WHITE);
        g2.fill(new RoundRectangle2D.Float(0, 0, w, h, cornerRadius,
                cornerRadius));

        // ... then compositing the image on top,
        // using the white shape from above as alpha source
        g2.setComposite(AlphaComposite.SrcAtop);
        g2.drawImage(image, 0, 0, null);

        g2.dispose();

        return output;
    }
}
5. base64编码工具: Base64Util
public class Base64Util {
    public static String encode(ByteArrayOutputStream outputStream) {
        return Base64.getEncoder().encodeToString(outputStream.toByteArray());
    }
}
6. 二维码解析工具: QrCodeDeWrapper
public class QrCodeDeWrapper {


    /**
     * 读取二维码中的内容, 并返回
     *
     * @param qrcodeImg 二维码图片的地址
     * @return 返回二维码的内容
     * @throws IOException       读取二维码失败
     * @throws FormatException   二维码解析失败
     * @throws ChecksumException
     * @throws NotFoundException
     */
    public static String decode(String qrcodeImg) throws IOException, FormatException, ChecksumException, NotFoundException {
        BufferedImage image = ImageUtil.getImageByPath(qrcodeImg);
        return decode(image);
    }


    public static String decode(BufferedImage image) throws FormatException, ChecksumException, NotFoundException {
        if (image == null) {
            throw new IllegalStateException("can not load qrCode!");
        }


        LuminanceSource source = new BufferedImageLuminanceSource(image);
        BinaryBitmap bitmap = new BinaryBitmap(new HybridBinarizer(source));
        QRCodeReader qrCodeReader = new QRCodeReader();
        Result result = qrCodeReader.decode(bitmap);
        return result.getText();
    }

}
3. 填坑
1. 生成二维码边框过大的问题
即便指定了生成二维码图片的边距为0,但是最终生成的二维码图片边框依然可能很大
如下图
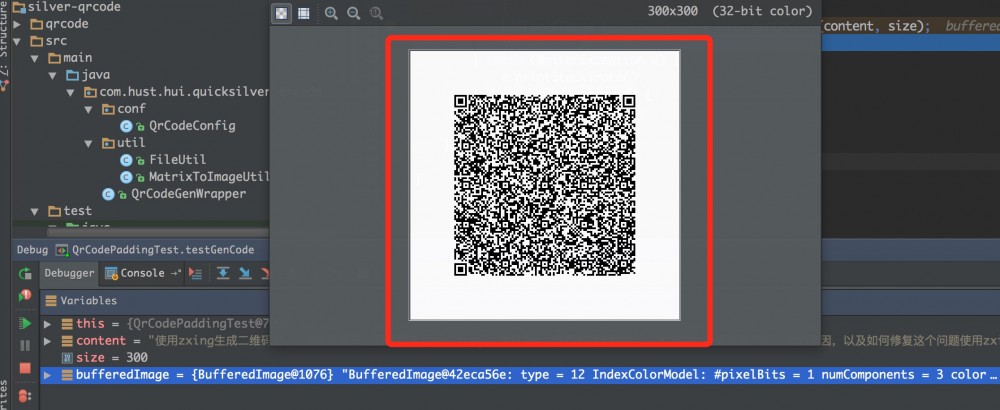
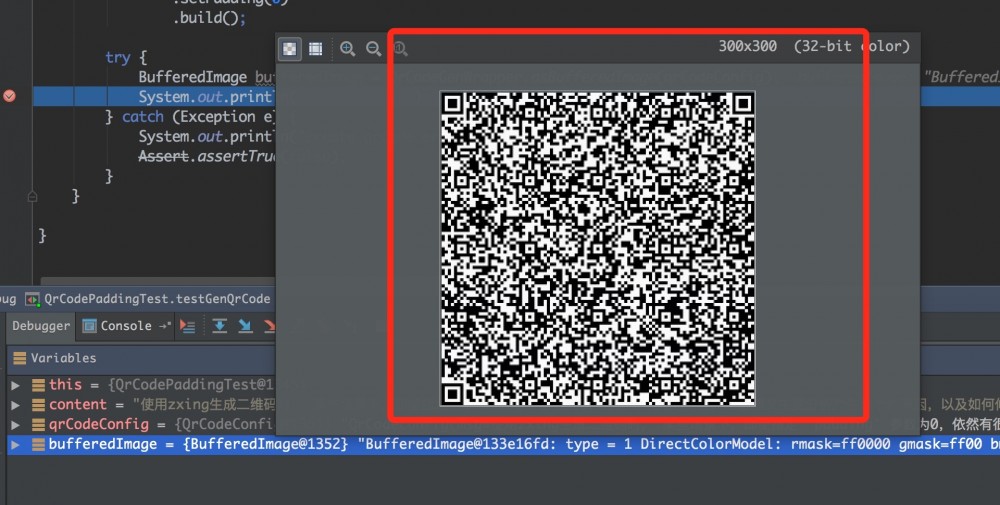
这个问题上面已经修复,产生的原因和修复过程可以查看 zxing 二维码大白边一步一步修复指南
修复之后如下图
2. 插入logo
上面虽然实现了插入logo的逻辑,但是生成的边框处有点问题,坑还没填
希望是指定边框大小时,不管logo图片有多大,最终的边框一样大小,而上面却有点问题...
此外就是生成的logo样式不美观,不能忍啊
演示说明
暴露对应的http接口比较简单,可以直接查看工程源码,下面启动spring-boot,然后开始愉快的进行http测试;
4. 其他
项目源码: https://github.com/liuyueyi/quick-media
个人博客: 一灰的个人博客
公众号获取更多:

正文到此结束
热门推荐


相关文章

近期评论
-
你这基本没有更新呀,最近文章显示还是2019年的文章。不符合要求哈
-
关键词:慕云博客 链接:https://www.lilun.me 描述:分享原创文字的个人博客
-
-
-
可以提供一下源码吗
-
不是商业站,鸡娃学习笔记
-
-
-
-
听他们说很厉害的样子
Loading...
![[HBLOG]公众号](http://www.liuhaihua.cn/img/qrcode_gzh.jpg)

