springBoot探索(1)——分析
前两季完成了spring+springMvc+mybatis+Druid+Shiro+Ehcache框架的整合、使用。同时也展开了对项目简单重构,更多的时候我们学会了利用框架偷懒。
当然本着偷懒精神,同时带着群友的呼声,我们不妨来看看springBoot相关的信息。
但是要明白一点,无论以前还是现在,spring相关的只要核心没变,就算外在形式变化了,只要我们保证实质不变化,那么还是差不多没变的。
本项目github仓库: github.com/pc859107393…
本项目国内码云仓库: git.oschina.net/859107393/M…
本系列为连载文章。当然如果你没有spring基础,建议你先看看我的java手把手教程
当然 我的简书访问速度更快
有兴趣交流springboot进行快速开发的同学可以加一下下面的企鹅群。

行走的java全栈
分析springboot。
首先百度一下springboot、springmvc的区别。
Spring MVC 是基于 Spring 的一个 渲染web的MVC 框架。
Spring Boot 是基于 Spring 的条件注册的一套快速开发整合包。
大概意思就是上面这样描述,对不对呢?其实我们根据以往的经验,再去看看springboot的源包也就可以看到大概了。
引入springboot
我们还是一样进行gradle引入。
// https://mvnrepository.com/artifact/org.springframework.boot/spring-boot
compile group: 'org.springframework.boot', name: 'spring-boot', version: '1.5.4.RELEASE'
在gradle自动引入依赖完成后,我们可以看到springboot自动引入了如下资源:
- spring-boot:1.5.4.RELEASE
- spring-aop:4.3.9.RELEASE
- spring-beans:4.3.9.RELEASE
- spring-context:4.3.9.RELEASE
- spring-core:4.3.9.RELEASE
- spring-expression:4.3.9.RELEASE
到了这里我们就可以明白上面对springBoot的概述。也就是自动注册一堆框架提供给我们使用。
那么,我们能不能快速的集成更多的框架呢?
首先我在spring4all社区找到了一款集成了Druid的快速启动框架: druid-spring-boot 。同时,我还看到了 泥瓦匠BYSocket写的springBoot教程 。所以,我找到了更为快捷的办法。
继续gradle引入资源:
//druid-spring-boot-starter
compile('com.github.drtrang:druid-spring-boot-starter:1.0.3') {
    exclude group: 'com.alibaba'
}
在上面的代码中,exclude group: 'com.alibaba'的意思是排除组织是com.alibaba的包。为什么排除呢?主要是作者用的阿里巴巴的包相对旧一点和他github上面的包不一致。
接着我们一次把需要的包全部导入,如下:
compile 'com.alibaba:druid:1.1.2'
// https://mvnrepository.com/artifact/org.springframework.boot/spring-boot-starter-parent
compile 'org.springframework.boot:spring-boot-starter-parent:1.5.4.RELEASE'
// https://mvnrepository.com/artifact/org.springframework.boot/spring-boot-starter-web
compile 'org.springframework.boot:spring-boot-starter-web:1.5.4.RELEASE'

runtime 'mysql:mysql-connector-java:5.1.39'

testCompile 'org.springframework.boot:spring-boot-starter-test:1.5.4.RELEASE'
可以看到我们再次导入了Druid。同时,我们导入了:
- spring-boot-starter-parent
- spring-boot-starter-web
- mysql-connector
- spring-boot-starter-test
有了上面的包后,我们接着是删掉前面的spring-boot,毕竟springboot太大了。,所以最后我们gradle目前的引入资源是:
dependencies {
    testCompile group: 'junit', name: 'junit', version: '4.12'

    // https://mvnrepository.com/artifact/org.mybatis.spring.boot/mybatis-spring-boot-starter
    compile 'org.mybatis.spring.boot:mybatis-spring-boot-starter:1.3.0'

    compile 'com.squareup.okhttp3:okhttp:3.8.1'

    //druid-spring-boot-starter
    compile('com.github.drtrang:druid-spring-boot-starter:1.0.3') {
        exclude group: 'com.alibaba'
    }

    compile 'com.alibaba:druid:1.1.2'
    // https://mvnrepository.com/artifact/org.springframework.boot/spring-boot-starter-parent
    compile 'org.springframework.boot:spring-boot-starter-parent:1.5.4.RELEASE'
    // https://mvnrepository.com/artifact/org.springframework.boot/spring-boot-starter-web
    compile 'org.springframework.boot:spring-boot-starter-web:1.5.4.RELEASE'

    runtime 'mysql:mysql-connector-java:5.1.39'

    testCompile 'org.springframework.boot:spring-boot-starter-test:1.5.4.RELEASE'
}
这个时候我们直接新建一个类,来启动springboot。
/**
 * Spring Boot 应用启动类
 *
 * @author acheng
 */
@SpringBootApplication
public class Application {

    public static void main(String[] args) {
        // 程序启动入口
        // 启动嵌入式的 Tomcat 并初始化 Spring 环境及其各 Spring 组件
        SpringApplication.run(Application.class,args);
    }
}
如无意外,这里绝对是报错(提示我们Druid需要的DataSource创建失败,然后结束运行)。哈哈哈,大家肯定觉得笔者是傻瓜,为什么明明知道有错还哈哈哈。这里其实涉及到一个问题,那就是框架整合以及框架需要的配置支持,当然这个在springboot中叫做约定!
我们看一下导入的 Druid-Starter相关的项目介绍!
框架作者明显告诉我们需要创建一个application.yml的约定文件来配置Druid相关的参数。
偷懒直接引入作者的文件,再作适当的修改,结果如下:
debug: false

logging:
  level:
    root: info
    org.springframework: info
    org.springframework.jdbc: debug
    org.mybatis: debug
    com.github.trang: debug

spring:
  profiles:
    # 默认环境为 default,多数据源演示请改为请参考git上面的demo
    active: default
  output:
    ansi:
      enabled: always
  datasource:
    driver-class-name: com.mysql.jdbc.Driver
    url: jdbc:mysql://localhost:3306/ccdb?useUnicode=true&characterEncoding=utf8&autoReconnect=true
    username: root
    password: laopo5201314
    druid:
      # spring.datasource.druid 前缀的配置将注入到 DruidParentDataSource,作为公共参数
      initial-size: 1
      min-idle: 1
      max-active: 10
      max-wait: 30000
      time-between-eviction-runs-millis: 60000
      min-evictable-idle-time-millis: 1800000
      max-evictable-idle-time-millis: 25200000
      validation-query: SELECT 1
      test-while-idle: true
      test-on-borrow: true
      test-on-return: false
      pool-prepared-statements: true
      max-open-prepared-statements: 20
      use-global-data-source-stat: true
      stat:
        db-type: mysql
        log-slow-sql: true
        slow-sql-millis: 1000
        merge-sql: true
      slf4j:
        enabled: true
        connection-log-enabled: false
        connection-log-error-enabled: true
        statement-log-enabled: false
        statement-log-error-enabled: true
        statement-sql-pretty-format: true
        statement-executable-sql-log-enable: true
        result-set-log-enabled: false
        result-set-log-error-enabled: true
      wall:
        enabled: true
        db-type: mysql
        log-violation: true
        throw-exception: false
        config:
          select-all-column-allow: false
      config:
        enabled: false #关闭密码加密(为true时候需要利用Druid进行加密数据库密码)
      aop-stat: #aop状态监测
        enabled: true
        patterns:
          - acheng1314.cn.*
      web-stat: #web状态监测
        enabled: true
      stat-view-servlet:    #开启Druid的web监测页面
        enabled: true
  transaction:
    rollback-on-commit-failure: true
  aop:
    auto: true
    proxy-target-class: true
  http:
    encoding:
      force: true
    converters:
      preferred-json-mapper: gson

# 开始设置mybatis,具体的意思请参照我前面的的手把手教程
mybatis:
  type-aliases-package: acheng1314.cn.domain
  mapper-locations: "classpath:acheng1314/cn/dao/*.xml"
  configuration:
    map-underscore-to-camel-case: true
    use-generated-keys: true
    use-column-label: true

---

debug: false

spring:
  profiles: default
关于上面的配置文件其实没有多大的必要仔细阐述,毕竟大部分都是Druid的配置!上面Druid-Starter和我以前项目的配置文件互相参考基本可以完成这些配置。同时我在上面把mapper和dao扔到了一起。
接着我们可以启动项目来看看,我们默认的首页可以再网页上面输出一串json,如下:
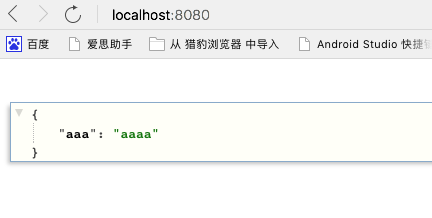
代码也是很简单,大概如下:
@RestController
public class HelloWorldController {

    @GetMapping(value = "/", produces = MediaType.APPLICATION_JSON_UTF8_VALUE)
    @ResponseBody
    public Object sayHello() {
        Map<String, Object> map = new HashMap<>();
        map.put("aaa", "aaaa");
        return map;
    }
}
其实到这里,目前的项目已经差不多了。但是,这不是我们的目标,我们还应该考虑APIDocs、缓存、权限验证等等。
接入APIDocs——>SpringFox
相对来说,这个就是容易的多了。
引入资源
compile "io.springfox:springfox-swagger2:2.7.0"
compile "io.springfox:springfox-staticdocs:2.6.1"
compile "io.springfox.ui:springfox-swagger-ui-rfc6570:1.0.0"
引入对应的设置
在这里所谓的引入设置,我们完全可以是配置java代码
@EnableSwagger2
public class SwaggerConfiguration {
    @Bean
    public Docket createRestApi() {
        return new Docket(DocumentationType.SWAGGER_2)  //Docket,Springfox的私有API设置初始化为Swagger2
                .select()
                .paths(PathSelectors.any())
                .build()
                .apiInfo(new ApiInfoBuilder()   //设置API文档的主体说明
                        .title("acheng的SpringBoot探索之路ApiDocs")
                        .description("acheng的SpringBoot探索之路")
                        .version("v1.01")
                        .termsOfServiceUrl("http://acheng1314.cn/")
                        .build());

    }
}
到了这里,我们并没有完,还需要简单的把SpringFox的配置注入到项目中。如下:
/**
 * Spring Boot 应用启动类
 *
 * @author acheng
 */
@SpringBootApplication
@MapperScan("acheng1314.cn.dao")    //提供dao文件
@EnableWebMvc
@ComponentScan(basePackages = "acheng1314.cn.controller")
@Import(SwaggerConfiguration.class)
public class Application extends WebMvcConfigurerAdapter {

    public static void main(String[] args) {
        // 程序启动入口
        // 启动嵌入式的 Tomcat 并初始化 Spring 环境及其各 Spring 组件
        SpringApplication.run(Application.class, args);
    }

    @Override
    public void addResourceHandlers(ResourceHandlerRegistry registry) {
        registry.addResourceHandler("swagger-ui.html")
                .addResourceLocations("classpath:/META-INF/resources/");

        registry.addResourceHandler("/webjars/**")
                .addResourceLocations("classpath:/META-INF/resources/webjars/");
    }
}
然后我们启动项目,在浏览器地址栏中输入:
http://localhost:8080/swagger-ui.html#/
http://localhost:8080/druid
http://localhost:8080/
上面这几个地址均能正常访问! 仔细看看是不是比当初我们的spring+springMvc+Druid+mybatis整合更加容易呢?本期项目到这里就算是结束了。
如果你认可我所做的事情,并且认为我做的事对你有一定的帮助,希望你也能打赏我一杯咖啡,谢谢。

正文到此结束
- 本文标签: json 参数 build Action 希望 tab js map GitHub Select mybatis autoReconnect=true Logging AOP classpath https sql API DOM REST Connection 文章 IO root git 阿里巴巴 NSA SpringMVC autoReconnect Word cache web ip cat IDE Document 组织 dataSource http mapper bug java tomcat 数据库 数据 HTML value 百度 core ORM springboot spring servlet description UI App key 开发 src bean Spring Boot 云 tar 支付宝 CTO XML dependencies lib Service id mysql db 配置 代码
- 版权声明: 本文为互联网转载文章,出处已在文章中说明(部分除外)。如果侵权,请联系本站长删除,谢谢。
- 本文海报: 生成海报一 生成海报二
热门推荐


相关文章


Loading...
![[HBLOG]公众号](http://www.liuhaihua.cn/img/qrcode_gzh.jpg)

