Spring Cloud Bus整合RabbitMQ
上篇文章中小伙伴们已经学会了RabbitMQ的基本安装与使用以及如何在Spring Boot中使用RabbitMQ,整体来说还是比较简单的。本文我们来看看Spring Cloud Bus和RabbitMQ的整合,看看如何更简单的实现配置刷新。
本文是Spring Cloud系列的第二十七篇文章,了解前二十六篇文章内容有助于更好的理解本文:
1. 使用Spring Cloud搭建服务注册中心
2. 使用Spring Cloud搭建高可用服务注册中心
3. Spring Cloud中服务的发现与消费
4. Eureka中的核心概念
5. 什么是客户端负载均衡
6. Spring RestTemplate中几种常见的请求方式
7. RestTemplate的逆袭之路,从发送请求到负载均衡
8. Spring Cloud中负载均衡器概览
9. Spring Cloud中的负载均衡策略
10. Spring Cloud中的断路器Hystrix
11. Spring Cloud自定义Hystrix请求命令
12. Spring Cloud中Hystrix的服务降级与异常处理
13. Spring Cloud中Hystrix的请求缓存
14. Spring Cloud中Hystrix的请求合并
15. Spring Cloud中Hystrix仪表盘与Turbine集群监控
16. Spring Cloud中声明式服务调用Feign
17. Spring Cloud中Feign的继承特性
18. Spring Cloud中Feign配置详解
19. Spring Cloud中的API网关服务Zuul
20. Spring Cloud Zuul中路由配置细节
21. Spring Cloud Zuul中异常处理细节
22. 分布式配置中心Spring Cloud Config初窥
23. Spring Cloud Config服务端配置细节(一)
24. Spring Cloud Config服务端配置细节(二)之加密解密
25. Spring Cloud Config客户端配置细节
26. Spring Cloud Bus之RabbitMQ初窥
在 Spring Cloud Config客户端配置细节 一文中,我们提到过配置文件动态刷新的问题,结合RabbitMQ,这一需求可以更加轻松的实现。我们先来看下面一张架构图:
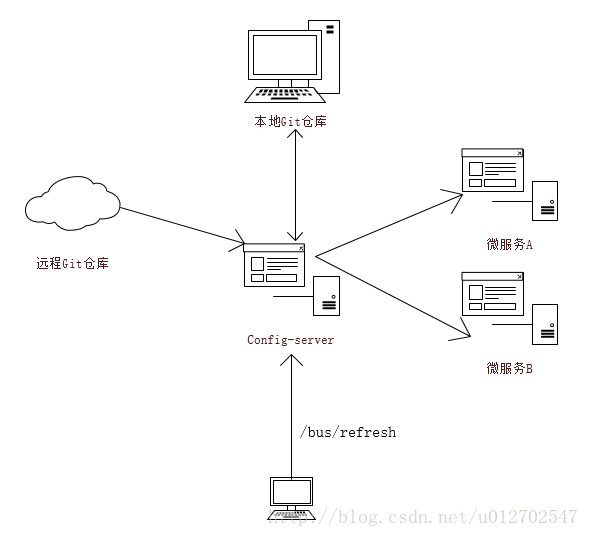
整张图的工作流程我们之前也详细的说过,当我的微服务A/微服务B启动的时候,会从Config-Server中加载配置文件,而Config-Server则会通过git clone命令将配置中心的配置文件先clone下来在本地保存一份,然后再返回给微服务A/微服务B。
这是我们之前的工作流程,现在我们结合Spring Cloud Bus来实现配置文件的动态更新。使用Spring Cloud Bus来实现配置文件的动态更新原理很简单,如上图,当我的配置文件更新后,我向Config-Server中发送一个/bus/refresh请求,Config-Server收到这个请求之后,会将这个请求广播出去,这样所有的微服务就都收到这个请求了,微服务收到这个请求之后就会自动去更新自己的配置文件。在这个系统中,从RabbitMQ的角度来看,所有的微服务都是一样的,所以这个/bus/refresh请求我们也可以在微服务节点上发出,一样能够实现配置文件动态更新的效果,但是这样做就破坏了我们微服务的结构,使得微服务节点之间有了区别,所以刷新配置的请求我们还是放在Config-Server上来做比较合适,好了,下面我们就来看看如何实现这一需求。
当我的微服务需要注册到eureka注册中心时,我需要给它添加spring-cloud-starter-eureka依赖,而当我的微服务需要使用Spring Cloud Bus时,我就给它添加spring-cloud-starter-bus-amqp依赖,我们在之前的Config-Server和Config-Client上都添加如下依赖:
<dependency>
    <groupId>org.springframework.cloud</groupId>
    <artifactId>spring-cloud-starter-bus-amqp</artifactId>
</dependency>
OK,添加好依赖之后,由于我们的Config-Server一会要连接到RabbitMQ服务器上,所以在Config-Server的application.properties中做如下配置:
spring.rabbitmq.host=localhost
spring.rabbitmq.port=5672
spring.rabbitmq.username=sang
spring.rabbitmq.password=123456
配置好之后,分别启动我们的Eureka注册中心、Config-Server和Config-Client(Config-Client启动两个实例,方便我们测试),我们在Config-Server和Config-Client的启动日志中都可以看到如下内容:
Mapped “{[/bus/refresh],methods=[POST]}” onto public void org.springframework.cloud.bus.endpoint.RefreshBusEndpo
int.refresh(java.lang.String)
这个接口就是在我们添加了spring-cloud-starter-bus-amqp依赖之后具备的,Config-Server和Config-Client都具备这个接口。
此时我们访问 http://localhost:2008/sang ,我们看到的内容如下:
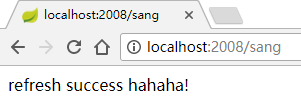
然后我们通过git工具,修改配置仓库中文件的内容,修改之后提交,提交之后如果我们直接访问 http://localhost:2008/sang ,内容还是不变,此时我们可以利用POSTMAN或者RestClient发送一个POST请求到 http://localhost:2007/bus/refresh 地址,这个时候Config-Server收到通知之后,就会广播配置文件改变的消息,此时再访问 http://localhost:2008/sang 和 http://localhost:2009/sang ,就能看到改变后的配置文件了:
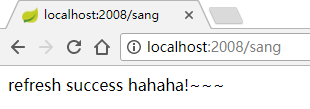
此时我们发现两个实例 http://localhost:2008/sang 和 http://localhost:2009/sang 都改变了,如果我们我们只想通知其中一个微服务更新配置,那么在刷新请求的时候携带上一个参数就行了,比如当我的配置文件更新后,我只想端口号为2008的实例更新配置,端口号为2009的实例不更新配置,那么在配置文件修改之后,我只需发送如下请求即可: http://localhost:2007/bus/refresh?destination=configClient:2008 ,destination后面指定要更新的实例的instance-id,小伙伴们注意我这里的config-client的如下两条配置:
spring.application.name=configClient
eureka.instance.instance-id=${spring.application.name}:${server.port}
每一个实例的instance-id是
好了我们的Spring Cloud Bus整合RabbitMQ就说到这里,有问题欢迎小伙伴们留言讨论。
更多JavaEE资料请关注公众号:

正文到此结束
热门推荐


相关文章


Loading...
![[HBLOG]公众号](http://www.liuhaihua.cn/img/qrcode_gzh.jpg)

