Spring Boot自动配置的"魔法"是如何实现的?
Spring Boot是Spring旗下众多的子项目之一,其理念是约定优于配置,它通过实现了自动配置(大多数用户平时习惯设置的配置作为默认配置)的功能来为用户快速构建出标准化的应用。Spring Boot的特点可以概述为如下几点:
-
内置了嵌入式的Tomcat、Jetty等Servlet容器,应用可以不用打包成War格式,而是可以直接以Jar格式运行。
-
提供了多个可选择的”starter”以简化Maven的依赖管理(也支持Gradle),让您可以按需加载需要的功能模块。
-
尽可能地进行自动配置,减少了用户需要动手写的各种冗余配置项,Spring Boot提倡无XML配置文件的理念,使用Spring Boot生成的应用完全不会生成任何配置代码与XML配置文件。
-
提供了一整套的对应用状态的监控与管理的功能模块(通过引入spring-boot-starter-actuator),包括应用的线程信息、内存信息、应用是否处于健康状态等,为了满足更多的资源监控需求,Spring Cloud中的很多模块还对其进行了扩展。
有关Spring Boot的使用方法就不做多介绍了,如有兴趣请自行阅读官方文档 Spring Boot 或其他文章。
如今微服务的概念愈来愈热,转型或尝试微服务的团队也在如日渐增,而对于技术选型,Spring Cloud是一个比较好的选择,它提供了一站式的分布式系统解决方案,包含了许多构建分布式系统与微服务需要用到的组件,例如服务治理、API网关、配置中心、消息总线以及容错管理等模块。可以说,Spring Cloud”全家桶”极其适合刚刚接触微服务的团队。似乎有点跑题了,不过说了这么多,我想要强调的是,Spring Cloud中的每个组件都是基于Spring Boot构建的,而理解了Spring Boot的自动配置的原理,显然也是有好处的。
Spring Boot的自动配置看起来神奇,其实原理非常简单,背后全依赖于@Conditional注解来实现的。
本文作者为 SylvanasSun(sylvanas.sun@gmail.com) ,首发于SylvanasSun’s Blog。
原文链接: https://sylvanassun.github.io/2018/01/08/2018-01-08-spring_boot_auto_configure/
(转载请务必保留本段声明,并且保留超链接。)
什么是@Conditional?
@Conditional是由Spring 4提供的一个新特性,用于根据特定条件来控制Bean的创建行为。而在我们开发基于Spring的应用的时候,难免会需要根据条件来注册Bean。
例如,你想要根据不同的运行环境,来让Spring注册对应环境的数据源Bean,对于这种简单的情况,完全可以使用@Profile注解实现,就像下面代码所示:
@Configuration
public class AppConfig{
	@Bean
	@Profile("DEV")
	public DataSource devDataSource(){
		...
	}

	@Bean
	@Profile("PROD")
	public DataSource prodDataSource(){
		...
	}
}
剩下只需要设置对应的Profile属性即可,设置方法有如下三种:
-
通过
context.getEnvironment().setActiveProfiles("PROD")来设置Profile属性。 -
通过设定jvm的
spring.profiles.active参数来设置环境(Spring Boot中可以直接在application.properties配置文件中设置该属性)。 -
通过在DispatcherServlet的初始参数中设置。
<servlet>
	<servlet-name>dispatcher</servlet-name>
	<servlet-class>org.springframework.web.servlet.DispatcherServlet</servlet-class>
	<init-param>
		<param-name>spring.profiles.active</param-name>
		<param-value>PROD</param-value>
	</init-param>
</servlet>
但这种方法只局限于简单的情况,而且通过源码我们可以发现@Profile自身也使用了@Conditional注解。
package org.springframework.context.annotation;

@Target({ElementType.TYPE, ElementType.METHOD})
@Retention(RetentionPolicy.RUNTIME)
@Documented
@Conditional({ProfileCondition.class}) // 组合了Conditional注解
public @interface Profile {
    String[] value();
}

package org.springframework.context.annotation;

class ProfileConditionimplements Condition{
    ProfileCondition() {
    }

    // 通过提取出@Profile注解中的value值来与profiles配置信息进行匹配
    public boolean matches(ConditionContext context, AnnotatedTypeMetadata metadata){
        if(context.getEnvironment() != null) {
            MultiValueMap attrs = metadata.getAllAnnotationAttributes(Profile.class.getName());
            if(attrs != null) {
                Iterator var4 = ((List)attrs.get("value")).iterator();

                Object value;
                do {
                    if(!var4.hasNext()) {
                        return false;
                    }

                    value = var4.next();
                } while(!context.getEnvironment().acceptsProfiles((String[])((String[])value)));

                return true;
            }
        }

        return true;
    }
}
在业务复杂的情况下,显然需要使用到@Conditional注解来提供更加灵活的条件判断,例如以下几个判断条件:
-
在类路径中是否存在这样的一个类。
-
在Spring容器中是否已经注册了某种类型的Bean(如未注册,我们可以让其自动注册到容器中,上一条同理)。
-
一个文件是否在特定的位置上。
-
一个特定的系统属性是否存在。
-
在Spring的配置文件中是否设置了某个特定的值。
举个栗子,假设我们有两个基于不同数据库实现的DAO,它们全都实现了UserDao,其中JdbcUserDAO与MySql进行连接,MongoUserDAO与MongoDB进行连接。现在,我们有了一个需求,需要根据命令行传入的系统参数来注册对应的UserDao,就像 java -jar app.jar -DdbType=MySQL 会注册JdbcUserDao,而 java -jar app.jar -DdbType=MongoDB 则会注册MongoUserDao。使用@Conditional可以很轻松地实现这个功能,仅仅需要在你自定义的条件类中去实现Condition接口,让我们来看下面的代码。(以下案例来自: https://dzone.com/articles/how-springboot-autoconfiguration-magic-works)
public interface UserDAO{
	....
}

public class JdbcUserDAOimplements UserDAO{
	....
}

public class MongoUserDAOimplements UserDAO{
	....
}

public class MySQLDatabaseTypeConditionimplements Condition{
	@Override
	public boolean matches(ConditionContext conditionContext, AnnotatedTypeMetadata metadata){
 		String enabledDBType = System.getProperty("dbType"); // 获得系统参数 dbType
 		// 如果该值等于MySql,则条件成立
 		return (enabledDBType != null && enabledDBType.equalsIgnoreCase("MySql"));
 	}
}

// 与上述逻辑一致
public class MongoDBDatabaseTypeConditionimplements Condition{
	@Override
	public boolean matches(ConditionContext conditionContext, AnnotatedTypeMetadata metadata){
 		String enabledDBType = System.getProperty("dbType");
 		return (enabledDBType != null && enabledDBType.equalsIgnoreCase("MongoDB"));
 	}
}

// 根据条件来注册不同的Bean
@Configuration
public class AppConfig{
	@Bean
	@Conditional(MySQLDatabaseTypeCondition.class)
	public UserDAO jdbcUserDAO(){
		return new JdbcUserDAO();
	}

	@Bean
	@Conditional(MongoDBDatabaseTypeCondition.class)
	public UserDAO mongoUserDAO(){
		return new MongoUserDAO();
	}
}
现在,我们又有了一个新需求,我们想要根据当前工程的类路径中是否存在MongoDB的驱动类来确认是否注册MongoUserDAO。为了实现这个需求,可以创建检查MongoDB驱动是否存在的两个条件类。
public class MongoDriverPresentsConditionimplements Condition{
	@Override
	public boolean matches(ConditionContext conditionContext, AnnotatedTypeMetadata metadata){
		try {
			Class.forName("com.mongodb.Server");
			return true;
		} catch (ClassNotFoundException e) {
			return false;
		}
	}
}

public class MongoDriverNotPresentsConditionimplements Condition{
	@Override
	public boolean matches(ConditionContext conditionContext, AnnotatedTypeMetadata metadata){
		try {
			Class.forName("com.mongodb.Server");
			return false;
		} catch (ClassNotFoundException e) {
			return true;
		}
	}
}
假如,你想要在UserDAO没有被注册的情况下去注册一个UserDAOBean,那么我们可以定义一个条件类来检查某个类是否在容器中已被注册。
public class UserDAOBeanNotPresentsConditionimplements Condition{
	@Override
	public boolean matches(ConditionContext conditionContext, AnnotatedTypeMetadata metadata){
		UserDAO userDAO = conditionContext.getBeanFactory().getBean(UserDAO.class);
		return (userDAO == null);
	}
}
如果你想根据配置文件中的某项属性来决定是否注册MongoDAO,例如 app.dbType 是否等于 MongoDB ,我们可以实现以下的条件类。
public class MongoDbTypePropertyConditionimplements Condition{
	@Override
	public boolean matches(ConditionContext conditionContext, AnnotatedTypeMetadata metadata){
		String dbType = conditionContext.getEnvironment().getProperty("app.dbType");
		return "MONGO".equalsIgnoreCase(dbType);
	}
}
我们已经尝试并实现了各种类型的条件判断,接下来,我们可以选择一种更为优雅的方式,就像@Profile一样,以注解的方式来完成条件判断。首先,我们需要定义一个注解类。
@Target({ ElementType.TYPE, ElementType.METHOD })
@Retention(RetentionPolicy.RUNTIME)
@Documented
@Conditional(DatabaseTypeCondition.class)
public @interface DatabaseType {
	Stringvalue();
}
具体的条件判断逻辑在DatabaseTypeCondition类中,它会根据系统参数 dbType 来判断注册哪一个Bean。
public class DatabaseTypeConditionimplements Condition{
	@Override
	public boolean matches(ConditionContext conditionContext, AnnotatedTypeMetadata metadata){
		Map<String, Object> attributes = metadata
											.getAnnotationAttributes(DatabaseType.class.getName());
		String type = (String) attributes.get("value");
		// 默认值为MySql
		String enabledDBType = System.getProperty("dbType", "MySql");
		return (enabledDBType != null && type != null && enabledDBType.equalsIgnoreCase(type));
	}
}
最后,在配置类应用该注解即可。
@Configuration
@ComponentScan
public class AppConfig{
	@Bean
	@DatabaseType("MySql")
	public UserDAO jdbcUserDAO(){
		return new JdbcUserDAO();
	}

	@Bean
	@DatabaseType("mongoDB")
	public UserDAO mongoUserDAO(){
		return new MongoUserDAO();
	}
}
AutoConfigure源码分析
通过了解@Conditional注解的机制其实已经能够猜到自动配置是如何实现的了,接下来我们通过源码来看看它是怎么做的。本文中讲解的源码基于Spring Boot 1.5.9版本(最新的正式版本)。
使用过Spring Boot的童鞋应该都很清楚,它会替我们生成一个入口类,其命名规格为 ArtifactNameApplication ,通过这个入口类,我们可以发现一些信息。
@SpringBootApplication
public class DemoApplication{

    public static void main(String[] args){
        SpringApplication.run(DemoApplication.class, args);
    }

}
首先该类被@SpringBootApplication注解修饰,我们可以先从它开始分析,查看源码后可以发现它是一个包含许多注解的组合注解。
@Target({ElementType.TYPE})
@Retention(RetentionPolicy.RUNTIME)
@Documented
@Inherited
@SpringBootConfiguration
@EnableAutoConfiguration
@ComponentScan(
    excludeFilters = {@Filter(
    type = FilterType.CUSTOM,
    classes = {TypeExcludeFilter.class}
), @Filter(
    type = FilterType.CUSTOM,
    classes = {AutoConfigurationExcludeFilter.class}
)}
)
public @interface SpringBootApplication {
    @AliasFor(
        annotation = EnableAutoConfiguration.class,
        attribute = "exclude"
    )
    Class<?>[] exclude() default {};

    @AliasFor(
        annotation = EnableAutoConfiguration.class,
        attribute = "excludeName"
    )
    String[] excludeName() default {};

    @AliasFor(
        annotation = ComponentScan.class,
        attribute = "basePackages"
    )
    String[] scanBasePackages() default {};

    @AliasFor(
        annotation = ComponentScan.class,
        attribute = "basePackageClasses"
    )
    Class<?>[] scanBasePackageClasses() default {};
}
该注解相当于同时声明了@Configuration、@EnableAutoConfiguration与@ComponentScan三个注解(如果我们想定制自定义的自动配置实现,声明这三个注解就足够了),而@EnableAutoConfiguration是我们的关注点,从它的名字可以看出来,它是用来开启自动配置的,源码如下:
@Target({ElementType.TYPE})
@Retention(RetentionPolicy.RUNTIME)
@Documented
@Inherited
@AutoConfigurationPackage
@Import({EnableAutoConfigurationImportSelector.class})
public @interface EnableAutoConfiguration {
    String ENABLED_OVERRIDE_PROPERTY = "spring.boot.enableautoconfiguration";

    Class<?>[] exclude() default {};

    String[] excludeName() default {};
}
我们发现@Import(Spring 提供的一个注解,可以导入配置类或者Bean到当前类中)导入了EnableAutoConfigurationImportSelector类,根据名字来看,它应该就是我们要找到的目标了。不过查看它的源码发现它已经被Deprecated了,而官方API中告知我们去查看它的父类AutoConfigurationImportSelector。
/**@deprecated*/
@Deprecated
public class EnableAutoConfigurationImportSelectorextends AutoConfigurationImportSelector{
    public EnableAutoConfigurationImportSelector(){
    }

    protected boolean isEnabled(AnnotationMetadata metadata){
        return this.getClass().equals(EnableAutoConfigurationImportSelector.class)?((Boolean)this.getEnvironment().getProperty("spring.boot.enableautoconfiguration", Boolean.class, Boolean.valueOf(true))).booleanValue():true;
    }
}
由于AutoConfigurationImportSelector的源码太长了,这里我只截出关键的地方,显然方法selectImports是选择自动配置的主入口,它调用了其他的几个方法来加载元数据等信息,最后返回一个包含许多自动配置类信息的字符串数组。
public String[] selectImports(AnnotationMetadata annotationMetadata) {
    if(!this.isEnabled(annotationMetadata)) {
        return NO_IMPORTS;
    } else {
        try {
            AutoConfigurationMetadata ex = AutoConfigurationMetadataLoader.loadMetadata(this.beanClassLoader);
            AnnotationAttributes attributes = this.getAttributes(annotationMetadata);
            List configurations = this.getCandidateConfigurations(annotationMetadata, attributes);
            configurations = this.removeDuplicates(configurations);
            configurations = this.sort(configurations, ex);
            Set exclusions = this.getExclusions(annotationMetadata, attributes);
            this.checkExcludedClasses(configurations, exclusions);
            configurations.removeAll(exclusions);
            configurations = this.filter(configurations, ex);
            this.fireAutoConfigurationImportEvents(configurations, exclusions);
            return (String[])configurations.toArray(new String[configurations.size()]);
        } catch (IOException var6) {
            throw new IllegalStateException(var6);
        }
    }
}
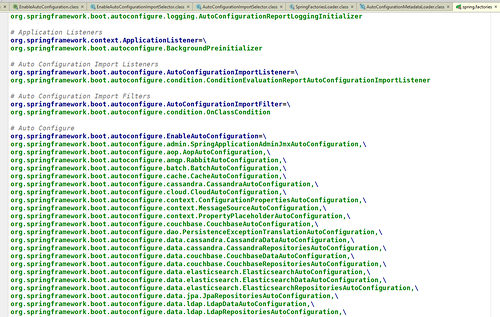
重点在于方法getCandidateConfigurations()返回了自动配置类的信息列表,而它通过调用SpringFactoriesLoader.loadFactoryNames()来扫描加载含有META-INF/spring.factories文件的jar包,该文件记录了具有哪些自动配置类。(建议还是用IDE去看源码吧,这些源码单行实在太长了,估计文章中的观看效果很差)
protected List<String> getCandidateConfigurations(AnnotationMetadata metadata, AnnotationAttributes attributes) {
    List configurations = SpringFactoriesLoader
    									.loadFactoryNames(this.getSpringFactoriesLoaderFactoryClass(), this.getBeanClassLoader());
    Assert.notEmpty(configurations, "No auto configuration classes
    found in META-INF spring.factories.
    If you are using a custom packaging, make sure that file is correct.");
    return configurations;
}

public static List<String> loadFactoryNames(Class<?> factoryClass, ClassLoader classLoader) {
    String factoryClassName = factoryClass.getName();

    try {
        Enumeration ex = classLoader != null?classLoader.getResources("META-INF/spring.factories"):ClassLoader.getSystemResources("META-INF/spring.factories");
        ArrayList result = new ArrayList();

        while(ex.hasMoreElements()) {
            URL url = (URL)ex.nextElement();
            Properties properties = PropertiesLoaderUtils.loadProperties(new UrlResource(url));
            String factoryClassNames = properties.getProperty(factoryClassName);
            result.addAll(Arrays.asList(StringUtils.commaDelimitedListToStringArray(factoryClassNames)));
        }

        return result;
    } catch (IOException var8) {
        throw new IllegalArgumentException("Unable to load [" + factoryClass.getName() + "] factories from location [" + "META-INF/spring.factories" + "]", var8);
    }
}
自动配置类中的条件注解
接下来,我们在spring.factories文件中随便找一个自动配置类,来看看是怎样实现的。我查看了MongoDataAutoConfiguration的源码,发现它声明了@ConditionalOnClass注解,通过看该注解的源码后可以发现,这是一个组合了@Conditional的组合注解,它的条件类是OnClassCondition。
@Configuration
@ConditionalOnClass({Mongo.class, MongoTemplate.class})
@EnableConfigurationProperties({MongoProperties.class})
@AutoConfigureAfter({MongoAutoConfiguration.class})
public class MongoDataAutoConfiguration{
	....
}

@Target({ElementType.TYPE, ElementType.METHOD})
@Retention(RetentionPolicy.RUNTIME)
@Documented
@Conditional({OnClassCondition.class})
public @interface ConditionalOnClass {
    Class<?>[] value() default {};

    String[] name() default {};
}
然后,我们开始看OnClassCondition的源码,发现它并没有直接实现Condition接口,只好往上找,发现它的父类SpringBootCondition实现了Condition接口。
class OnClassConditionextends SpringBootConditionimplements AutoConfigurationImportFilter,BeanFactoryAware,BeanClassLoaderAware{
	.....
}

public abstract class SpringBootConditionimplements Condition{
    private final Log logger = LogFactory.getLog(this.getClass());

    public SpringBootCondition(){
    }

    public final boolean matches(ConditionContext context, AnnotatedTypeMetadata metadata){
        String classOrMethodName = getClassOrMethodName(metadata);

        try {
            ConditionOutcome ex = this.getMatchOutcome(context, metadata);
            this.logOutcome(classOrMethodName, ex);
            this.recordEvaluation(context, classOrMethodName, ex);
            return ex.isMatch();
        } catch (NoClassDefFoundError var5) {
            throw new IllegalStateException("Could not evaluate condition on " + classOrMethodName + " due to " + var5.getMessage() + " not found. Make sure your own configuration does not rely on that class. This can also happen if you are @ComponentScanning a springframework package (e.g. if you put a @ComponentScan in the default package by mistake)", var5);
        } catch (RuntimeException var6) {
            throw new IllegalStateException("Error processing condition on " + this.getName(metadata), var6);
        }
    }

    public abstract ConditionOutcome getMatchOutcome(ConditionContext var1, AnnotatedTypeMetadata var2);
}
SpringBootCondition实现的matches方法依赖于一个抽象方法this.getMatchOutcome(context, metadata),我们在它的子类OnClassCondition中可以找到这个方法的具体实现。
public ConditionOutcome getMatchOutcome(ConditionContext context, AnnotatedTypeMetadata metadata){
    ClassLoader classLoader = context.getClassLoader();
    ConditionMessage matchMessage = ConditionMessage.empty();
    // 找出所有ConditionalOnClass注解的属性
    List onClasses = this.getCandidates(metadata, ConditionalOnClass.class);
    List onMissingClasses;
    if(onClasses != null) {
        // 找出不在类路径中的类
        onMissingClasses = this.getMatches(onClasses, OnClassCondition.MatchType.MISSING, classLoader);
        // 如果存在不在类路径中的类,匹配失败
        if(!onMissingClasses.isEmpty()) {
            return ConditionOutcome.noMatch(ConditionMessage.forCondition(ConditionalOnClass.class, new Object[0]).didNotFind("required class", "required classes").items(Style.QUOTE, onMissingClasses));
        }

        matchMessage = matchMessage.andCondition(ConditionalOnClass.class, new Object[0]).found("required class", "required classes").items(Style.QUOTE, this.getMatches(onClasses, OnClassCondition.MatchType.PRESENT, classLoader));
    }

    // 接着找出所有ConditionalOnMissingClass注解的属性
    // 它与ConditionalOnClass注解的含义正好相反,所以以下逻辑也与上面相反
    onMissingClasses = this.getCandidates(metadata, ConditionalOnMissingClass.class);
    if(onMissingClasses != null) {
        List present = this.getMatches(onMissingClasses, OnClassCondition.MatchType.PRESENT, classLoader);
        if(!present.isEmpty()) {
            return ConditionOutcome.noMatch(ConditionMessage.forCondition(ConditionalOnMissingClass.class, new Object[0]).found("unwanted class", "unwanted classes").items(Style.QUOTE, present));
        }

        matchMessage = matchMessage.andCondition(ConditionalOnMissingClass.class, new Object[0]).didNotFind("unwanted class", "unwanted classes").items(Style.QUOTE, this.getMatches(onMissingClasses, OnClassCondition.MatchType.MISSING, classLoader));
    }

    return ConditionOutcome.match(matchMessage);
}

// 获得所有annotationType注解的属性
private List<String> getCandidates(AnnotatedTypeMetadata metadata, Class<?> annotationType){
    MultiValueMap attributes = metadata.getAllAnnotationAttributes(annotationType.getName(), true);
    ArrayList candidates = new ArrayList();
    if(attributes == null) {
        return Collections.emptyList();
    } else {
        this.addAll(candidates, (List)attributes.get("value"));
        this.addAll(candidates, (List)attributes.get("name"));
        return candidates;
    }
}

private void addAll(List<String> list, List<Object> itemsToAdd){
    if(itemsToAdd != null) {
        Iterator var3 = itemsToAdd.iterator();

        while(var3.hasNext()) {
            Object item = var3.next();
            Collections.addAll(list, (String[])((String[])item));
        }
    }

}

// 根据matchType.matches方法来进行匹配
private List<String> getMatches(Collection<String> candidates, OnClassCondition.MatchType matchType, ClassLoader classLoader){
    ArrayList matches = new ArrayList(candidates.size());
    Iterator var5 = candidates.iterator();

    while(var5.hasNext()) {
        String candidate = (String)var5.next();
        if(matchType.matches(candidate, classLoader)) {
            matches.add(candidate);
        }
    }

    return matches;
}
关于match的具体实现在MatchType中,它是一个枚举类,提供了PRESENT和MISSING两种实现,前者返回类路径中是否存在该类,后者相反。
private static enum MatchType {
    PRESENT {
        public boolean matches(String className, ClassLoader classLoader){
            return OnClassCondition.MatchType.isPresent(className, classLoader);
        }
    },
    MISSING {
        public boolean matches(String className, ClassLoader classLoader){
            return !OnClassCondition.MatchType.isPresent(className, classLoader);
        }
    };

    private MatchType(){
    }

    // 跟我们之前看过的案例一样,都利用了类加载功能来进行判断
    private static boolean isPresent(String className, ClassLoader classLoader){
        if(classLoader == null) {
            classLoader = ClassUtils.getDefaultClassLoader();
        }

        try {
            forName(className, classLoader);
            return true;
        } catch (Throwable var3) {
            return false;
        }
    }

    private static Class<?> forName(String className, ClassLoader classLoader) throws ClassNotFoundException {
        return classLoader != null?classLoader.loadClass(className):Class.forName(className);
    }

    public abstract boolean matches(String var1, ClassLoader var2);
}
现在终于真相大白,@ConditionalOnClass的含义是指定的类必须存在于类路径下,MongoDataAutoConfiguration类中声明了类路径下必须含有Mongo.class, MongoTemplate.class这两个类,否则该自动配置类不会被加载。
在Spring Boot中到处都有类似的注解,像@ConditionalOnBean(容器中是否有指定的Bean),@ConditionalOnWebApplication(当前工程是否为一个Web工程)等等,它们都只是@Conditional注解的扩展。当你揭开神秘的面纱,去探索本质时,发现其实Spring Boot自动配置的原理就是如此简单,在了解这些知识后,你完全可以自己去实现自定义的自动配置类,然后编写出自定义的starter。
正文到此结束
- 本文标签: java jetty tar UI CTO list 文章 Spring Boot spring maven 配置 需求 value ACE id logo db https map 代码 XML http Collection Lua mysql tab git sql GitHub Collections src IO mongo 源码 tomcat cat API Select dataSource ORM 本质 定制 servlet 线程 管理 Document final bean 分布式系统 ssl 数据库 IDE MongoDB 开发 Property springboot web mail find 数据 App 参数 message 分布式
- 版权声明: 本文为互联网转载文章,出处已在文章中说明(部分除外)。如果侵权,请联系本站长删除,谢谢。
- 本文海报: 生成海报一 生成海报二
热门推荐


相关文章

近期评论
-
你这基本没有更新呀,最近文章显示还是2019年的文章。不符合要求哈
-
关键词:慕云博客 链接:https://www.lilun.me 描述:分享原创文字的个人博客
-
-
-
可以提供一下源码吗
-
不是商业站,鸡娃学习笔记
-
-
-
-
听他们说很厉害的样子
Loading...
![[HBLOG]公众号](http://www.liuhaihua.cn/img/qrcode_gzh.jpg)

