JAVA学习笔记26——ActiveMQ讲解之整合Spring(二)
上一篇文章中我们讲解了ActiveMQ的基本用法,在代码中按照步骤一步步的就可以正常使用了,但是我们应该都会觉得这样的写法太繁琐了,每次都得写这么一大段代码才能发送和接收消息,所以今天我们讲一下如何将ActiveMQ整合Spring,和Spring集成以后,ActiveMQ的使用将会简单不少。
一、代码配置
1.1 在pom文件中引用相关jar包
<dependency>
    <groupId>org.springframework</groupId>
    <artifactId>spring-jms</artifactId>
</dependency>
<dependency>
    <groupId>org.springframework</groupId>
    <artifactId>spring-context-support</artifactId>
</dependency>
1.2 配置Activemq整合spring,配置ConnectionFactory
在项目的资源目录下新建一个spring/applicationContext-activemq.xml文件,用于配置spring的整合,代码如下:
<?xml version="1.0" encoding="UTF-8"?>
<beans xmlns="http://www.springframework.org/schema/beans"
    xmlns:context="http://www.springframework.org/schema/context" xmlns:p="http://www.springframework.org/schema/p"
    xmlns:aop="http://www.springframework.org/schema/aop" xmlns:tx="http://www.springframework.org/schema/tx"
    xmlns:xsi="http://www.w3.org/2001/XMLSchema-instance"
    xsi:schemaLocation="http://www.springframework.org/schema/beans http://www.springframework.org/schema/beans/spring-beans-4.2.xsd
    http://www.springframework.org/schema/context http://www.springframework.org/schema/context/spring-context-4.2.xsd
    http://www.springframework.org/schema/aop http://www.springframework.org/schema/aop/spring-aop-4.2.xsd http://www.springframework.org/schema/tx http://www.springframework.org/schema/tx/spring-tx-4.2.xsd
    http://www.springframework.org/schema/util http://www.springframework.org/schema/util/spring-util-4.2.xsd">

    <!-- JMS服务厂商提供的ConnectionFactory -->
    <bean id="targetConnectionFactory" class="org.apache.activemq.ActiveMQConnectionFactory">
        <constructor-arg name="brokerURL" value="tcp://192.168.25.88:61616"/>
    </bean>
    <!-- spring对象ConnectionFactory的封装 -->
    <bean id="connectionFactory" class="org.springframework.jms.connection.SingleConnectionFactory">
        <property name="targetConnectionFactory" ref="targetConnectionFactory"></property>
    </bean>
</beans>
1.3 配置生产者
继续在配置文件中添加代码。
<!-- 配置JMSTemplate -->
<bean id="jmsTemplate" class="org.springframework.jms.core.JmsTemplate">
    <property name="connectionFactory" ref="connectionFactory"/>
</bean>
1.4 在spring容器中配置Destination
继续在配置文件中添加代码。
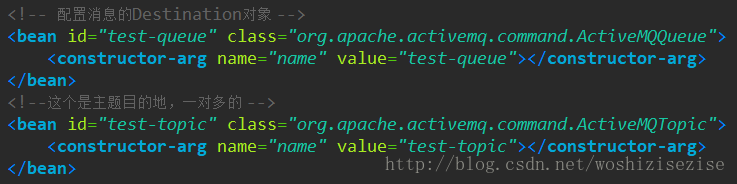
<!-- 配置消息的Destination对象 -->
<bean id="test-queue" class="org.apache.activemq.command.ActiveMQQueue">
    <constructor-arg name="name" value="test-queue"></constructor-arg>
</bean>
<!--这个是主题目的地,一对多的 -->
<bean id="test-topic" class="org.apache.activemq.command.ActiveMQTopic">
    <constructor-arg name="name" value="test-topic"></constructor-arg>
</bean>
到这里,我们的ActiveMQ与Spring整合的配置文件已经配置好了,下面我们通过代码来测试一下程序。
二、搭建新的测试工程
一会儿我们在activeMQ-demo工程中发布新的queue和topic消息,我们在另一个工程中接收订阅的消息,这里我们需要新建一个测试工程,命名为activeMQ-service,我们来快速的浏览一下项目结构。
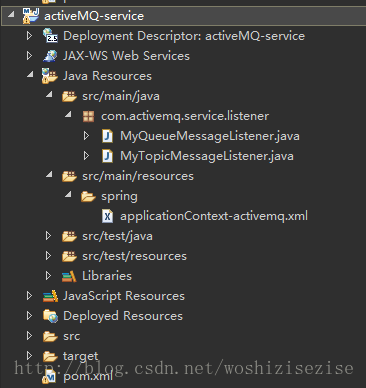
这里同样需要配置spring配置文件,然后需要在项目中新增两个listener,这个listener呢就相当于之前我们写的消费者,它在spring中进行了整合之后,可以通过监听来收取消息,下面我们来看看具体的代码。
2.1 applicationContext-activemq.xml
<?xml version="1.0" encoding="UTF-8"?>
<beans xmlns="http://www.springframework.org/schema/beans"
    xmlns:context="http://www.springframework.org/schema/context" xmlns:p="http://www.springframework.org/schema/p"
    xmlns:aop="http://www.springframework.org/schema/aop" xmlns:tx="http://www.springframework.org/schema/tx"
    xmlns:xsi="http://www.w3.org/2001/XMLSchema-instance"
    xsi:schemaLocation="http://www.springframework.org/schema/beans http://www.springframework.org/schema/beans/spring-beans-4.2.xsd
    http://www.springframework.org/schema/context http://www.springframework.org/schema/context/spring-context-4.2.xsd
    http://www.springframework.org/schema/aop http://www.springframework.org/schema/aop/spring-aop-4.2.xsd http://www.springframework.org/schema/tx http://www.springframework.org/schema/tx/spring-tx-4.2.xsd
    http://www.springframework.org/schema/util http://www.springframework.org/schema/util/spring-util-4.2.xsd">

    <!-- JMS服务厂商提供的ConnectionFactory -->
    <bean id="targetConnectionFactory" class="org.apache.activemq.ActiveMQConnectionFactory">
        <constructor-arg name="brokerURL" value="tcp://192.168.25.88:61616"/>
    </bean>
    <!-- spring对象ConnectionFactory的封装 -->
    <bean id="connectionFactory" class="org.springframework.jms.connection.SingleConnectionFactory">
        <property name="targetConnectionFactory" ref="targetConnectionFactory"></property>
    </bean>
    <!-- 配置消息的Destination对象 -->
    <bean id="test-queue" class="org.apache.activemq.command.ActiveMQQueue">
        <constructor-arg name="name" value="test-queue"></constructor-arg>
    </bean>
    <bean id="test-topic" class="org.apache.activemq.command.ActiveMQTopic">
        <constructor-arg name="name" value="test-topic"></constructor-arg>
    </bean>
    <!-- 配置消息的接收者 -->
    <bean id="myQueueMessageListener" class="com.activemq.service.listener.MyQueueMessageListener"/>
    <bean class="org.springframework.jms.listener.DefaultMessageListenerContainer">
        <property name="connectionFactory" ref="connectionFactory" />
        <property name="destination" ref="test-queue" />
        <property name="messageListener" ref="myQueueMessageListener" />
    </bean>
    <bean id="myTopicMessageListener" class="com.activemq.service.listener.MyTopicMessageListener"/>
    <bean class="org.springframework.jms.listener.DefaultMessageListenerContainer">
        <property name="connectionFactory" ref="connectionFactory" />
        <property name="destination" ref="test-topic" />
        <property name="messageListener" ref="myTopicMessageListener" />
    </bean>
</beans>
这里配置的Destination中的id需要和发布消息的工程的配置文件中的id保持一致,即
这里的id配置的是什么,我们接收消息的配置的id就是什么,否则找不到对应关系。
2.2 pom.xml
在pom.xml文件中添加以下的jar包
<dependencies>
    <!-- Spring -->
    <dependency>
        <groupId>org.springframework</groupId>
        <artifactId>spring-context</artifactId>
    </dependency>
    <dependency>
        <groupId>org.springframework</groupId>
        <artifactId>spring-beans</artifactId>
    </dependency>
    <dependency>
        <groupId>org.springframework</groupId>
        <artifactId>spring-webmvc</artifactId>
    </dependency>
    <dependency>
        <groupId>org.springframework</groupId>
        <artifactId>spring-jdbc</artifactId>
    </dependency>
    <dependency>
        <groupId>org.springframework</groupId>
        <artifactId>spring-aspects</artifactId>
    </dependency>
    <dependency>
        <groupId>org.springframework</groupId>
        <artifactId>spring-jms</artifactId>
    </dependency>
    <dependency>
        <groupId>org.springframework</groupId>
        <artifactId>spring-context-support</artifactId>
    </dependency>
    <!-- activemq的jar包 -->
    <dependency>
        <groupId>org.apache.activemq</groupId>
        <artifactId>activemq-all</artifactId>
    </dependency>
</dependencies>
<build>
    <plugins>
        <plugin>
            <groupId>org.apache.tomcat.maven</groupId>
            <artifactId>tomcat7-maven-plugin</artifactId>
            <configuration>
                <path>/</path>
                <port>8081</port>
            </configuration>
        </plugin>
    </plugins>
</build>
2.3 MyQueueMessageListener.java
这个类已经在applicationContext-activemq.xml配置文件中注入了,所以当接收到消息的时候,就会被MyQueueMessageListener监听到,看看源码:
package com.activemq.service.listener;

import javax.jms.JMSException;
import javax.jms.Message;
import javax.jms.MessageListener;
import javax.jms.TextMessage;

public class MyQueueMessageListener implements MessageListener {

    @Override
    public void onMessage(Message message) {
        // 接收到消息
        try {
            TextMessage textMessage = (TextMessage) message;
            String text = textMessage.getText();
            System.out.println(text);
        } catch (JMSException e) {
            e.printStackTrace();
        }
    }
}
三、测试Spring整合发送Queue消息
3.1 在activeMQ-demo工程中新建测试类SpringActiveMQ.java
我们在activeMQ-demo工程中的测试目录下新建一个测试类,通过在这里发送消息队列Queue消息,看看代码:
package com.activemq.test;
import javax.jms.Destination;
import javax.jms.JMSException;
import javax.jms.Message;
import javax.jms.Session;
import javax.jms.TextMessage;
import org.junit.Test;
import org.springframework.context.ApplicationContext;
import org.springframework.context.support.ClassPathXmlApplicationContext;
import org.springframework.jms.core.JmsTemplate;
import org.springframework.jms.core.MessageCreator;
public class SpringActiveMQ {
@Test
public void testJmsTemplate() throws Exception{
//初始化spring容器
ApplicationContext applicationContext = new ClassPathXmlApplicationContext("classpath:spring/applicationContext-activemq.xml");
//从容器中活得JmsTemplate对象
JmsTemplate jmsTemplate = applicationContext.getBean(JmsTemplate.class);
//发送消息
Destination destination = (Destination) applicationContext.getBean("test-queue");
//从容器中活得Destination对象
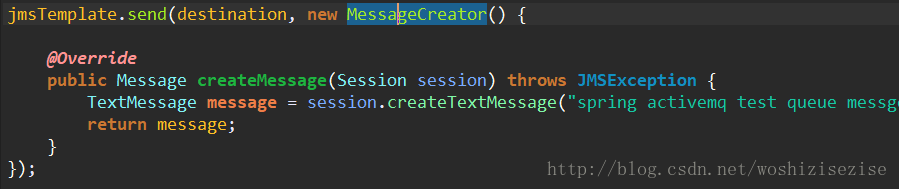
jmsTemplate.send(destination, new MessageCreator() {
@Override
public Message createMessage(Session session) throws JMSException {
TextMessage message = session.createTextMessage("spring activemq test queue messge");
return message;
}
});
}
}
3.2 运行activeMQ-service工程
我们首先将activeMQ-service工程运行起来,我们已经配置了tomcat,并且端口号为8081,所以我们可以将activeMQ-service工程运行起来,这样activeMQ-demo发送的消息可以被接收到。
3.3 执行SpringActiveMQ 类中的testJmsTemplate()方法
当我们的activeMQ-service工程运行起来以后,我们执行activeMQ-demo工程中的SpringActiveMQ测试类中的testJmsTemplate()方法,观察console输出台的信息:

可以看到,输出台输出的就是我们之前在testJmsTemplate方法中发送的消息
所以通过我们和Spring整合后的方式,我们已经可能正常的收到消息了。
四、测试Spring整合发送Topic消息
4.1 MyTopicMessageListener.java
来看看MyTopicMessageListener中的代码:
package com.activemq.service.listener;

import javax.jms.JMSException;
import javax.jms.Message;
import javax.jms.MessageListener;
import javax.jms.TextMessage;

public class MyTopicMessageListener implements MessageListener {

    @Override
    public void onMessage(Message message) {
        // 接收到消息
        try {
            TextMessage textMessage = (TextMessage) message;
            String text = textMessage.getText();
            System.out.println(text);
        } catch (JMSException e) {
            e.printStackTrace();
        }
    }
}
和MyQueueMessageListener.java中代码一样。
4.2 在activeMQ-demo工程的SpringActiveMQ.java测试类中添加方法
@Test
public void testJmsTemplateTopic() throws Exception{
    //初始化spring容器
    ApplicationContext applicationContext = new ClassPathXmlApplicationContext("classpath:spring/applicationContext-activemq.xml");
    //从容器中活得JmsTemplate对象
    JmsTemplate jmsTemplate = applicationContext.getBean(JmsTemplate.class);
    //发送消息
    Destination destination = (Destination) applicationContext.getBean("test-topic");
    //从容器中活得Destination对象
    jmsTemplate.send(destination, new MessageCreator() {

        @Override
        public Message createMessage(Session session) throws JMSException {
            TextMessage message = session.createTextMessage("spring activemq test topic messge");
            return message;
        }
    });
}
这里发送的是topic消息,我们的activeMQ-service工程中已经订阅了,并且已经启动了,所以这里我们直接执行testJmsTemplateTopic方法,观察console输出台消息:

这里可以看到接收到的消息正是topic消息,所以通过和Spring进行整合之后我们呢可以用JmsTemplate来发送消息,并且同时根据listener监听来处理接收到的消息,并作下一步逻辑处理。
到此为止,关于ActiveMQ的讲解和简单的入门实践,包括传统方式和通过Spring整合后的方式发送和接收消息,我们已经讲完了,ActiveMQ主要作为一个消息中间件使用,用于我们处理完当前业务逻辑后提醒其他的服务做出响应,这里举个例子,比如在电商平台中,我们在商品管理后台中新上架了一件商品,当我们往数据库中插入商品成功后,我们同时应该更新我们的索引库,这两个服务出于业务分离的考虑,必然是运行在不同的服务器中的,所以这个时候我们就可以使用到ActiveMQ进行消息通知,让索引库所在的工程进行更新操作,具体做法和上面一样,大家可以自己尝试~
正文到此结束
- 本文标签: 配置 CTO dependencies 文章 bean 服务器 pom cat TCP spring集成 ACE Service web 数据库 代码 一对多 http Property apache maven tar SDN list core connectionFactory id java db 管理 value src queue MQ spring 端口 https IDE XML build message AOP 目录 源码 struct 数据 消息队列 schema ActiveMQ IO classpath tomcat UI App Connection JMS plugin 测试
- 版权声明: 本文为互联网转载文章,出处已在文章中说明(部分除外)。如果侵权,请联系本站长删除,谢谢。
- 本文海报: 生成海报一 生成海报二
热门推荐


相关文章


Loading...
![[HBLOG]公众号](http://www.liuhaihua.cn/img/qrcode_gzh.jpg)

