Spring-Cloud 从0开始(一) Eureka-Server
2019年第一篇blog打算从微服务开始,正所谓自己立下的flag趴着也要写完^^.所以从今天开始打算会持续写Spring-Cloud相关文章.
什么是微服务
- 微服务是一种架构风格
- 一些列微小的服务组成
- 每个服务独立开发,独立部署
为甚么采用微服务
因为单体用用存在一些问题,总结归纳如下:
- 开发效率低(代码体系大)
- 代码维护难(代码体系大)
- 稳定性不高(改动一个模块可能影响其他代码功能)
- 扩展困难(单个模块扩展需要考虑是否影响其他模块功能)
- 部署不够灵活(部署时间超级长,部署繁琐)
什么是Eureka
- Eureka:在英文词典中意为"找到了,发现了", 顾名思义,他在Spring-Cloud中承担的角色是服务的注册与发现
- Spring Cloud Eureka 是基于Netflix Eureka做的二次封装
- Spring Cloud Eureka 组件由两部分组成 Eureka-Server, Eureka-Client
- Eureka-Server:服务注册中心
- Eureka-Client:服务注册和服务调用
说明
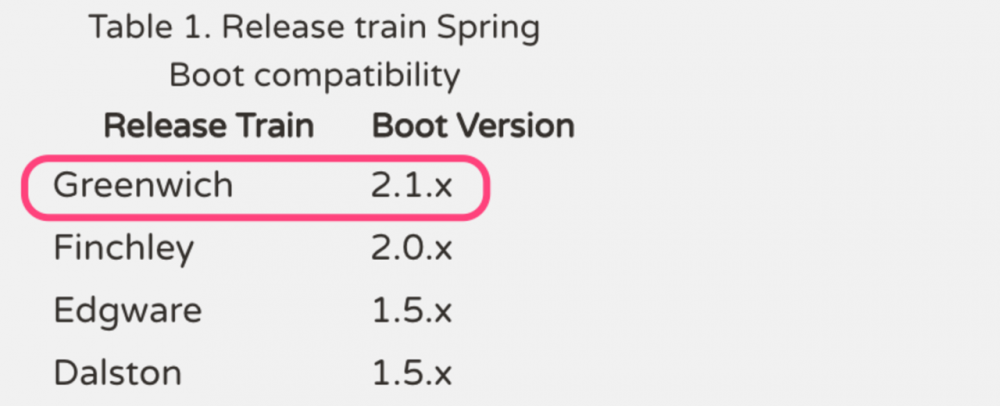
- 在系列博客中,Spring-Cloud版本是:Greenwich.RC1
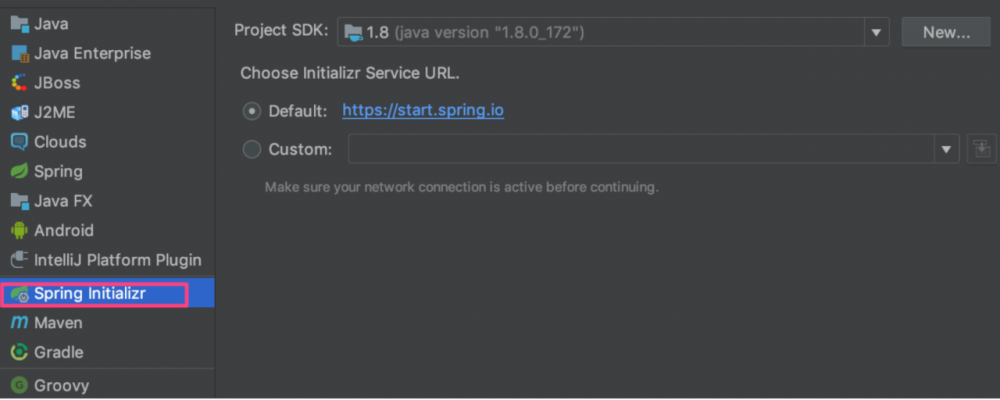
- IDE 采用idea
- Spring-Boot 版本:2.1.1.RELEASE,关于Spring-CLoud版本和Boot的版本对应,我们可以去官网查看,我们这里选择如下
搭建Eureka-Server
-
打开idea,选择创建Spring项目
-
选择Maven坐标:gav

-
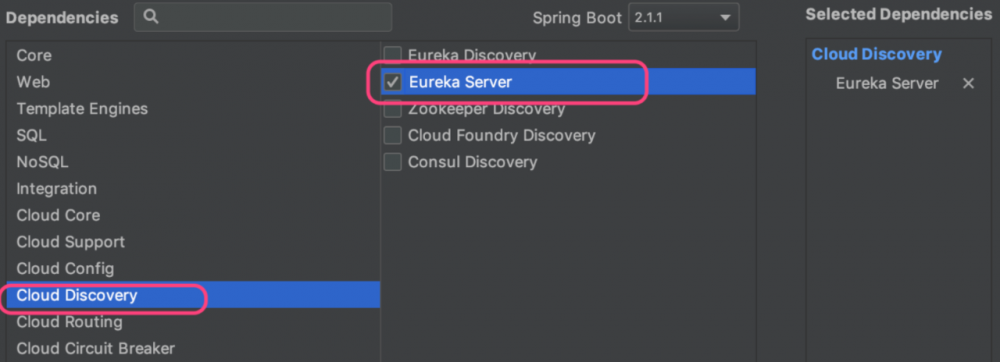
选择项目类型为Eureka-Server
-
创建完项目之后,查看Pom中Spring-Cloud与Boot版本:
<!-- spring-boot版本 -->
<parent>
    <groupId>org.springframework.boot</groupId>
    <artifactId>spring-boot-starter-parent</artifactId>
    <version>2.1.1.RELEASE</version>
    <relativePath/> <!-- lookup parent from repository -->
</parent>

<!-- spring-cloud版本 -->
<properties>
    <java.version>1.8</java.version>
    <spring-cloud.version>Greenwich.RC1</spring-cloud.version>
</properties>
复制代码
- 作为Eureka-Server我们需要在启动类添加注解@EnableEurekaServer
@SpringBootApplication
@EnableEurekaServer
public class EurekaServerApplication {
    public static void main(String[] args) {
        SpringApplication.run(EurekaServerApplication.class, args);
    }
}
复制代码
- 配置文件修改
- 由于Spring-Cloud中bootstrap.yml/properties(这里采用yml)是项目的启动加载配置文件,所以我们先将配置文件重命名为bootstrap.yml
- 作为服务注册中心,我们要求高可靠性和稳定性,所以我们这里搭建三套Eureka-Server,端口分别为8761, 8762, 8763;其项目搭建方式一样(同上), Eureka-Server1的配置文件如下:
eureka:
  client:
    service-url:
      defaultZone: http://localhost:8762/eureka/,http://localhost:8763/eureka/
    register-with-eureka: false

spring:
  application:
    name: eureka-server

server:
  port: 8761
复制代码
Eureka-Server2的配置文件如下:
spring:
  application:
    name: eureka-server2

server:
  port: 8762

eureka:
  client:
    service-url:
      defaultZone: http://localhost:8761/eureka/,http://localhost:8763/eureka/
    register-with-eureka: false
复制代码
Eureka-Server3的配置文件如下:
spring:
  application:
    name: eureka-server3

server:
  port: 8763

eureka:
  client:
    register-with-eureka: false
    service-url:
      defaultZone: http://localhost:8761/eureka/,http://localhost:8762/eureka/
复制代码
配置说明:
- spring.application.name : 是服务的名称
- server.port: 代表服务的端口
- eureka.client.register-with-eureka=false 表示让Eureka-Server自己不需要注册到自己
- 由上面三个Eureka-Server的配置我们可以看到,在注册Eureka-Server集群中,我们只需要将不同的Eureka-Server相互注册,就可以实现Eureka-Server的高可用
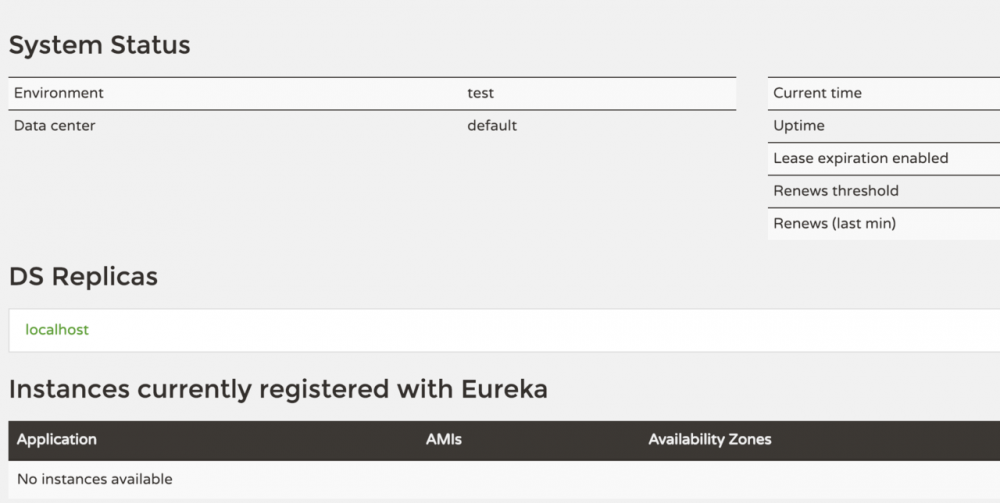
- 启动服务 启动服务之后我们可以访问: http://localhost:8761/; http://localhost:8762/; http://localhost:8763/ 发现注册中心已经启动:
结尾
到这里,我们集群式的Eureka-Server已经搭建好了, 我们下一节来搭建Eureka-Client来发现服务.好了,预知后事如何, 请听下回分解!
正文到此结束
热门推荐


相关文章


Loading...
![[HBLOG]公众号](http://www.liuhaihua.cn/img/qrcode_gzh.jpg)

