Spring boot 中使用Swagger
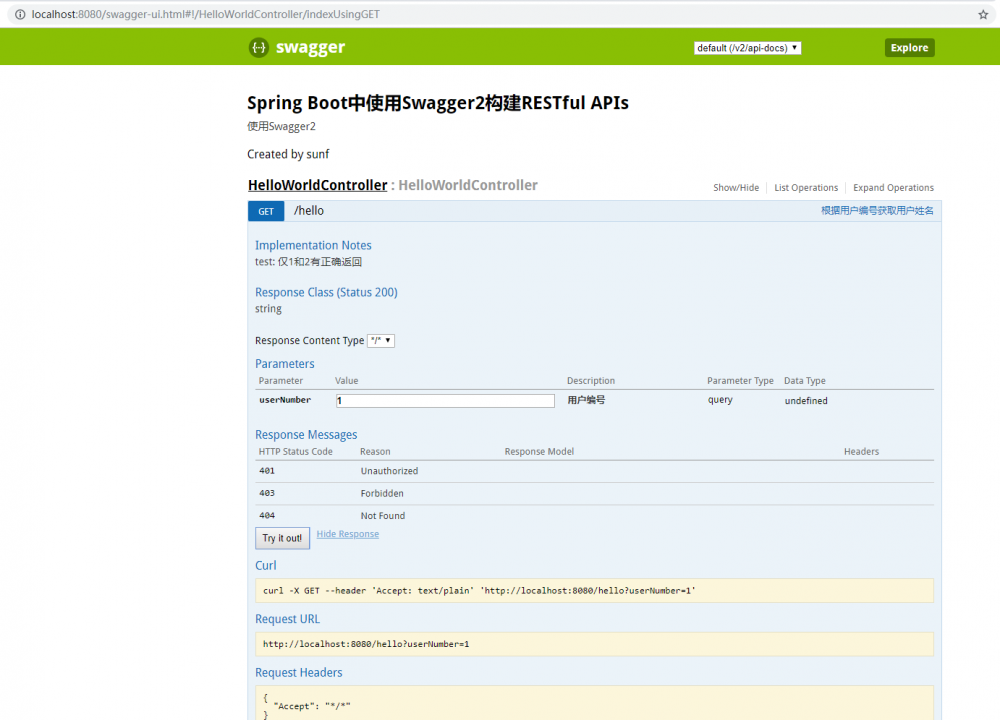
0.Swagger 效果图
 1.maven添加依赖
<!--Swagger-UI API文档生产工具-->
		<dependency>
			<groupId>io.springfox</groupId>
			<artifactId>springfox-swagger2</artifactId>
			<version>2.6.1</version>
		</dependency>
		<dependency>
			<groupId>io.springfox</groupId>
			<artifactId>springfox-swagger-ui</artifactId>
			<version>2.6.1</version>
		</dependency>
		<!--Swagger-UI API文档生产工具-->
2. 添加Swagger 配置类
package com.example.demo;

import org.springframework.context.annotation.Bean;
import org.springframework.context.annotation.Configuration;

import springfox.documentation.builders.ApiInfoBuilder;
import springfox.documentation.builders.PathSelectors;
import springfox.documentation.builders.RequestHandlerSelectors;
import springfox.documentation.service.ApiInfo;
import springfox.documentation.spi.DocumentationType;
import springfox.documentation.spring.web.plugins.Docket;
import springfox.documentation.swagger2.annotations.EnableSwagger2;

/**
 * Swagger2配置类
 * 在与spring boot集成时,放在与Application.java同级的目录下。
 * 通过@Configuration注解,让Spring来加载该类配置。
 * 再通过@EnableSwagger2注解来启用Swagger2。
 */
@Configuration
@EnableSwagger2
public class Swagger2 {

    /**
     * 创建API应用
     * apiInfo() 增加API相关信息
     * 通过select()函数返回一个ApiSelectorBuilder实例,用来控制哪些接口暴露给Swagger来展现,
     * 本例采用指定扫描的包路径来定义指定要建立API的目录。
     *
     * @return
     */
    @Bean
    public Docket createRestApi() {
        return new Docket(DocumentationType.SWAGGER_2)
                .apiInfo(apiInfo())
                .select()
                .apis(RequestHandlerSelectors.basePackage("com.example.demo.controller"))
                .paths(PathSelectors.any())
                .build();
    }

    /**
     * 创建该API的基本信息(这些基本信息会展现在文档页面中)
     * 访问地址:http://项目实际地址/swagger-ui.html
     * @return
     */
    private ApiInfo apiInfo() {
        return new ApiInfoBuilder()
                .title("Spring Boot中使用Swagger2构建RESTful APIs")
                .description("使用Swagger2")
                .termsOfServiceUrl("http://www.baidu.com")
                .contact("sunf")
                .version("1.0")
                .build();
    }
}
注意类似com.example.demo.controller 这种包名要修改成自己的
3.Controller 上写的东西
package com.example.demo.controller;

import io.swagger.annotations.Api;
import io.swagger.annotations.ApiImplicitParam;
import io.swagger.annotations.ApiOperation;
import org.springframework.stereotype.Controller;
import org.springframework.web.bind.annotation.*;

@Controller
@Api(value = "HelloWorldController|一个用来测试swagger注解的控制器",tags = "HelloWorldController", description = "HelloWorldController")
public class HelloWorldController {

    @ResponseBody
    @RequestMapping(value = "/hello", method = RequestMethod.GET)
    @ApiOperation(value = "根据用户编号获取用户姓名", notes = "test: 仅1和2有正确返回")
    @ApiImplicitParam(paramType="query", name = "userNumber", value = "用户编号", required = true, dataType = "Integer")
    public String index(@RequestParam Integer userNumber){
        if(userNumber == 1){
            return "小白";
        }
        else if(userNumber == 2){
            return "小红";
        }
        else{
            return "未知";
        }
    }
}
4.访问地址
访问:http://localhost:8080/swagger-ui.html
5247
正文到此结束
热门推荐


相关文章


Loading...
![[HBLOG]公众号](http://www.liuhaihua.cn/img/qrcode_gzh.jpg)

