SpringCloud 服务消费者(RestTemplate+Ribbon)
Ribbon简介
Ribbon是一个基于HTTP和TCP的客户端负载均衡工具,它有助于控制HTTP和TCP的客户端的行为。为Ribbon配置服务提供者地址后,Ribbon就可基于某种负载均衡算法,自动地帮助服务消费者去请求。Ribbon默认为我们提供了很多负载均衡算法,例如轮询、随机等,我们也可为Ribbon实现自定义的负载均衡算法。
启动注册中心和服务提供者
1.启动 SpringCloud 高可用服务注册中心(Eureka) 搭建的注册中心和服务提供者。
2.在say-hello项目中添加一个controller,对外提供服务
@RestController
public class SayHelloController {
    @Value("${server.port}")
    private String serverPort;

    @GetMapping("/sayHello")
    public String sayHelloCtr(@RequestParam("helloName")String helloName){
        return "Hello "+helloName+",我的端口是: "+serverPort;
    }
}
3.然后把注册中心和服务提供者say-hello分别启动两个实例。
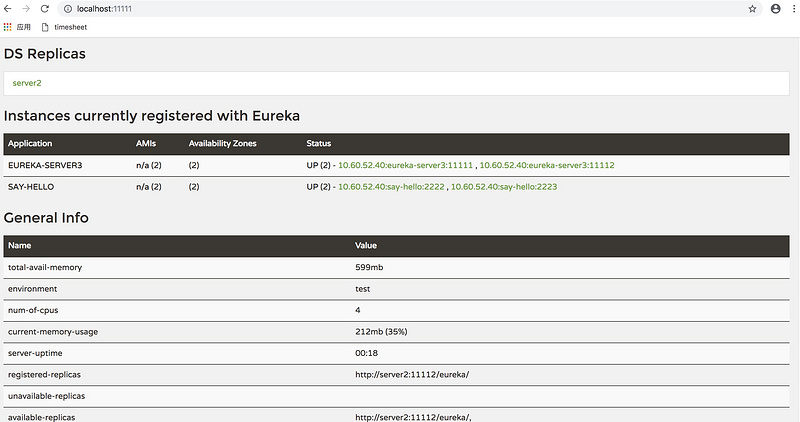
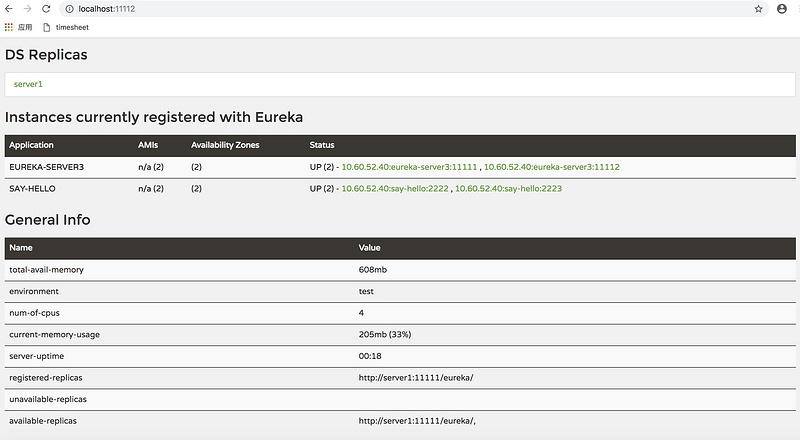
4.查看Eureka注册中心( http://localhost :11111/, http://localhost :11112/)
创建服务消费者
1.创建一个module项目(service-ribbon)
2.添加maven依赖
<?xml version="1.0" encoding="UTF-8"?>
<project xmlns="http://maven.apache.org/POM/4.0.0" xmlns:xsi="http://www.w3.org/2001/XMLSchema-instance"
         xsi:schemaLocation="http://maven.apache.org/POM/4.0.0 http://maven.apache.org/xsd/maven-4.0.0.xsd">
    <modelVersion>4.0.0</modelVersion>

    <parent>
        <groupId>com.definesys</groupId>
        <artifactId>my_cloud</artifactId>
        <version>0.0.1-SNAPSHOT</version>
        <relativePath/> <!-- lookup parent from repository -->
    </parent>

    <groupId>com.definesys</groupId>
    <artifactId>service-ribbon</artifactId>
    <version>0.0.1-SNAPSHOT</version>
    <name>service-ribbon</name>
    <description>Demo project for Spring Boot</description>

    <properties>
        <java.version>1.8</java.version>
    </properties>

    <dependencies>
        <dependency>
            <groupId>org.springframework.cloud</groupId>
            <artifactId>spring-cloud-starter-netflix-eureka-client</artifactId>
        </dependency>
        <dependency>
            <groupId>org.springframework.cloud</groupId>
            <artifactId>spring-cloud-starter-netflix-ribbon</artifactId>
        </dependency>
        <!--ribbon中使用断路器-->
        <dependency>
            <groupId>org.springframework.cloud</groupId>
            <artifactId>spring-cloud-starter-netflix-hystrix</artifactId>
        </dependency>
    </dependencies>

    <build>
        <plugins>
            <plugin>
                <groupId>org.springframework.boot</groupId>
                <artifactId>spring-boot-maven-plugin</artifactId>
            </plugin>
        </plugins>
    </build>

</project>
3.修改配置文件
server.port=3333

eureka.client.service-url.defaultZone=http://server1:11111/eureka/,http://server2:11112/eureka/

spring.application.name=service-ribbon
4.创建一个开启负载均衡的restRemplate
@Configuration
public class RestTemplateConfig {
    @Bean
    @LoadBalanced //表明这个restRemplate开启负载均衡的功能
    public RestTemplate restTemplate(RestTemplateBuilder restTemplateBuilder){
        return restTemplateBuilder
                .setConnectTimeout(20000)
                .setReadTimeout(30000)
                .build();
    }

}
5.添加service消费say-hello提供的服务
@Service
public class HelloServiceRibbonSer {
    @Autowired
    RestTemplate restTemplate;

    public String helloServiceRibbon(String helloName) {
        return restTemplate.getForObject("http://say-hello/sayHello?helloName="+helloName,String.class);
    }

}
注:getForObject中的url say-hello为say-hello项目(服务提供者)的应用名称,也就是在创建say-hello项目时在配置文件中配置的spring.application.name=say-hello。sayHello为say-hello项目中接口的地址(controller), helloName是请求参数。
6.创建controller,调用service中的方法
@RestController
public class HelloServiceRibbonControler {
    @Autowired
    private HelloServiceRibbonSer helloServiceRibbonSer;

    @GetMapping("/ribbonHello")
    public String ribbonHelloCtr(@RequestParam("helloName")String helloName){
        return helloServiceRibbonSer.helloServiceRibbon(helloName);
    }
}
7.启动service-ribbon,在浏览器地址栏访问ribbon项目中的controller
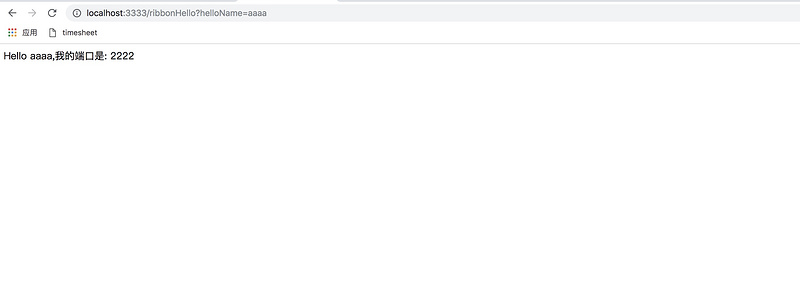
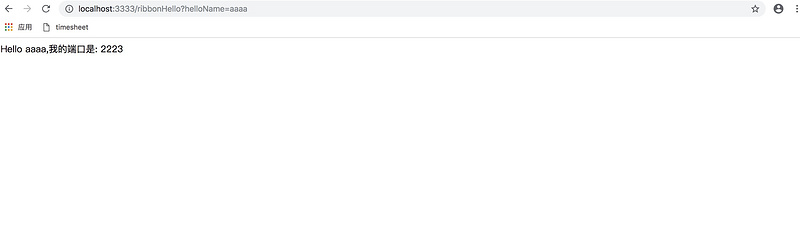
当一直访问 http://localhost :3333/ribbonHello?helloName=aaaa时可以发现浏览器交替显示端口2222和2223,说明已经实现客户端的负载均衡,并且ribbon默认采用轮询的负载均衡算法。
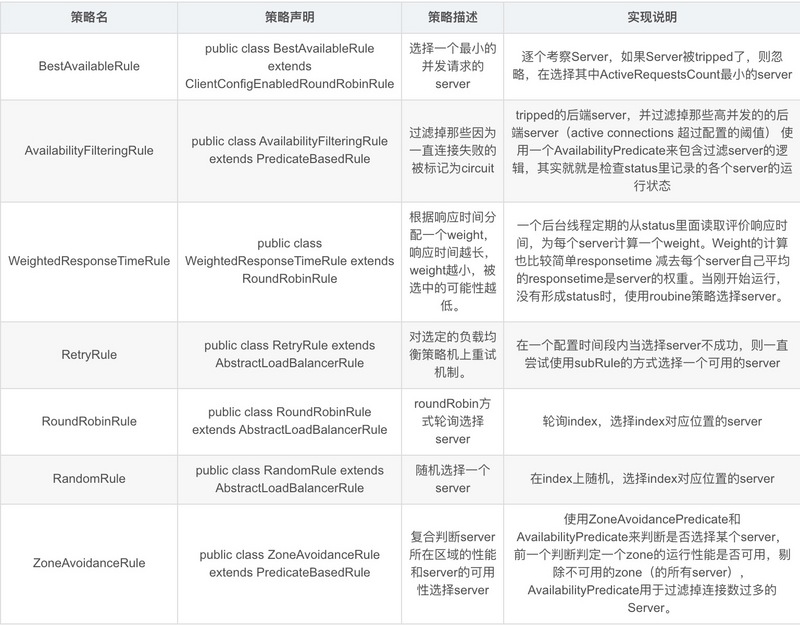
Ribbon负载均衡策略
自定义负载均衡策略
1.修改service-ribbon工程配置文件添加如下配置(使用随机方式)
client.ribbon.NFLoadBalancerRuleClassName=com.netflix.loadbalancer.RandomRule
2.修改RestTemplateConfig配置类添加
@Bean
    public IRule ribbonRule() {
        return new RandomRule();//实例化与配置文件对应的策略类
    }
3.修改HelloServiceRibbonControler
@RestController
public class HelloServiceRibbonControler {
    @Autowired
    private HelloServiceRibbonSer helloServiceRibbonSer;

    @Autowired
    private LoadBalancerClient loadBalancerClient;

    @GetMapping("/ribbonHello")
    public String ribbonHelloCtr(@RequestParam("helloName")String helloName){
        return helloServiceRibbonSer.helloServiceRibbon(helloName);
    }

    /**
     * 随机方式
     * @param helloName
     * @return
     */
    @GetMapping("/ribbonRandomHello")
    public String ribbonRandomHelloCtr(@RequestParam("helloName")String helloName){
        this.loadBalancerClient.choose("CLIENT");//随机访问策略
        return helloServiceRibbonSer.helloServiceRibbon(helloName);
    }
4.启动项目
依次启动eureka注册中心,say-hello项目,service-ribbon项目,访问 http://localhost :3333/ribbonRandomHello?helloName=aaaa。可以发现浏览器随机显示端口。
正文到此结束
- 本文标签: 配置 Eureka http 高可用 pom map value src Spring Boot rand maven cat XML client id 服务注册 db description 实例 build IO 注册中心 端口 tar DOM schema plugin Netflix apache 负载均衡 App dependencies bean ribbon java https TCP 参数 Service springcloud spring ip UI REST 1111 Hystrix
- 版权声明: 本文为互联网转载文章,出处已在文章中说明(部分除外)。如果侵权,请联系本站长删除,谢谢。
- 本文海报: 生成海报一 生成海报二
热门推荐


相关文章

近期评论
-
你这基本没有更新呀,最近文章显示还是2019年的文章。不符合要求哈
-
关键词:慕云博客 链接:https://www.lilun.me 描述:分享原创文字的个人博客
-
-
-
可以提供一下源码吗
-
不是商业站,鸡娃学习笔记
-
-
-
-
听他们说很厉害的样子
Loading...
![[HBLOG]公众号](http://www.liuhaihua.cn/img/qrcode_gzh.jpg)

