Netty+SpringBoot+FastDFS+Html5实现聊天App详解(一)
Netty学习
Netty+SpringBoot+FastDFS+Html5实现聊天App,项目介绍: https://segmentfault.com/a/11...
Netty+SpringBoot+FastDFS+Html5实现聊天App,项目github链接: https://github.com/ShimmerPig...
本章练习完整代码链接: https://github.com/ShimmerPig...
IO编程与NIO编程
传统IO编程性能分析
IO编程模型在客户端较少的情况下运行良好,但是对于客户端比较多的业务来说,单机服务端可能需要支撑成千上万的连接,IO模型可能就不太合适了。这是因为在传统的IO模型中,每个连接创建成功之后都需要一个线程来维护,每个线程包含一个while死循环,那么1w个连接对应1w个线程,继而1w个while死循环,这就带来如下几个问题:
1.线程资源受限:线程是操作系统中非常宝贵的资源,同一时刻有大量的线程处于阻塞状态是非常严重的资源浪费,操作系统耗不起。
2.线程切换效率低下:单机cpu核数固定,线程爆炸之后操作系统频繁进行线程切换,应用性能急剧下降。
3.除了以上两个问题,IO编程中,我们看到数据读写是以字节流为单位,效率不高。
为了解决这三个问题,JDK在1.4之后提出了NIO。下面简单描述一下NIO是如何解决以上三个问题的。
线程资源受限
NIO编程模型中,新来一个连接不再创建一个新的线程,而是可以把这条连接直接绑定到某个固定的线程,然后这条连接所有的读写都由这个线程来负责。
这个过程的实现归功于NIO模型中selector的作用,一条连接来了之后,现在不创建一个while死循环去监听是否有数据可读了,而是直接把这条连接注册到selector上,然后,通过检查这个selector,就可以批量监测出有数据可读的连接,进而读取数据。
线程切换效率低下
由于NIO模型中线程数量大大降低,线程切换效率因此也大幅度提高。
IO读写以字节为单位
NIO解决这个问题的方式是数据读写不再以字节为单位,而是以字节块为单位。IO模型中,每次都是从操作系统底层一个字节一个字节地读取数据,而NIO维护一个缓冲区,每次可以从这个缓冲区里面读取一块的数据。
hello netty
完整代码链接: https://github.com/ShimmerPig...
首先定义一对线程组——主线程bossGroup与从线程workerGroup。
bossGroup——用于接受客户端的连接,但是不做任何处理,跟老板一样,不做事。
workerGroup——bossGroup会将任务丢给他,让workerGroup去处理。
//主线程
EventLoopGroup bossGroup = new NioEventLoopGroup();
//从线程
EventLoopGroup workerGroup = new NioEventLoopGroup();
定义服务端的启动类serverBootstrap,需要设置主从线程,NIO的双向通道,与子处理器(用于处理workerGroup),这里的子处理器后面我们会手动创建。
// netty服务器的创建, ServerBootstrap 是一个启动类
            ServerBootstrap serverBootstrap = new ServerBootstrap();
            serverBootstrap.group(bossGroup, workerGroup)            // 设置主从线程组
                            .channel(NioServerSocketChannel.class)    // 设置nio的双向通道
                            .childHandler(new HelloServerInitializer()); // 子处理器,用于处理workerGroup
启动服务端,绑定8088端口,同时设置启动的方式为同步的,这样我们的Netty就会一直等待,直到该端口启动完毕。
ChannelFuture channelFuture = serverBootstrap.bind(8088).sync();
监听关闭的通道channel,设置为同步方式。
channelFuture.channel().closeFuture().sync();
将两个线程优雅地关闭。
bossGroup.shutdownGracefully();
workerGroup.shutdownGracefully();
创建管道channel的子处理器HelloServerInitializer,用于处理workerGroup。
HelloServerInitializer里面只重写了initChannel方法,是一个初始化器,channel注册后,会执行里面相应的初始化方法。
在initChannel方法中通过SocketChannel获得对应的管道,通过该管道添加相关助手类handler。
HttpServerCodec是由netty自己提供的助手类,可以理解为拦截器,当请求到服务端,我们需要做解码,响应到客户端做编码。
添加自定义的助手类customHandler,返回"hello netty~"
ChannelPipeline pipeline = channel.pipeline();
pipeline.addLast("HttpServerCodec", new HttpServerCodec());
pipeline.addLast("customHandler", new CustomHandler());
创建自定义的助手类CustomHandler继承SimpleChannelInboundHandler,返回hello netty~
重写channelRead0方法,首先通过传入的上下文对象ChannelHandlerContext获取channel,若消息类型为http请求,则构建一个内容为"hello netty~"的http响应,通过上下文对象的writeAndFlush方法将响应刷到客户端。
if (msg instanceof HttpRequest) {
    // 显示客户端的远程地址
    System.out.println(channel.remoteAddress());

    // 定义发送的数据消息
    ByteBuf content = Unpooled.copiedBuffer("Hello netty~", CharsetUtil.UTF_8);

    // 构建一个http response
    FullHttpResponse response =
        new DefaultFullHttpResponse(HttpVersion.HTTP_1_1,
                HttpResponseStatus.OK,
                content);
    // 为响应增加数据类型和长度
    response.headers().set(HttpHeaderNames.CONTENT_TYPE, "text/plain");
    response.headers().set(HttpHeaderNames.CONTENT_LENGTH, content.readableBytes());

    // 把响应刷到客户端
    ctx.writeAndFlush(response);
}
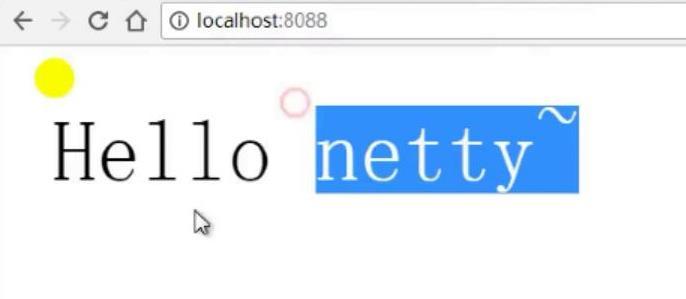
访问8088端口,返回"hello netty~"
netty聊天小练习
完整代码链接: https://github.com/ShimmerPig...
服务器
定义主从线程与服务端的启动类
public class WSServer {

    public static void main(String[] args) throws Exception {

        EventLoopGroup mainGroup = new NioEventLoopGroup();
        EventLoopGroup subGroup = new NioEventLoopGroup();

        try {
            ServerBootstrap server = new ServerBootstrap();
            server.group(mainGroup, subGroup)
                .channel(NioServerSocketChannel.class)
                .childHandler(new WSServerInitialzer());

            ChannelFuture future = server.bind(8088).sync();

            future.channel().closeFuture().sync();
        } finally {
            mainGroup.shutdownGracefully();
            subGroup.shutdownGracefully();
        }
    }

}
创建channel的子处理器WSServerInitialzer
加入相关的助手类handler
public class WSServerInitialzer extends ChannelInitializer<SocketChannel> {

    @Override
    protected void initChannel(SocketChannel ch) throws Exception {
        ChannelPipeline pipeline = ch.pipeline();

        // websocket 基于http协议,所以要有http编解码器
        pipeline.addLast(new HttpServerCodec());
        // 对写大数据流的支持
        pipeline.addLast(new ChunkedWriteHandler());
        // 对httpMessage进行聚合,聚合成FullHttpRequest或FullHttpResponse
        // 几乎在netty中的编程,都会使用到此hanler
        pipeline.addLast(new HttpObjectAggregator(1024*64));

        // ====================== 以上是用于支持http协议    ======================

        // ====================== 以下是支持httpWebsocket ======================

        /**
         * websocket 服务器处理的协议,用于指定给客户端连接访问的路由 : /ws
         * 本handler会帮你处理一些繁重的复杂的事
         * 会帮你处理握手动作: handshaking(close, ping, pong) ping + pong = 心跳
         * 对于websocket来讲,都是以frames进行传输的,不同的数据类型对应的frames也不同
         */
        pipeline.addLast(new WebSocketServerProtocolHandler("/ws"));

        // 自定义的handler
        pipeline.addLast(new ChatHandler());
    }

}
创建自定义的助手类ChatHandler,用于处理消息。
TextWebSocketFrame:在netty中,是用于为websocket专门处理文本的对象,frame是消息的载体。
创建管道组ChannelGroup,用于管理所有客户端的管道channel。
private static ChannelGroup clients =
    new DefaultChannelGroup(GlobalEventExecutor.INSTANCE);
重写channelRead0方法,通过传入的TextWebSocketFrame获取客户端传入的内容。通过循环的方法对ChannelGroup中所有的channel进行回复。
@Override
protected void channelRead0(ChannelHandlerContext ctx, TextWebSocketFrame msg)
throws Exception {
    // 获取客户端传输过来的消息
    String content = msg.text();
    System.out.println("接受到的数据:" + content);

//        for (Channel channel: clients) {
//            channel.writeAndFlush(
//                new TextWebSocketFrame(
//                        "[服务器在]" + LocalDateTime.now()
//                        + "接受到消息, 消息为:" + content));
//        }
    // 下面这个方法,和上面的for循环,一致
    clients.writeAndFlush(
    new TextWebSocketFrame(
            "[服务器在]" + LocalDateTime.now()
            + "接受到消息, 消息为:" + content));

}
重写handlerAdded方法,当客户端连接服务端之后(打开连接),获取客户端的channle,并且放到ChannelGroup中去进行管理。
@Override
public void handlerAdded(ChannelHandlerContext ctx) throws Exception {
    clients.add(ctx.channel());
}
重写handlerRemoved方法,当触发handlerRemoved,ChannelGroup会自动移除对应客户端的channel。
@Override
public void handlerRemoved(ChannelHandlerContext ctx) throws Exception {
    // 当触发handlerRemoved,ChannelGroup会自动移除对应客户端的channel
    //        clients.remove(ctx.channel());
    System.out.println("客户端断开,channle对应的长id为:"
                + ctx.channel().id().asLongText());
    System.out.println("客户端断开,channle对应的短id为:"
                            + ctx.channel().id().asShortText());
}
客户端
<!DOCTYPE html>
<html>
    <head>
        <meta charset="utf-8" />
        <title></title>
    </head>
    <body>

        <div>发送消息:</div>
        <input type="text" id="msgContent"/>
        <input type="button" value="点我发送" onclick="CHAT.chat()"/>

        <div>接受消息:</div>
        <div id="receiveMsg" style="background-color: gainsboro;"></div>

        <script type="application/javascript">

            window.CHAT = {
                socket: null,
                init: function() {
                    if (window.WebSocket) {
                        CHAT.socket = new WebSocket("ws://192.168.1.4:8088/ws");
                        CHAT.socket.onopen = function() {
                            console.log("连接建立成功...");
                        },
                        CHAT.socket.onclose = function() {
                            console.log("连接关闭...");
                        },
                        CHAT.socket.onerror = function() {
                            console.log("发生错误...");
                        },
                        CHAT.socket.onmessage = function(e) {
                            console.log("接受到消息:" + e.data);
                            var receiveMsg = document.getElementById("receiveMsg");
                            var html = receiveMsg.innerHTML;
                            receiveMsg.innerHTML = html + "<br/>" + e.data;
                        }
                    } else {
                        alert("浏览器不支持websocket协议...");
                    }
                },
                chat: function() {
                    var msg = document.getElementById("msgContent");
                    CHAT.socket.send(msg.value);
                }
            };

            CHAT.init();

        </script>
    </body>
</html>
测试

正文到此结束
- 本文标签: web ip Bootstrap CTO 同步 JavaScript id ssh IDE CEO final message 服务端 java db 数据 代码 操作系统 IOS FastDFS spring remote UI HTML5 value ACE HTTP协议 端口 cat GitHub Select http IO 测试 线程 Netty Document DDL NIO tag 协议 https 管理 HTML src executor 模型 服务器 git 大数据 App client 处理器 springboot
- 版权声明: 本文为互联网转载文章,出处已在文章中说明(部分除外)。如果侵权,请联系本站长删除,谢谢。
- 本文海报: 生成海报一 生成海报二
热门推荐


相关文章


Loading...
![[HBLOG]公众号](http://www.liuhaihua.cn/img/qrcode_gzh.jpg)

