统一认证 - Apereo CAS 小试
做这些尝试的时候,Apereo CAS比较稳定的版本是5.3.x,使用如果想按照这个文章搭设的话,最好采用相同的版本
Apereo CAS单机版的搭设
Apereo CAS秉承耶鲁的自由文化传统,整个产品高度自由化,哪哪都提供了极其灵活的使用方式。比如单机版的部署,一般的软件提供的单机版都是下载一来,运行某个文件就直接开跑的。Apereo就不同,即使是单机版,也要配置一些内容才可以运行的。
不单单是配置,单机版的代码实现也是可以改的,而且还可以很优雅地改,就是可以在不修改原来代码的前提下进行修改。Apereo CAS采用了Maven的 overlayer 特性,提供了一份CAS的overlayer或者叫template,我们可以从下载一份layer ,然后在里面按照约定的方式,实现功能覆盖Apereo CAS提供的类,或者配置文件。
git clone https://github.com/apereo/cas-overlay-template
这是Apereo CAS官方提供的一个overlay,大家也可以下载使用其他组织提供的overlay。该项目的目录结构如下:
C:/githome/github/cas/cas-server>ls -l
total 1220
-rw-r--r-- 1 NOTECH 1049089  11560 Jan 25 14:25 LICENSE.txt
-rw-r--r-- 1 NOTECH 1049089   2768 Jan 25 14:28 README.md
-rw-r--r-- 1 NOTECH 1049089   4353 Jan 25 14:28 build.cmd
-rwxr-xr-x 1 NOTECH 1049089   5608 Jan 25 14:28 build.sh
drwxr-xr-x 1 NOTECH 1049089      0 Jan 25 14:25 etc
drwxr-xr-x 1 NOTECH 1049089      0 Jan 25 14:28 maven
-rwxr-xr-x 1 NOTECH 1049089   7332 Jan 25 14:28 mvnw
-rw-r--r-- 1 NOTECH 1049089   5839 Jan 25 14:28 mvnw.bat
-rw-r--r-- 1 NOTECH 1049089   9458 Jan 28 10:15 pom.xml
drwxr-xr-x 1 NOTECH 1049089      0 Jan 25 14:31 src
其实就是一个简单的maven项目,多了一个etc的目录,然后pom文件里面有一个 cas-server-webapp 的overlayer依赖。这时我们可以直接跑 mvn package , 一样会生成相应的cas包,只是这个包跑不起来,因为cas需要一些配置才能起来的。
前面说了overlayer会按照目录路径进行覆盖,也就是如果overlayer的项目里面有文件路径相同,那么打包的时候就会进行覆盖。而上一篇blog说了,Apereo CAS是基于springboot的开发的,那么我们要覆盖对应的配置文件,那就新建 src/main/resources 目录。
安全证书
首先,Apereo CAS作为一个安全的统一认证中心,那么本身也要安全的吧。所有它提供了HTTPS的链接方式,也就意味着我们需要提供一个keystore。命令行打开目录 cas-server/src/main/resources/etc/cas ,执行以下命令生成对应的keystore
keytool -genkey -keyalg RSA -alias thekeystore -keystore thekeystore
-storepass changeit -validity 360 -keysize 2048
changeit 是这个keystore的密码,最好改成你自己的密码,当然,作为demo用这个也是可以的
接着我们要把这个keystore导成证书给客户端用:
keytool -export -alias thekeystore -file thekeystore.crt
-keystore thekeystore
现在我们要把这个导出来的证书导进去JVM里面
keytool -import -alias thekeystore -storepass changeit -file thekeystore.crt -keystore "C:/Program Files/Java/jdk1.8.0_101/jre/lib/security/cacerts"

keytool -import -alias thekeystore -storepass changeit -file thekeystore.crt -keystore "C:/Program Files/Java/jre1.8.0_101/lib/security/cacerts"
CAS配置
接着我们把证书的路径,CAS启动端口等信息配置到springboot标准的配置文件application.properties里面。
server.context-path=/cas
server.port=6443

server.ssl.key-store=classpath:/etc/cas/thekeystore
server.ssl.key-store-password=changeit
server.ssl.key-password=changeit
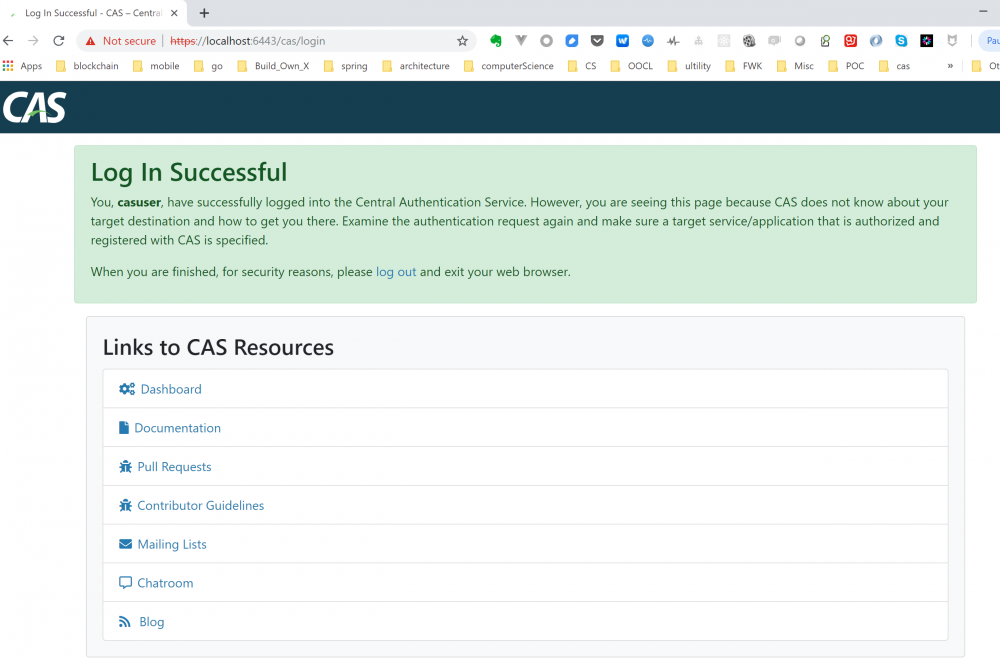
好了,打包 build package ,然后 build run 跑一下看看。应该可以看到CAS的默认登录页面 https://localhost :6443/cas

验证信息存储
好了,到这时可能发现:天啦噜!用哪个用户可以登录啊? 从头到尾都没有用户信息的配置,而按照我们所了解的Apereo CAS的尿性,它可不会有什么默认值的。为简单试玩一下,我们可以直接在上面的application.properties文件里面,直接hardcode一个用户在里面,如下:
cas.authn.accept.users=casuser::Mellon
重新 build package , build run ,打开登录页面 https://localhost :6443/cas, 输入用户名casuser,密码Mellon,应该就可以登录成功了
把用户信息hardcode在配置文件显然是很helloworld的做法,CAS提供了很多用户信息存储方式,有各种DB,LDAP等。具体可以参考官网的配置文件,有很详细的说明 https://apereo.github.io/cas/...
这次我们采用的是MYSQL的链接方式。首先我们要在overlayers的pom文件里面添加JDBC的support,如下:
<dependency>
                    <groupId>org.apereo.cas</groupId>
                    <artifactId>cas-server-support-jdbc</artifactId>
                    <version>${cas.version}</version>
                </dependency>
                <dependency>
                    <groupId>org.apereo.cas</groupId>
                    <artifactId>cas-server-support-jdbc-drivers</artifactId>
                    <version>${cas.version}</version>
                </dependency>
然后还是在原来的application.properties文件里面,把authentication的相关配置写上:
cas.authn.jdbc.query[0].sql=select * from cms_auth_user where user_name=?
cas.authn.jdbc.query[0].healthQuery=
cas.authn.jdbc.query[0].isolateInternalQueries=false
cas.authn.jdbc.query[0].url=jdbc:mysql://127.0.0.1:3306/CASTEST?useUnicode=true&characterEncoding=UTF-8&autoReconnect=true&useSSL=false
cas.authn.jdbc.query[0].failFast=true
cas.authn.jdbc.query[0].isolationLevelName=ISOLATION_READ_COMMITTED
cas.authn.jdbc.query[0].dialect=org.hibernate.dialect.MySQLDialect
cas.authn.jdbc.query[0].leakThreshold=10
cas.authn.jdbc.query[0].propagationBehaviorName=PROPAGATION_REQUIRED
cas.authn.jdbc.query[0].batchSize=1
cas.authn.jdbc.query[0].user=root
#cas.authn.jdbc.query[0].ddlAuto=create-drop
cas.authn.jdbc.query[0].maxAgeDays=180
cas.authn.jdbc.query[0].password=123456
cas.authn.jdbc.query[0].autocommit=false
cas.authn.jdbc.query[0].driverClass=com.mysql.jdbc.Driver
cas.authn.jdbc.query[0].idleTimeout=5000
这里只是列出了一些必要的配置,比如driver.class是什么,query的语句是什么,连接哪个数据库等等。配置成功后,我们可以在数据库里面插入一两个用户试试
CAS监控中心
Apereo CAS提供了一个监控中心, 当大家登录CAS成功后,满怀希望地点击 dashboard 的链接时,展示给大家的是冷冷的 "Access Denied"页面! 无良啊无良,高度地自由是有代价的!!! CAS认为大家默认是不需要这个功能的,所以默认是关闭的! 我们需要通过配置文件打开这个功能! 你以为只要打开 endpoints.enabled=true 就可以了吗? 我们把CAS想简单的,这家伙龟毛到每一个监控的功能都需要独立打开的!所以就有了下面长长的一个配置文件!
endpoints.enabled=true
endpoints.sensitive=false

endpoints.restart.enabled=false
endpoints.shutdown.enabled=false

management.security.enabled=true
management.security.roles=ACTUATOR,ADMIN
management.security.sessions=if_required
management.context-path=/status
management.add-application-context-header=false

security.basic.authorize-mode=role
security.basic.enabled=false
security.basic.path=/cas/status/**

cas.adminPagesSecurity.ip=.+

cas.monitor.endpoints.dashboard.enabled=true
cas.monitor.endpoints.dashboard.sensitive=false

cas.monitor.endpoints.discovery.enabled=true
cas.monitor.endpoints.discovery.sensitive=false

cas.monitor.endpoints.auditEvents.enabled=true
cas.monitor.endpoints.auditEvents.sensitive=false

cas.monitor.endpoints.authenticationEvents.enabled=true
cas.monitor.endpoints.authenticationEvents.sensitive=false

cas.monitor.endpoints.configurationState.enabled=true
cas.monitor.endpoints.configurationState.sensitive=false

cas.monitor.endpoints.healthCheck.enabled=true
cas.monitor.endpoints.healthCheck.sensitive=false

cas.monitor.endpoints.loggingConfig.enabled=true
cas.monitor.endpoints.loggingConfig.sensitive=false

cas.monitor.endpoints.metrics.enabled=true
cas.monitor.endpoints.metrics.sensitive=false

cas.monitor.endpoints.attributeResolution.enabled=true
cas.monitor.endpoints.attributeResolution.sensitive=false

cas.monitor.endpoints.singleSignOnReport.enabled=true
cas.monitor.endpoints.singleSignOnReport.sensitive=false

cas.monitor.endpoints.statistics.enabled=true
cas.monitor.endpoints.statistics.sensitive=false

cas.monitor.endpoints.trustedDevices.enabled=true
cas.monitor.endpoints.trustedDevices.sensitive=false

cas.monitor.endpoints.status.enabled=true
cas.monitor.endpoints.status.sensitive=false

cas.monitor.endpoints.singleSignOnStatus.enabled=true
cas.monitor.endpoints.singleSignOnStatus.sensitive=false

cas.monitor.endpoints.springWebflowReport.enabled=true
cas.monitor.endpoints.springWebflowReport.sensitive=false

cas.monitor.endpoints.registeredServicesReport.enabled=true
cas.monitor.endpoints.registeredServicesReport.sensitive=false

cas.monitor.endpoints.configurationMetadata.enabled=true
cas.monitor.endpoints.configurationMetadata.sensitive=false
这里是实在受不了CAS的配置粒度细微到怀疑人生,所以adminSercurity没有打开,放开给所有的IP所有的用户,只要登录成功后都可以访问
正文到此结束
- 本文标签: GitHub REST http Security session web db 数据库 数据 软件 DDL Logging Dashboard java 端口 tar UI 组织 src autocommit springboot spring cmd 配置 key lib 下载 id 目录 认证 https XML build 文章 希望 mysql classpath git sql Select autoReconnect=true ACE MQ 部署 ldap ip 安全 App autoReconnect Word IO JDBC ssl pom cat 代码 开发 cacerts Service JVM root maven 产品
- 版权声明: 本文为互联网转载文章,出处已在文章中说明(部分除外)。如果侵权,请联系本站长删除,谢谢。
- 本文海报: 生成海报一 生成海报二
热门推荐


相关文章


Loading...
![[HBLOG]公众号](http://www.liuhaihua.cn/img/qrcode_gzh.jpg)

