使用maven创建简单的多模块 Spring Web项目
第一次写技术文章,主要内容是使用maven创建一个简单的SpringMVC WEB 项目,如有操作或理解错误请务必指出,当谦虚学习。
做这一次的工作主要是因为想加强一下自己对Spring Web 项目的理解,因为平时都是直接写业务代码,我觉得还是有必要自己了解一下创建项目的过程。后续会基于这个项目写更多的SpringWeb开发过程,希望能帮助到有需要的人。
总的来说是一个相当精简的多模块springWeb项目搭建过程,让我们进入正题吧
我们知道单体应用,就写在一个project里面的话,业务一旦庞大起来非常难以管理。
把各个模块单独抽出来可以方便的对jar包进行版本管理(尽管我还没经历过这个),维护项目,团队开发也会方便许多。
基本思想其实就是一个java web项目引用别的模块Jar包,最终web项目被打成war包发布。
**而所有的war包项目,jar包项目都是在同一个父模块下管理的(它们都是Maven项目)**
(如果你有IDE,装好插件就用IDE创建吧,我个人不喜欢手动命令行创建)
1. 创建父项目

下图中:框起来打勾这个会让你跳过项目模式选择,勾选对于创建项目没有什么影响,以后也许会转一下Maven这方面的文章 
POM包才能做父项目,谨记!!!!! 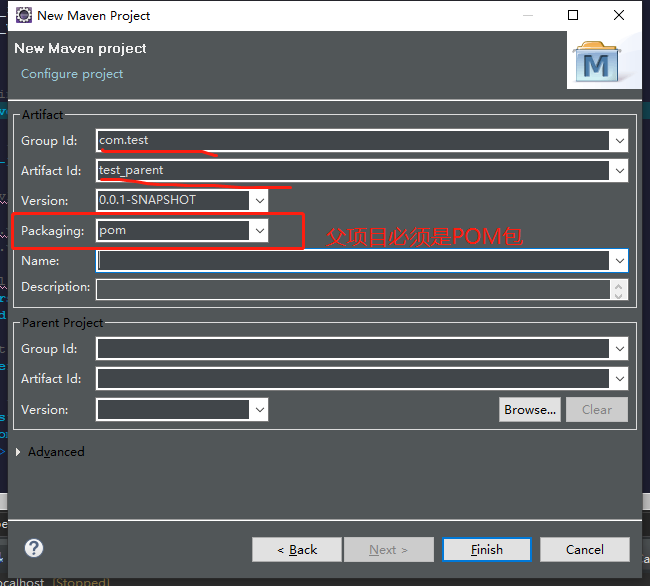
2. 子项目结构和创建
以下是我的结构分层,你也可以按你的想法来,最终目的是要方便自己开发。
test_parent    (父项目)
    |----test_web    (web项目)
    |----test_service    (业务内容)
    |----test_framework    (工具,框架封装、配置)
    |----test_dao    (数据持久层,DO也放这)
    |----test_controller    (处理映射)
创建子项目直接右键父项目然后新建maven module ,也就是子模块
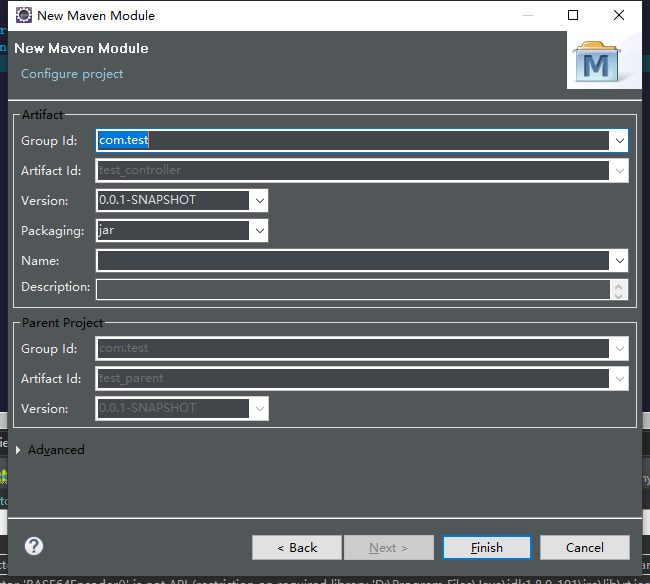
我们先创建web模块,这里你可以勾选第一条然后创建简单项目,
如果没有勾选,那么你要在下一步里选择 maven-achetype-webapp,这里以简单项目为例子
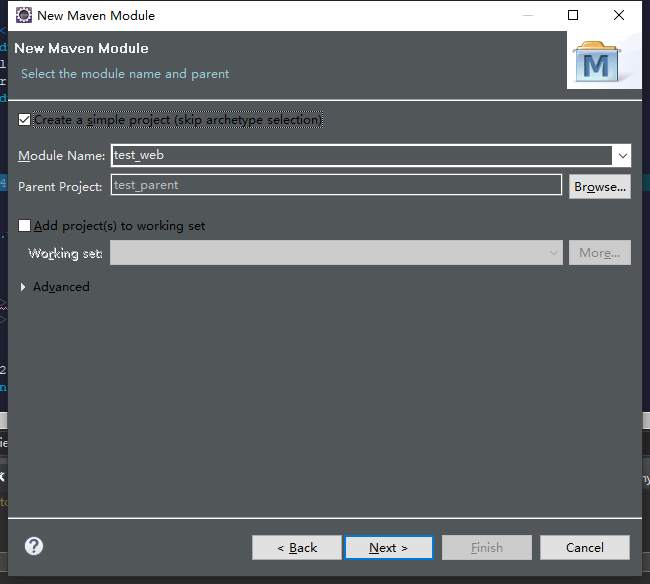
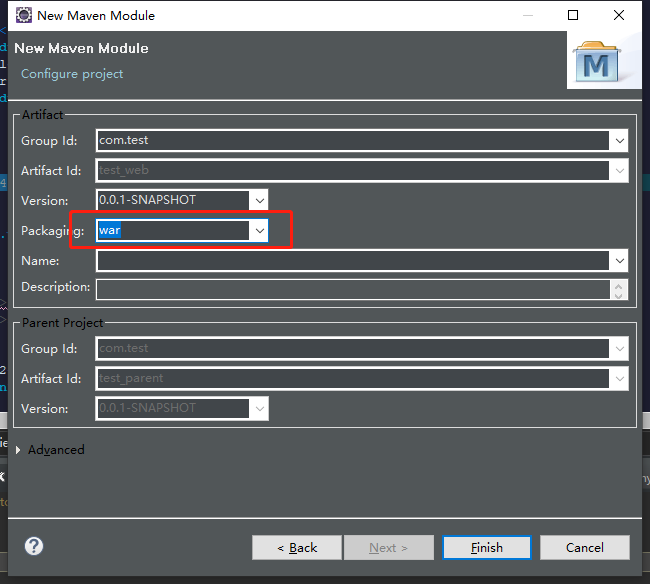
Group Id 和 version 都是继承父项目的
一定要选择war包打包,不然要重新把他构建成web项目。
如果你没选war包: https://www.cnblogs.com/leonk...
最后点finish完成
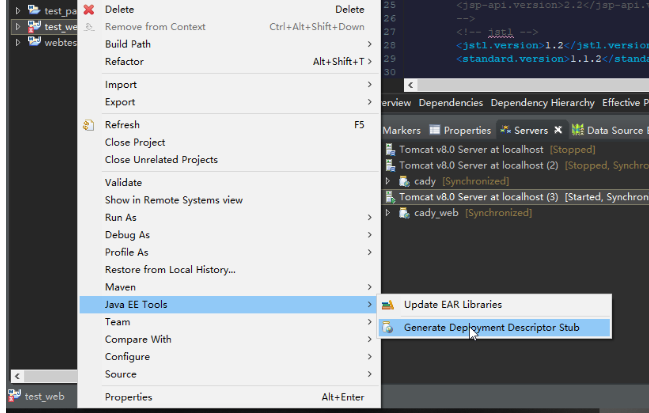
点击生成Web描述文件 (web.xml)
这样就完成了Web模块的创建,剩下的其他项目都是同样的步骤创建,都是选择jar包,参考下图:
3. 配置各模块的pom.xml
pom.xml记录所需的jar包,模块联系,包信息,打包参数等等信息,在多模块里我们要理清关系,不要重复引用
首先毫无疑问的是让parent加载spring的jar包是最方便开发的,因为默认所有模块都继承parent,所以子模块引用spring内容也方便。
其次配置文件我们统一放在framework中进行管理。
那么先来写入web.xml配置吧
<?xml version="1.0" encoding="UTF-8"?>
<web-app xmlns:xsi="http://www.w3.org/2001/XMLSchema-instance"
    xmlns="http://java.sun.com/xml/ns/javaee"
    xsi:schemaLocation="http://java.sun.com/xml/ns/javaee http://java.sun.com/xml/ns/javaee/web-app_3_0.xsd"
    id="WebApp_ID" version="3.0">
    <display-name>test_web</display-name>

    <context-param>
        <!-- 配置地址 -->
        <param-name>contextConfigLocation</param-name>
        <param-value>classpath*:spring-*.xml</param-value>
    </context-param>

    <listener>
        <listener-class>org.springframework.web.context.ContextLoaderListener</listener-class>
    </listener>

    <servlet>
        <servlet-name>spring</servlet-name>
        <servlet-class>org.springframework.web.servlet.DispatcherServlet</servlet-class>
        <init-param>
            <param-name>contextConfigLocation</param-name>
            <!-- spring-mvc.xml 配置地址 -->
            <param-value>classpath*:spring-mvc.xml</param-value>
        </init-param>
        <load-on-startup>1</load-on-startup>
    </servlet>
    <servlet-mapping>
        <servlet-name>spring</servlet-name>
        <url-pattern>/</url-pattern>
    </servlet-mapping>

    <filter>
        <filter-name>CharacterEncodingFilter</filter-name>
        <filter-class>org.springframework.web.filter.CharacterEncodingFilter</filter-class>
        <init-param>
            <param-name>encoding</param-name>
            <param-value>UTF-8</param-value>
        </init-param>
        <init-param>
            <param-name>forceEncoding</param-name>
            <param-value>true</param-value>
        </init-param>
    </filter>
    <filter-mapping>
        <filter-name>CharacterEncodingFilter</filter-name>
        <url-pattern>/*</url-pattern>
    </filter-mapping>
</web-app>
这里可以看到我们写了classpath*,原因是它能搜索到项目目录以外的Jar包下文件
相关: http://www.cnblogs.com/wlgqo/...
web.xml详解: https://blog.csdn.net/qq_3557...
web.xml是对WEB项目来说是必须的配置文件,写好了spring配置文件的位置以后,就来新建2个spring配置文件,新建的配置放在test_framework模块里,路径如下图
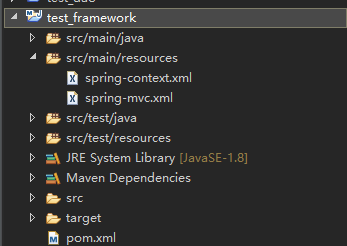
spring-context.xml spring-mvc.xml
一个是spring-context.xml 也叫applicationContext.xml,是webApp的上下文配置,也可以理解为配置dao、service 通用bean的地方,但我们这里使用的是注解扫描方式配置bean,所以就简单许多,即便有工具存在,写改xml真的很讨厌啊!
<?xml version="1.0" encoding="UTF-8"?>
<beans xmlns="http://www.springframework.org/schema/beans" xmlns:xsi="http://www.w3.org/2001/XMLSchema-instance" xmlns:mvc="http://www.springframework.org/schema/mvc"
    xmlns:context="http://www.springframework.org/schema/context" xmlns:tx="http://www.springframework.org/schema/tx" xmlns:util="http://www.springframework.org/schema/util"
    xmlns:aop="http://www.springframework.org/schema/aop"
    xsi:schemaLocation="http://www.springframework.org/schema/beans http://www.springframework.org/schema/beans/spring-beans-4.0.xsd
        http://www.springframework.org/schema/mvc http://www.springframework.org/schema/mvc/spring-mvc-4.0.xsd
        http://www.springframework.org/schema/context http://www.springframework.org/schema/context/spring-context-4.0.xsd
        http://www.springframework.org/schema/util http://www.springframework.org/schema/util/spring-util-4.0.xsd
        http://www.springframework.org/schema/tx http://www.springframework.org/schema/tx/spring-tx.xsd
        http://www.springframework.org/schema/aop http://www.springframework.org/schema/aop/spring-aop-4.0.xsd">


    <!-- 注解注册 -->
    <!-- <context:annotation-config /> -->

    <context:component-scan base-package="com.test" >
        <context:exclude-filter type="annotation" expression="org.springframework.stereotype.Controller" />
        <context:exclude-filter type="annotation" expression="org.springframework.web.bind.annotation.RestController" />
    </context:component-scan>

</beans>
这里要去掉对controller的扫描,applicationContext初始化的上下文加载的Bean是对于整个应用程序共享的,不管是使用什么表现层技术,一般如DAO层、Service层Bean;
DispatcherServlet (下一个要配置的东西) 初始化的上下文加载的Bean是只对Spring Web MVC有效的Bean,如Controller、HandlerMapping、HandlerAdapter等等,该初始化上下文应该只加载Web相关组件。
context:component-scan 的 base-package 值用来决定我们需要扫描的包的基础名,
具体配置相关可以看: https://www.cnblogs.com/exe19...
而context:annotation-config/ 呢?其实也是spring为了方便我们开发者给我们提供的一个自动识别注解的配置,相关细节如下:
解释说明: https://www.cnblogs.com/_popc...
两条配置的区别和诠释: https://www.cnblogs.com/leiOO...
下面是第二个配置文件 spring-mvc.xml
<?xml version="1.0" encoding="UTF-8" standalone="no"?>
<beans xmlns="http://www.springframework.org/schema/beans"
    xmlns:context="http://www.springframework.org/schema/context"
    xmlns:aop="http://www.springframework.org/schema/aop" xmlns:mvc="http://www.springframework.org/schema/mvc"
    xmlns:p="http://www.springframework.org/schema/p" xmlns:xsi="http://www.w3.org/2001/XMLSchema-instance"
    xsi:schemaLocation="http://www.springframework.org/schema/beans  http://www.springframework.org/schema/beans/spring-beans-4.0.xsd
        http://www.springframework.org/schema/context http://www.springframework.org/schema/context/spring-context-4.0.xsd
        http://www.springframework.org/schema/mvc http://www.springframework.org/schema/mvc/spring-mvc-4.0.xsd
        http://www.springframework.org/schema/aop http://www.springframework.org/schema/aop/spring-aop-4.0.xsd">

    <!-- 自动扫描的包名 -->
    <context:component-scan base-package="com.test.*.controller" >
        <context:include-filter type="annotation" expression="org.springframework.stereotype.Controller" />
    </context:component-scan>

    <!-- 默认的注解映射的支持 -->
    <mvc:annotation-driven>
        <mvc:message-converters>
            <bean class="org.springframework.http.converter.StringHttpMessageConverter">
                <constructor-arg value="UTF-8" />
            </bean>
            <bean class="org.springframework.http.converter.ResourceHttpMessageConverter" />
        </mvc:message-converters>
    </mvc:annotation-driven>

</beans>
包扫描没什么好说的,这里还强调include了注解controller。
mvc:annotation-driven 是spring默认的注解驱动,这个配置项一口气把一堆东西都给我们加进来了,但主要还是针对controller和处理请求的,具体的在下面文章中,因为加的内容有点多,所以这个留到后面研究,稍微理解作用就好:
相关文章 : https://blog.csdn.net/vicroad...
mvc:message-converters 顾名思义,就是用于处理请求消息的,request content-header 会记录请求的内容类型,根据这些类型,spring会把内容转化成服务器操作的对象,这里的字符串转化是为了避免乱码,我们指定了编码格式。
相关文章: https://www.jianshu.com/p/2f6...
以上,我们就已经把最简约的配置写好了。接下来我们随便写一个controller试试
4.写个Controller吧
根据之前写好的controller的扫描包名,去我们test_controller模块里创建一个controller
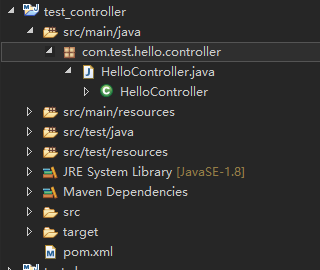
package com.test.hello.controller;

import org.springframework.web.bind.annotation.RequestMapping;
import org.springframework.web.bind.annotation.RestController;

@RestController
@RequestMapping("/test")
public class HelloController
{
    @RequestMapping("/get")
    public String helloGet(@RequestParam String str) throws Exception
    {
        return str;
    }
}
很简单的一段返回请求字符串的代码,现在一切就绪可以启动服务器了,配置好Tomcat就可以启动了,右键test_web --> run as --> run on server 选择创建好的tomcat容器,就可以启动了。
接下来,访问: localhost:8080/test/test/get?str=helloWorld
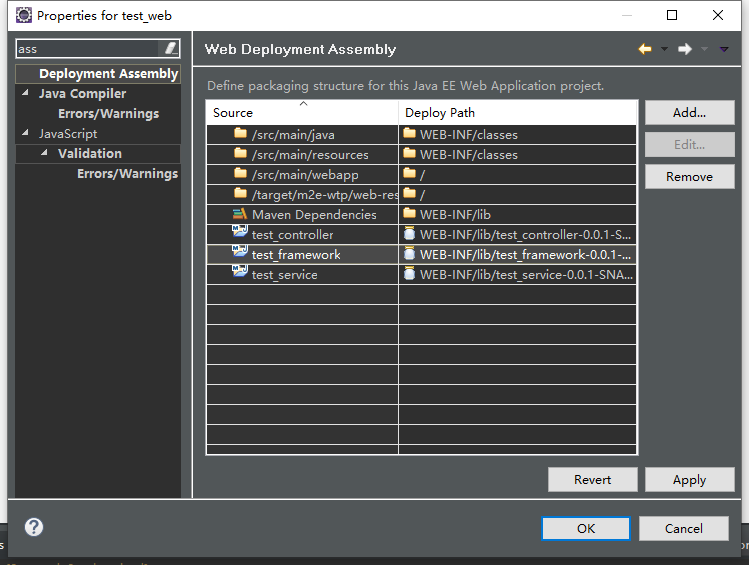
如果你使用eclipse启动且没有正常启动,特别是出现严重错误时,请先检查web.xml配置命名有没有问题,然后再检查test_web项目的assembly,这个会影响项目的发布文件,下图所示,右键项目点properties,没有test_framework的话就加入framework项目。
网站无响应,检查一下tomcat的端口,默认是8080。404检查代码的映射路径。
5.结束语
第一次写技术文章,记录一下自己的学习过程,日后会以当前项目作为基础,继续记录下自己遇到的问题和分享的知识,希望能帮助到一部分新手,此外,本篇文章中若有错误,欢迎指出,我会不断更新文章误点,不吝赐教。
正文到此结束
- 本文标签: web servlet map 代码 REST Service java 网站 SDN 插件 message 乱码 spring eclipse cat 管理 SpringMVC 文章 谦虚 目录 pom tar IDE list http id maven https 数据 value src 希望 端口 struct 开发者 XML schema AOP classpath ip UI App 开发 IO 服务器 tomcat 配置 CTO 参数 bean
- 版权声明: 本文为互联网转载文章,出处已在文章中说明(部分除外)。如果侵权,请联系本站长删除,谢谢。
- 本文海报: 生成海报一 生成海报二
热门推荐


相关文章

近期评论
-
Your article is a perfect article without a hitch. Thank you. My site:
horse racing betting game -
I found this post very interesting and informative. Thank you for sharing your special thoughts with us. My site:
horse racing betting -
你这基本没有更新呀,最近文章显示还是2019年的文章。不符合要求哈
-
关键词:慕云博客 链接:https://www.lilun.me 描述:分享原创文字的个人博客
-
-
-
可以提供一下源码吗
-
不是商业站,鸡娃学习笔记
-
-
Loading...
![[HBLOG]公众号](http://www.liuhaihua.cn/img/qrcode_gzh.jpg)

