SpringBoot+MySQL+MyBatis的入门教程
本博客
猫叔的博客 ,转载请申明出处
本系列教程为 HMStrange项目 附带。
历史文章
- 如何在VMware12安装Centos7.6最新版
- Centos7.6安装Java8
- Centos7.6安装MySQL+Redis(最新版)
教程内容
备注:本系列开发工具均为IDEA
1、构建项目,选择Lombok、Web、MySQL、MyBatis四个基本的Maven依赖。
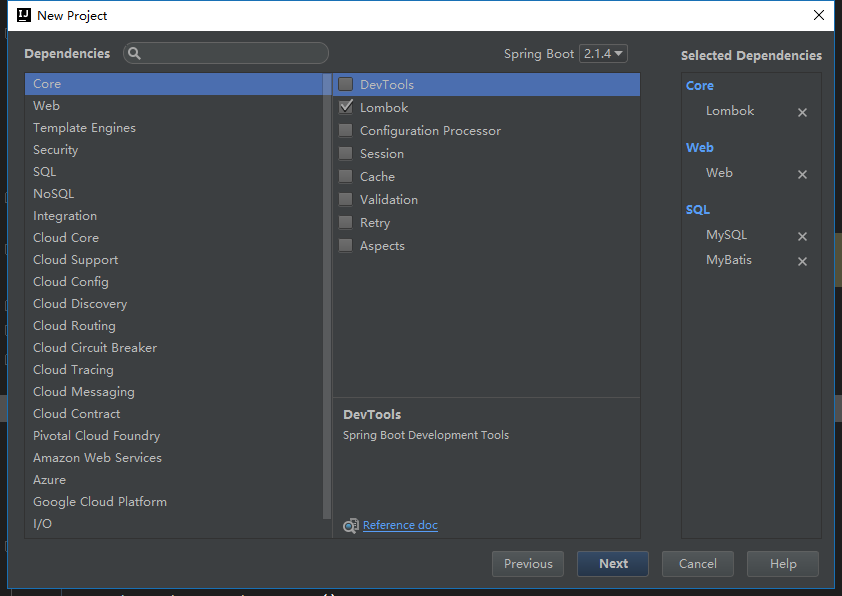
大家可以看看pom文件
<?xml version="1.0" encoding="UTF-8"?>
<project xmlns="http://maven.apache.org/POM/4.0.0" xmlns:xsi="http://www.w3.org/2001/XMLSchema-instance"
    xsi:schemaLocation="http://maven.apache.org/POM/4.0.0 http://maven.apache.org/xsd/maven-4.0.0.xsd">
    <modelVersion>4.0.0</modelVersion>
    <parent>
        <groupId>org.springframework.boot</groupId>
        <artifactId>spring-boot-starter-parent</artifactId>
        <version>2.1.4.RELEASE</version>
        <relativePath/> <!-- lookup parent from repository -->
    </parent>
    <groupId>com.myself.mybatis</groupId>
    <artifactId>datademo</artifactId>
    <version>0.0.1-SNAPSHOT</version>
    <name>datademo</name>
    <description>Demo project for Spring Boot</description>

    <properties>
        <java.version>1.8</java.version>
    </properties>

    <dependencies>
        <dependency>
            <groupId>org.springframework.boot</groupId>
            <artifactId>spring-boot-starter-web</artifactId>
        </dependency>
        <dependency>
            <groupId>org.mybatis.spring.boot</groupId>
            <artifactId>mybatis-spring-boot-starter</artifactId>
            <version>2.0.1</version>
        </dependency>

        <dependency>
            <groupId>mysql</groupId>
            <artifactId>mysql-connector-java</artifactId>
            <scope>runtime</scope>
        </dependency>
        <dependency>
            <groupId>org.projectlombok</groupId>
            <artifactId>lombok</artifactId>
            <optional>true</optional>
        </dependency>
        <dependency>
            <groupId>org.springframework.boot</groupId>
            <artifactId>spring-boot-starter-test</artifactId>
            <scope>test</scope>
        </dependency>
    </dependencies>

    <build>
        <plugins>
            <plugin>
                <groupId>org.springframework.boot</groupId>
                <artifactId>spring-boot-maven-plugin</artifactId>
            </plugin>
        </plugins>
    </build>

</project>
2、准备MySQL,这里可以参考历史文章的安装MySQL环节,我新建了一个数据库,针对这个项目,构建了一张简单的表。
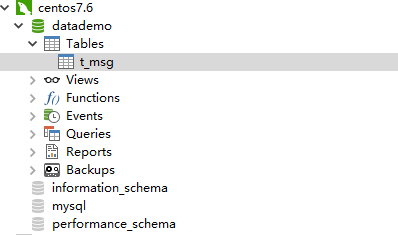
DDL
CREATE TABLE `t_msg` (
  `id` int(11) NOT NULL,
  `message` varchar(255) DEFAULT NULL COMMENT '信息',
  PRIMARY KEY (`id`)
) ENGINE=InnoDB DEFAULT CHARSET=utf8mb4;
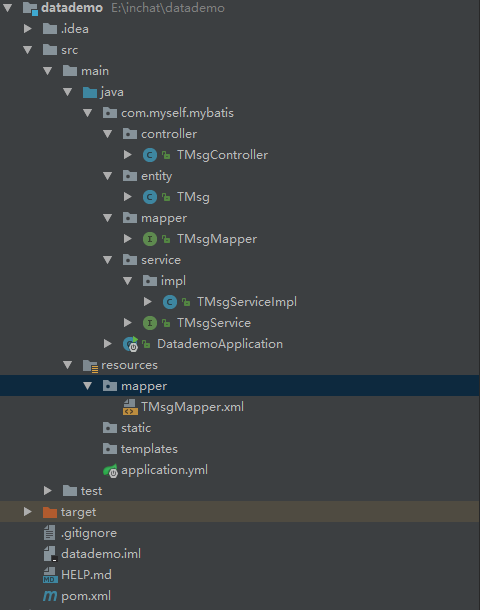
3、构建项目目录,我构建了一个经典的web项目目录结构,entity实体类、mapper映射、service接口、impl接口实现、controller业务访问、resources/mapper包用于存放xml
4、填写application.yml,默认生成不是yml,不过我觉得yml视觉效果好一些,就改了一下,我们需要填写数据库信息,还有mybatis的数据库映射地址,实体类地址
spring:
  datasource:
    url: jdbc:mysql://192.168.192.133:3306/datademo?characterEncoding=utf-8&useSSL=false
    username: root
    password: password
    driver-class-name: com.mysql.cj.jdbc.Driver
mybatis:
  mapper-locations: classpath*:mapper/*Mapper.xml
  type-aliases-package: com.myself.mybatis.entity
5、构建数据库对应的实体类TMsg,这个类放在entity
package com.myself.mybatis.entity;

import lombok.Data;

import java.io.Serializable;

/**
 * Created by MySelf on 2019/4/9.
 */
@Data
public class TMsg implements Serializable {

    private Integer id;

    private String message;

}
6、构建对应的Mapper接口(其实就类似dao层),这里与TMsgMapper.xml文件对应关系
package com.myself.mybatis.mapper;

import com.myself.mybatis.entity.TMsg;
import org.apache.ibatis.annotations.Mapper;

/**
 * Created by MySelf on 2019/4/9.
 */
@Mapper
public interface TMsgMapper {

    public TMsg findById(Integer id);

}
<?xml version="1.0" encoding="UTF-8"?>
<!DOCTYPE mapper PUBLIC "-//mybatis.org//DTD Mapper 3.0//EN" "http://mybatis.org/dtd/mybatis-3-mapper.dtd">
<mapper namespace="com.myself.mybatis.mapper.TMsgMapper">
    <select id="findById" resultType="com.myself.mybatis.entity.TMsg">
        SELECT id,message from t_msg WHERE id = #{id}
    </select>
</mapper>
我这边就单纯一个方法,大家可以扩展自己的方法。
7、service层与其实现,这个比较简单,一般做过web项目的都了解
package com.myself.mybatis.service;

import com.myself.mybatis.entity.TMsg;

/**
 * Created by MySelf on 2019/4/9.
 */
public interface TMsgService {

    public TMsg findById(Integer id);

}
package com.myself.mybatis.service.impl;

import com.myself.mybatis.entity.TMsg;
import com.myself.mybatis.mapper.TMsgMapper;
import com.myself.mybatis.service.TMsgService;
import org.springframework.beans.factory.annotation.Autowired;
import org.springframework.stereotype.Service;

/**
 * Created by MySelf on 2019/4/9.
 */
@Service
public class TMsgServiceImpl implements TMsgService {

    @Autowired
    private TMsgMapper tMsgMapper;

    @Override
    public TMsg findById(Integer id) {
        return tMsgMapper.findById(id);
    }
}
8、controller层,我这边构建了一个get方法,通过id获取信息。
package com.myself.mybatis.controller;

import com.myself.mybatis.entity.TMsg;
import com.myself.mybatis.service.TMsgService;
import org.apache.ibatis.annotations.Param;
import org.springframework.beans.factory.annotation.Autowired;
import org.springframework.web.bind.annotation.GetMapping;
import org.springframework.web.bind.annotation.RequestMapping;
import org.springframework.web.bind.annotation.RestController;

/**
 * Created by MySelf on 2019/4/9.
 */
@RestController
@RequestMapping("/msg")
public class TMsgController {

    @Autowired
    private TMsgService tMsgService;

    @GetMapping("/getMsg")
    public String getMsg(@Param("id") Integer id){
        TMsg tMsg = tMsgService.findById(id);
        return tMsg.getMessage();
    }

}
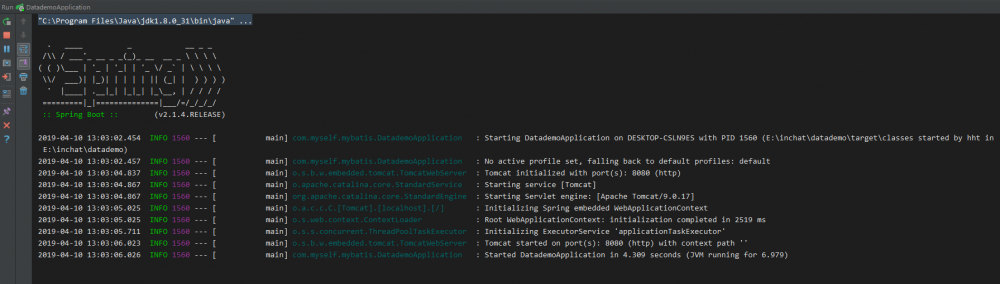
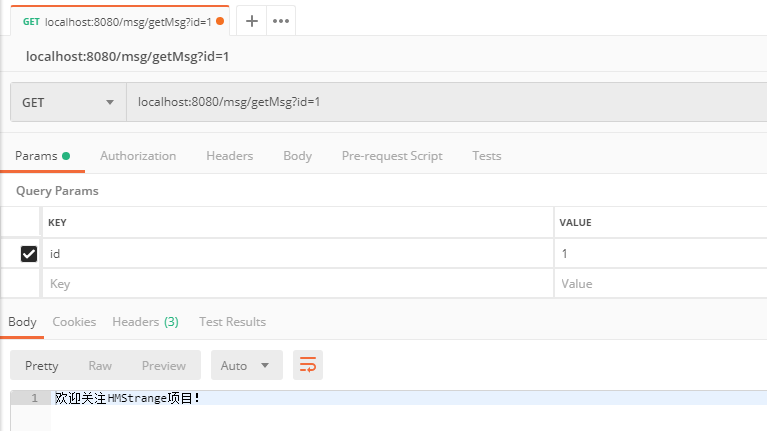
9、启动项目,并使用Postman测试
10、项目下载地址
欢迎到HMStrange项目进行下载: https://github.com/UncleCatMy...
公众号:Java猫说
学习交流群:728698035
现架构设计(码农)兼创业技术顾问,不羁平庸,热爱开源,杂谈程序人生与不定期干货。

正文到此结束
- 本文标签: ssl VMware 数据库 redis REST build 文章 iBATIS root description 数据 key schema ACE IO 2019 web pom find UI XML dataSource Word plugin zab apache maven 创业 安装 Select 开源 博客 mapper JDBC java db tar map App 开发 http bean 架构设计 spring tab https sql CTO dependencies DDL Service springboot 目录 classpath git centos GitHub 入门教程 entity message Spring Boot mysql 测试 ip cat IDE mybatis src 下载 id
- 版权声明: 本文为互联网转载文章,出处已在文章中说明(部分除外)。如果侵权,请联系本站长删除,谢谢。
- 本文海报: 生成海报一 生成海报二
热门推荐


相关文章


Loading...
![[HBLOG]公众号](http://www.liuhaihua.cn/img/qrcode_gzh.jpg)

