实战|如何自定义SpringBoot Starter?
我在「 SpringBoot自动化配置源码分析 」从源码的角度讲解了 SpringBoot 自动化配置的原理,知道了它最终要干的事情不过是读取 META-INF/spring.factories 中的自动化配置类而已。
SpringBoot 项目就是由一个一个 Starter 组成的,一个 Starter 代表该项目的 SpringBoot 起步依赖,除了官方已有的 Starter,如果你需要将自己的项目支持 SpringBoot,那么就需要把它制作成一个 Starter。这篇博客依据 SpringBoot 的自动化配置原理,开发一个属于自己的 Starter。
自定义 Starter
自动化配置需满足两个条件:
1. 能够生成 Bean,并注册到 Bean 容器中; 2. 能够自动配置项目所需要的配置。
在这里创建一个 spring-boot-starter-helloworld 项目作为例子,实现以上两点。
引入 SpringBoot 自动化配置依赖:
<dependencies>
<dependency>
<groupId>org.springframework.boot</groupId>
<artifactId>spring-boot-autoconfigure</artifactId>
<version>1.5.9.RELEASE</version>
</dependency>
</dependencies>
spring-boot-starter-helloworld 只是作为例子演示自定义 starter 的过程,实现的功能很简单就是创建一个 HelloworldService 的,并配置 sayHello() 方法打印的语句。
public class HelloworldService {
private String words;
private String getWords() {
return words;
}
public void setWords(String words) {
this.words = words;
}
public String sayHello() {
return "hello, " + words;
}
}
创建属性类,prefix = "helloworld"代表该项目在属性文件中配置的前缀,即可以在属性文件中通过 helloworld.words=springboot,就可以改变属性类字段 words 的值了。
@ConfigurationProperties(prefix = "helloworld")
public class HelloworldProperties {
public static final String DEFAULT_WORDS = "world";
private String words = DEFAULT_WORDS;
public String getWords() {
return words;
}
public void setWords(String words) {
this.words = words;
}
}
创建自动化配置类,这个相当于就是一个普通的 Java 配置类,可以在这里创建 Bean,并可获得与 application.properties 属性文件相对应的属性类的 Bean。
// 相当于一个普通的 java 配置类
@Configuration
// 当 HelloworldService 在类路径的条件下
@ConditionalOnClass({HelloworldService.class})
// 将 application.properties 的相关的属性字段与该类一一对应,并生成 Bean
@EnableConfigurationProperties(HelloworldProperties.class)
public class HelloworldAutoConfiguration {
// 注入属性类
@Autowired
private HelloworldProperties hellowordProperties;
@Bean
// 当容器没有这个 Bean 的时候才创建这个 Bean
@ConditionalOnMissingBean(HelloworldService.class)
public HelloworldService helloworldService() {
HelloworldService helloworldService = new HelloworldService();
helloworldService.setWords(hellowordProperties.getWords());
return helloworldService;
}
}
在 META-INF 目录下创建 spring.factories,这个属性文件可重要啦,因为 SpringBoot 自动化配置最终就是要扫描 META-INF/spring.factories 来加载项目的自动化配置类。
# Auto Configure
org.springframework.boot.autoconfigure.EnableAutoConfiguration=com.objcoding.starters.helloworld.HelloworldAutoConfiguration
引用 Starter
为了引入 starter,我在这里再创建一个 spring-boot-starter-helloworld-sample 项目。
添加 spring-boot-starter-helloworld 起步依赖:
<dependency>
<groupId>com.objcoding</groupId>
<artifactId>spring-boot-starter-helloworld</artifactId>
<version>1.0-SNAPSHOT</version>
</dependency>
在 application.properties 中添加属性:
helloworld.words=springboot
在 SpringBoot 主程序中 注入 helloworldService
@RestController
@SpringBootApplication
public class HelloworldApplication {
@Autowired
private HelloworldService helloworldService;
@GetMapping("/")
public String sayHello() {
return helloworldService.sayHello();
}
public static void main(String[] args) {
SpringApplication.run(HelloworldApplication.class, args);
}
}
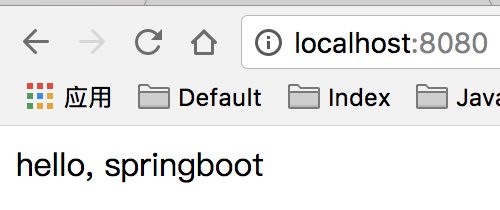
访问 http://localhost:8080/,打印以下结果:
Demo源码地址: https://github.com/objcoding/spring-boot-starter-tutorial
推荐阅读:
SpringBoot自动化配置源码分析
Java并发之AQS源码分析(二)

长按可以订阅
来都来了
点个在看再走呗?

正文到此结束
热门推荐


相关文章

近期评论
-
你这基本没有更新呀,最近文章显示还是2019年的文章。不符合要求哈
-
关键词:慕云博客 链接:https://www.lilun.me 描述:分享原创文字的个人博客
-
-
-
可以提供一下源码吗
-
不是商业站,鸡娃学习笔记
-
-
-
-
听他们说很厉害的样子
Loading...
![[HBLOG]公众号](http://www.liuhaihua.cn/img/qrcode_gzh.jpg)

