springboot项目中使用websocket(javax.websocket包下的)
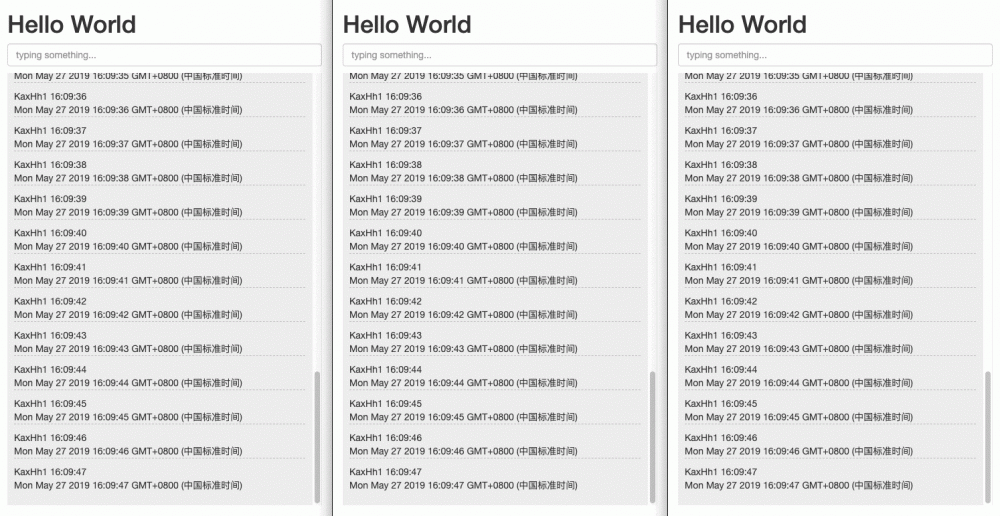
先上图
基于spring-boot项目开发的
首先创建项目,不多说
依赖如下, springboot版本是 2.1.5
<dependency>
  <groupId>org.springframework.boot</groupId>
  <artifactId>spring-boot-starter-websocket</artifactId>
  <exclusions>
    <exclusion>
      <groupId>org.springframework.boot</groupId>
      <artifactId>spring-boot-starter-tomcat</artifactId>
    </exclusion>
  </exclusions>
</dependency>
<dependency>
  <groupId>org.springframework.boot</groupId>
  <artifactId>spring-boot-starter-undertow</artifactId>
</dependency>
配置
添加配置类 WebSocketConfig 代码如下
@Configuration
@EnableWebSocket
public class WebSocketConfig {

    @Bean
    public ServerEndpointExporter serverEndpoint() {
        return new ServerEndpointExporter();
    }
}
添加处理连接和处理消息类 MyWebSocket
@ServerEndpoint(value = "/websocket")
@Component
public class MyWebSocket {
    //在线人数
    private static int online = 0;
    //所有的对象,用于群发
    public static List<MyWebSocket> webSockets = new CopyOnWriteArrayList<>();
    //会话
    private Session session;

    public Session getSession() {
        return session;
    }

    //建立连接
    @OnOpen
    public void onOpen(Session session) {
        online++;
        webSockets.add(this);
        this.session = session;
    }

    //连接关闭
    @OnClose
    public void onClose() {
        online--;
        webSockets.remove(this);
    }

    //收到客户端的消息
    @OnMessage
    public String onMessage(String text, Session session) {
        return "client message: " + text;
    }
}
原接文链: https://tomoya92.github.io/2019/05/27/spring-boot-websocket/
客户端
if (window.WebSocket) {

  // Create WebSocket connection.
  const socket = new WebSocket('ws://localhost:8080/websocket');

  // Connection opened
  socket.addEventListener('open', function (event) {
    socket.send('Hello Server!');
  });

  // Connection closed
  socket.addEventListener('close', function (event) {
    socket.send('I am leave!');
  });

  // Listen for messages
  socket.addEventListener('message', function (event) {
    console.log(event);
  });

  // 延时给服务端发送一条消息
  setTimeout(function() {
    socket.send('hello world!');
  }, 500);

}
将上面js放在一个js里,启动项目,然后可以看到浏览器控制台里有日志输出
封装
上面已经是一个简单的websocket应用了,如果不嫌麻烦完全可以在客户端将对象转成json字符串发给后台,后台再将接收到的json字符串转成对象来处理,只要前端跟后台能约定好,就没有啥大问题
但是用了java怎么能少了封装,再说javax.websocket包里也支持 encoder , decoder , 下面来说一下怎么直接接收一个对象
先创建一个用于传输数据的对象
public class Message implements Serializable {

  private static final long serialVersionUID = 7600555288728686383L;

  private String type;
  private Object payload;

  public Message() {
  }

  public Message(String type, Object payload) {
    this.type = type;
    this.payload = payload;
  }

  public String getType() {
    return type;
  }

  public void setType(String type) {
    this.type = type;
  }

  public Object getPayload() {
    return payload;
  }

  public void setPayload(Object payload) {
    this.payload = payload;
  }
}
创建 encoder 和 decoder,我这里用的是fastjson包将json字符串和对象互转
<dependency>
  <groupId>com.alibaba</groupId>
  <artifactId>fastjson</artifactId>
  <version>1.2.57</version>
</dependency>
MessageEncoder.java
import co.yiiu.pydeploy.util.Message;
import com.alibaba.fastjson.JSON;

import javax.websocket.Encoder;
import javax.websocket.EndpointConfig;

public class MessageEncoder implements Encoder.Text<Message> {
  @Override
  public String encode(Message o) {
    return JSON.toJSONString(o);
  }

  @Override
  public void init(EndpointConfig endpointConfig) {

  }

  @Override
  public void destroy() {

  }
}
文原接链: https://tomoya92.github.io/2019/05/27/spring-boot-websocket/
MessageDecoder.java
import co.yiiu.pydeploy.util.Message;
import com.alibaba.fastjson.JSON;

import javax.websocket.Decoder;
import javax.websocket.EndpointConfig;

public class MessageDecoder implements Decoder.Text<Message> {
  @Override
  public Message decode(String s) {
    return JSON.parseObject(s, Message.class);
  }

  @Override
  public boolean willDecode(String s) {
    // 验证json字符串是否合法,合法才会进入decode()方法进行转换,不合法直接抛异常
    return JSON.isValid(s);
  }

  @Override
  public void init(EndpointConfig endpointConfig) {

  }

  @Override
  public void destroy() {

  }
}
修改 MyWebSocket.java 类注解,添加上 @ServerEndpoint(value = "/websocket", encoders = {MessageEncoder.class}, decoders = {MessageDecoder.class})
其中 @OnMessage 注解修饰的方法参数就可以用 Message 对象来接收了
//收到客户端的消息
@OnMessage
public Message onMessage(Message text, Session session) {
  System.out.println("client message: " + text.toString());
  // 直接将前端发的对象返回给前端显示
  return text;
}
前端接收到的数据还是字符串,还是要通过 JSON.parse(str) 来转换一下
点对点和群发
点对点发消息要知道对方websocket的session,然后通过 session.getBasicRemote().sendText("text") 方法发送给对方
群发只需要把 MyWebSocket 类中的 webSockets 对象循环再使用点对点的方式发送即可
总结
写 encoder 和 decoder 的时候发现还有 binery 的解码跟编码,也就是说还可以能过自定义编/解码用来传输二进制的数据,这块我没有折腾,有需要了再弄
原文链接:
正文到此结束
热门推荐


相关文章

近期评论
-
你这基本没有更新呀,最近文章显示还是2019年的文章。不符合要求哈
-
关键词:慕云博客 链接:https://www.lilun.me 描述:分享原创文字的个人博客
-
-
-
可以提供一下源码吗
-
不是商业站,鸡娃学习笔记
-
-
-
-
听他们说很厉害的样子
Loading...
![[HBLOG]公众号](http://www.liuhaihua.cn/img/qrcode_gzh.jpg)

