第一个SpringBoot项目
第一个SpringBoot项目
SpringBoot为我们提供了一系列的依赖包,所以需要构建工具的支持:Maven或Gradle。博主更习惯使用Maven,暂时学习教程基本采用所Maven与IntelliJ IDEA;新公司使用的是Gradle,所以后续可能会使用Gradle。框架基于目前最新的SpringBoot 2.1.1。
一、创建项目
第一个项目,先做一个简单的demo,能跑起来即可。
1.点击 File -> Project ;
2.选择 Spring Initializr ;
第一次用,建议选择的是 Spring Initializr (官方的构建插件,需要联网),还有 Maven 或 Gradle 可选,后续可选用。
选择SDK版本,本项目用的是JDK 1.8,然后点击Next。
3.填写项目基本信息
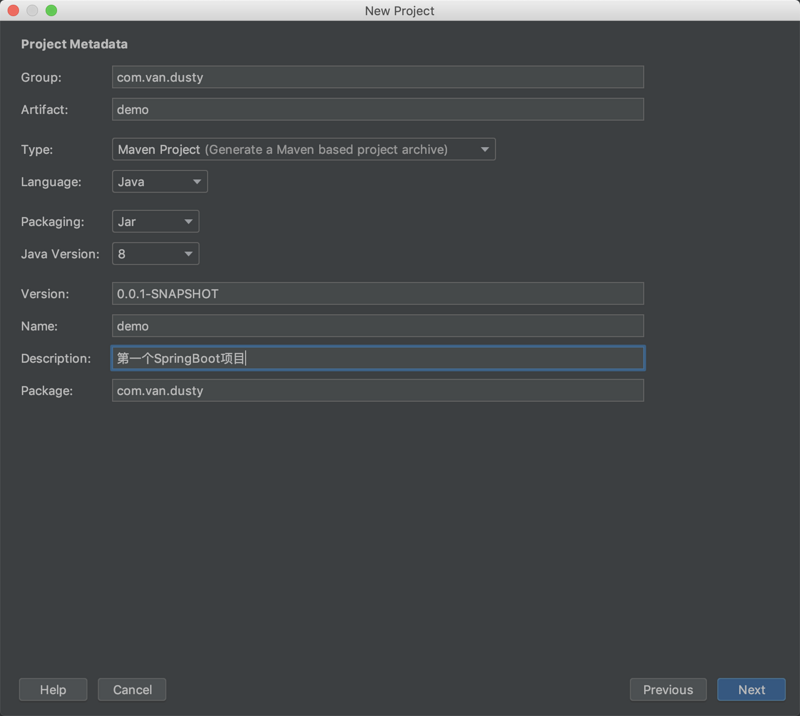
Group
Artifact
Description
4.选择包
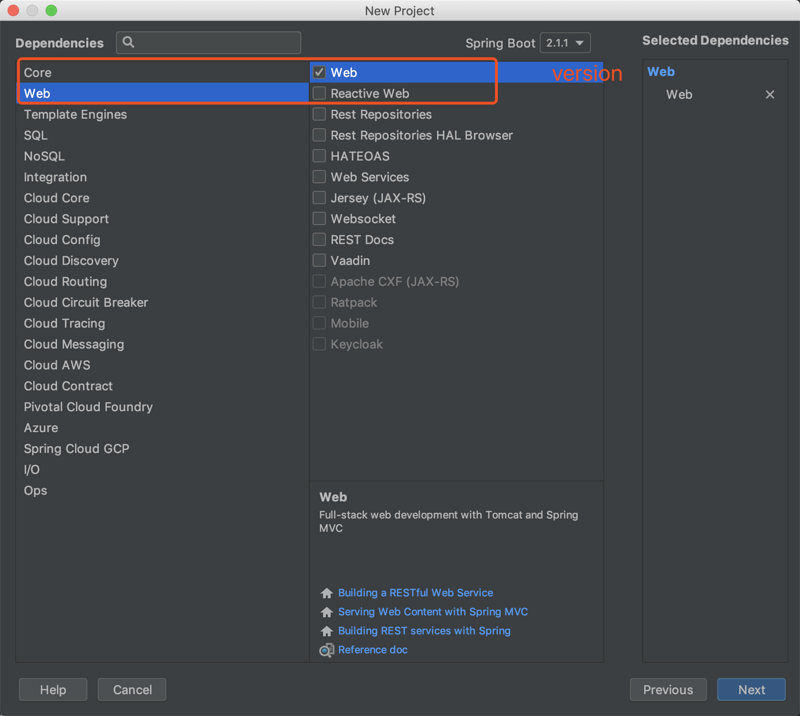
- 选择最新的SpringBoot版本,最新的为2.1.1,即图中version;
-
Spring Initializr为我们提供了很多的选项,不同的选项有不同的作用,第一个项目只需要依赖Web -> Web就可以了,选择好依赖包之后点击Next->Finish。
5.目录结果
- src
    -main
        -java
            -package
                #主函数,启动类,运行它如果运行了 Tomcat、Jetty、Undertow 等容器
                -SpringbootApplication
        -resouces
            #存放静态资源 js/css/images 等
            - statics
            #存放 html 模板文件
            - templates
            #主要的配置文件,SpringBoot启动时候会自动加载application.yml/application.properties
            - application.yml
    #测试文件存放目录
    -test
 # pom.xml 文件是Maven构建的基础,里面包含了我们所依赖JAR和Plugin的信息
- pom
6.pom.xml 依赖
注意的是版本要选择RELEASE,稳定版本BUG少
<?xml version="1.0" encoding="UTF-8"?>
<project xmlns="http://maven.apache.org/POM/4.0.0"
         xmlns:xsi="http://www.w3.org/2001/XMLSchema-instance"
         xsi:schemaLocation="http://maven.apache.org/POM/4.0.0 http://maven.apache.org/xsd/maven-4.0.0.xsd">
    <parent>
        <groupId>org.springframework.boot</groupId>
        <artifactId>spring-boot-starter</artifactId>
        <version>2.1.1.RELEASE</version>
    </parent>
    <modelVersion>4.0.0</modelVersion>
    <!--Group:组织ID,一般分为两段,第一段为域,第二段为公司名称。域又分为org、com、cn等等,其中org为非营利组织,com为商业组织;-->
    <!--Artifact:唯一标识符,一般是项目名称;-->
    <!--Description:项目描述。-->
    <groupId>cn.van</groupId>
    <artifactId>springboot-demo</artifactId>
    <version>1.0-SNAPSHOT</version>
    <description>第一个SpringBoot项目示例</description>
    <dependencies>
        <!-- 测试包,当我们使用 mvn package 的时候该包并不会被打入,因为它的生命周期只在 test 之内-->
        <dependency>
            <groupId>org.springframework.boot</groupId>
            <artifactId>spring-boot-starter-test</artifactId>
            <scope>test</scope>
        </dependency>
        <!-- web 包,默认就内嵌了Tomcat 容器-->
        <dependency>
            <groupId>org.springframework.boot</groupId>
            <artifactId>spring-boot-starter-web</artifactId>
        </dependency>

    </dependencies>

    <build>
        <plugins>
            <!-- 编译插件 -->
            <plugin>
                <groupId>org.springframework.boot</groupId>
                <artifactId>spring-boot-maven-plugin</artifactId>
            </plugin>
        </plugins>
    </build>

</project>
7.主函数入口
一个项目中千万不要出现多个main函数,否在在打包的时候spring-boot-maven-plugin将找不到主函数(主动指定打包主函数入口除外…)
package com.van.dusty;

import org.springframework.boot.SpringApplication;
import org.springframework.boot.autoconfigure.SpringBootApplication;
import org.springframework.web.bind.annotation.GetMapping;
import org.springframework.web.bind.annotation.RestController;

/**
 * 第一个springboot程序的启动类
 * 其中 @RestController 等同于 (@Controller 与 @ResponseBody)
 */

@RestController
@SpringBootApplication
public class Application {
    public static void main(String[] args) {
        SpringApplication.run(Application.class, args);
    }

    @GetMapping("/demo")
    public String demo() {
        return "Hello SpringBoot!";
    }
}
二、项目启动-测试
SpringBoot默认的端口是 8080 ,启动项目后直接访问 http://localhost:8080/demo 进行测试。
三、项目源码
https://github.com/vanDusty/SpringBoot-Home/tree/master/springboot-demo-list/springboot-demo
正文到此结束
- 本文标签: git 配置 list http bug 测试 map XML src springboot 编译 ip cat HTML build id web tomcat description App schema Master apache jetty tar GitHub dependencies IO java pom CSS REST plugin spring maven js IDE 插件 maven构建 目录 端口 https UI 组织 生命 源码
- 版权声明: 本文为互联网转载文章,出处已在文章中说明(部分除外)。如果侵权,请联系本站长删除,谢谢。
- 本文海报: 生成海报一 生成海报二
热门推荐


相关文章

近期评论
-
你这基本没有更新呀,最近文章显示还是2019年的文章。不符合要求哈
-
关键词:慕云博客 链接:https://www.lilun.me 描述:分享原创文字的个人博客
-
-
-
可以提供一下源码吗
-
不是商业站,鸡娃学习笔记
-
-
-
-
听他们说很厉害的样子
Loading...
![[HBLOG]公众号](http://www.liuhaihua.cn/img/qrcode_gzh.jpg)

