SpringCloud微服务架构系列 -- 服务的注册、发现与调用

简介
众所周知,SpringCloud是一个微服务框架,本质上是基于SpringBoot的一整套实现微服务的框架。包含了服务发现、负载均衡、断路器、服务网关、分布式配置等组件。其中服务注册、发现又有Netflix的Eureka,阿里的Dubbo,Apache的Consul等,本篇文章将以Eureka进行讲解。
Eureka
Eureka是Netflix开发的服务发现框架,本身是一个基于REST的服务。由两个组件组成:
- Eureka Server:也被称作是服务注册中心,用于提供服务的注册与发现。
- Eureka Client:包含服务消费者与服务生产者。
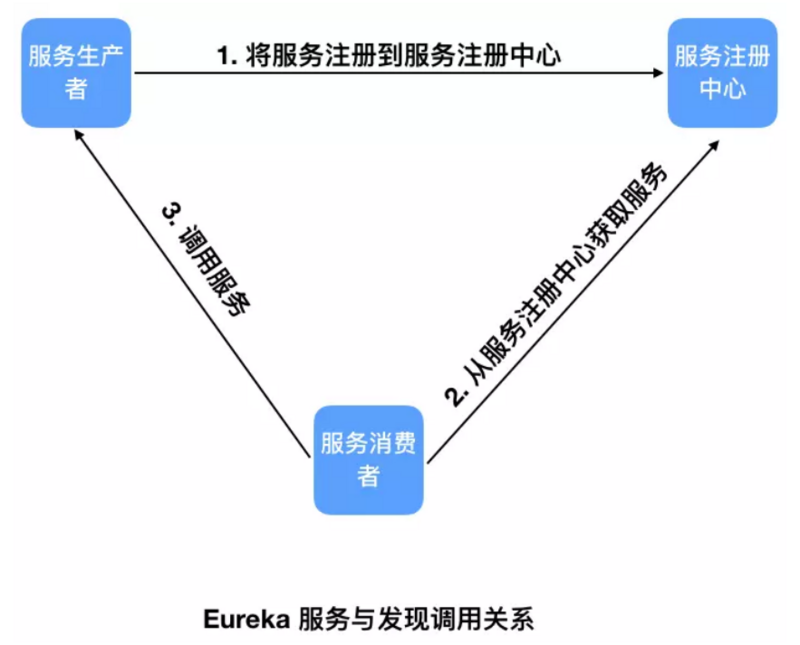
图片来源于互联网,如侵权可联系博主
Eureka的作用就是将我们定义的API接口注册到Eureka服务器上,方便管理,调用的时候只需要知道服务名就可以,不再通过IP加端口号的方式调用,利于解耦。
服务的注册与发现
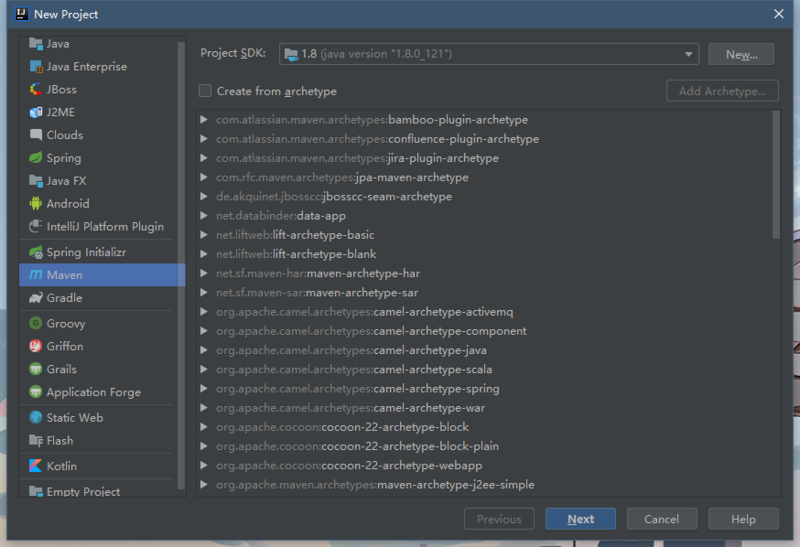
一、新建主项目
- 选择Maven,点击Next
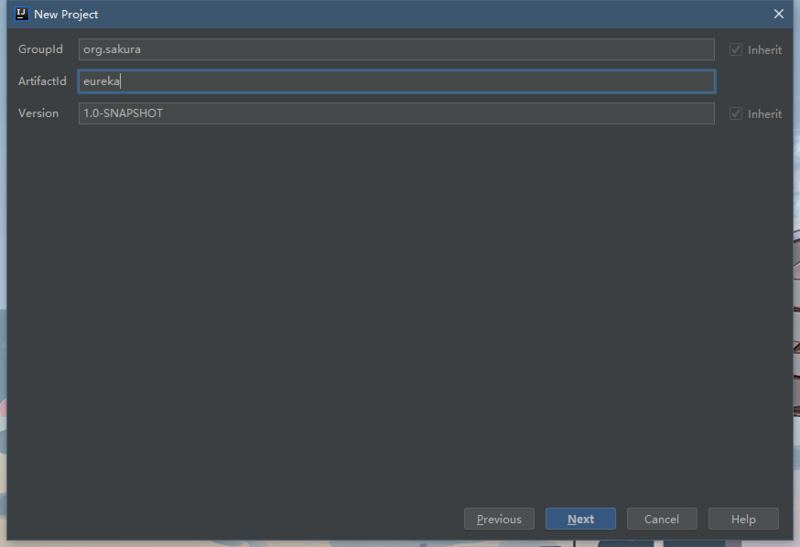
- 填写相关信息,点击Next
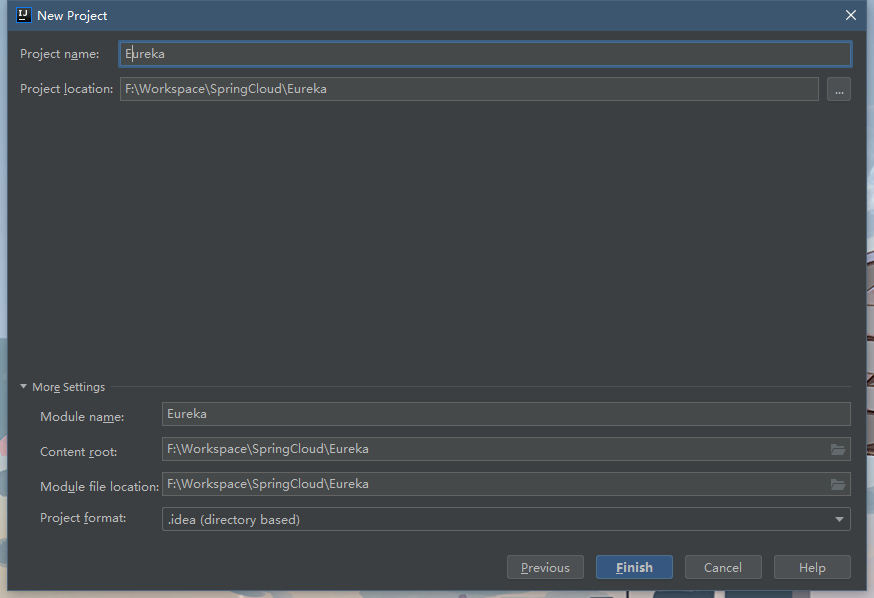
- 确定信息无误后,点击Finish
-
将
src文件夹删除(如果有的话)打开pom.xml文件,添加如下代码。<!--必须指定该父模块,不然后面子模块启动会报错,很麻烦--> <parent> <groupId>org.springframework.boot</groupId> <artifactId>spring-boot-starter-parent</artifactId> <version>2.1.7.RELEASE</version> <relativePath/> <!-- lookup parent from repository --> </parent> <!--父模块类型必须为pom--> <packaging>pom</packaging> <!--包含子模块--> <modules> </modules> <!--在父模块添加web依赖,子模块可继承该依赖--> <dependencies> <dependency> <groupId>org.springframework.boot</groupId> <artifactId>spring-boot-starter-web</artifactId> </dependency> </dependencies>
二、新建Eureka Server
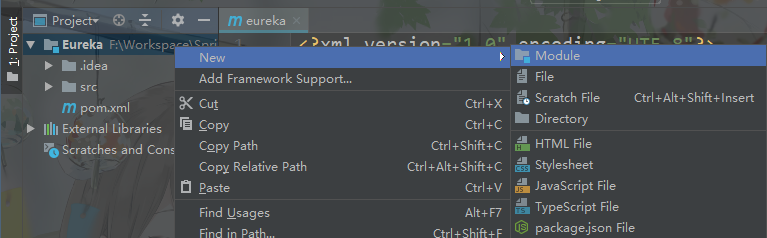
- 在项目上右键新建Module
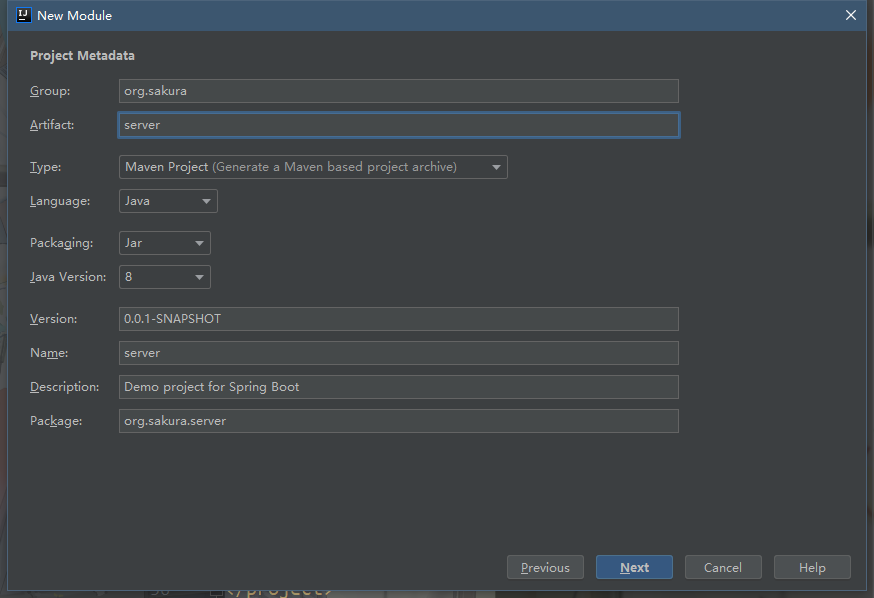
- 选择Spring Initializr,点击Next,填写相关信息,Next
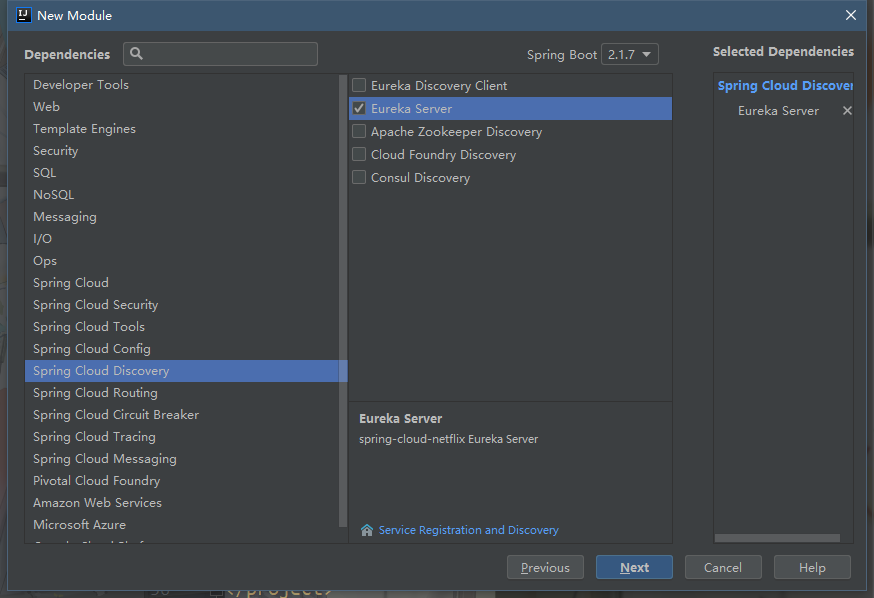
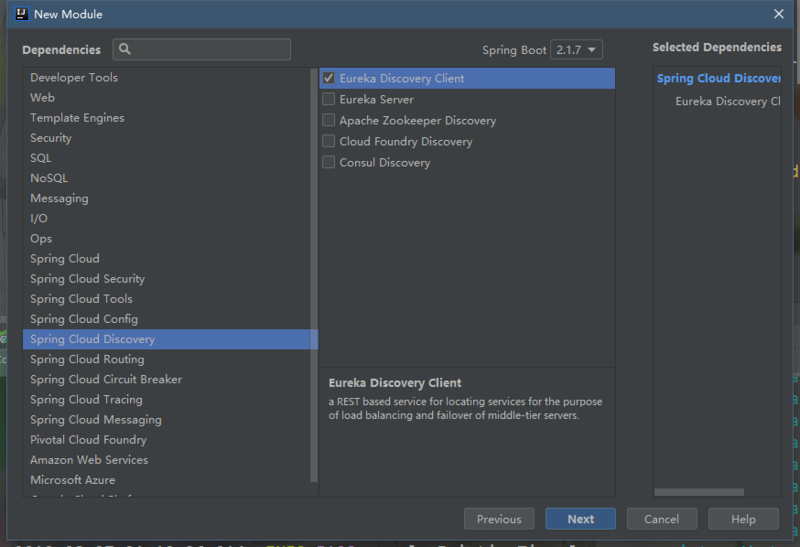
- 选择导入Eureka Server 依赖,Next,确认信息,点击Finish
-
打开Server模块的
pom.xml文件,修改<parent>标签<parent> <groupId>org.sakura</groupId> <artifactId>eureka</artifactId> <version>1.0-SNAPSHOT</version> </parent> -
打开主模块的
pom.xml文件,在<modules>标签添加相应的子模块<!--包含子模块--> <modules> <module>Server</module> </modules> -
将Server模块中的
application.properties重命名为application.yml,并添加如下信息,也可直接使用properties文件类型(需修改如下代码)# Eureka 服务注册与发现的组件 server: port: 8080 spring: application: #服务名,很重要 name: server eureka: instance: hostname: localhost #将prefer-ip-address设为开启时,将默认显示服务的地址,而非主机名 # prefer-ip-address: true #以IP地址注册到服务中心,相互注册使用IP地址 # prefer-ip: 127.0.0.1 #显式设置服务的地址 client: # 下面两个 false 表明自己是 server,而非 client register-with-eureka: false # 不要使用 eureka 服务进行注册,即在管理界面不可见 fetch-registry: false # 不要在本地缓存注册表信息 service-url: defaultZone: http://${eureka.instance.hostname}:${server.port}/eureka/ # defaultZone: http://127.0.0.1:${server.port}/eureka/ server: #开启自我保护模式 enable-self-preservation: false #清理无效节点,默认60*1000毫秒,即60秒 eviction-interval-timer-in-ms: 5000 -
修改Server模块的启动类,添加
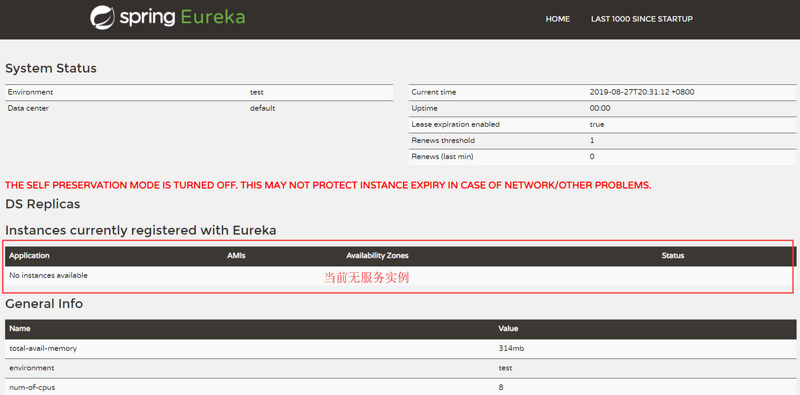
@EnableEurekaServer注解即可@EnableEurekaServer @SpringBootApplication public class ServerApplication { public static void main(String[] args) { SpringApplication.run(ServerApplication.class, args); } } - 启动Server服务,打开 http://localhost:8080
三、新建Eureka Client
- 新建Client模块,前两步和之前一样,只有导入依赖那里不一样
- 修改子父模块的
pom.xml,与Server模块一样 -
修改
application.ymlserver: port: 8081 spring: application: # 服务名,很重要 name: client eureka: instance: hostname: localhost #以IP地址注册到服务中心,相互注册使用IP地址 # prefer-ip-address: true client: service-url: #服务注册地址 defaultZone: http://${eureka.instance.hostname}:8080/eureka -
修改启动类,添加
@EnableEurekaClient注解(@EnableDiscoveryClient或不加都可以)@EnableEurekaClient @SpringBootApplication public class Client1Application { public static void main(String[] args) { SpringApplication.run(Client1Application.class, args); } } - 启动Client服务(启动Client前,需保证Server正在运行,不然会报错),打开刚才的链接
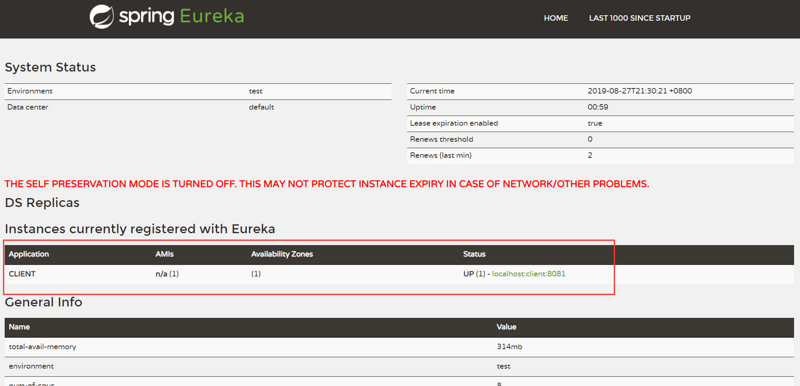
可以看到,Client服务已经注册到服务中心了。这里可能有小伙伴会发现点击这个服务的链接是会出现404的,这是因为项目没有使用到Actuator。
服务的调用
SpringCloud有两种服务调用的方式
- Ribbon
- Feign
一、Ribbon
SpringCloud Ribbon是一个基于HTTP和TCP的客户端负载均衡工具,它基于Netflix Ribbon实现。几乎存在于每一个SpringCloud构建的微服务和基础设施中。因为微服务间的调用,API网关的请求转发等内容,实际上都是通过Ribbon来实现的。
-
再创建一个Client2服务,配置文件中除端口与之前的Client不同外,其它都一致, 服务名也一样 ,这是为了实现负载均衡。
server: port: 8082 spring: application: name: client eureka: instance: hostname: localhost #以IP地址注册到服务中心,相互注册使用IP地址 # prefer-ip-address: true client: service-url: #服务注册地址 defaultZone: http://${eureka.instance.hostname}:8080/eureka -
为两个Client各添加一个API接口
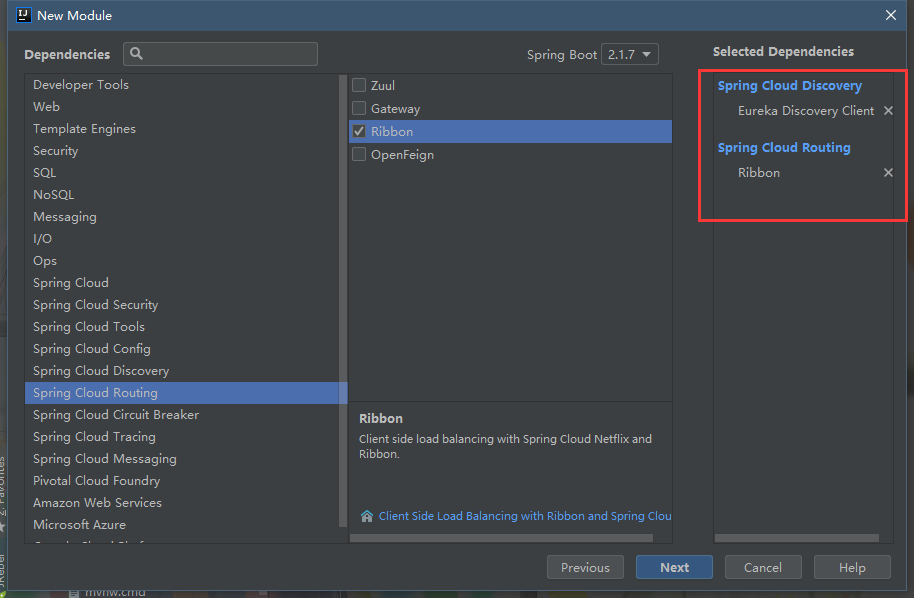
@RestController
public class HelloController {

    @GetMapping("/hello")
    public String sayHello(@RequestParam(required = true,name = "name") String name){
        return "Hello " + name + ", 8081";
    }
}
@RestController public class HelloController { @GetMapping("/hello") public String sayHello(@RequestParam(required = true,name = "name") String name){ return "Hello " + name + ", 8082"; } } - 再新建一个Robbon模块,前面基本一样,依赖不同
-
修改配置文件和pom
server: port: 8083 spring: application: name: ribbon eureka: instance: hostname: localhost #以IP地址注册到服务中心,相互注册使用IP地址 # prefer-ip-address: true client: service-url: #服务注册地址 defaultZone: http://${eureka.instance.hostname}:8080/eureka -
修改启动类,需添加一个RestTemplate bean
@EnableDiscoveryClient
@SpringBootApplication

public class RibbonApplication {

    public static void main(String[] args) {
        SpringApplication.run(RibbonApplication.class, args);
    }

    /**
     * 负载均衡配置
*/
    @Bean
    @LoadBalanced
    RestTemplate restTemplate(){
        return new RestTemplate();
    }
}
```
-
在Ribbon模块中加入一个Service和一个Controller
@Service
public class HelloService {

    @Autowired
    RestTemplate restTemplate;

    public String helloService(String name){
        return restTemplate.getForObject("http://client/hello?name="+name,String.class);
    }
}
@RestController public class HelloController { @Autowired HelloService helloService; @GetMapping("/hello") public String hello(String name){ return helloService.helloService(name); } } - 依次启动Server模块和其它各模块
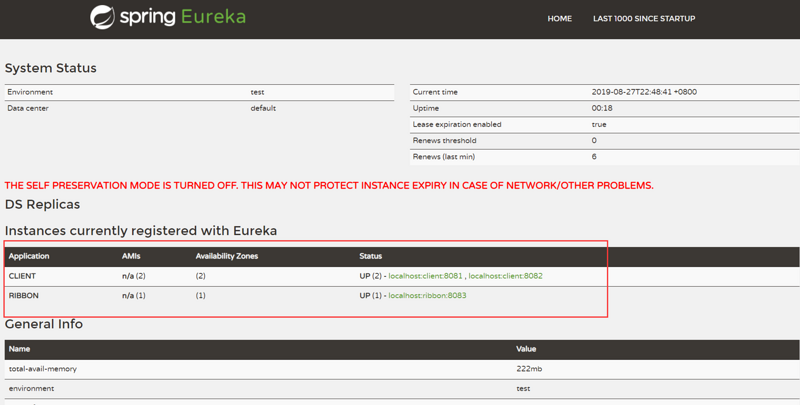
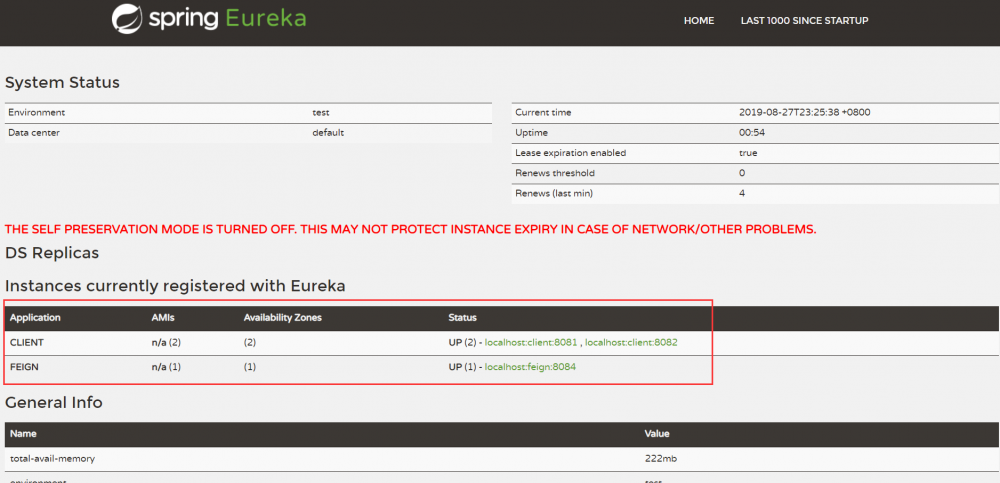
可以看到,两个Client和一个Ribbon都已经注册上去了
- 打开 http://localhost:8083/hello?name=sakura
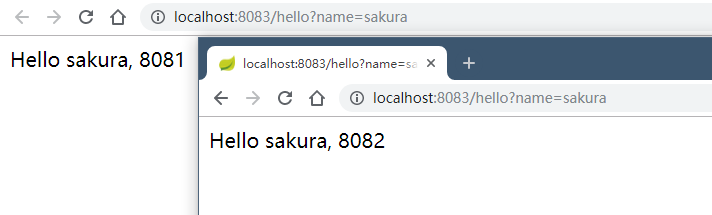
每次刷新调用的服务都不同,证明客户端负载均衡成功了
二、Feign
Feign是基于Ribbon实现的工具,采用基于接口的注解
- 新建Feign模块,引入依赖
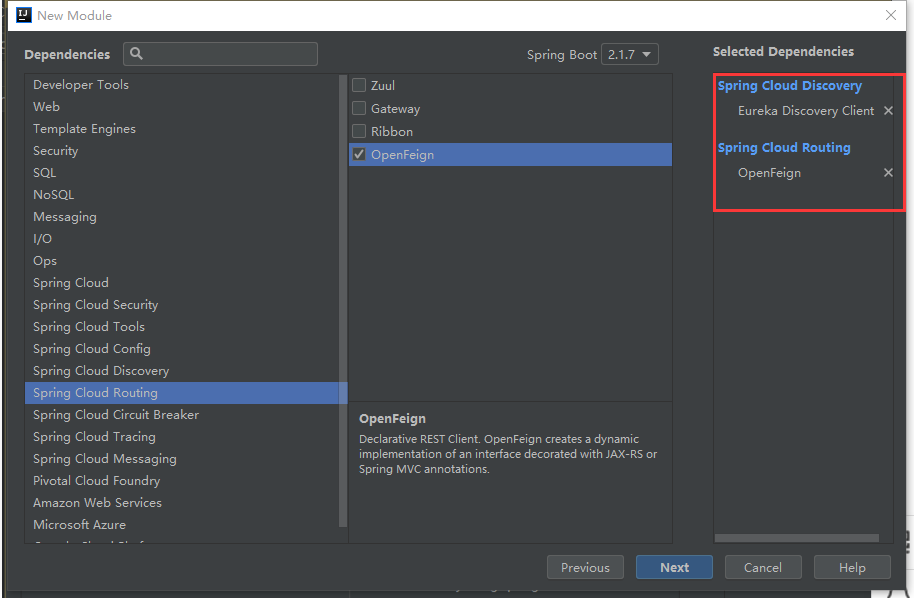
-
修改配置文件和pom
server: port: 8084 spring: application: name: feign eureka: instance: hostname: localhost #以IP地址注册到服务中心,相互注册使用IP地址 # prefer-ip-address: true client: service-url: #服务注册地址 defaultZone: http://${eureka.instance.hostname}:8080/eureka -
修改启动类,添加
@EnableEurekaClient和@EnableFeignClients@EnableFeignClients @EnableEurekaClient @SpringBootApplication public class FeignApplication { public static void main(String[] args) { SpringApplication.run(FeignApplication.class, args); } } -
创建一个Service接口
@FeignClient(value = "client") //value值为需要调用的服务名 public interface IFeignService { @GetMapping("/hello") //这里的地址为需要调用的服务里相应的接口地址 String hello(@RequestParam(value = "name")String name); } -
使用上面的接口(声明完上面Feign接口后,其他Spring管理的类,如Service、Controller都可以直接注入使用,IDEA可能会提示不能注入,可忽略)
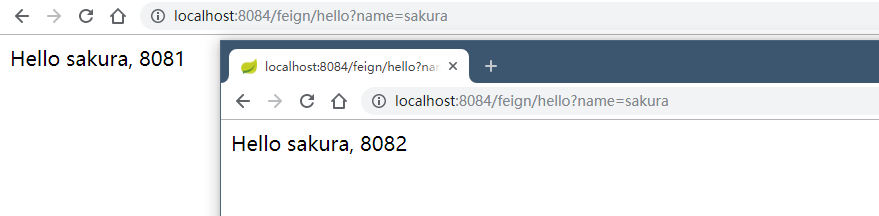
@RestController public class HelloController { @Autowired private IFeignService iFeignService; @GetMapping("/feign/hello") public String sayHello(String name){ return iFeignService.hello(name); } } - 依次启动Server模块和Feign模块和Client模块
- 访问 http://localhost:8084/feign/hello?name=sakura
以上相对全面简洁的介绍了SpringCloud中服务的注册、发现与调用。代码已上传至 Github
正文到此结束
- 本文标签: 管理 Eureka http id 注册中心 端口 IDE value 主机 IO Netflix 服务器 负载均衡 UI XML src 图片 Feign web https 配置 App client bean ribbon apache git map TCP dubbo Service springcloud 微服务 spring ip cat 代码 开发 文章 本质 缓存 pom GitHub dependencies ACE springboot consul maven 互联网 API REST 删除 分布式 服务注册 db tar
- 版权声明: 本文为互联网转载文章,出处已在文章中说明(部分除外)。如果侵权,请联系本站长删除,谢谢。
- 本文海报: 生成海报一 生成海报二
热门推荐


相关文章

近期评论
-
你这基本没有更新呀,最近文章显示还是2019年的文章。不符合要求哈
-
关键词:慕云博客 链接:https://www.lilun.me 描述:分享原创文字的个人博客
-
-
-
可以提供一下源码吗
-
不是商业站,鸡娃学习笔记
-
-
-
-
听他们说很厉害的样子
Loading...
![[HBLOG]公众号](http://www.liuhaihua.cn/img/qrcode_gzh.jpg)

