阿里架构师分享Spring高级注解,Java程序员你都懂了吗?
开发环境:IntelliJ IDEA 2019.2.2
新建一个名称为demo的Spring Boot项目。
一、限定注解
当存在多个同类型的bean时,可以使用Primary注解指定优先注入的bean。如果对bean的注入选择做进一步的控制,则可以使用限定注解。
限定注解可以与特定的参数关联起来,缩小类型匹配的范围,最后选择一个符合条件的bean来注入。
1、新建类 MyBean.java
package com.example.demo;
public class MyBean {
    public MyBean(String id){
        this.id = id;
    }
    private String id;
    public String getId() {
        return id;
    }
    public void setId(String id) {
        this.id = id;
    }
}
2、新建类 MyConfig.java
package com.example.demo;
import org.springframework.context.annotation.Bean;
import org.springframework.context.annotation.Configuration;
@Configuration
public class MyConfig {
    @Bean
        public MyBean bean1(){
        return new MyBean("1");
    }
    @Bean
        public MyBean bean2(){
        return new MyBean("2");
    }
}
3、新建一个控制器 DemoController.java
package com.example.demo;
import org.springframework.beans.factory.annotation.Autowired;
import org.springframework.beans.factory.annotation.Qualifier;
import org.springframework.web.bind.annotation.RequestMapping;
import org.springframework.web.bind.annotation.RestController;
@RestController
public class DemoController {
    @Autowired
        @Qualifier("bean1")
        MyBean bean;
    @RequestMapping(value = "/")
        public String index(){
        return bean.getId();
    }
}
运行项目后,浏览器访问: http://localhost :8080/,页面显示:
二、自定义限定注解
如果需要根据特定的属性来指定注入的bean,则可以自定义限定注解。
1、继续使用上面例子的类 MyBean.java
2、新建一个接口 MyBeanQualifier.java
package com.example.demo;
import org.springframework.beans.factory.annotation.Qualifier;
import java.lang.annotation.ElementType;
import java.lang.annotation.Retention;
import java.lang.annotation.RetentionPolicy;
import java.lang.annotation.Target;
@Target({
    ElementType.FIELD, ElementType.METHOD
}
)
@Retention(RetentionPolicy.RUNTIME)
@Qualifier
public @interface MyBeanQualifier {
    String type();
}
3、修改上面例子代码 MyConfig.java
在配置bean时,需要为相应的bean设置不同的类型。
package com.example.demo;
import org.springframework.context.annotation.Bean;
import org.springframework.context.annotation.Configuration;
@Configuration
public class MyConfig {
    @Bean
        @MyBeanQualifier(type = "bean1")
        public MyBean bean1(){
        return new MyBean("1");
    }
    @Bean
        @MyBeanQualifier(type = "bean2")
        public MyBean bean2(){
        return new MyBean("2");
    }
}
4、修改上面例子控制器代码 DemoController.java
package com.example.demo;
import org.springframework.beans.factory.annotation.Autowired;
import org.springframework.web.bind.annotation.RequestMapping;
import org.springframework.web.bind.annotation.RestController;
@RestController
public class DemoController {
    @Autowired
        @MyBeanQualifier(type = "bean2")
        MyBean bean;
    @RequestMapping(value = "/")
        public String index(){
        return bean.getId();
    }
}
运行项目后,浏览器访问: http://localhost :8080/,页面显示:
三、自定义bean的生命周期
Scope注解主要用于配置bean在容器中的生命周期,除了可以配置为singleton和prototype,在Web环境还可以配置为request、session等 值,表示容器会为一次请求或一个会话分配一个bean的实例。
如果对bean的生命周期有特殊需求,可以使用自定义的Scope。
例子:一个bean被使用3次后,就获取新的bean实例。
1、继续使用上面例子的类 MyBean.java
2、新建一个自定义的Scope类 MyScope.java
package com.example.demo;
import org.springframework.beans.factory.ObjectFactory;
import org.springframework.beans.factory.config.Scope;
import java.util.HashMap;
import java.util.Map;
public class MyScope implements Scope {
    //记录bean的使用次数
    private Map<String,Integer> beanCounts = new HashMap<String,Integer>();
    //保存实例
    private Map<String,Object> beans = new HashMap<String,Object>();
    @Override
        public Object get(String s, ObjectFactory<?> objectFactory) {
        if(beanCounts.get(s) == null){
            beanCounts.put(s, 0);
        }
        //第一次使用,放到实例的Map中
        Integer beanCount = beanCounts.get(s);
        if(beanCount == 0){
            Object newObject = objectFactory.getObject();
            beans.put(s, newObject);
        }
        Object bean = beans.get(s);
        //计数器加1
        Integer newBeanCount = beanCount + 1;
        if(newBeanCount >= 3){
            newBeanCount = 0;
        }
        //设置新的次数
        beanCounts.put(s, newBeanCount);
        return bean;
    }
    @Override
        public Object remove(String s) {
        return null;
    }
    @Override
        public void registerDestructionCallback(String s, Runnable runnable) {
    }
    @Override
        public Object resolveContextualObject(String s) {
        return null;
    }
    @Override
        public String getConversationId() {
        return null;
    }
}
3、修改上面例子代码 MyConfig.java
将自定义Scope注册到容器中。
package com.example.demo;
import org.springframework.beans.factory.BeanFactory;
import org.springframework.beans.factory.annotation.Autowired;
import org.springframework.beans.factory.config.ConfigurableListableBeanFactory;
import org.springframework.beans.factory.config.CustomScopeConfigurer;
import org.springframework.context.annotation.Bean;
import org.springframework.context.annotation.Configuration;
import org.springframework.context.annotation.Scope;
import javax.annotation.PostConstruct;
@Configuration
public class MyConfig {
    @Autowired
        BeanFactory factory;
    @PostConstruct
        public void customScopeConfigurer(){
        CustomScopeConfigurer config = new CustomScopeConfigurer();
        config.addScope("three", new MyScope());
        config.postProcessBeanFactory((ConfigurableListableBeanFactory)factory);
    }
    @Bean
        @Scope(scopeName = "three")
        public MyBean bean1(){
        return new MyBean("1");
    }
}
4、修改上面例子控制器代码 DemoController.java
package com.example.demo;
import org.springframework.beans.factory.annotation.Autowired;
import org.springframework.context.ApplicationContext;
import org.springframework.web.bind.annotation.RequestMapping;
import org.springframework.web.bind.annotation.RestController;
@RestController
public class DemoController {
    @Autowired
        ApplicationContext ctx;
    @RequestMapping(value = "/")
        public String index(){
        for (int i=0;i<5;i++){
            System.out.println(ctx.getBean("bean1"));
        }
        return "";
    }
}
运行项目后,浏览器访问: http://localhost :8080/,IDEA控制台输出:
com.example.demo.MyBean@61f13a02
com.example.demo.MyBean@61f13a02
com.example.demo.MyBean@61f13a02
com.example.demo.MyBean@54094334
com.example.demo.MyBean@54094334
可见前3次得到同一个bean实例。
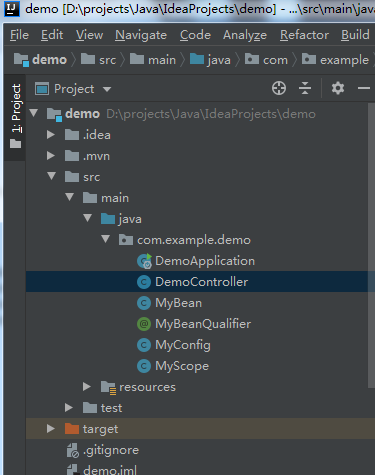
附,项目结构图
【本人秃顶程序员】:专注于Java开发技术的研究与知识分享!
————END————
- 点赞
- ...
- 转发
- ...
- 关注
- ...
最后,欢迎做Java的工程师朋友们加入Java高级架构进阶Qqun:963944895
群内有技术大咖指点难题,还提供免费的Java架构学习资料(里面有高可用、高并发、高性能及分布式、Jvm性能调优、Spring源码,MyBatis,Netty,Redis,Kafka,Mysql,Zookeeper,Tomcat,Docker,Dubbo,Nginx等多个知识点的架构资料)
比你优秀的对手在学习,你的仇人在磨刀,你的闺蜜在减肥,隔壁老王在练腰, 我们必须不断学习,否则我们将被学习者超越!
趁年轻,使劲拼,给未来的自己一个交代!
正文到此结束
- 本文标签: UI 程序员 缩小 ACE 分布式 JVM spring https 配置 App 参数 生命 Spring Boot session mysql struct map CTO mybatis http id HashMap tomcat sql 需求 REST src IO 架构师 tab zookeeper 代码 list example bean 工程师 源码 cat Netty value dubbo JAVA架构 专注 2019 Nginx tar IDE Docker 免费 高可用 并发 web redis 实例 开发 朋友们 高并发 Qualifier java
- 版权声明: 本文为互联网转载文章,出处已在文章中说明(部分除外)。如果侵权,请联系本站长删除,谢谢。
- 本文海报: 生成海报一 生成海报二
热门推荐


相关文章

近期评论
-
你这基本没有更新呀,最近文章显示还是2019年的文章。不符合要求哈
-
关键词:慕云博客 链接:https://www.lilun.me 描述:分享原创文字的个人博客
-
-
-
可以提供一下源码吗
-
不是商业站,鸡娃学习笔记
-
-
-
-
听他们说很厉害的样子
Loading...
![[HBLOG]公众号](http://www.liuhaihua.cn/img/qrcode_gzh.jpg)

