Spring Boot 整合视图层技术
这一节我们主要学习如何整合视图层技术:
- Jsp
- Freemarker
- Thymeleaf
在之前的案例中,我们都是通过 @RestController 来处理请求,所以返回的内容为json对象。那么如果需要渲染html页面的时候,要如何实现呢?
Spring Boot推荐使用模板引擎
模板引擎实现伪html 达到seo优化 使动态页面静态化
在动态html上实现Spring Boot依然可以完美胜任,并且提供了多种模板引擎的默认配置支持,所以在推荐的模板引擎下,我们可以很快的上手开发动态网站。
Spring Boot提供了默认配置的模板引擎主要有以下几种:
Thymeleaf
FreeMarker
Velocity
Groovy
Mustache
Spring Boot建议使用这些模板引擎,避免使用jsp。
Jsp
创建项目
创建 war 项目,编写pom.xml
<?xml version="1.0" encoding="UTF-8"?>

<project xmlns="http://maven.apache.org/POM/4.0.0" xmlns:xsi="http://www.w3.org/2001/XMLSchema-instance"
         xsi:schemaLocation="http://maven.apache.org/POM/4.0.0 http://maven.apache.org/xsd/maven-4.0.0.xsd">
    <modelVersion>4.0.0</modelVersion>

    <groupId>com.springboot</groupId>
    <artifactId>springboot-view</artifactId>
    <version>1.0-SNAPSHOT</version>
    <packaging>war</packaging>

    <name>springboot-view Maven Webapp</name>
    <!-- FIXME change it to the project's website -->
    <url>http://www.example.com</url>

    <properties>
        <project.build.sourceEncoding>UTF-8</project.build.sourceEncoding>
        <maven.compiler.source>1.8</maven.compiler.source>
        <maven.compiler.target>1.8</maven.compiler.target>
    </properties>

    <parent>
        <groupId>org.springframework.boot</groupId>
        <artifactId>spring-boot-starter-parent</artifactId>
        <version>2.1.6.RELEASE</version>
    </parent>

    <dependencies>
        <!-- Web 组件 -->
        <dependency>
            <groupId>org.springframework.boot</groupId>
            <artifactId>spring-boot-starter-web</artifactId>
        </dependency>
        <!-- Spring Boot不推荐使用 jsp,所以需要手动导入 jstl 和 jasper 依赖 -->
        <!-- jstl -->
        <dependency>
            <groupId>javax.servlet</groupId>
            <artifactId>jstl</artifactId>
        </dependency>
        <!-- jasper -->
        <dependency>
            <groupId>org.apache.tomcat.embed</groupId>
            <artifactId>tomcat-embed-jasper</artifactId>
            <scope>provided</scope>
        </dependency>
    </dependencies>
</project>
视图解析器
resources/application.properties
spring.mvc.view.prefix=/WEB-INF/jsp/
spring.mvc.view.suffix=.jsp
实体类
User.java
package com.springboot.pojo;

import java.io.Serializable;

public class User implements Serializable {

    private Integer id;
    private String username;
    private Integer age;

    public User() {
    }

    public User(Integer id, String username, Integer age) {
        this.id = id;
        this.username = username;
        this.age = age;
    }

    public Integer getId() {
        return id;
    }

    public void setId(Integer id) {
        this.id = id;
    }

    public String getUsername() {
        return username;
    }

    public void setUsername(String username) {
        this.username = username;
    }

    public Integer getAge() {
        return age;
    }

    public void setAge(Integer age) {
        this.age = age;
    }

    @Override
    public String toString() {
        return "User{" +
                "id=" + id +
                ", username='" + username + '/'' +
                ", age=" + age +
                '}';
    }

}
控制层
UserController.java
package com.springboot.controller;

import com.springboot.pojo.User;
import org.springframework.stereotype.Controller;
import org.springframework.ui.Model;
import org.springframework.web.bind.annotation.RequestMapping;

import java.util.ArrayList;
import java.util.List;

@Controller
public class UserController {

    @RequestMapping("/showUser")
    public String showUser(Model model) {
        List<User> list = new ArrayList<>();
        list.add(new User(1, "张三", 18));
        list.add(new User(2, "李四", 20));
        list.add(new User(3, "王五", 22));
        model.addAttribute("list", list);
        // 跳转视图
        return "userList";
    }

}
视图层
userList.jsp
<%@ page language="java" contentType="text/html; charset=UTF-8" pageEncoding="UTF-8" %>
<%@ taglib prefix="c" uri="http://java.sun.com/jsp/jstl/core" %>
<!DOCTYPE html>
<html>
<head>
    <meta http-equiv="Content-Type" content="text/html; charset=UTF-8">
    <title>用户展示</title>
</head>
<body>
    <table border="1" cellspacing="0" align="center" width="50%">
        <tr>
            <th>ID</th>
            <th>Name</th>
            <th>Age</th>
        </tr>
        <c:forEach items="${list}" var="user">
            <tr>
                <td>${user.id}</td>
                <td>${user.username}</td>
                <td>${user.age}</td>
            </tr>
        </c:forEach>
    </table>
</body>
</html>
启动类
App.java
package com.springboot;

import org.springframework.boot.SpringApplication;
import org.springframework.boot.autoconfigure.SpringBootApplication;

@SpringBootApplication
public class App {

    public static void main(String[] args) {
        SpringApplication.run(App.class, args);
    }

}
结果

Freemarker
创建项目
创建 war 项目,编写pom.xml
<?xml version="1.0" encoding="UTF-8"?>

<project xmlns="http://maven.apache.org/POM/4.0.0" xmlns:xsi="http://www.w3.org/2001/XMLSchema-instance"
         xsi:schemaLocation="http://maven.apache.org/POM/4.0.0 http://maven.apache.org/xsd/maven-4.0.0.xsd">
    <modelVersion>4.0.0</modelVersion>

    <groupId>com.springboot</groupId>
    <artifactId>springboot-view</artifactId>
    <version>1.0-SNAPSHOT</version>
    <packaging>war</packaging>

    <name>springboot-view Maven Webapp</name>
    <!-- FIXME change it to the project's website -->
    <url>http://www.example.com</url>

    <properties>
        <project.build.sourceEncoding>UTF-8</project.build.sourceEncoding>
        <maven.compiler.source>1.8</maven.compiler.source>
        <maven.compiler.target>1.8</maven.compiler.target>
    </properties>

    <parent>
        <groupId>org.springframework.boot</groupId>
        <artifactId>spring-boot-starter-parent</artifactId>
        <version>2.1.6.RELEASE</version>
    </parent>

    <dependencies>
        <!-- web 组件 -->
        <dependency>
            <groupId>org.springframework.boot</groupId>
            <artifactId>spring-boot-starter-web</artifactId>
        </dependency>
        <!-- freemarker 组件 -->
        <dependency>
            <groupId>org.springframework.boot</groupId>
            <artifactId>spring-boot-starter-freemarker</artifactId>
        </dependency>
    </dependencies>
</project>
视图解析器
该文件内容不一定非得需要,可以不添加,不添加使用默认值。
resources/application.properties
# FREEMARKER (FreeMarkerAutoConfiguration)
spring.freemarker.allow-request-override=false
spring.freemarker.allow-session-override=false
spring.freemarker.cache=true
spring.freemarker.charset=UTF-8
spring.freemarker.check-template-location=true
spring.freemarker.content-type=text/html
spring.freemarker.enabled=true
spring.freemarker.expose-request-attributes=false
spring.freemarker.expose-session-attributes=false
spring.freemarker.expose-spring-macro-helpers=true
spring.freemarker.prefer-file-system-access=true
spring.freemarker.suffix=.ftl
spring.freemarker.template-loader-path=classpath:/templates/
spring.freemarker.settings.template_update_delay=0
spring.freemarker.settings.default_encoding=UTF-8
spring.freemarker.settings.classic_compatible=true
spring.freemarker.order=1
实体类
User.java
package com.springboot.pojo;

import java.io.Serializable;

public class User implements Serializable {

    private Integer id;
    private String username;
    private Integer age;

    public User() {
    }

    public User(Integer id, String username, Integer age) {
        this.id = id;
        this.username = username;
        this.age = age;
    }

    public Integer getId() {
        return id;
    }

    public void setId(Integer id) {
        this.id = id;
    }

    public String getUsername() {
        return username;
    }

    public void setUsername(String username) {
        this.username = username;
    }

    public Integer getAge() {
        return age;
    }

    public void setAge(Integer age) {
        this.age = age;
    }

    @Override
    public String toString() {
        return "User{" +
                "id=" + id +
                ", username='" + username + '/'' +
                ", age=" + age +
                '}';
    }

}
控制层
UserController.java
package com.springboot.controller;

import com.springboot.pojo.User;
import org.springframework.stereotype.Controller;
import org.springframework.ui.Model;
import org.springframework.web.bind.annotation.RequestMapping;

import java.util.ArrayList;
import java.util.List;

@Controller
public class UserController {

    @RequestMapping("/showUser")
    public String showUser(Model model) {
        List<User> list = new ArrayList<>();
        list.add(new User(1, "张三", 18));
        list.add(new User(2, "李四", 20));
        list.add(new User(3, "王五", 22));
        model.addAttribute("list", list);
        // 跳转视图
        return "userList";
    }

}
视图层
Spring Boot要求模板形式的视图层技术的文件必须要放到 src/main/resources 目录下的 templates 目录。
该目录内的模板文件名称必须是 ftl 的后缀结尾。
userList.ftl
<!DOCTYPE html>
<html>
<head>
    <title>用户展示</title>
    <meta charset="UTF-8"></meta>
</head>
<body>
    <table border="1" cellspacing="0" align="center" width="50%">
        <tr>
            <th>ID</th>
            <th>Name</th>
            <th>Age</th>
        </tr>
        <#list list as user >
            <tr>
                <td>${user.id}</td>
                <td>${user.username}</td>
                <td>${user.age}</td>
            </tr>
        </#list>
    </table>
</body>
</html>
启动类
App.java
package com.springboot;

import org.springframework.boot.SpringApplication;
import org.springframework.boot.autoconfigure.SpringBootApplication;

@SpringBootApplication
public class App {

    public static void main(String[] args) {
        SpringApplication.run(App.class, args);
    }

}
结果

Thymeleaf (重点讲解)
入门案例
创建项目
创建 war 项目,编写pom.xml
<?xml version="1.0" encoding="UTF-8"?>

<project xmlns="http://maven.apache.org/POM/4.0.0" xmlns:xsi="http://www.w3.org/2001/XMLSchema-instance"
         xsi:schemaLocation="http://maven.apache.org/POM/4.0.0 http://maven.apache.org/xsd/maven-4.0.0.xsd">
    <modelVersion>4.0.0</modelVersion>

    <groupId>com.springboot</groupId>
    <artifactId>springboot-view</artifactId>
    <version>1.0-SNAPSHOT</version>
    <packaging>war</packaging>

    <name>springboot-view Maven Webapp</name>
    <!-- FIXME change it to the project's website -->
    <url>http://www.example.com</url>

    <properties>
        <project.build.sourceEncoding>UTF-8</project.build.sourceEncoding>
        <maven.compiler.source>1.8</maven.compiler.source>
        <maven.compiler.target>1.8</maven.compiler.target>
    </properties>

    <parent>
        <groupId>org.springframework.boot</groupId>
        <artifactId>spring-boot-starter-parent</artifactId>
        <version>2.1.6.RELEASE</version>
    </parent>

    <dependencies>
        <!-- web 组件 -->
        <dependency>
            <groupId>org.springframework.boot</groupId>
            <artifactId>spring-boot-starter-web</artifactId>
        </dependency>
        <!-- thymeleaf 组件 -->
        <dependency>
            <groupId>org.springframework.boot</groupId>
            <artifactId>spring-boot-starter-thymeleaf</artifactId>
        </dependency>
    </dependencies>
</project>
控制层
ThymeleafController.java
package com.springboot.controller;
import org.springframework.stereotype.Controller;
import org.springframework.ui.Model;
import org.springframework.web.bind.annotation.RequestMapping;
@Controller
public class ThymeleafController {
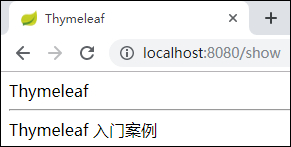
@RequestMapping("/show")
public String showMsg(Model model) {
model.addAttribute("msg", "Thymeleaf 入门案例");
return "msg";
}
}
视图层
Spring Boot要求模板形式的视图层技术的文件必须要放到 src/main/resources 目录下的 templates 目录。
msg.html
<!DOCTYPE html>
<html lang="en">
<head>
    <meta charset="UTF-8">
    <title>Thymeleaf</title>
</head>
<body>
    <span th:text="Thymeleaf"></span>
    <hr/>
    <span th:text="${msg}"></span>
</body>
</html>
启动类
App.java
package com.springboot;

import org.springframework.boot.SpringApplication;
import org.springframework.boot.autoconfigure.SpringBootApplication;

@SpringBootApplication
public class App {

    public static void main(String[] args) {
        SpringApplication.run(App.class, args);
    }

}
运行结果出现异常(如果是 Spring Boot 1.X.X 版本才会出现此异常):
org.xml.sax.SAXParseException: 元素类型 "meta" 必须由匹配的结束标记 "</meta>" 终止。
异常处理
如果是 Spring Boot 1.X.X 版本需要以下操作,本案例是 Spring Boot 2.1.6 版本,所以不需要更改。
方式一:编写风格严谨的HTML代码
<meta charset="UTF-8"/>
方式二:更换Thymeleaf的jar包版本
thymeleaf.jar:更新为 3.0 以上的版本

<properties>
    <thymeleaf.version>3.0.11.RELEASE</thymeleaf.version>
</properties>
运行结果
Thymeleaf 语法详解
Thymeleaf 内置对象语法:
- 调用内置对象一定要用
# - 大部分的内置对象都以
s结尾strings、numbers、dates
准备数据
实体类
User.java
package com.springboot.pojo;

import java.io.Serializable;

public class User implements Serializable {

    private Integer id;
    private String username;
    private Integer age;

    public User() {
    }

    public User(Integer id, String username, Integer age) {
        this.id = id;
        this.username = username;
        this.age = age;
    }

    public Integer getId() {
        return id;
    }

    public void setId(Integer id) {
        this.id = id;
    }

    public String getUsername() {
        return username;
    }

    public void setUsername(String username) {
        this.username = username;
    }

    public Integer getAge() {
        return age;
    }

    public void setAge(Integer age) {
        this.age = age;
    }

    @Override
    public String toString() {
        return "User{" +
                "id=" + id +
                ", username='" + username + '/'' +
                ", age=" + age +
                '}';
    }

}
控制层
ThymeleafController.java
package com.springboot.controller;

import com.springboot.pojo.User;
import org.springframework.stereotype.Controller;
import org.springframework.ui.Model;
import org.springframework.web.bind.annotation.PathVariable;
import org.springframework.web.bind.annotation.RequestMapping;

import javax.servlet.http.HttpServletRequest;
import javax.servlet.http.HttpServletResponse;
import java.util.*;

@Controller
public class ThymeleafController {

    @RequestMapping("/show")
    public String showMsg(Model model,
                          HttpServletRequest request,
                          HttpServletResponse response) {

        // 字符串
        model.addAttribute("msg", "Thymeleaf 入门案例");
        // 日期时间
        model.addAttribute("myDate", new Date());
        // 条件判断if
        model.addAttribute("sex", 1);
        // 条件判断switch
        model.addAttribute("id", 1);
        // 对象
        model.addAttribute("user", new User(1, "张三", 20));

        // 迭代遍历list
        List<User> userList = new ArrayList<>();
        userList.add(new User(1, "张三", 20));
        userList.add(new User(2, "李四", 22));
        userList.add(new User(3, "王五", 24));
        model.addAttribute("userList", userList);

        // 迭代遍历map
        Map<String, User> userMap = new HashMap<>();
        userMap.put("u1", new User(1, "张三", 20));
        userMap.put("u2", new User(2, "李四", 22));
        userMap.put("u3", new User(3, "王五", 24));
        model.addAttribute("userMap", userMap);

        // 域对象操作
        request.setAttribute("req", "HttpServletRequest");
        request.getSession().setAttribute("sess", "HttpSession");
        request.getSession().getServletContext().setAttribute("app", "Application");
        return "msg";

    }

    /**
     * URL表达式-相对路径
     * @return
     */
    @RequestMapping("/index")
    public String index() {
        return "index";
    }

    /**
     * URL表达式-普通传参
     * @param id
     * @param username
     * @return
     */
    @RequestMapping("/user")
    public String user(Integer id, String username) {
        System.out.println("id:" + id + " username:" + username);
        return "user";
    }

    /**
     * URL表达式-restful传参
     * @param id
     * @param username
     * @return
     */
    @RequestMapping("/person/{id}/{username}")
    public String person(@PathVariable Integer id, @PathVariable String username) {
        System.out.println("id:" + id + " username:" + username);
        return "person";
    }

}
视图层
index.html
<!DOCTYPE html>
<html lang="en">
<head>
    <meta charset="UTF-8">
    <title>Thymeleaf</title>
</head>
<body>
    index
</body>
</html>
user.html
<!DOCTYPE html>
<html lang="en">
<head>
    <meta charset="UTF-8">
    <title>Thymeleaf</title>
</head>
<body>
    user
</body>
</html>
person.html
<!DOCTYPE html>
<html lang="en">
<head>
    <meta charset="UTF-8">
    <title>Thymeleaf</title>
</head>
<body>
    person
</body>
</html>
字符串
变量输出
th:text :在页面中输入值
<span th:text="Thymeleaf"></span>
th:value :可以将一个值设置至input标签的value中
<input type="text" th:value="${msg}" />
字符串操作
${#strings.isEmpty(key)} :判断字符串是否为空
<span th:text="${#strings.isEmpty(msg)}"></span>
${#strings.contains(msg, 'T')} :判断字符串是否包含子串
<span th:text="${#strings.contains(msg, 'T')}"></span>
${#strings.startsWith(msg, 'T')} :判断字符串是否以子串开头
<span th:text="${#strings.startsWith(msg, 'T')}"></span>
${#strings.endsWith(msg, 'T')} :判断字符串是否以子串结尾
<span th:text="${#strings.endsWith(msg, 'T')}"></span>
${#strings.length(msg)} :返回字符串的长度
<span th:text="${#strings.length(msg)}"></span>
${#strings.indexOf(msg, 'T')} :查找子串的位置,并返回该子串的下标,如果没找到则返回-1
<span th:text="${#strings.indexOf(msg, 'T')}"></span>
${#strings.substring(msg, 5)} :截取子串,从指定下标开始截止到末尾结束
${#strings.substring(msg, 5, 12)} :截取子串,从指定下标开始截止到指定下标结束
<span th:text="${#strings.substring(msg, 5)}"></span>
<span th:text="${#strings.substring(msg, 5, 12)}"></span>
${#strings.toUpperCase(msg)} :将字符串转大写
<span th:text="${#strings.toUpperCase(msg)}"></span>
${#strings.toLowerCase(msg)} :将字符串转小写
<span th:text="${#strings.toLowerCase(msg)}"></span>
日期时间
${#dates.format(key)} :格式化日期,以浏览器默认语言为格式化标准
<span th:text="${#dates.format(myDate)}"></span>
${#dates.format(key,'yyy/MM/dd')} :自定义格式日期转换
<span th:text="${#dates.format(myDate, 'yyyy年MM月dd日 HH:mm:ss')}"></span>
${#dates.year(myDate)} :获取年份,还可以获取月份、日、时、分、秒
<span th:text="${#dates.year(myDate)}"></span>年
<span th:text="${#dates.month(myDate)}"></span>月
<span th:text="${#dates.day(myDate)}"></span>日
<span th:text="${#dates.hour(myDate)}"></span>时
<span th:text="${#dates.minute(myDate)}"></span>分
<span th:text="${#dates.second(myDate)}"></span>秒
条件判断
th:if :单选择
性别:<span th:if="${sex} == 1">男</span>
     <span th:if="${sex} == 2">女</span>
th:switch :多选择(如果要实现 if else if else 判断表达式,在 Thymeleaf 要使用 th:switch 代替)
编号:<span th:switch="${id}">
        <span th:case="1">1 张三</span>
        <span th:case="2">2 李四</span>
        <span th:case="3">3 王五</span>
    </span>
对象
<input th:value="${user.username}"/>
<span th:text="${user.age}"></span>
迭代遍历
th:each :迭代遍历
<table border="1" cellspacing="0">
    <tr>
        <th>ID</th>
        <th>NAME</th>
        <th>AGE</th>
    </tr>
    <tr th:each="user : ${userList}">
        <td th:text="${user.id}"></td>
        <td th:text="${user.username}"></td>
        <td th:text="${user.age}"></td>
    </tr>
</table>
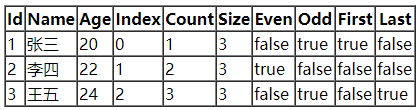
th:each :状态变量属性
- index:当前迭代器的索引 从 0 开始
- count:当前迭代对象的计数 从 1 开始
- size:被迭代对象的长度
- even/odd:布尔值,当前循环是否是偶数/奇数 从 0 开始
- first:布尔值,当前循环的是否是第一条,如果是返回 true 否则返回 false
- last:布尔值,当前循环的是否是最后一条,如果是则返回 true 否则返回 false
<table border="1" cellspacing="0">
    <tr>
        <th>Id</th>
        <th>Name</th>
        <th>Age</th>
        <th>Index</th>
        <th>Count</th>
        <th>Size</th>
        <th>Even</th>
        <th>Odd</th>
        <th>First</th>
        <th>Last</th>
    </tr>
    <tr th:each="user, state : ${userList}">
        <td th:text="${user.id}"></td>
        <td th:text="${user.username}"></td>
        <td th:text="${user.age}"></td>
        <td th:text="${state.index}"></td>
        <td th:text="${state.count}"></td>
        <td th:text="${state.size}"></td>
        <td th:text="${state.even}"></td>
        <td th:text="${state.odd}"></td>
        <td th:text="${state.first}"></td>
        <td th:text="${state.last}"></td>
    </tr>
</table>
th:each :迭代 Map
<table border="1" cellspacing="0">
    <tr>
        <th>Id</th>
        <th>Name</th>
        <th>Age</th>
    </tr>
    <tr th:each="user : ${userMap}">
        <td th:text="${user}"></td>
    </tr>
</table>
<table border="1" cellspacing="0">
    <tr>
        <th>Id</th>
        <th>Name</th>
        <th>Age</th>
    </tr>
    <tr th:each="user : ${userMap}">
        <td th:each="entry : ${user}" th:text="${entry.value.id}" ></td>
        <td th:each="entry : ${user}" th:text="${entry.value.username}"></td>
        <td th:each="entry : ${user}" th:text="${entry.value.age}"></td>
    </tr>
</table>

域对象操作
${#httpServletRequest.getAttribute(key)} :HttpServletRequest
Request:<span th:text="${#httpServletRequest.getAttribute('req')}"></span>
${session.key} :HttpSession
Session:<span th:text="${session.sess}"></span>
${application.key} :ServletContext
Application:<span th:text="${application.app}"></span>
URL表达式
基本语法
URL表达式的基本语法: @{}
th:href :绝对路径
<a th:href="@{http://www.baidu.com}">绝对路径</a>
th:href :相对路径,相对于当前项目的根路径
<a th:href="@{/index}">相对于当前项目的根路径</a>
th:href :相对路径, 相对于服务器的根路径
<a th:href="@{~/project/resourcename}">相对于服务器的根路径</a>
参数传递
<a th:href="@{/user(id=1, username=zhagnsan)}">相对路径-普通传参</a>
<a th:href="@{/person/1/zhangsan}">相对路径-restful传参</a>
<a th:href="@{/person/{id}/{name}(id=2, name=lisi)}">相对路径-restful传参</a>
✍️本章节到这里就结束了,喜欢的话就点赞 加转发:revolving_hearts:吧,我们下章节再见:wave:。
正文到此结束
- 本文标签: list build cache ArrayList web tomcat UI HTML value example ORM 索引 apache servlet 配置 App key schema Freemarker session update map 时间 开发 WMS HashMap java pom 网站 代码 XML dependencies http springboot spring maven cat RESTful json 参数 core Spring Boot 目录 tab tar NSA parse 快的 src id tag classpath js IDE 遍历 REST lib IO zab 服务器 https 数据 解析
- 版权声明: 本文为互联网转载文章,出处已在文章中说明(部分除外)。如果侵权,请联系本站长删除,谢谢。
- 本文海报: 生成海报一 生成海报二
热门推荐


相关文章


Loading...
![[HBLOG]公众号](http://www.liuhaihua.cn/img/qrcode_gzh.jpg)

