SpringCloud系列教程04-服务调用之Ribbon
本节示例代码在: https://github.com/laolunsi/spring-boot-stack
一、概述
在第二篇文章 SpringCloud服务调用之Feign 中,我们介绍了SpringCloud中使用feign进行服务调用的案例。当时还介绍了feign是基于ribbon的。
这一篇,我们就来看看通过 原生 的ribbon是怎么进行服务调用的。
官方文档: https://projects.spring.io/spring-cloud/spring-cloud.html#spring-cloud-ribbon
Ribbon is a client side load balancer which gives you a lot of control over the behaviour of HTTP and TCP clients. Feign already uses Ribbon, so if you are using @FeignClient then this section also applies.
ribbon可以实现服务调用和负载均衡,而feign集成了ribbon。
也就是说:feign是基于ribbon的,ribbon的调用可以理解是SpringCloud原生的服务调用。
注:这一篇,我们基于上一篇 SpringCloud服务注册之Consul 中的consul来实现这么一个demo。
需要:consul、service-producer服务(引入consul)、service-consumer服务(引入consul和ribbon)
版本:SpringBoot 2.0.7.RELEASE与SpringCloud Finchely.RELEASE
二、创建服务提供者service-producer
服务生产者与上一节相同,需要引入 consul-discovery :
<properties>
        <java.version>1.8</java.version>
        <spring-cloud.version>Finchley.RELEASE</spring-cloud.version>
    </properties>

    <dependencies>
        <dependency>
            <groupId>org.springframework.boot</groupId>
            <artifactId>spring-boot-starter-web</artifactId>
        </dependency>

        <!-- 引入consul用于服务注册与发现 -->
        <dependency>
            <groupId>org.springframework.cloud</groupId>
            <artifactId>spring-cloud-starter-consul-discovery</artifactId>
        </dependency>

        <!-- 健康监控 -->
        <dependency>
            <groupId>org.springframework.boot</groupId>
            <artifactId>spring-boot-starter-actuator</artifactId>
        </dependency>

    </dependencies>

    <dependencyManagement>
        <dependencies>
            <dependency>
                <groupId>org.springframework.cloud</groupId>
                <artifactId>spring-cloud-dependencies</artifactId>
                <version>${spring-cloud.version}</version>
                <type>pom</type>
                <scope>import</scope>
            </dependency>
        </dependencies>
    </dependencyManagement>
配置文件:
server:
  port: 8200
spring:
  application:
    name: service-producer
  cloud:
    consul:
      host: localhost
      port: 8500
      discovery:
        register: true
        instance-id: ${spring.application.name}:${server.port}
        service-name: ${spring.application.name}
        port: ${server.port}
启动类添加 @EnableDiscoveryClient 注解:
package com.example.serviceproducer;

import org.springframework.boot.SpringApplication;
import org.springframework.boot.autoconfigure.SpringBootApplication;
import org.springframework.cloud.client.discovery.EnableDiscoveryClient;

@SpringBootApplication
@EnableDiscoveryClient
public class ServiceProducerApplication {

    public static void main(String[] args) {
        SpringApplication.run(ServiceProducerApplication.class, args);
    }

}
测试接口:
package com.example.serviceproducer;

import org.springframework.web.bind.annotation.GetMapping;
import org.springframework.web.bind.annotation.PathVariable;
import org.springframework.web.bind.annotation.RequestMapping;
import org.springframework.web.bind.annotation.RestController;

@RestController
@RequestMapping(value = "producer")
public class HelloAction {

    @GetMapping(value = "hello/{name}")
    public String hello(@PathVariable String name) {
        return "Hello " + name + ", this is response from hello by service-producer.";
    }
}
启动服务后,测试一下:

三、创建服务消费者service-consumer
服务消费者需要引入 consul-discovery 和 netflix-ribbon :
<properties>
        <java.version>1.8</java.version>
        <spring-cloud.version>Finchley.RELEASE</spring-cloud.version>
    </properties>

    <dependencies>
        <dependency>
            <groupId>org.springframework.boot</groupId>
            <artifactId>spring-boot-starter-web</artifactId>
        </dependency>

        <!-- 引入consul用于服务注册与发现 -->
        <dependency>
            <groupId>org.springframework.cloud</groupId>
            <artifactId>spring-cloud-starter-consul-discovery</artifactId>
        </dependency>

        <!-- 健康监控 -->
        <dependency>
            <groupId>org.springframework.boot</groupId>
            <artifactId>spring-boot-starter-actuator</artifactId>
        </dependency>

        <!-- 引入ribbon -->
        <dependency>
            <groupId>org.springframework.cloud</groupId>
            <artifactId>spring-cloud-starter-netflix-ribbon</artifactId>
        </dependency>

    </dependencies>

    <dependencyManagement>
        <dependencies>
            <dependency>
                <groupId>org.springframework.cloud</groupId>
                <artifactId>spring-cloud-dependencies</artifactId>
                <version>${spring-cloud.version}</version>
                <type>pom</type>
                <scope>import</scope>
            </dependency>
        </dependencies>
    </dependencyManagement>
配置文件与 service-producer 基本相同:
server:
  port: 8201
spring:
  application:
    name: service-consumer
  cloud:
    consul:
      host: localhost
      port: 8500
      discovery:
        register: true
        service-name: ${spring.application.name}
        instance-id: ${spring.application.name}:${server.port}
        port: ${server.port}
同样在启动类上添加 @EnableDiscoveryClient 注解。
下面就有所不同了,还需要注入一个 RestTemplate 的Bean实例——这个类来自 spring-boot-starter-web 包:
package com.example.serviceconsumer;

import org.springframework.boot.SpringApplication;
import org.springframework.boot.autoconfigure.SpringBootApplication;
import org.springframework.cloud.client.discovery.EnableDiscoveryClient;
import org.springframework.cloud.client.loadbalancer.LoadBalanced;
import org.springframework.cloud.netflix.hystrix.EnableHystrix;
import org.springframework.context.annotation.Bean;
import org.springframework.web.client.RestTemplate;

@SpringBootApplication
@EnableDiscoveryClient
public class ServiceConsumerApplication {

    public static void main(String[] args) {
        SpringApplication.run(ServiceConsumerApplication.class, args);
    }

    /**
     * 注入RestTemplate Bean并开启负载均衡
     * @return
     */
    @Bean
    @LoadBalanced
    public RestTemplate restTemplate() {
        return new RestTemplate();
    }

}
注:也可以不采用注入而在使用的时候直接 new RestTemplate() 。
看一下我编写的测试接口:
package com.example.serviceconsumer;

import org.springframework.beans.factory.annotation.Autowired;
import org.springframework.web.bind.annotation.GetMapping;
import org.springframework.web.bind.annotation.RequestMapping;
import org.springframework.web.bind.annotation.RestController;
import org.springframework.web.client.RestTemplate;

@RestController
@RequestMapping(value = "consumer")
public class ConsumerAction {

    @Autowired
    private RestTemplate restTemplate;

    @GetMapping(value = "test")
    public String test(String name) {
        // 利用RestTemplate,直接请求对应的service-name/request
        String producerRes = restTemplate.getForObject("http://service-producer/producer/hello/" + name, String.class);
        String res = "service-consumer服务调用service-producer服务,hello接口返回数据:" + producerRes;
        System.out.println(res);
        return res;
    }
}
上面的示例中,使用了 restTemplate.getForObject("http://service-producer/producer/hello/" + name, String.class); 来调用服务 service-producer 的路径为 producer/hello/{name} 的接口。
四、ribbon/feign/http比较
与普通的HTTP请求比较:HTTP请求使用 http://ip:port/path 的方式请求,而ribbon则使用 http://service-name/path 的方式。
与feign请求比较:
@FeignClient(name = "service-provider")
public interface HelloRemote {

    @GetMapping(value = "hello/{name}")
    public String hello(@PathVariable("name") String name);
}
注:feign的使用参考—— SpringCloud系列教程02-服务调用之feign
feign是使用 @FeignClient 来声明式地声明一个与被调用服务接口相同的接口,然后直接调用这个接口。而ribbon是直接通过路径调用。
五、测试
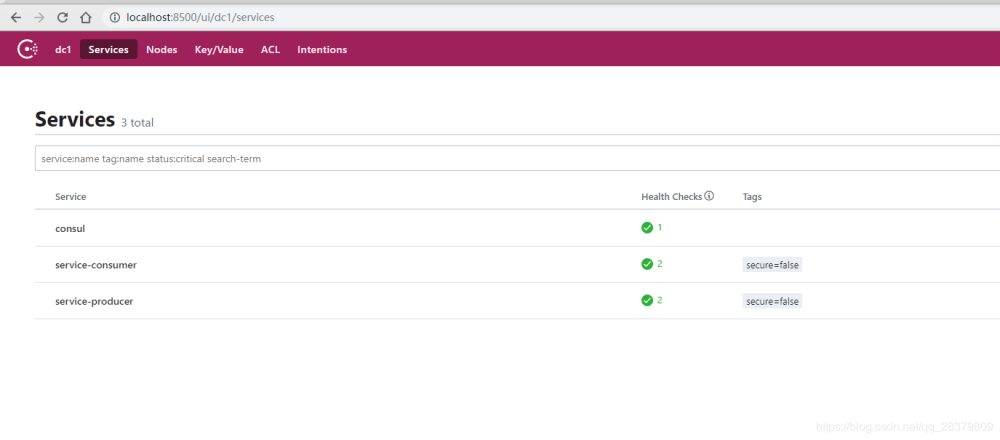
启动service-consumer后,看一下consul:
测试consumer服务调用producer服务:

至此,基于ribbon进行服务调用的示例已经完成。具体可以参考下面地址的源码。
参考
- 方志朋-服务消费者(rest+ribbon)(Finchley版): https://blog.csdn.net/forezp/article/details/81040946
正文到此结束
- 本文标签: db cat 代码 dependencies 文章 Hystrix remote tar GitHub REST ACE springboot 源码 负载均衡 SDN value http id consul https IDE 实例 src IO 服务注册 测试 git 数据 HTML client bean Netflix PHP ip UI App example Service Feign web 配置 CTO consumer Action ribbon java pom map TCP provider producer springcloud spring
- 版权声明: 本文为互联网转载文章,出处已在文章中说明(部分除外)。如果侵权,请联系本站长删除,谢谢。
- 本文海报: 生成海报一 生成海报二
热门推荐


相关文章

近期评论
-
你这基本没有更新呀,最近文章显示还是2019年的文章。不符合要求哈
-
关键词:慕云博客 链接:https://www.lilun.me 描述:分享原创文字的个人博客
-
-
-
可以提供一下源码吗
-
不是商业站,鸡娃学习笔记
-
-
-
-
听他们说很厉害的样子
Loading...
![[HBLOG]公众号](http://www.liuhaihua.cn/img/qrcode_gzh.jpg)

