iOS 书本打开动画制作教程(第一部分)
作者: Vincent Ngo , 原文链接 ,原文日期:2015/08/11
译者: 靛青K ;校对: shanks ;定稿: numbbbbb

在接下来的2个系列教程中,你将会学习开发一个漂亮的 iOS 书本打开动画和一个点击翻页动画,类似于 Paper by FiftyThree 的应用中的动画。
- 在第一部分,你将会学习到如何自定义你的集合视图布局,并且应用深度和阴影来让 app 书本更加真实。
- 在 第二部分 ,你将会学习如何创建一个自定义的变换来合理的管理不同的 controller。并且加入手势来在视图之间创建符合人们自然感觉的变换。
这个教程是写给中级水平以上的开发者的,你将学会去做自定义变换和自定义的集合视图布局。
如果你到现在还没有使用过集合视图,那就先来看看我们的 一些其他 iOS 指导 吧。
注意:感谢 Attila Hegedüs 编写了这个精彩的示例项目。
项目准备
点击 这里 下载这个教程的项目代码,然后解压这个 zip 格式文件,并用 Xcode 打开 Paper.xcodeproj 。
编译并运行,你将会看到下图这样的效果:
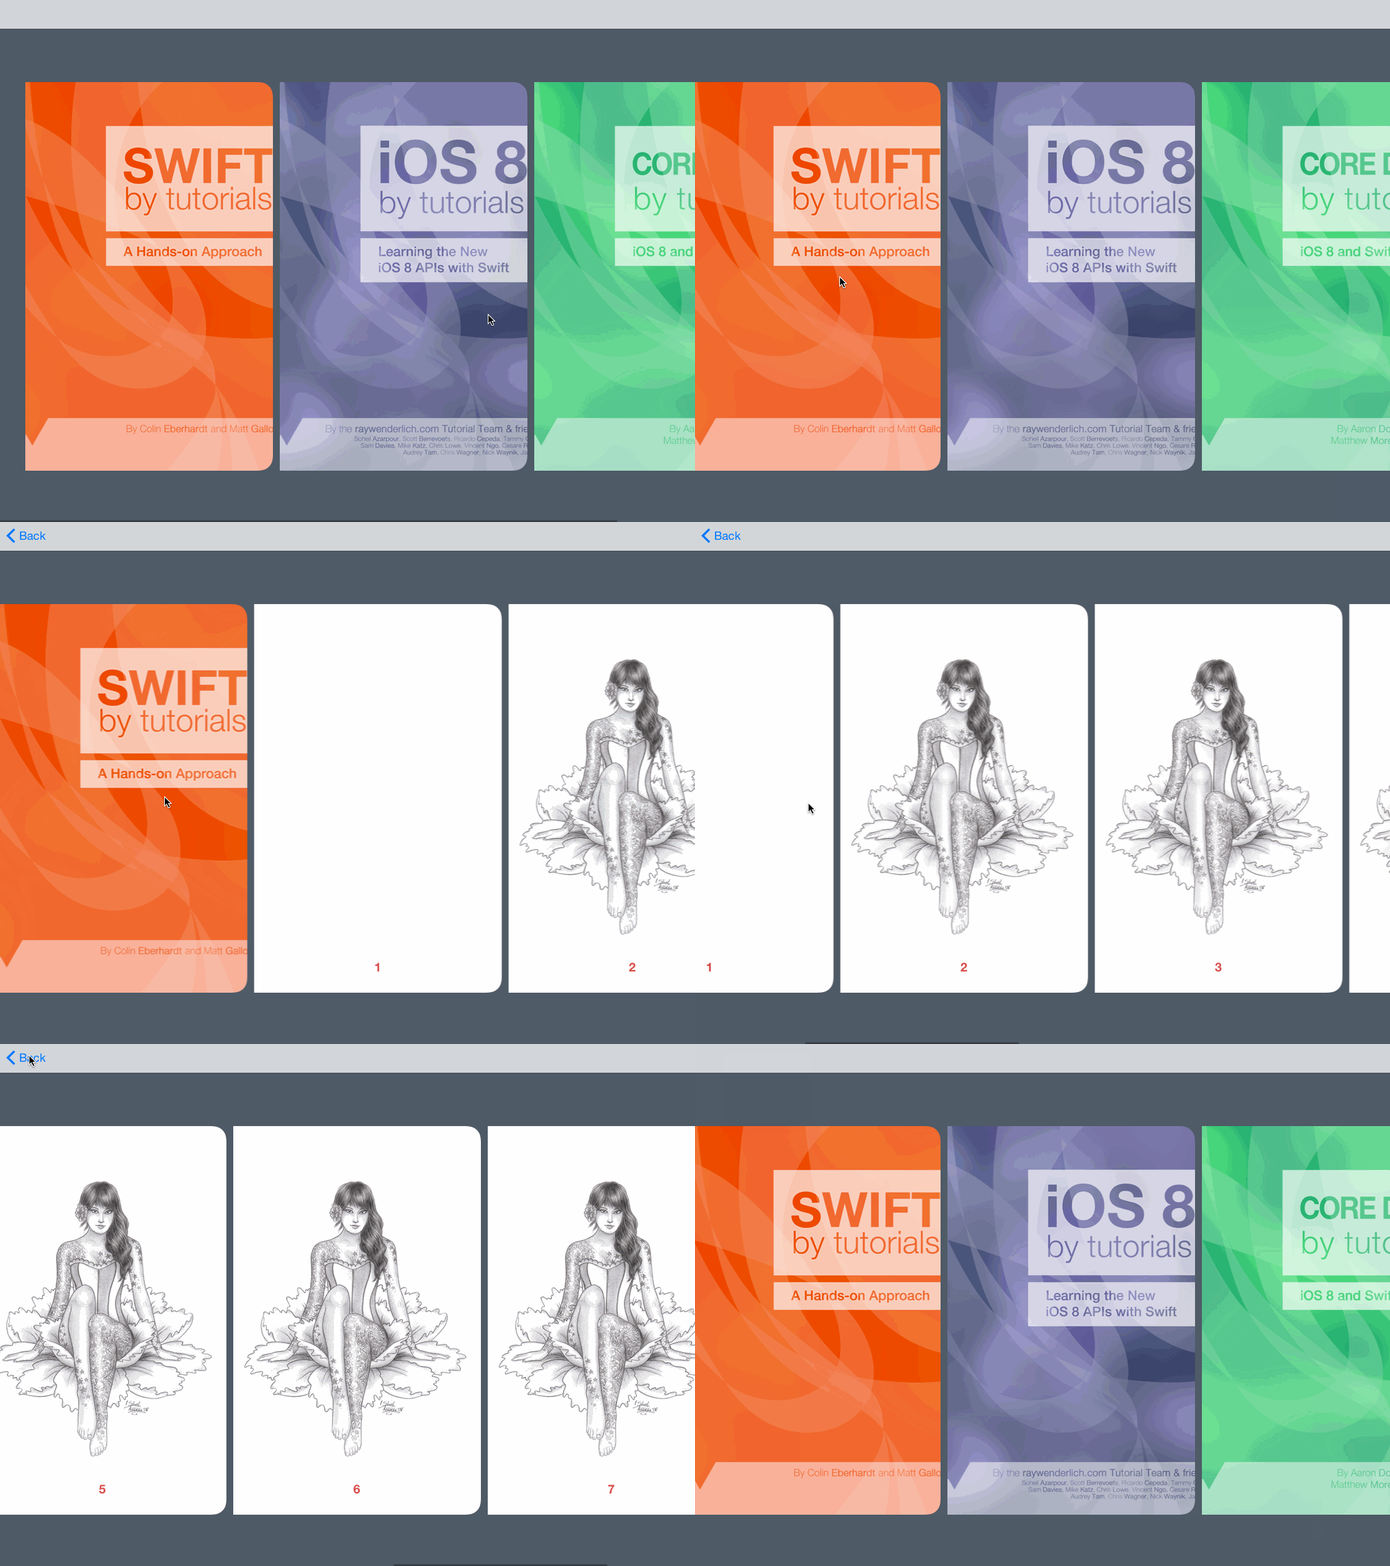
这个 app 已经建立的非常完整了,你可以滚动你的藏书,并从你最喜欢的这些书中选一本阅读。但当你最近一次打开书时,会发现阅读的书时一页挨一页的滚动的吗?对于这样的集合视图,你可以把它做的更加华丽(dress up)!
项目结构
在这里你可以快速浏览一下初始项目的最重要的结构组成:
Data Models文件夹包含三个文件:
- Books.plist 包含示例书本数据。每一本书都包含一张封面图片和一组代表每一页的图片。
- BookStore.swift 是一个单例,在整个 app 运行生命期只创建一次。这个 BookStore 的工作就是从 Books.plist 加载数据来创建 Book 实例。
- Book.swift 是一个储存书本信息的类,存储信息包括书本封面、每页的图片和页数。
在 Books 文件夹中包含两个文件:
- BooksViewController.swift 是
UICollectionViewController的子类,这个类负责水平方向的展示一列书本。 - BookCoverCell.swift 展示所有的书的封面, BooksViewController 会用到它。
在 Book 文件夹中,你可以看到两个文件:
- BookViewController.swift 也是
UICollectionViewController。它是用来展示你在 BooksViewController 中选择的书本中每页的内容的。 - BookPageCell.swift 是在 BookViewController 中用来展示一本书中全部内容的。
这里最后的一个文件夹是 Helper :
- UIImage+Helpers.swift 是 UIImage 一个类别。这个类别包含两个实用的方法,一个是为图片添加圆角,另一个是将图片裁至指定大小。
文档结构就是这样了,是时候写写代码了!
自定义 Book 布局
首先你需要重写 BooksViewController 的集合视图默认布局的方法。现在的布局是展示三个一样大的封面在整个屏幕上。等下你将调整其中的大小,使其看起来更舒服一下,就像下面这样:
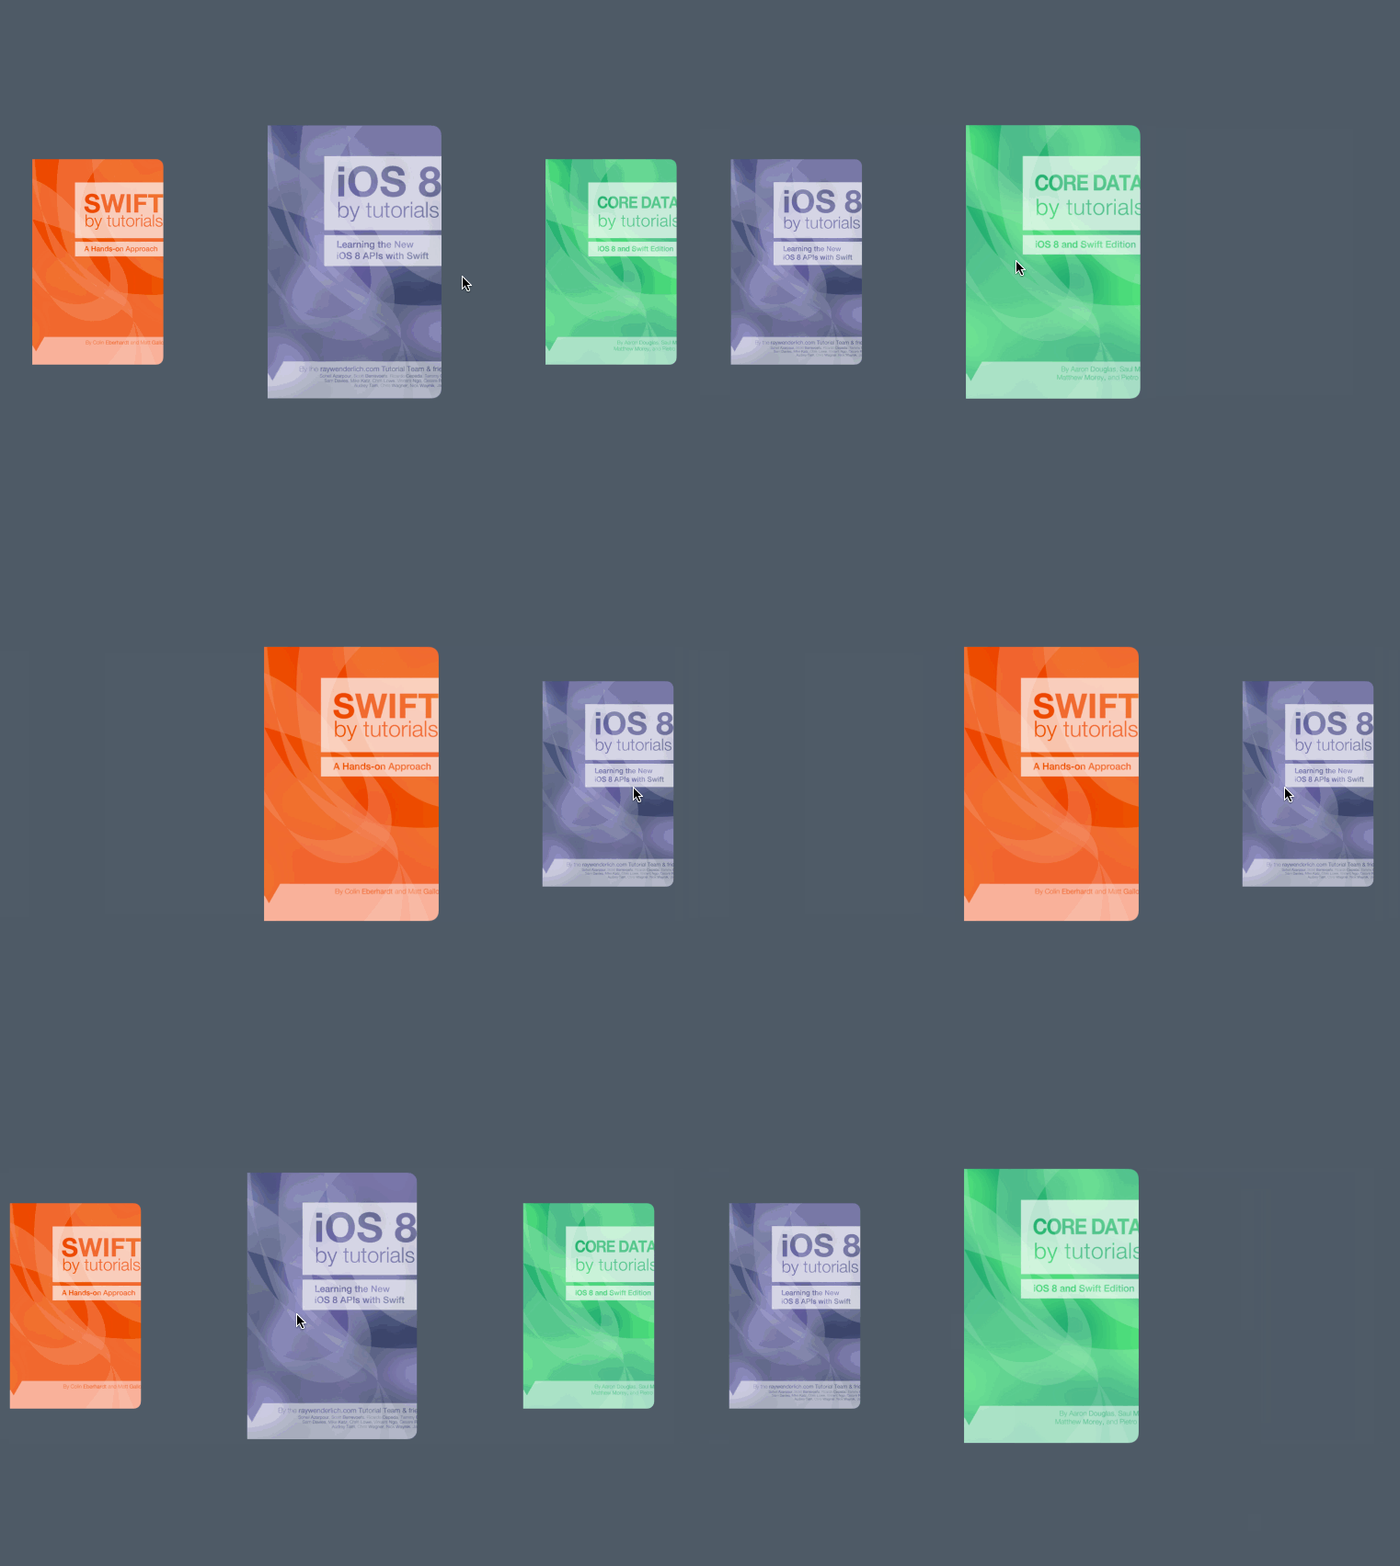
随着你的滑动,最接近中心的封面图片意味着被选中,适当放大一下,继续滑动,书的封面就会随着你滑到边缘慢慢的缩小。
在 App/Books 分组下创建分组,名字为 Layout 。接下来右键 Layout 文件夹,选择 New File… ,之后选择 iOS/Source/Cocoa Touch Class 模版,并点击 Next 。命名为 BooksLayout ,这个是 UICollectionViewFlowLayout 子类,并将 Lanuage 设置为 Swift 。
接下来你需要了解 BooksViewController 的集合视图,来使用你设置的新布局。
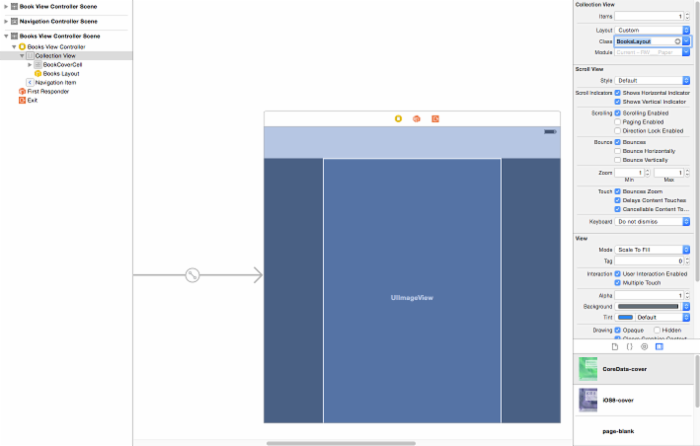
打开 Main.storyboard ,点击 BooksViewController 之后再点击 Collection View 。在 Attributes Inspector ,设置 Layout 为 Custom 并把 Class 设置为 BooksLayout ,就像下图这样:
打开 BooksLayout.swift ,并且在 BooksLayout 类的声明前加上两行代码:
private let PageWidth: CGFloat = 362 private let PageHeight: CGFloat = 568 我们将用这两个常量来设置 Cell 的大小。
现在在这个类的大括号里添加初始化方法:
required init(coder aDecoder: NSCoder) { super.init(coder: aDecoder) scrollDirection = UICollectionViewScrollDirection.Horizontal //1 itemSize = CGSizeMake(PageWidth, PageHeight) //2 minimumInteritemSpacing = 10 //3 } 上面的代码起到了下面三种作用:
- 设置集合视图的滚动视图的方向为水平。
- 设置 cell 的页的宽高分别为 362 、 568。
- 设置 cell 之间的最小空白(间距)为 10。
接下来在 init(coder:) 下面添加这些代码:
override func prepareLayout() { super.prepareLayout() //The rate at which we scroll the collection view. //1 collectionView?.decelerationRate = UIScrollViewDecelerationRateFast //2 collectionView?.contentInset = UIEdgeInsets( top: 0, left: collectionView!.bounds.width / 2 - PageWidth / 2, bottom: 0, right: collectionView!.bounds.width / 2 - PageWidth / 2 ) } prepareLayout() 方法给你一个机会--在处理每个 cell 的布局信息前,预先处理一些布局的计算。
每个数字标记下面分别是如下功能:
- 设置在用户离开他们手指后,集合视图滑动的速度。通过设置他的 `UIScrollViewDecelerationRateFast ,滚动视图速度会减的很快。尝试一下 Normal 和 Fast 来看看不同的效果吧!
- 设置集合视图的内容大小以便于第一个书的封面总是在中心。
现在你需要处理每个 cell 的布局情况:
在 prepareLayout() 下面添加如下代码:
override func layoutAttributesForElementsInRect(rect: CGRect) -> [AnyObject]? { //1 var array = super.layoutAttributesForElementsInRect(rect) as! [UICollectionViewLayoutAttributes] //2 for attributes in array { //3 var frame = attributes.frame //4 var distance = abs(collectionView!.contentOffset.x + collectionView!.contentInset.left - frame.origin.x) //5 var scale = 0.7 * min(max(1 - distance / (collectionView!.bounds.width), 0.75), 1) //6 attributes.transform = CGAffineTransformMakeScale(scale, scale) } return array } layoutAttributesForElementsInRect(_:) 返回一个 UICollectionViewLayoutAttributes 对象的数组,它提供了每个 cell 的属性特征。
- 调用父类的
layoutAttributesForElementsInRect获取每个 cell 的默认布局属性的数组。 - 遍历数组中的每个属性特征。
- 获取当前 cell 的框架大小。
- 计算封面(也就是 cell )到屏幕中心的距离。
- 通过封面到屏幕中心的距离来获取一个 0.75 到 1 的一个因数。然后还应该乘上一个 0.7 确保他们的大小合适。
- 最后,应用这个封面的尺寸大小。
接下来,在 layoutAttributesForElementsInRect(_:) 后面添加如下代码:
override func shouldInvalidateLayoutForBoundsChange(newBounds: CGRect) -> Bool { return true } 返回 true 来强迫每次集合视图的视图范围的改变时,都去重新计算每个 cell 的布局属性。当滑动的时候, UICollectionView 会改变他的视图范围,这是重新计算 cell 的布局属性的最佳时机。
编译并运行你的应用,你将会看到中间的视图会比其他的大一些:
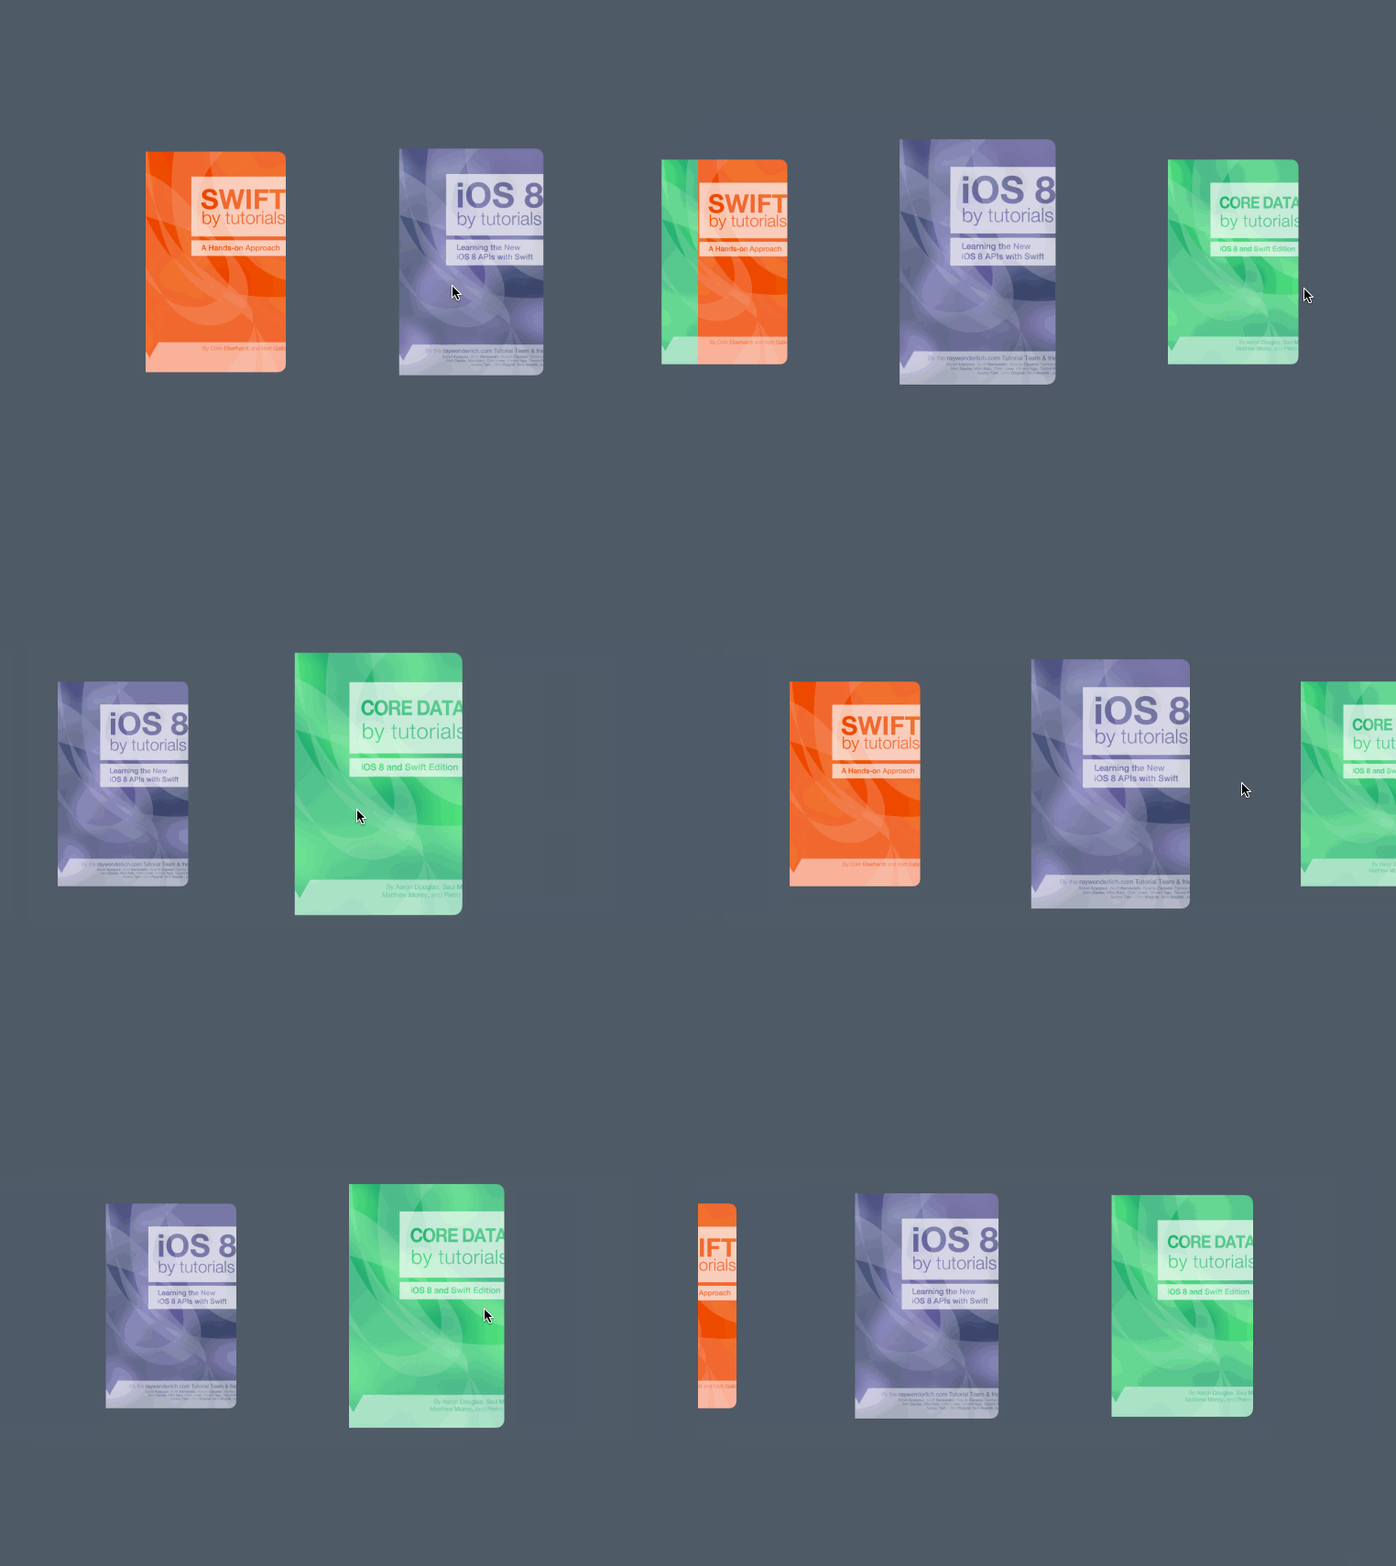
滑动这些书去看每本书是如何变大变小的。但如果能一本书停在中间的地方,表明选择的是这本书,效果是不是更好呢?
用接下来的方法你将会添加这样的效果!
选中某一本书
targetContentOffsetForProposedContentOffset(_:withScrollingVelocity:) 确定集合视图将会在哪里停止滑动,然后返回一个人为设定的位置来设定集合视图的 contentOffset 。如果你不想重写这个方法,只需要返回默认的 offset 。
在 shouldInvalidateLayoutForBoundsChange(_:) 后面添加如下代码:
override func targetContentOffsetForProposedContentOffset(proposedContentOffset: CGPoint, withScrollingVelocity velocity: CGPoint) -> CGPoint { // Snap cells to centre //1 var newOffset = CGPoint() //2 var layout = collectionView!.collectionViewLayout as! UICollectionViewFlowLayout //3 var width = layout.itemSize.width + layout.minimumLineSpacing //4 var offset = proposedContentOffset.x + collectionView!.contentInset.left //5 if velocity.x > 0 { //ceil returns next biggest number offset = width * ceil(offset / width) } else if velocity.x == 0 { //6 //rounds the argument offset = width * round(offset / width) } else if velocity.x < 0 { //7 //removes decimal part of argument offset = width * floor(offset / width) } //8 newOffset.x = offset - collectionView!.contentInset.left newOffset.y = proposedContentOffset.y //y will always be the same... return newOffset } 这是如何计算用手指滑动一下,书的封面所预期停止的位置:
- 创建一个新的
CGPoint变量newOffset。 - 获取当前视图的布局。
- 获取 cell 的完整宽度。
- 计算当前的 offset 来处理屏幕中心的位置。
- 如果
velocity.x > 0,说明用户是在向右滑动。把offset/width作为你打算滑动到的位置。 - 如果
velocity.x = 0,说明用户并没有足够的滑动,应该保持选择同样的一本书。 - 如果
velocity.x < 0,说明用户在向左滑动。 - 更新
x方向的位置,并返回。这就保证了总有一本书都会在正中间。
编译并运行你的应用,再一次滑动他们,你将会注意到总有一本书是在中间显示的:
为了完成这个布局,你需要创建一个机制(mechanism)来限定(restrict)只能点击中间的书。而现在你能点击任何位置。
打开 BooksViewController.swift ,并在 // MARK: Helpers: 注释下面添加如下代码:
func selectedCell() -> BookCoverCell? { if let indexPath = collectionView?.indexPathForItemAtPoint(CGPointMake(collectionView!.contentOffset.x + collectionView!.bounds.width / 2, collectionView!.bounds.height / 2)) { if let cell = collectionView?.cellForItemAtIndexPath(indexPath) as? BookCoverCell { return cell } } return nil } selectedCell() 总是会返回中间的 cell 。
然后在用下面的代码替换 openBook(_:) 方法:
func openBook() { let vc = storyboard?.instantiateViewControllerWithIdentifier("BookViewController") as! BookViewController vc.book = selectedCell()?.book // UICollectionView loads it's cells on a background thread, so make sure it's loaded before passing it to the animation handler dispatch_async(dispatch_get_main_queue(), { () -> Void in self.navigationController?.pushViewController(vc, animated: true) return }) } 简单的使用这个新的 selectedCell 方法,
接下来,将 collectionView(_:didSelectItemAtIndexPath:) 方法替换成如下样子:
override func collectionView(collectionView: UICollectionView, didSelectItemAtIndexPath indexPath: NSIndexPath) { openBook() } 简单的代码改动让你打开一本对应索引的书,现在你总是会打开屏幕上中间的那本书。
编译并运行你的应用,你将注意到总是会打开在视图中心的书。
你现在已经完成了 BooksLayout 。是时候让屏幕上的书更真实一点了,让用户可以翻开书本的下一页。
书本翻页布局
这是你最终要完成的效果:

现在看起来更像一本书了!:]
在 Book 分组下面创建一个名字为 Layout 分组。接下来,右键 Layout 文件夹并选择 New File… ,之后选择 iOS/Source/Cocoa Touch Class 模版,并点击 Next 。创建一个 UICollectionViewFlowLayout 的子类 BookLayout , Language 选择 Swift 。
在开始之前,你书本的集合视图需要选择这个新的布局。打开 Main.stroyboard 并选择 Book View Controller Scene 。选择这个集合视图,设置 Layout 为 Custom 。最后,设置布局的 Class 为 BookLayout 。如下所示:
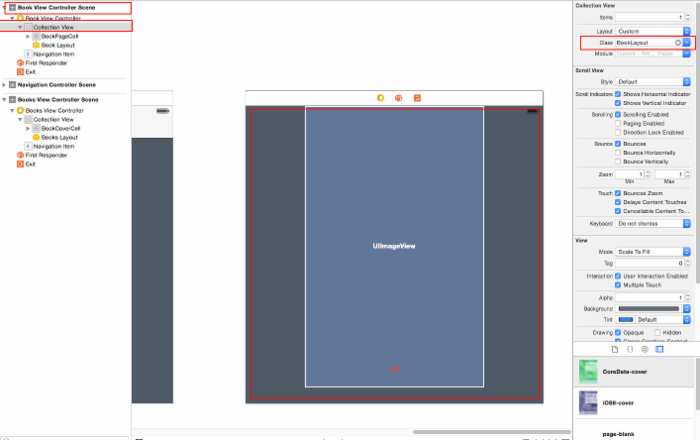
打开 BookLayout.swift ,并在 BookLayout 类声明前面添加如下代码:
private let PageWidth: CGFloat = 362 private let PageHeight: CGFloat = 568 private var numberOfItems = 0 你将使用这些常量设置每个 cell 的大小,还有你将需要记录这本书的全部页数。
接下来,在类的声明里面添加如下代码:
override func prepareLayout() { super.prepareLayout() collectionView?.decelerationRate = UIScrollViewDecelerationRateFast numberOfItems = collectionView!.numberOfItemsInSection(0) collectionView?.pagingEnabled = true } 这个类似你在 BooksLayout 中写的代码,只有几点不同:
- 设置减速的等级
UIScrollViewDecelerationRateFast,来让滑动的视图很快停下来。 - 获取当前书本的页数。
- 开启分页功能。这个可以修正多个集合视图框架的宽的问题(代替了默认的连续滚动)。
接着在 BookLayout.swift 添加如下代码:
override func shouldInvalidateLayoutForBoundsChange(newBounds: CGRect) -> Bool { return true } 同样的,返回 true 来让用户每次滑动的时候都去更新布局。
接着,通过重写 collectionViewContentSize() 方法设置集合视图的内容大小:
override func collectionViewContentSize() -> CGSize { return CGSizeMake((CGFloat(numberOfItems / 2)) * collectionView!.bounds.width, collectionView!.bounds.height) } 这个方法返回重写的内容大小。高总是保持不变,而重写了每个项目的宽,也就是每一页,将其分成每页占半个屏幕大小。这样就把整本书分成了两个部分,一边一页。整个内容包含两页。
就像之前的 BooksLayout ,你需要重写 layoutAttributesForElementsInRect(_:) 方法,以便你可以给你的 cell 添加出来分页的特效。
在 collectionViewContentSize() 后面添加如下代码:
override func layoutAttributesForElementsInRect(rect: CGRect) -> [AnyObject]? { //1 var array: [UICollectionViewLayoutAttributes] = [] //2 for i in 0 ... max(0, numberOfItems - 1) { //3 var indexPath = NSIndexPath(forItem: i, inSection: 0) //4 var attributes = layoutAttributesForItemAtIndexPath(indexPath) if attributes != nil { //5 array += [attributes] } } //6 return array } 不再像 BooksLayout 中需要计算属性值那样,你还有一个方法 layoutAttributesForItemAtIndexPath(_:) 没有完成,一个实现在任何特定的时间都在可见区域中中包含所有的 cell。
这里一行一行的解释:
- 创建一个新的数组来保存
UICollectionViewLayoutAttributes。 - 遍历集合视图的全部项目(也就是每一页)。
- 为每一个集合视图里的项目创建一个
NSIndexPath。 - 获取当前
indexPath对应的属性,等下你就会去重写layoutAttributesForItemAtIndexPath(_:)方法。 - 添加属性特征到数组中。
- 返回全部 cell 的属性特征。
处理翻页的几何效果
在你直接实现 layoutAttributesForItemAtIndexPath(_:) 之前,花一分钟思考(consider)布局问题,该如何实现,如果你能写出任何有帮助的方法,学习的一定会更好更标准化(modular)。:]

Spine 书脊 Ratio 比率
上面的图解(diagram)展示出每一页对应着书脊的旋转角度。这个图解上的比率是从 -1.0 到 1.0 。为什么?来,想象一本书放在桌子上,书脊代表 0.0 。随着你将一页从左翻到右,这个“翻转”的比率从 -1.0(完全在左边)到 1.0(完全在右边)。
因此,你可以用一下的比率代表书页的翻转程度:
- 0.0 代表这一页是 90 度,垂直(perpendicular )于桌子。
- +/- 0.5 代表这一页和桌子的夹角是 45 度。
- +/- 1.0 代表这一页平行于桌子。
注意这个角度是指自右向左的方向,也就是逆时针方向(counterclockwise),符号代表着翻转比率的方向。
首先,首先在 layoutAttributesForElementsInRect(_:) 后面添加一个辅助方法:
//MARK: - Attribute Logic Helpers func getFrame(collectionView: UICollectionView) -> CGRect { var frame = CGRect() frame.origin.x = (collectionView.bounds.width / 2) - (PageWidth / 2) + collectionView.contentOffset.x frame.origin.y = (collectionViewContentSize().height - PageHeight) / 2 frame.size.width = PageWidth frame.size.height = PageHeight return frame } 对于每一页,你都要考虑框架中间到集合视图的距离。 getFrame(_:) 将会对齐每页边缘对于书脊的距离。这个唯一的变量用来改变视图 offset 的 x 方向的偏移量。
接下来,在 getFrame(_:) 后面添加如下方法:
func getRatio(collectionView: UICollectionView, indexPath: NSIndexPath) -> CGFloat { //1 let page = CGFloat(indexPath.item - indexPath.item % 2) * 0.5 //2 var ratio: CGFloat = -0.5 + page - (collectionView.contentOffset.x / collectionView.bounds.width) //3 if ratio > 0.5 { ratio = 0.5 + 0.1 * (ratio - 0.5) } else if ratio < -0.5 { ratio = -0.5 + 0.1 * (ratio + 0.5) } return ratio } 这个方法计算书页的翻转 比率 。依次解释标记部分:
- 计算书中某一页是第几页--要记住一页书是分了两边的。乘上 0.5 得到正确的页数。
- 通过翻转的程度的百分比计算
ratio。 - 你需要限定翻转比率在 -0.5 到 0.5 之间。乘上 0.1 为每一页之间创建一个间隙,这样就得到一个每页之间重叠在一起的效果。
在你计算完了这个比率以后,你就可以用它来计算正在翻过去的那一页的角度了。
在 getRatio(_:indexPath:) 后面添如下方法:
func getAngle(indexPath: NSIndexPath, ratio: CGFloat) -> CGFloat { // Set rotation var angle: CGFloat = 0 //1 if indexPath.item % 2 == 0 { // The book's spine is on the left of the page angle = (1-ratio) * CGFloat(-M_PI_2) } else { //2 // The book's spine is on the right of the page angle = (1 + ratio) * CGFloat(M_PI_2) } //3 // Make sure the odd and even page don't have the exact same angle angle += CGFloat(indexPath.row % 2) / 1000 //4 return angle } 这里有一点数学知识,但只要耐心的理解一下,就很容易搞定:
- 检查当前页面是不是偶数(even)。如果是偶数,说明这一页在书脊的右边。当把某一页翻到书脊的右边,旋转的是一个逆时针,所以当页是在书脊右边时,说明它有一个负角度。别忘了加上刚刚的 -0.5 到 0.5 的翻转程度处理。
- 如果当前页面是奇数(odd),说明这一页在书脊左边。某一页翻转到左边是一个顺时针,所以在书脊左边的页有一个正角度。
- 为每一页多添加一点点的角度,确保每一页都是分离开的。
- 返回这个用于旋转的角度。
一旦你有了这个角度,你需要对每一页进行转换。添加如下代码:
func makePerspectiveTransform() -> CATransform3D { var transform = CATransform3DIdentity transform.m34 = 1.0 / -2000 return transform } 修改转换中的 m34 属性,为每一页添加一点点透视效果。
现在可以使用这个角度了,添加如下代码:
func getRotation(indexPath: NSIndexPath, ratio: CGFloat) -> CATransform3D { var transform = makePerspectiveTransform() var angle = getAngle(indexPath, ratio: ratio) transform = CATransform3DRotate(transform, angle, 0, 1, 0) return transform } 现在你使用了两个预处理方法计算这个转换和角度,并创建一个 CATransform3D 应用在每一页的 y 轴上。
现在,你已经写好了所有的处理方法,最后要做的就是开始为每个 cell 创建属性。在 layoutAttributesForElementsInRect(_:) 后面添加如下代码:
override func layoutAttributesForItemAtIndexPath(indexPath: NSIndexPath) -> UICollectionViewLayoutAttributes! { //1 var layoutAttributes = UICollectionViewLayoutAttributes(forCellWithIndexPath: indexPath) //2 var frame = getFrame(collectionView!) layoutAttributes.frame = frame //3 var ratio = getRatio(collectionView!, indexPath: indexPath) //4 if ratio > 0 && indexPath.item % 2 == 1 || ratio < 0 && indexPath.item % 2 == 0 { // Make sure the cover is always visible if indexPath.row != 0 { return nil } } //5 var rotation = getRotation(indexPath, ratio: min(max(ratio, -1), 1)) layoutAttributes.transform3D = rotation //6 if indexPath.row == 0 { layoutAttributes.zIndex = Int.max } return layoutAttributes } 你需要为你的集合视图中每个 cell 都调用这个方法:
- 通过 cell 的索引创建一个
UICollectionViewLayoutAttributes对象。 - 使用
getFrame方法来设置属性,确保 cell 一定是被约束在书脊上。 - 使用
getRatio方法来计算集合视图中的一个项目的翻转比率,在很早之前你就已经写好了这个方法了。 - 检查当前页面是否在翻转比率范围内,如果不是,就不展示这个 cell 。为了最好的(optimization)效果(也是由于更一般的感觉),你不应该展示某一页的背面,而只是前面,除非这页是书的封面,是一直都要展示出来的。
- 用得到的翻转比率获得角度和变形情况。
- 检查当前
indexPath是不是第一页。如果是,确保zIndex总是在其他页的上面,避免出现闪烁(flickering)的情况。
编译并运行你的应用,打开你的一本书,点击(flip)它,我勒个去?怎么回事?

这些页好像被固定(anchored)在了他们中心,而不是在边缘!
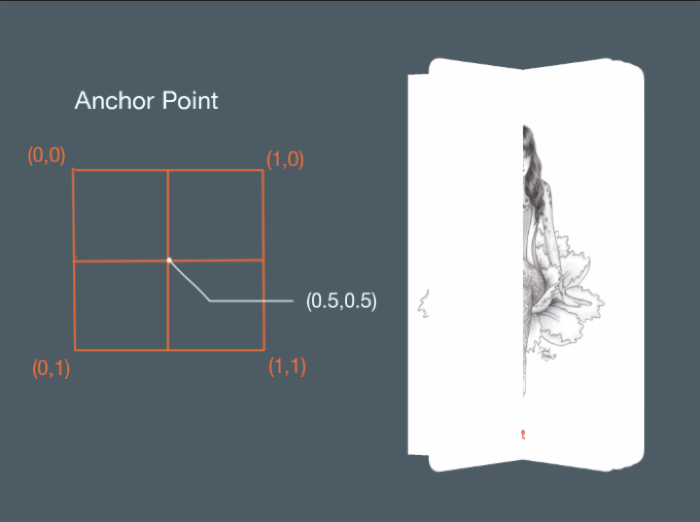
在这个图解上,可以看到每一页的固定点都在 x 和 y 的 0.5 倍地方。你能告诉我你需要做些什么就可以修复这个吗?
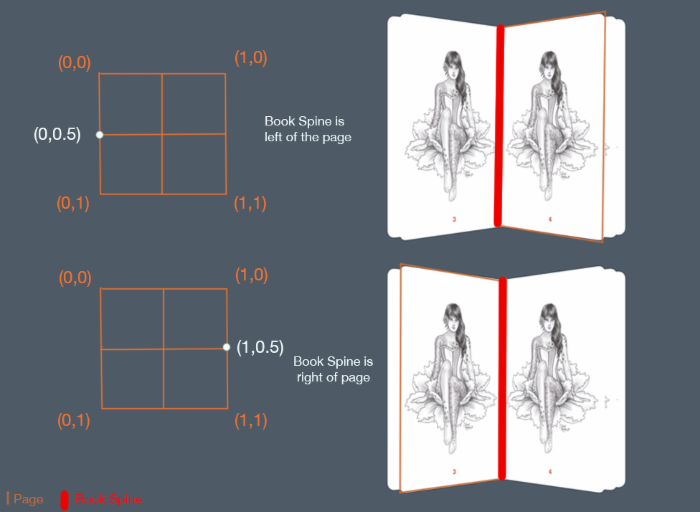
这里很清楚的展示了你需要改变的某一页的固定点对应着的边缘位置。如果这一页是在书的右手边,这个固定的应该是 (0, 0.5) 。而当这一页在左手边的时候,固定点应该改成 (1, 0.5) 。
打开 BookPageCell.swift 并添加如下代码:
override func applyLayoutAttributes(layoutAttributes: UICollectionViewLayoutAttributes!) { super.applyLayoutAttributes(layoutAttributes) //1 if layoutAttributes.indexPath.item % 2 == 0 { //2 layer.anchorPoint = CGPointMake(0, 0.5) isRightPage = true } else { //3 //4 layer.anchorPoint = CGPointMake(1, 0.5) isRightPage = false } //5 self.updateShadowLayer() } 这里重写了 applyLayoutAttributes(_:) 方法,这个应用的布局属性创建在 BokLayout .
代码非常直观:
- 检查当前 cell 是不是偶数。如果是,就说明书脊在它的左边。
- 设置在左边的 cell 的固定点,并且设置
isRightPage为true。这个变量会帮助你确定当前页面边缘弧度。 - 如果当前 cell 是奇数,那就说明书脊在他的右边。
- 设置右边的 cell 的固定点,并设置
isRightPage为false。 - 最后,更新当前页面的阴影图层。
编译并运行你的应用,点击进入书的内容部分,现在这些看起来就好一些了:
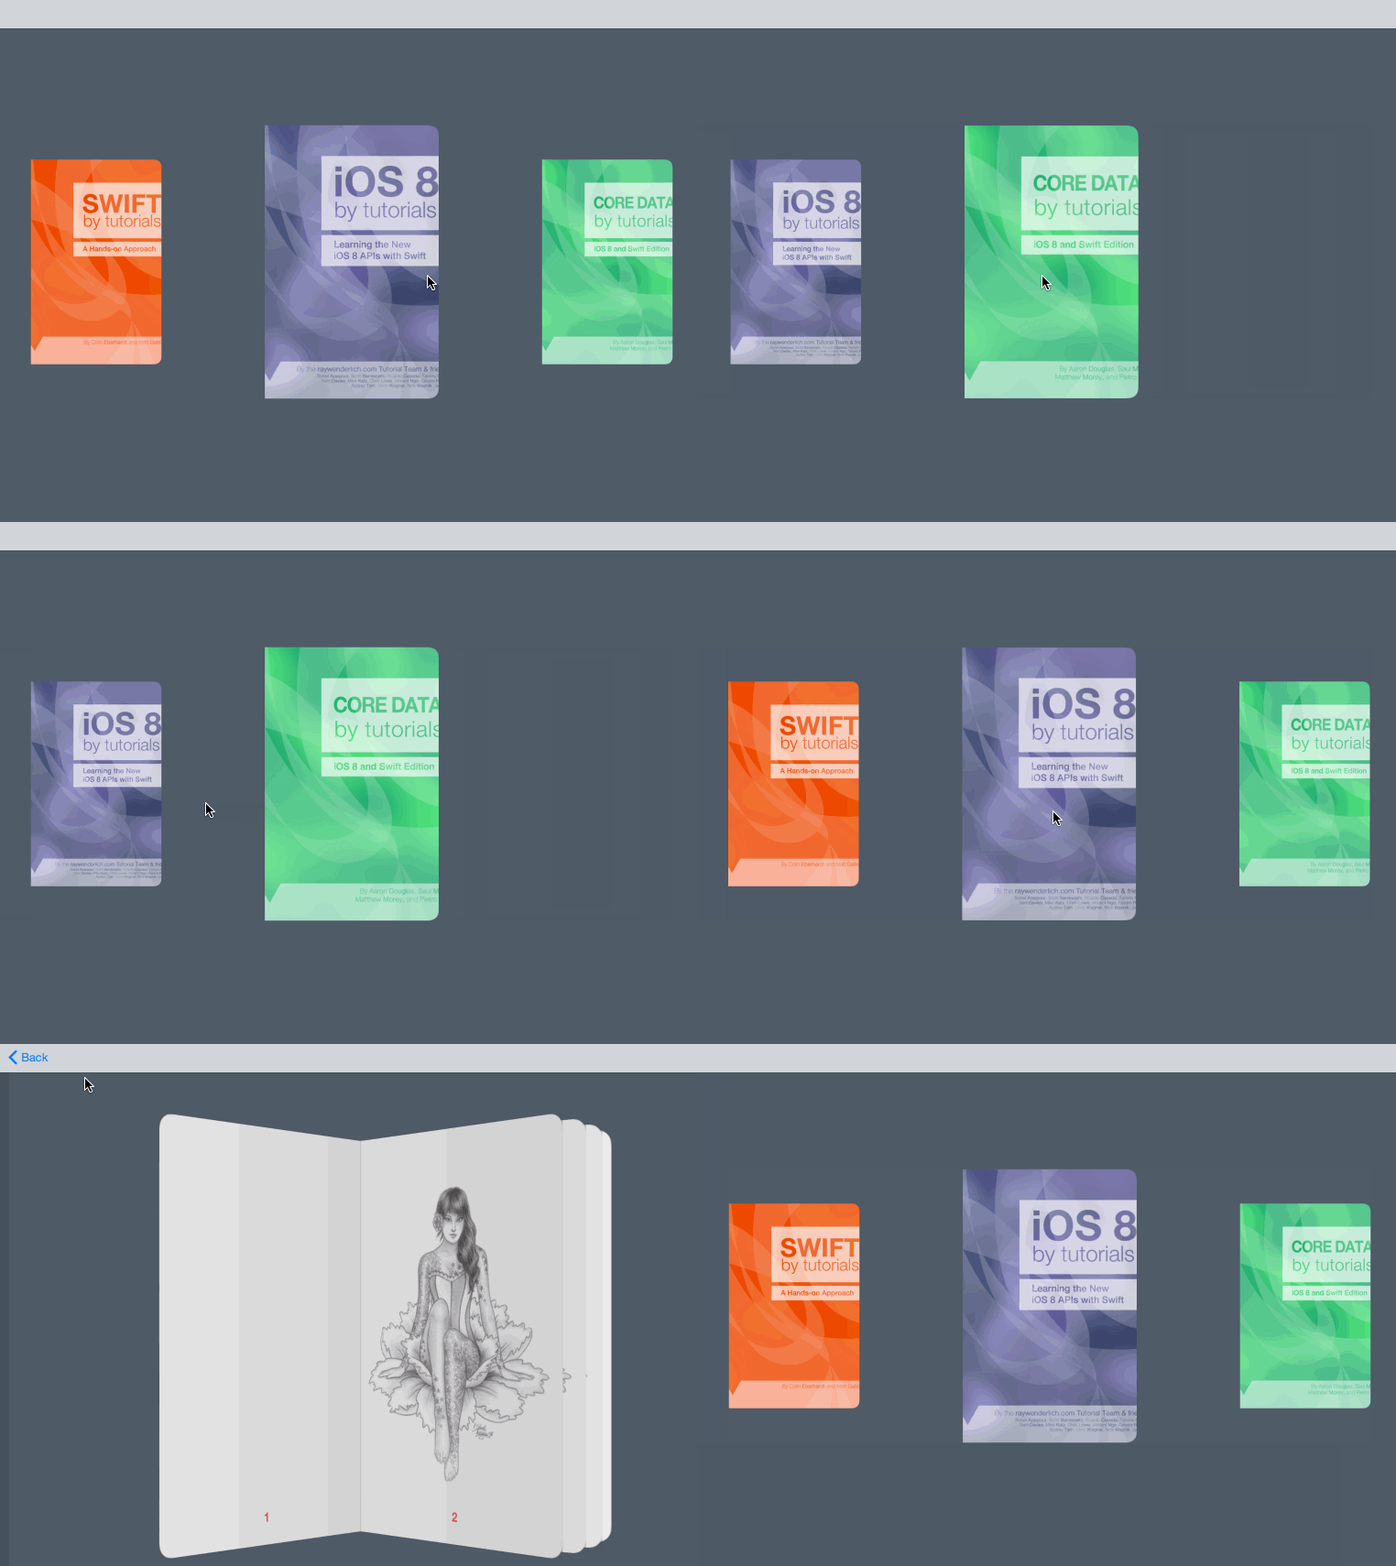
以上就是这次指导的第一部分了!是时候感到自豪了,你现在创建好的这个效果的确很酷很完美!:]
接下来做什么?
你可以下载这个 第一部分的完成项目 ,这里包含了这个项目的全部源码。
现在你已经开始学习了集合视图的默认布局,并且学习了如何自定义一个新的布局,来让效果变的更加真实!很多人就会在使用这款应用时,感觉到是他们点进了一本真实的书。这里所做的事情,就是把一款阅读类应用做的跟真实的阅读体验一样。
然而,不能这样就算了!你将会在这个教程的 第二部分 中做出更有感觉的效果,在这部分你将会去探索自定义的变换,来应用在打开和关闭书籍上面。
你是否在你做的这个应用中有一些布局方面的灵感了?如果你对本次指导有什么疑问、意见或者想法,请在下面一起讨论吧!
最后补充:
译者注:译者在这里认为在 openBook 方法中,不应该是点击其他的书,打开的都是中间的书,这样反而怪怪的,我们可以更改 openBook 方法为 openWithIndexPath() ,这样实现的效果是点击其他的书,这本书滑动到中间来。译者认为这样的效果应该更符合人们的正常感觉。
以下是相关代码:
func openBookWithIndexPath(indexPath : NSIndexPath) { let middleIndexPath = collectionView?.indexPathForItemAtPoint(CGPointMake(collectionView!.contentOffset.x + collectionView!.bounds.width / 2, collectionView!.bounds.height / 2)) if middleIndexPath?.row == indexPath.row { let vc = storyboard?.instantiateViewControllerWithIdentifier("BookViewController") as! BookViewController vc.book = selectedCell()?.book // UICollectionView loads it's cells on a background thread, so make sure it's loaded before passing it to the animation handler dispatch_async(dispatch_get_main_queue(), { () -> Void in self.navigationController?.pushViewController(vc, animated: true) return }) } else if middleIndexPath?.row < indexPath.row { collectionView?.setContentOffset(CGPointMake(collectionView!.contentOffset.x + 362 + 10, collectionView!.contentOffset.y), animated: true) } else if middleIndexPath?.row > indexPath.row { collectionView?.setContentOffset(CGPointMake(collectionView!.contentOffset.x - 362 - 10, collectionView!.contentOffset.y), animated: true) } } 注意替换 delegate 中的方法:
override func collectionView(collectionView: UICollectionView, didSelectItemAtIndexPath indexPath: NSIndexPath) { openBookWithIndexPath(indexPath) } 这里只是简单利用之前的代码实现一下,如果你有更好的方法,可以在下面评论交流哦。


![[HBLOG]公众号](https://www.liuhaihua.cn/img/qrcode_gzh.jpg)

