tomcat源码分析(第二篇 tomcat启动过程详解)
大家都知道,每一个应用程序都有一个唯一的入口(即main函数),那么对于Java语言开发的tomcat服务器也不例外,找到这个入口,了解各个组件加载的具体过程,对理解整个应用的实现过程有很大的帮助。 tomcat启动相关的类位于catalina.startup包路径下,入口是类Bootstrap中的main()函数。Bootstrap启动类主要完成了三方面的内容,分别如下:
①在静态代码块中设置catalinaHome和catalinaBase两个路径;
②common、server、shared三个类加载器的初始化;
③利用反射机制实例化org.apache.catalina.startup.Catalina类。
一、设置catalinaHome和catalinaBase
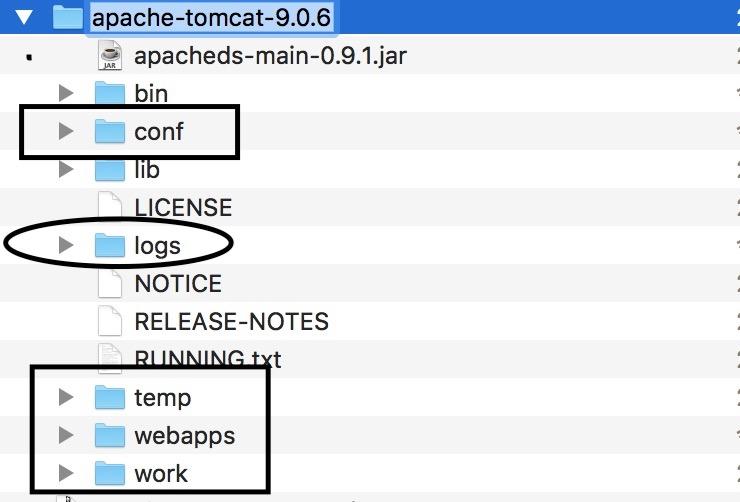
catalinaHome是tomcat的安装目录,catalinaBase是tomcat的工作目录;这两个目录的主要功能是当在同一台机器上部署多个tomcat实例时,可以不用安装多个tomcat副本,而是通过共享tomcat代码的方式实现。例如在同一台机器上部署两个tomcat实例时,只需要创建两个base目录,base1和base2,然后将tomcat安装目录下的共享目录拷贝到这两个目录下。分别修改conf目录下的server.xml文件中的端口号,就可以同时启动两个tomcat服务器,此时tomcat安装目录(即tomcatHome)下的bin和lib目录是共享的。
代码清单(Bootstrap中设置catalinaHome和catalinaBase的代码)
static {
        //获取tomcat的安装目录
        String userDir = System.getProperty("user.dir");
        String home = System.getProperty(Globals.CATALINA_HOME_PROP);
        File homeFile = null;
        if (home != null) {
            File f = new File(home);
            try {
                homeFile = f.getCanonicalFile();
            } catch (IOException ioe) {
                homeFile = f.getAbsoluteFile();
            }
        }

        if (homeFile == null) {
            //bootstrap.jar的根目录,其实就是tomcat按照路径下的bin文件夹
            File bootstrapJar = new File(userDir, "bootstrap.jar");
            if (bootstrapJar.exists()) {
                File f = new File(userDir, "..");
                try {
                    homeFile = f.getCanonicalFile();
                } catch (IOException ioe) {
                    homeFile = f.getAbsoluteFile();
                }
            }
        }

        if (homeFile == null) {
            // Second fall-back. Use current directory
            File f = new File(userDir);
            try {
                homeFile = f.getCanonicalFile();
            } catch (IOException ioe) {
                homeFile = f.getAbsoluteFile();
            }
        }

        catalinaHomeFile = homeFile;
        System.setProperty(
                Globals.CATALINA_HOME_PROP, catalinaHomeFile.getPath());

        // Then base
        String base = System.getProperty(Globals.CATALINA_BASE_PROP);
        if (base == null) {
            catalinaBaseFile = catalinaHomeFile;
        } else {
            File baseFile = new File(base);
            try {
                baseFile = baseFile.getCanonicalFile();
            } catch (IOException ioe) {
                baseFile = baseFile.getAbsoluteFile();
            }
            catalinaBaseFile = baseFile;
        }
        System.setProperty(
                Globals.CATALINA_BASE_PROP, catalinaBaseFile.getPath());
    }
二、初始化类加载器 common、server、shared

tomcat自定义的类加载器主要有三类:common、server和shared,用来加载不同位置的类和jar文件,实现不同web应用程序以及tomcat系统之间类文件的分离和共享。主要解决的问题有:部署在同一个tomcat服务器上多个web应用程序所使用的Java类库可以实现相互分离(同一个类库的不同版本);部署在同一个tomcat服务器上多个web应用程序所使用的Java类库可以实现相互共享;服务器保证自身的安全不受部署的web应用程序的影响(tomcat系统类只能通过server类加载器加载,web应用程序由shared类加载器下的WebAppClassLoader加载);实现HotSwap功能(通过替换JsperLoader类加载器实现)。
commonClassLoader
commonClassLoader在catalina.properties中的定义是: common.loader="${catalina.base}/lib","${catalina.base}/lib/*.jar","${catalina.home}/lib","${catalina.home}/lib/*.jar" 可以看出它加载的类库是catalina.base和catalina.home下lib中的文件。common是服务器和web应用程序共用的类加载器,也是server和shared的父加载器。在Bootstrap中的实现如下
private void initClassLoaders() {
        try {
            commonLoader = createClassLoader("common", null);
            if( commonLoader == null ) {
                commonLoader=this.getClass().getClassLoader();
            }
            catalinaLoader = createClassLoader("server", commonLoader);  //设置commonLoader为catalinaLoader和sharedLoader的父加载器。
            sharedLoader = createClassLoader("shared", commonLoader);
        } catch (Throwable t) {
            handleThrowable(t);
            log.error("Class loader creation threw exception", t);
            System.exit(1);
        }
    }
继续跟踪createClassLoader的源码如下:
private ClassLoader createClassLoader(String name, ClassLoader parent)
        throws Exception {
        String value = CatalinaProperties.getProperty(name + ".loader");
        if ((value == null) || (value.equals("")))
            return parent;
        value = replace(value);
        List<Repository> repositories = new ArrayList<>();
        String[] repositoryPaths = getPaths(value);
        for (String repository : repositoryPaths) {
            try {
                @SuppressWarnings("unused")
                URL url = new URL(repository);
                repositories.add(new Repository(repository, RepositoryType.URL));
                continue;
            } catch (MalformedURLException e) {
                // Ignore
            }
            if (repository.endsWith("*.jar")) {
                repository = repository.substring
                    (0, repository.length() - "*.jar".length());
                repositories.add(new Repository(repository, RepositoryType.GLOB));
            } else if (repository.endsWith(".jar")) {
                repositories.add(new Repository(repository, RepositoryType.JAR));
            } else {
                repositories.add(new Repository(repository, RepositoryType.DIR));
            }
        }

        return ClassLoaderFactory.createClassLoader(repositories, parent);
    }
catalinaClassLoader
catalinaClassLoader在catalina.properties中设置的路径为空 server.loader= ,所以它的类加载路径和它的父加载器commonClassLoader一样。初始化catalinaClassLoader后在init方法中设置为当前线程的类加载器,然后完成对rg.apache.catalina.startup.Catalina类的加载。
Thread.currentThread().setContextClassLoader(catalinaLoader);
 SecurityClassLoad.securityClassLoad(catalinaLoader);
 Class<?> startupClass = catalinaLoader.loadClass("org.apache.catalina.startup.Catalina");
sharedClassLoader
catalinaClassLoader在catalina.properties中设置的路径也为空,所以其默认类加载路径和它的父加载器commonClassLoader一样。
利用反射机制实例化org.apache.catalina.startup.Catalina类
Catalina类在tomcat启动中有着比较重要的作用,作为tomcat生命周期的一个开始类,Catalina主要职责是解析server.xml文件,完成Server,Service,Connector等组件的启动和关闭,接受tomcat停止指令,关闭tomcat服务器。在Bootstrap中通过反射机制生成org.apache.catalina.startup.Catalina实例,代码如下
Class<?> startupClass = catalinaLoader.loadClass("org.apache.catalina.startup.Catalina");
    Object startupInstance = startupClass.getConstructor().newInstance();
在Catalina类中是通过创建Digester的方式解析server.xml并且生成Server,Service,Connector和Container实例的,xml中只配置了Engine和Host两种Container。
protected String configFile = "conf/server.xml";  //设置server.xml的路径
...
 protected Digester createStartDigester() {
        long t1=System.currentTimeMillis();
        Digester digester = new Digester();
        digester.setValidating(false);
        digester.setRulesValidation(true);
        Map<Class<?>, List<String>> fakeAttributes = new HashMap<>();
        List<String> attrs = new ArrayList<>();
        attrs.add("className");
        fakeAttributes.put(Object.class, attrs);
        digester.setFakeAttributes(fakeAttributes);
        digester.setUseContextClassLoader(true);
        digester.addObjectCreate("Server",
                                 "org.apache.catalina.core.StandardServer",
                                 "className");
        digester.addSetProperties("Server");
        digester.addSetNext("Server",
                            "setServer",
                            "org.apache.catalina.Server");
    //省略一大段设置其他组件的代码,形式和StandardServer的生成一样,关于Digester类解析xml生成Java实例可参考《深入剖析tomcat》第15章。
}
Catalina类的入口同样是start方法,在Bootstrap中通过反射的方式调用了Catalina的start方法
public void start()
        throws Exception {
        if( catalinaDaemon==null ) init();
        Method method = catalinaDaemon.getClass().getMethod("start", (Class [] )null);
        method.invoke(catalinaDaemon, (Object [])null);

    }
start方法中又调用load方法进行创建Digester,生成各个组件;load类的定义如下:
public void load() {
        if (loaded) {
            return;
        }
        loaded = true;
        long t1 = System.nanoTime();
        initDirs();

        // Before digester - it may be needed
        initNaming();

        // Create and execute our Digester
        Digester digester = createStartDigester();

        InputSource inputSource = null;
        InputStream inputStream = null;
        File file = null;
        try {
            try {
                file = configFile();      //获取到server.xml 文件并解析
                inputStream = new FileInputStream(file);
                inputSource = new InputSource(file.toURI().toURL().toString());
            } catch (Exception e) {
                if (log.isDebugEnabled()) {
                    log.debug(sm.getString("catalina.configFail", file), e);
                }
            }
            if (inputStream == null) {
                try {
                    inputStream = getClass().getClassLoader()
                        .getResourceAsStream(getConfigFile());
                    inputSource = new InputSource
                        (getClass().getClassLoader()
                         .getResource(getConfigFile()).toString());
                } catch (Exception e) {
                    if (log.isDebugEnabled()) {
                        log.debug(sm.getString("catalina.configFail",
                                getConfigFile()), e);
                    }
                }
            }

            // This should be included in catalina.jar
            // Alternative: don't bother with xml, just create it manually.
            if (inputStream == null) {
                try {
                    inputStream = getClass().getClassLoader()
                            .getResourceAsStream("server-embed.xml");
                    inputSource = new InputSource
                    (getClass().getClassLoader()
                            .getResource("server-embed.xml").toString());
                } catch (Exception e) {
                    if (log.isDebugEnabled()) {
                        log.debug(sm.getString("catalina.configFail",
                                "server-embed.xml"), e);
                    }
                }
            }


            if (inputStream == null || inputSource == null) {
                if  (file == null) {
                    log.warn(sm.getString("catalina.configFail",
                            getConfigFile() + "] or [server-embed.xml]"));
                } else {
                    log.warn(sm.getString("catalina.configFail",
                            file.getAbsolutePath()));
                    if (file.exists() && !file.canRead()) {
                        log.warn("Permissions incorrect, read permission is not allowed on the file.");
                    }
                }
                return;
            }

            try {
                inputSource.setByteStream(inputStream);   //对server.xml数据流解析
                digester.push(this);
                digester.parse(inputSource);
            } catch (SAXParseException spe) {
                log.warn("Catalina.start using " + getConfigFile() + ": " +
                        spe.getMessage());
                return;
            } catch (Exception e) {
                log.warn("Catalina.start using " + getConfigFile() + ": " , e);
                return;
            }
        } finally {
            if (inputStream != null) {
                try {
                    inputStream.close();
                } catch (IOException e) {
                    // Ignore
                }
            }
        }

        getServer().setCatalina(this);       //配置server,启动类为当前Catalina类,Home和base在Bootstrap中定义
        getServer().setCatalinaHome(Bootstrap.getCatalinaHomeFile());
        getServer().setCatalinaBase(Bootstrap.getCatalinaBaseFile());

        // Stream redirection
        initStreams();

        // 启动server
        try {
            getServer().init();
        } catch (LifecycleException e) {
            if (Boolean.getBoolean("org.apache.catalina.startup.EXIT_ON_INIT_FAILURE")) {
                throw new java.lang.Error(e);
            } else {
                log.error("Catalina.start", e);
            }
        }

        long t2 = System.nanoTime();
        if(log.isInfoEnabled()) {
            log.info("Initialization processed in " + ((t2 - t1) / 1000000) + " ms");
        }
    }
tomcat启动是通过server.xml配置文件实现Server、Service、Connector和Container组件,那么这些组件具体是如何实现的,后面几篇文章将继续跟进tomcat各组件的具体实现。
tomcat源码分析(第三篇 tomcat请求原理解析--Connector源码分析)
正文到此结束
- 本文标签: CTO ssl final message HashMap 配置 rmi 实例 端口 core cat Service 代码 服务器 开发 js 文章 bug 安装 目录 parse tab src 线程 Property 类加载器 Bootstrap web list https ACE id map 解析 源码 lib swap JAVA实例 equals 数据 apache value struct 生命 IO 安全 App 启动过程 Java类 tar Security ArrayList UI java XML tomcat http apr ORM
- 版权声明: 本文为互联网转载文章,出处已在文章中说明(部分除外)。如果侵权,请联系本站长删除,谢谢。
- 本文海报: 生成海报一 生成海报二
热门推荐


相关文章

近期评论
-
ws0132613@gmail.comhttps://getmacos.com/gopanel/william smith
-
谢谢
-
https://www.newcmy.com/register?aff=HBVX建议您试试草莓云机场,可以流畅观看youtube和tiktok,上reddit/x也没有问题,还有各种ai优化节点。
-
-
-
想购买您这个站,我的联系方式QQ741756694微信同步 能卖联系
-
-
-
-
Loading...
![[HBLOG]公众号](https://www.liuhaihua.cn/img/qrcode_gzh.jpg)

