在 IntelliJ IDEA 中配置 Spring Boot 项目的热部署
Spring Boot 是由 Pivotal 团队提供的全新框架,其设计目的是用来简化新Spring应用的初始搭建以及开发过程。该框架使用了特定的方式来进行配置,从而使开发人员不再需要定义样板化的配置。Spring Boot 的 Web 项目,在每一次修改了 java 文件或者是 resource 的时候,都必须去重启一下项目,这样的话浪费了很多的时间,实现了热部署,在每一次作了修改之后,都会自动的重启
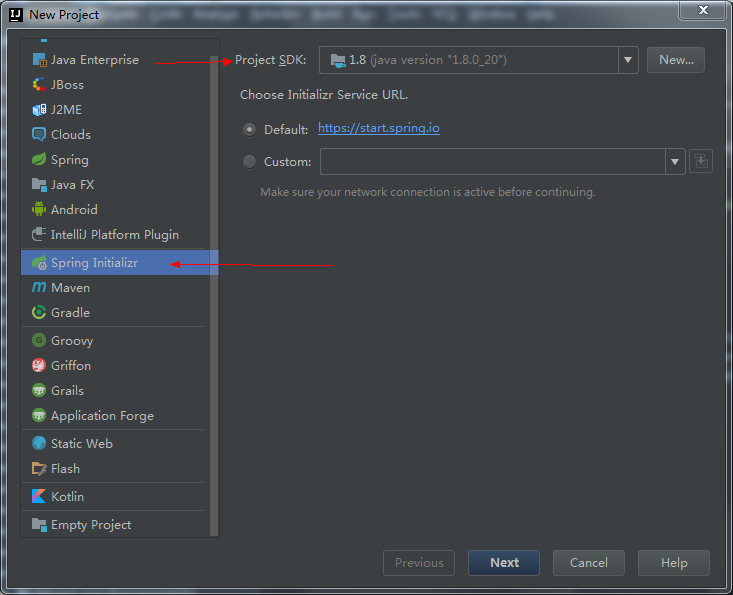
使用 IntelliJ IDEA 创建 Spring Boot 项目
新建 Spring Initializr 项目
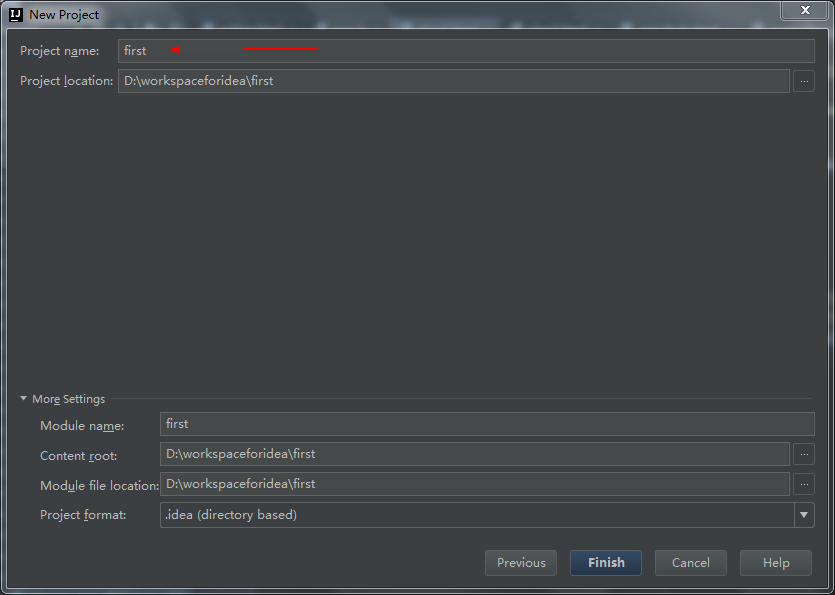
填写项目信息

选择项目使用的技术

填写项目名称
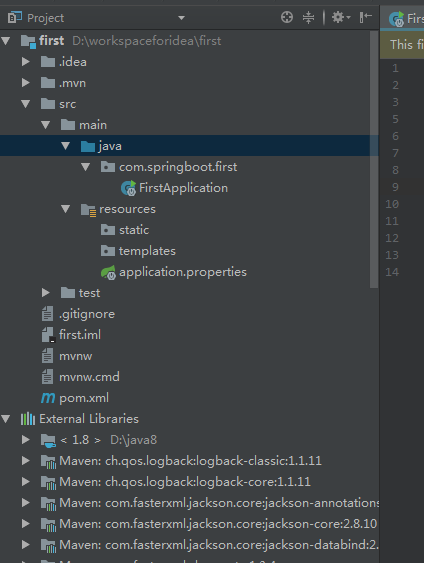
项目架构及依赖
添加测试控制器
找到入口的文件,将其修改成如下所示
package com.springboot.first;

import org.springframework.boot.SpringApplication;
import org.springframework.boot.autoconfigure.SpringBootApplication;
import org.springframework.web.bind.annotation.RequestMapping;
import org.springframework.web.bind.annotation.RestController;

@RestController
@SpringBootApplication
public class FirstApplication {

    @RequestMapping("/")
    String index() {
        return "Hello Spring Boot";
    }
    public static void main(String[] args) {
        SpringApplication.run(FirstApplication.class, args);
    }
}
@SpringBootApplication 是 Spring Boot 项目的核心注解,主要目的是开启自动配置。main方法是一个标准的Java应用的main方法,主要作用是作为项目启动的入口。
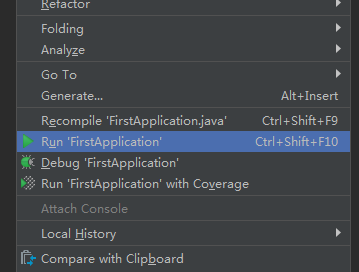
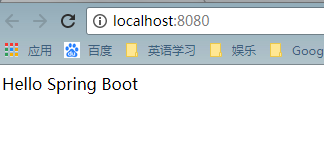
访问测试
运行项目,把它当成一个java类运行就可以了
运行信息
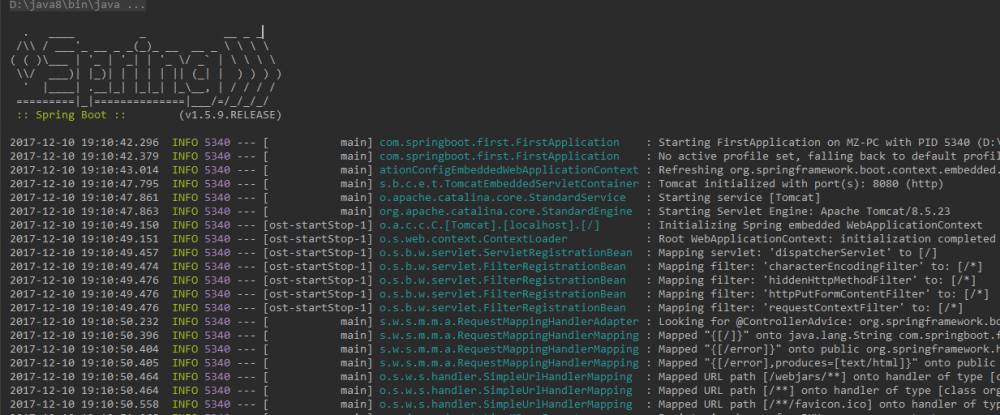
浏览器访问
IntelliJ IDEA 配置热部署
配置 pom.xml
引入热加载的插件
<dependency>
    <groupId>org.springframework.boot</groupId>
    <artifactId>spring-boot-devtools</artifactId>
    <optional>true</optional>
</dependency>
project 中添加 spring-boot-maven-plugin,主要在 eclipse 中起作用,idea 不需要加此配置,springboot 项目的话,应该是有此配置,加里面的内容即可。
<build>
    <plugins>
        <plugin>
            <groupId>org.springframework.boot</groupId>
            <artifactId>spring-boot-maven-plugin</artifactId>
            <configuration>
                <fork>true</fork>
            </configuration>
        </plugin>
    </plugins>
</build>
配置 Maven 下载加速
右键项目选中 maven 选项,然后选择 “open settings.xml” 或者 “create settings.xml”,然后把如下代码粘贴进去就可以了.重启IDE,感受速度飞起来的感觉吧!!!
<?xml version="1.0" encoding="UTF-8"?>
<settings xmlns="http://maven.apache.org/SETTINGS/1.0.0"
          xmlns:xsi="http://www.w3.org/2001/XMLSchema-instance"
          xsi:schemaLocation="http://maven.apache.org/SETTINGS/1.0.0 http://maven.apache.org/xsd/settings-1.0.0.xsd">
    <mirrors>
        <!-- mirror
         | Specifies a repository mirror site to use instead of a given repository. The repository that
         | this mirror serves has an ID that matches the mirrorOf element of this mirror. IDs are used
         | for inheritance and direct lookup purposes, and must be unique across the set of mirrors.
         |
        <mirror>
          <id>mirrorId</id>
          <mirrorOf>repositoryId</mirrorOf>
          <name>Human Readable Name for this Mirror.</name>
          <url>http://my.repository.com/repo/path</url>
        </mirror>
         -->

        <mirror>
            <id>alimaven</id>
            <name>aliyun maven</name>
            <url>http://maven.aliyun.com/nexus/content/groups/public/</url>
            <mirrorOf>central</mirrorOf>
        </mirror>

        <mirror>
            <id>uk</id>
            <mirrorOf>central</mirrorOf>
            <name>Human Readable Name for this Mirror.</name>
            <url>http://uk.maven.org/maven2/</url>
        </mirror>

        <mirror>
            <id>CN</id>
            <name>OSChina Central</name>
            <url>http://maven.oschina.net/content/groups/public/</url>
            <mirrorOf>central</mirrorOf>
        </mirror>

        <mirror>
            <id>nexus</id>
            <name>internal nexus repository</name>
            <!-- <url>http://192.168.1.100:8081/nexus/content/groups/public/</url>-->
            <url>http://repo.maven.apache.org/maven2</url>
            <mirrorOf>central</mirrorOf>
        </mirror>

    </mirrors>
</settings>
IntelliJ IDEA 相关配置
点击 file ,Settings ,Build ,Execution,Deplment

然后记得apply,ok
组合键: Shift+ALT+Ctrl+/ ,选择”Registry”,回车,找到”complier.automake.allow.when.app.running”
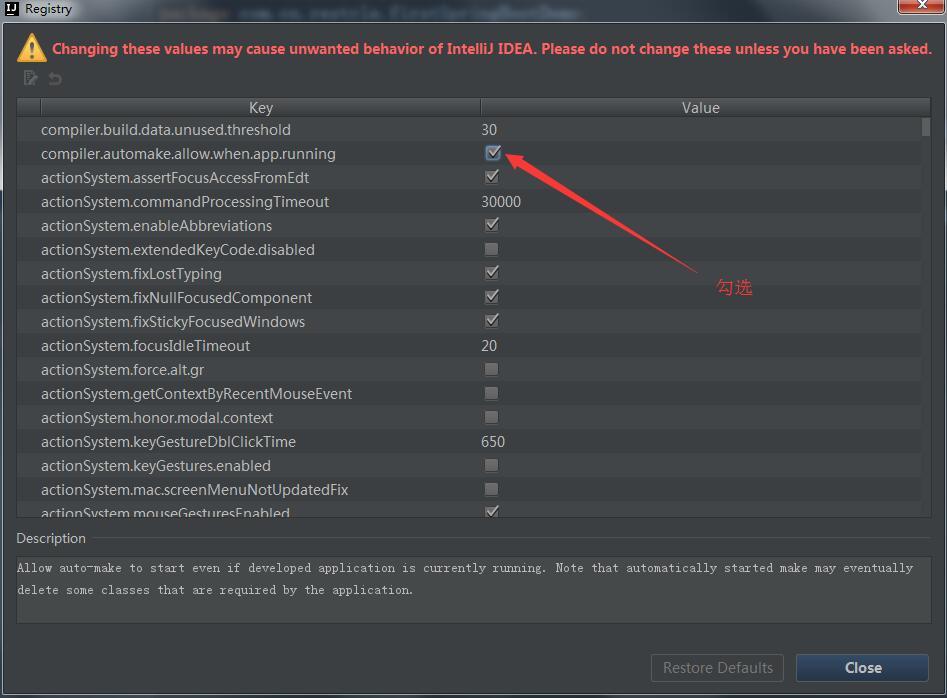
到此全部配置完毕,手动重启一次,修改代码保持即可看到控制台在自动重启
正文到此结束
热门推荐


相关文章

近期评论
-
谢谢
-
https://www.newcmy.com/register?aff=HBVX建议您试试草莓云机场,可以流畅观看youtube和tiktok,上reddit/x也没有问题,还有各种ai优化节点。
-
-
-
想购买您这个站,我的联系方式QQ741756694微信同步 能卖联系
-
-
-
-
-
https://www.liuhaihua.cn/archives/40657.html 这篇博客中的图片打不开了
Loading...
![[HBLOG]公众号](https://www.liuhaihua.cn/img/qrcode_gzh.jpg)

