从零开始-使用IntelliJ IDEA创建SpringBoot项目
*注:此文章谨以记录学习过程,分享学习心得!
刚刚开始了解SpringBoot框架,觉得很好用,觉得很有必要深入学习一下该框架,现在就来创建一个SpringBoot项目:
新建项目
1、在IDEA上新建一个Project
在IDEA上新建一个Project,选择Spring Initializr,
Project SDK 选择安装的JDK;
Choose Initializr Service URL 选择默认(Default: https://start.spring.io)
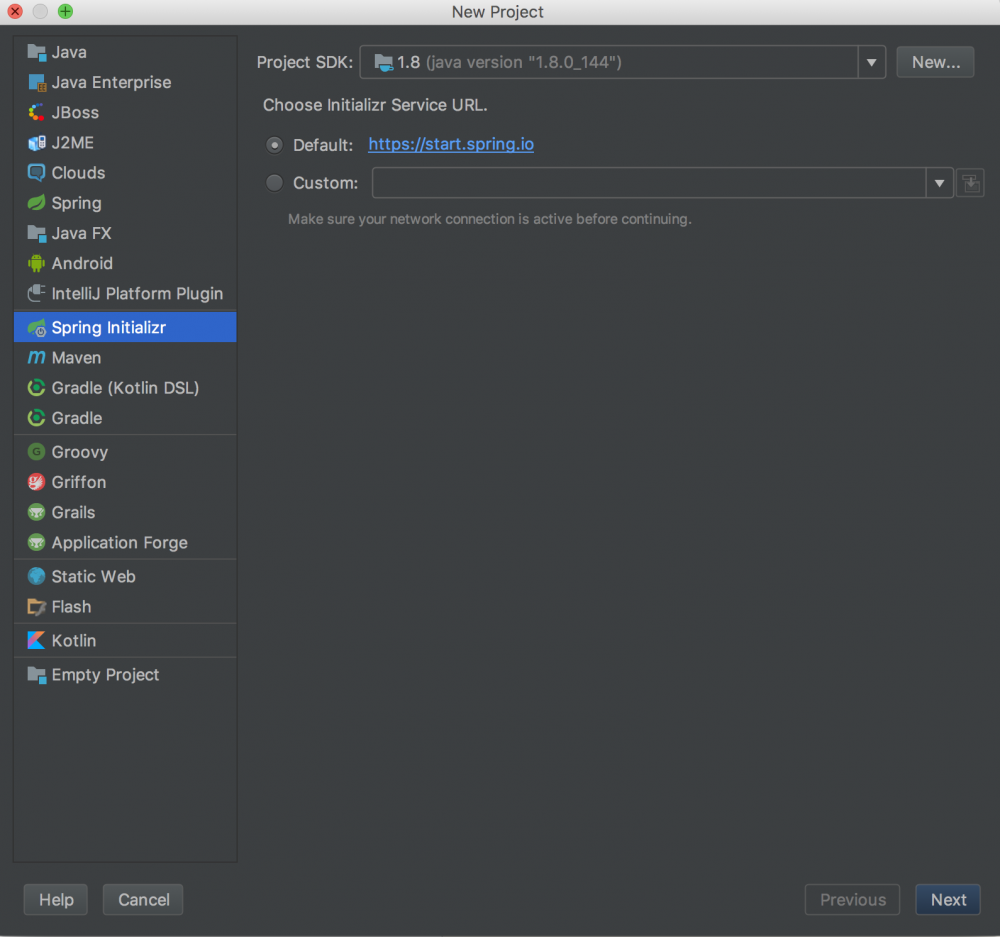
点击Next
2、进行项目配置
设置项目数组(group),项目标识(Artifact),Type选择一个Maven Project 表示是一个maven项目
Version:项目版本号
Name:项目名称
Description:项目描述
Package:项目包名
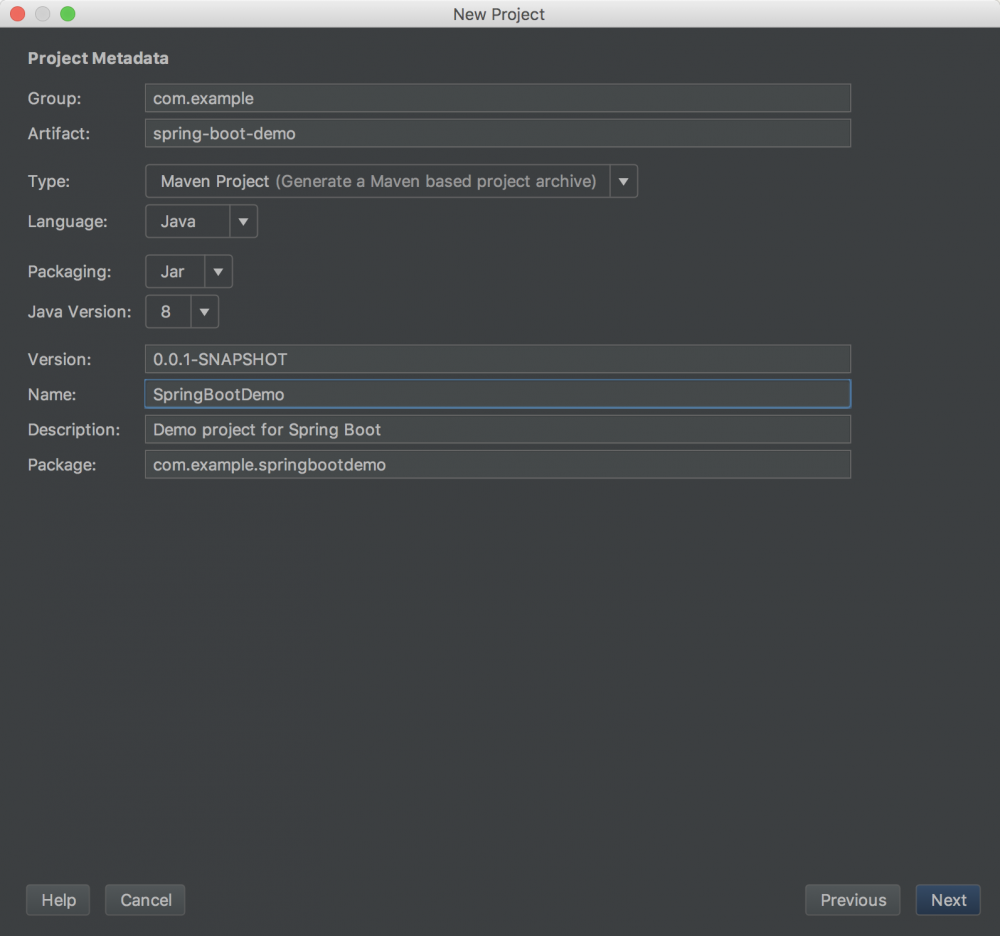
点击Next 下一步
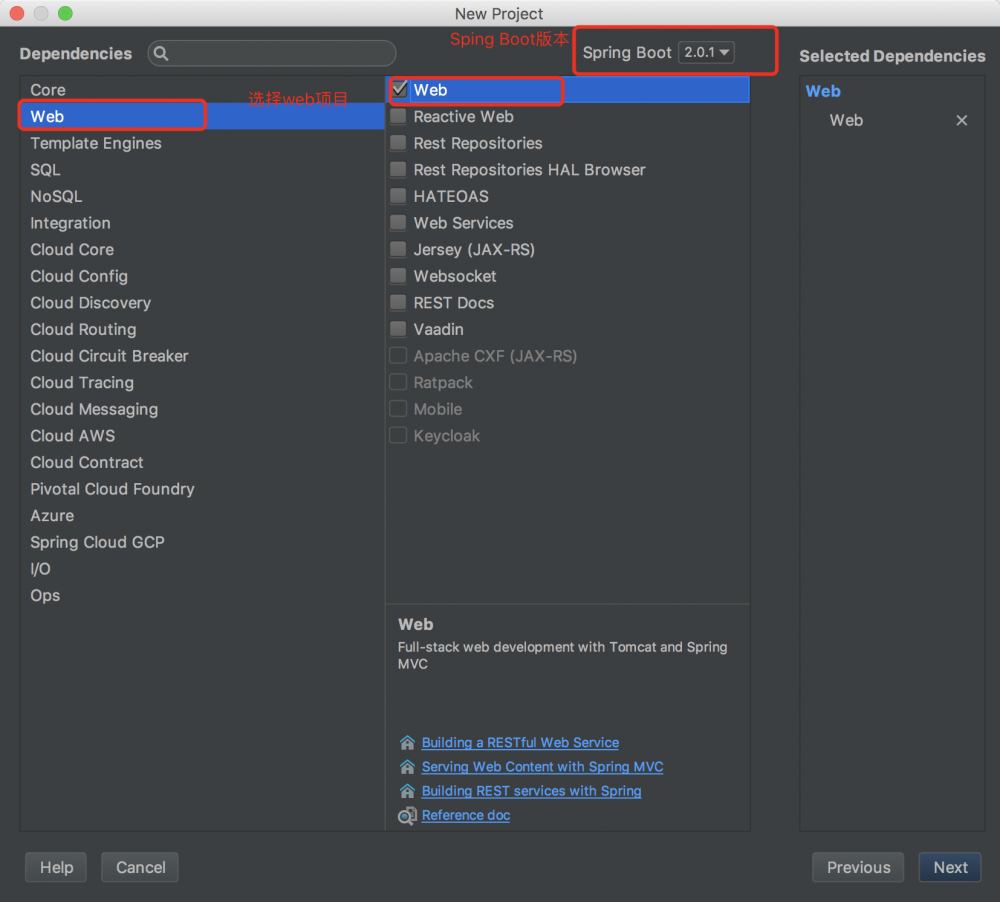
3、选择项目模板
我们来选择创建一个Web项目
选择Spring Boot版本
4、设置项目名称和项目路径
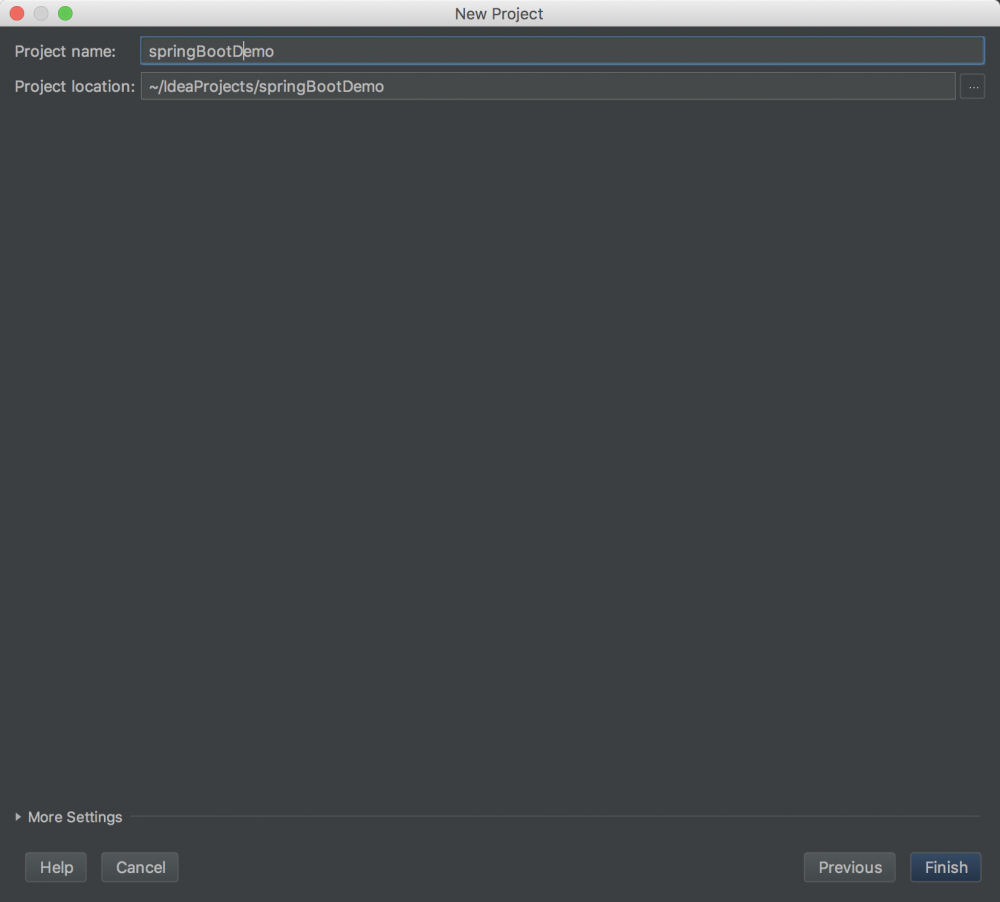 设置完项目路径,和项目名称后,点击FInish,创建项目完成,需要进行项目构建,等一小会即可完成。
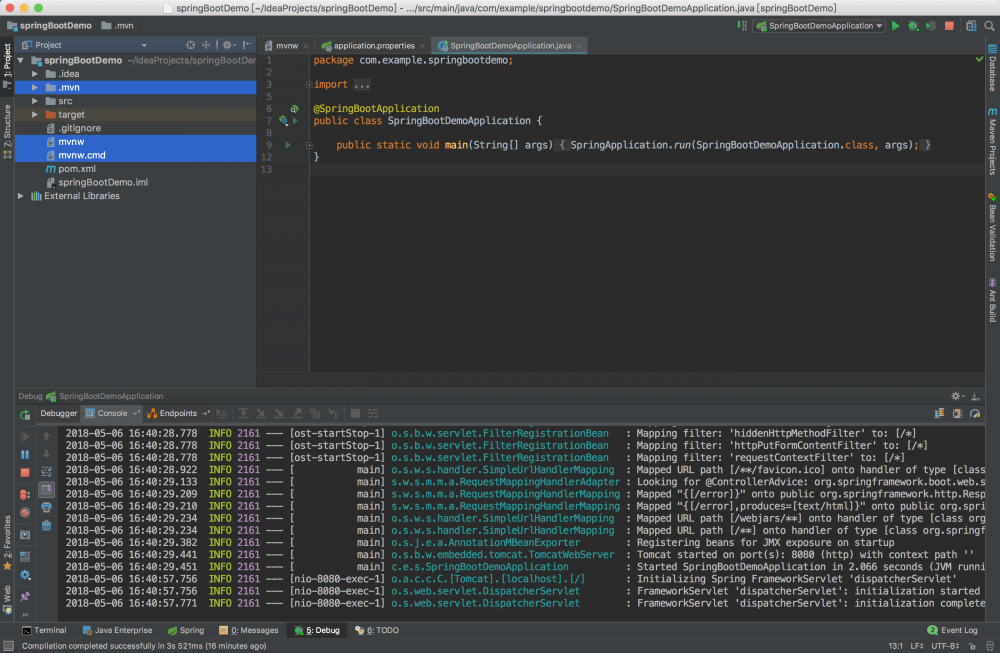
5、创建完成,我们删除.mvn文件夹,mvnw文件和 mvnw.cmd文件
6、maven配置的pom.xml文件
我们来看一下maven配置的pom.xml文件,里面包含了SpringBoot项目运行所需的版本库
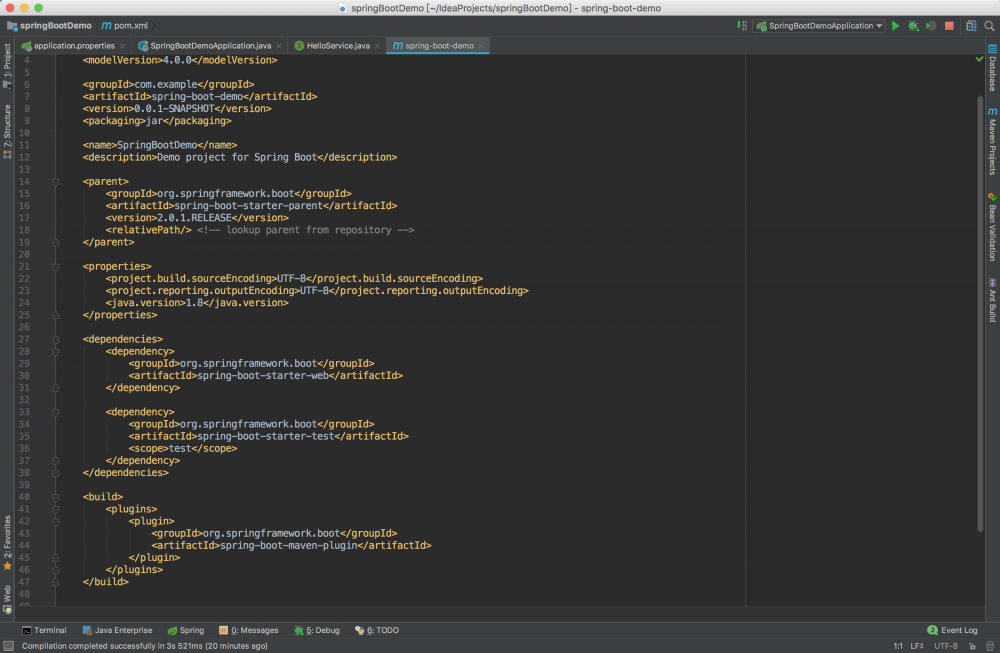
SpringBoot运行所需库为:
<!-- SpringBoot项目的基础库文件-->
    <parent>
        <groupId>org.springframework.boot</groupId>
        <artifactId>spring-boot-starter-parent</artifactId>
        <version>2.0.1.RELEASE</version>
        <relativePath/> <!-- lookup parent from repository -->
    </parent>
<!-- SpringBoot项目的基础库文件-->
    <dependencies>
<!-- web项目库-->
        <dependency>
            <groupId>org.springframework.boot</groupId>
            <artifactId>spring-boot-starter-web</artifactId>
        </dependency>
<!-- 测试所需库-->
        <dependency>
            <groupId>org.springframework.boot</groupId>
            <artifactId>spring-boot-starter-test</artifactId>
            <scope>test</scope>
        </dependency>
    </dependencies>
7、创建一个HelloService
package com.example.springbootdemo.service;

import org.springframework.stereotype.Service;

@Service
public interface HelloService {
    String sayHello();
}
8、创建HelloService的实现类HelloServiceImpl,实现sayHello()方法,返回”Hello World!”
package com.example.springbootdemo.service.impl;

import com.example.springbootdemo.service.HelloService;
import org.springframework.stereotype.Component;

@Component
public class HelloServiceImpl implements HelloService {
    @Override
    public String sayHello() {
        return "Hello World!";
    }
}
9、创建HelloController,调用HelloService实现类,打印”Hello World!”到浏览器
package com.example.springbootdemo.controller;

import com.example.springbootdemo.service.HelloService;
import org.springframework.beans.factory.annotation.Autowired;
import org.springframework.stereotype.Controller;
import org.springframework.web.bind.annotation.RequestMapping;
import org.springframework.web.bind.annotation.ResponseBody;

@Controller
@RequestMapping("/")
public class HelloController {
    @Autowired
    private HelloService helloService;

    @RequestMapping("/hello")
    @ResponseBody
    public String helloWorld(){
        return helloService.sayHello();
    }
}
10、见证奇迹的时刻,我们来运行一下所建项目,看能不能跟我们预期一样,在浏览器输入访问地址 http://localhost:8080/hello
就可以看到Hello World!
至此,学习创建一个SpringBoot项目就完成了。
正文到此结束
热门推荐


相关文章

近期评论
-
谢谢
-
https://www.newcmy.com/register?aff=HBVX建议您试试草莓云机场,可以流畅观看youtube和tiktok,上reddit/x也没有问题,还有各种ai优化节点。
-
-
-
想购买您这个站,我的联系方式QQ741756694微信同步 能卖联系
-
-
-
-
-
https://www.liuhaihua.cn/archives/40657.html 这篇博客中的图片打不开了
Loading...
![[HBLOG]公众号](https://www.liuhaihua.cn/img/qrcode_gzh.jpg)

