SpringBoot统一配置中心
一直使用springboot搭建后端项目,所有的配置都写到自己的resource目录下,随着微服务的项目越来越多,每个项目都需要自己的各种配置文件。而且后期一旦想要修改配置文件,就得重新发布一遍非常的麻烦,现在就来教教大家怎么统一在github上管理 这些配置,并做到一处修改处处生效,不需要重新发布项目。
1 创建统一服务项目
可以使用STS来初始化项目,选择自己的以来就好。
<?xml version="1.0" encoding="UTF-8"?>
<project xmlns="http://maven.apache.org/POM/4.0.0" xmlns:xsi="http://www.w3.org/2001/XMLSchema-instance"
    xsi:schemaLocation="http://maven.apache.org/POM/4.0.0 http://maven.apache.org/xsd/maven-4.0.0.xsd">
    <modelVersion>4.0.0</modelVersion>
    <parent>
        <groupId>org.springframework.boot</groupId>
        <artifactId>spring-boot-starter-parent</artifactId>
        <version>2.1.4.RELEASE</version>
        <relativePath/> <!-- lookup parent from repository -->
    </parent>
    <groupId>com.mike</groupId>
    <artifactId>config-server</artifactId>
    <version>0.0.1-SNAPSHOT</version>
    <name>config-server</name>
    <description>config server</description>

    <properties>
        <java.version>1.8</java.version>
        <spring-cloud.version>Greenwich.SR1</spring-cloud.version>
    </properties>

    <dependencies>
        <dependency>
            <groupId>org.springframework.boot</groupId>
            <artifactId>spring-boot-starter</artifactId>
        </dependency>
        <dependency>
            <groupId>org.springframework.cloud</groupId>
            <artifactId>spring-cloud-config-server</artifactId>
        </dependency>

        <dependency>
            <groupId>org.springframework.boot</groupId>
            <artifactId>spring-boot-starter-test</artifactId>
            <scope>test</scope>
        </dependency>
    </dependencies>

    <dependencyManagement>
        <dependencies>
            <dependency>
                <groupId>org.springframework.cloud</groupId>
                <artifactId>spring-cloud-dependencies</artifactId>
                <version>${spring-cloud.version}</version>
                <type>pom</type>
                <scope>import</scope>
            </dependency>
        </dependencies>
    </dependencyManagement>

    <build>
        <plugins>
            <plugin>
                <groupId>org.springframework.boot</groupId>
                <artifactId>spring-boot-maven-plugin</artifactId>
            </plugin>
        </plugins>
    </build>

</project>
创建 bootstrap.yml 文件,当然你可以使用 application.yml 或 application.properties
spring:
  application:
    name: config-repo
  cloud:
    config:
      server:
        git:
          uri: https://github.com/mike/config-repo.git   #github仓库地址
          username: mike      # 用户名
          password: 123456      # 密码
在github上创建一个config-repo仓库,并添加配置文件:
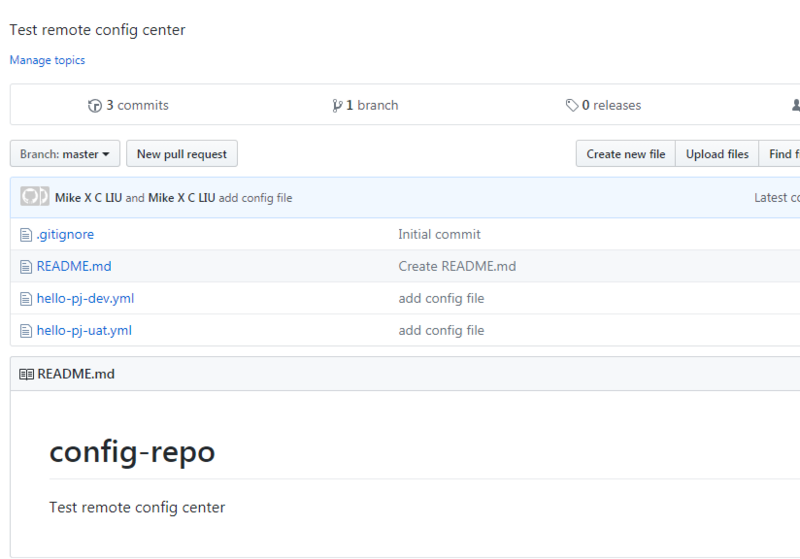
两个不同环境的配置
hello-pj-dev.yml
hello:
  text: hello spring dev
hello-pj-uat.yml
hello:
  text: hello spring uat
创建启动类:
@SpringBootApplication
@EnableConfigServer
public class ConfigServerApplication {

    public static void main(String[] args) {
        SpringApplication.run(ConfigServerApplication.class, args);
    }

}
启动应用,访问:
http://localhost :8080/hello-pj-dev.yml
http://localhost :8080/hello-pj-uat.yml
你就可以看到远程的配置中心。
2 创建测试项目
pom
<?xml version="1.0" encoding="UTF-8"?>
<project xmlns="http://maven.apache.org/POM/4.0.0" xmlns:xsi="http://www.w3.org/2001/XMLSchema-instance"
    xsi:schemaLocation="http://maven.apache.org/POM/4.0.0 http://maven.apache.org/xsd/maven-4.0.0.xsd">
    <modelVersion>4.0.0</modelVersion>
    <parent>
        <groupId>org.springframework.boot</groupId>
        <artifactId>spring-boot-starter-parent</artifactId>
        <version>2.1.4.RELEASE</version>
        <relativePath/> <!-- lookup parent from repository -->
    </parent>
    <groupId>com.mike</groupId>
    <artifactId>hello-server</artifactId>
    <version>0.0.1-SNAPSHOT</version>
    <name>hello-server</name>
    <description>hello server</description>

    <properties>
        <java.version>1.8</java.version>
        <spring-cloud.version>Greenwich.SR1</spring-cloud.version>
    </properties>

    <dependencies>
        <dependency>
            <groupId>org.springframework.boot</groupId>
            <artifactId>spring-boot-starter-web</artifactId>
        </dependency>
        <dependency>
            <groupId>org.springframework.cloud</groupId>
            <artifactId>spring-cloud-starter-config</artifactId>
        </dependency>

        <dependency>
            <groupId>org.springframework.boot</groupId>
            <artifactId>spring-boot-starter-test</artifactId>
            <scope>test</scope>
        </dependency>
    </dependencies>

    <dependencyManagement>
        <dependencies>
            <dependency>
                <groupId>org.springframework.cloud</groupId>
                <artifactId>spring-cloud-dependencies</artifactId>
                <version>${spring-cloud.version}</version>
                <type>pom</type>
                <scope>import</scope>
            </dependency>
        </dependencies>
    </dependencyManagement>

    <build>
        <plugins>
            <plugin>
                <groupId>org.springframework.boot</groupId>
                <artifactId>spring-boot-maven-plugin</artifactId>
            </plugin>
        </plugins>
    </build>

</project>
创建 bootstrap.yml 文件,只能是这个文件,不能是application文件
server:
  port: 8082
spring:
  application:
    name: hello-pj
  cloud:
    config:
      profile: dev
      uri: http://localhost:8080/
这里面配置了读取远程配置文件的uri,注意application.name必须对应github上的文件名,最终访问的是application.name+profile
创建测试controller
@RestController
public class TestController {
    @Value("${hello.text}")
    private String text;

    @GetMapping("/say")
    public String sayHello(){
        return text;
    }
}
访问 http://localhost :8082/say,你就可以看到对应的配置。这样你只需要在github上管理所有的配置就行了,但是记得'config-server'工程得一直启动,通过它我们才能获取github上的配置。
3 动态刷新配置
目前如果我们修改了github上的配置并不能马上生效,需要我们的客户端工程重启才行,现在需要改造成自动刷新。
在客户端工程中加入新的依赖:
<dependency>
            <groupId>org.springframework.cloud</groupId>
            <artifactId>spring-cloud-starter-bus-amqp</artifactId>
        </dependency>
修改 bootstrap.yml 文件
server:
  port: 8082
spring:
  application:
    name: hello-pj
  cloud:
    config:
      profile: dev
      uri: http://localhost:8080/
    bus:
      trace:
        enabled: true
rabbitmq:
    host: localhost
    port: 5672
    username: guest
    password: guest
注意 需要借助 rabbitmq ,所以本地需要启动 rabbitmq 。
在需要刷新的地方加入 注解@RefreshScope
@RestController
@RefreshScope
public class TestController {
    @Value("${hello.text}")
    private String text;

    @GetMapping("/say")
    public String sayHello(){
        return text;
    }
}
这样我们既可以随时修改github上的配置文件,而不需要重启应用。
如果对你有帮助,希望可以关注下我的公众号:

正文到此结束
- 本文标签: src 测试 springboot cat value 目录 plugin bus ip Bootstrap build web id description XML ACE 配置中心 UI schema apache 希望 tar App Word Config Server pom 配置 dependencies java MQ 微服务 https GitHub http maven rabbitmq map REST spring IO amqp git 管理
- 版权声明: 本文为互联网转载文章,出处已在文章中说明(部分除外)。如果侵权,请联系本站长删除,谢谢。
- 本文海报: 生成海报一 生成海报二
热门推荐


相关文章

近期评论
-
ws0132613@gmail.comhttps://getmacos.com/gopanel/william smith
-
谢谢
-
https://www.newcmy.com/register?aff=HBVX建议您试试草莓云机场,可以流畅观看youtube和tiktok,上reddit/x也没有问题,还有各种ai优化节点。
-
-
-
想购买您这个站,我的联系方式QQ741756694微信同步 能卖联系
-
-
-
-
Loading...
![[HBLOG]公众号](https://www.liuhaihua.cn/img/qrcode_gzh.jpg)

