Spring官网阅读系列(二):Spring依赖注入及方法注入

上篇文章我们学习了官网中的1.2,1.3两小节,主要是涉及了容器,以及Spring实例化对象的一些知识。这篇文章我们继续学习Spring官网,主要是针对1.4小节,主要涉及到Spring的依赖注入。虽然只有一节,但是涉及的东西确不少。话不多说,开始正文。
[TOC]
依赖注入:
根据官网介绍,依赖注入主要分为两种方式
- 构造函数注入
- Setter方法注入 官网:

我们分别对以上两种方式进行测试,官网上用的是XML的方式,我这边就采用注解的方式了:
测试代码如下,我们通过在Service中注入LuBanService这个过程来
public class Main02 { public static void main(String[] args) { AnnotationConfigApplicationContext ac = new // config类主要完成对类的扫描 AnnotationConfigApplicationContext(Config.class); Service service = (Service) ac.getBean("service"); service.test(); }}@Componentpublic class LuBanService { LuBanService(){ System.out.println("luBan create "); }}
测试setter方法注入
@Componentpublic class Service { private LuBanService luBanService; public Service() { System.out.println("service create"); } public void test(){ System.out.println(luBanService); } // 通过autowired指定使用set方法完成注入 @Autowired public void setLuBanService(LuBanService luBanService) { System.out.println("注入luBanService by setter"); this.luBanService = luBanService; }}
输出如下:
luBan create service create注入luBanService by setter // 验证了确实是通过setter注入的com.dmz.official.service.LuBanService@5a01ccaa
测试构造函数注入
@Componentpublic class Service { private LuBanService luBanService; public Service() { System.out.println("service create by no args constructor"); } // 通过Autowired指定使用这个构造函数,否则默认会使用无参 @Autowired public Service(LuBanService luBanService) { System.out.println("注入luBanService by constructor with arg"); this.luBanService = luBanService; System.out.println("service create by constructor with arg"); } public void test(){ System.out.println(luBanService); }}
输出如下:
luBan create 注入luBanService by constructor // 验证了确实是通过constructor注入的service create by constructorcom.dmz.official.service.LuBanService@1b40d5f0
疑问:
在上面的验证中,大家可能会有以下几个疑问:
- @Autowired直接加到字段上跟加到set方法上有什么区别?为什么我们验证的时候需要将其添加到setter方法上?首先我们明确一点,直接添加@Autowired注解到字段上,不需要提供setter方法也能完成注入。以上面的例子来说,Spring会通过反射获取到Service中luBanService这个字段,然后通过反射包的方法,Filed.set(Service,luBanService)这种方式来完成注入我们将@Autowired添加到setter方法时,我们可以通过断点看一下方法的调用栈,如下:对于这种方式来说,最终是通过Method.invoke(object,args)的方式来完成注入的,这里的method对象就是我们的setter方法
- @Autowired为什么加到构造函数上可以指定使用这个构造函数?我们先可以测试下,如果我们不加这个注解会怎么样呢?我把前文中的@Autowired注解注释,然后运行发现luBan create service create by no args constructor // 可以看到执行的是空参构造 null先不急得出结论,我们再进行一次测试,就是两个函数上都添加@Autowired注解呢?Exception in thread "main" org.springframework.beans.factory.BeanCreationException: Error creating bean with name 'service': Invalid autowire-marked constructor: public com.dmz.official.service.Service(com.dmz.official.service.LuBanService). Found constructor with 'required' Autowired annotation already: public com.dmz.official.service.Service()发现直接报错了,报错的大概意思是已经找到了一个被@Autowired注解标记的构造函数,同时这个注解中的required属性为true。后来我测试了将其中一个注解中的required属性改为false,发现还是报同样的错,最终将两个注解中的属性都改为false测试才通过,并且测试结果跟上面的一样,都是执行的无参构造。要说清楚这一点,涉及到两个知识Spring中的注入模型,下篇文章专门讲这个Spring对构造函数的推断。这个到源码阶段我打算专门写一篇文章,现在我们暂且记得:在 默认的注入模型 下,Spring如果同时找到了两个 符合要求的构造函数 ,那么Spring会采用默认的无参构造进行实例化,如果这个时候没有无参构造,那么此时会报错java.lang.NoSuchMethodException。什么叫符合要求的构造函数呢?就是构造函数中的参数Spring能找到,参数被Spring所管理。这里需要着重记得: 一,默认注入模型;二,符合要求的构造函数
- 如果我们同时采用构造注入加属性注入会怎么样呢?在没有进行测试前,我们可以大胆猜测下,Spring虽然能在构造函数里完成属性注入,但是这属于实例化对象阶段做的事情,那么在后面真正进行属性注入的时候,肯定会将其覆盖掉。现在我们来验证我们的结论@Component public class Service { private LuBanService luBanService; public Service(LuBanService luBanService) { System.out.println("注入luBanService by constructor with arg"); this.luBanService = luBanService; System.out.println("service create by constructor with arg"); } public void test(){ System.out.println(luBanService); } @Autowired public void setLuBanService(LuBanService luBanService) { System.out.println("注入luBanService by setter"); this.luBanService = null; } }运行结果:注入luBanService by constructor with arg // 实例化时进行了一次注入 service create by constructor with arg // 完成了实例化 注入luBanService by setter // 属性注入时将实例化时注入的属性进行了覆盖 null
区别:
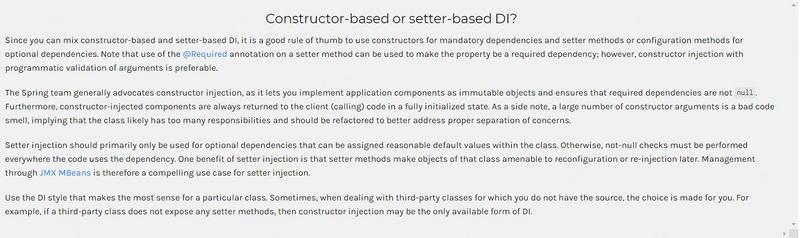
根据上图中官网所说,我们可以得出如下结论:
- 构造函数注入跟setter方法注入可以混用 2. 对于一些强制的依赖,我们最好使用构造函数注入,对于一些可选依赖我们可以采用setter方法注入
- Spring团队推荐使用构造函数的方式完成注入。但是对于一些参数过长的构造函数,Spring是不推荐的
方法注入:
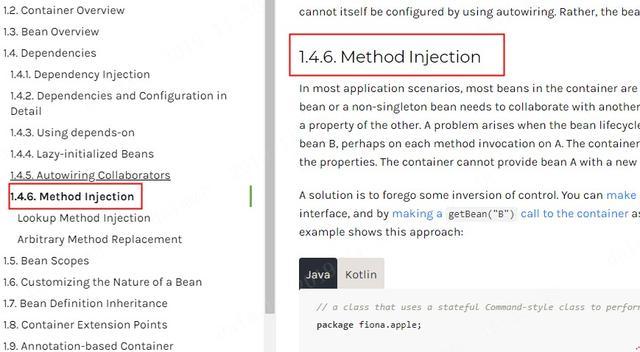
我们不完全按照官网顺序进行学习,先看这一小节,对应官网上的位置如下图:
为什么需要方法注入:
首先我们思考一个问题,在有了依赖注入的情况下,为什么还需要方法注入这种方式呢?换而言之,方法注入解决了什么问题?
我们来看下面这种场景:
@Componentpublic class MyService { @Autowired private LuBanService luBanService; public void test(int a){ luBanService.addAndPrint(a); }}@Component// 原型对象@Scope("prototype")public class LuBanService { int i; LuBanService() { System.out.println("luBan create "); } // 每次将当前对象的属性i+a然后打印 public void addAndPrint(int a) { i+=a; System.out.println(i); }}public class Main02 { public static void main(String[] args) { AnnotationConfigApplicationContext ac = new AnnotationConfigApplicationContext(Config.class); MyService service = (MyService) ac.getBean("myService"); service.test(1); service.test(2); service.test(3); }}
在上面的代码中,我们有两个Bean,MyService为单例的Bean,LuBanService为原型的Bean。我们的本意可能是希望每次都能获取到不同的LuBanService,预期的结果应该打印出:
1,2,3
实际输出:
1 3 6
这个结果说明我们每次调用到的LuBanService是同一个对象。当然,这也很好理解,因为在依赖注入阶段我们就完成了LuBanService的注入,之后我们在调用测试方法时,不会再去进行注入,所以我们一直使用的是同一个对象。
我们可以这么说,原型对象在这种情况下,失去了原型的意义,因为每次都使用的是同一个对象。那么如何解决这个问题呢?只要我每次在使用这个Bean的时候都去重新获取就可以了,那么这个时候我们可以通过方法注入来解决。
通过注入上下文(applicationContext对象)
又分为以下两种方式:
- 实现org.springframework.context.ApplicationContextAware接口
@Componentpublic class MyService implements ApplicationContextAware { private ApplicationContext applicationContext; public void test(int a) { LuBanService luBanService = ((LuBanService) applicationContext.getBean("luBanService")); luBanService.addAndPrint(a); } @Override public void setApplicationContext(@Nullable ApplicationContext applicationContext) throws BeansException { this.applicationContext = applicationContext; }}
- 直接注入上下文
@Componentpublic class MyService{ @Autowired private ApplicationContext applicationContext; public void test(int a) { LuBanService luBanService = ((LuBanService) applicationContext.getBean("luBanService")); luBanService.addAndPrint(a); }}
通过@LookUp的方式(也分为注解跟XML两种方式,这里只演示注解的)
@Componentpublic class MyService{ public void test(int a) { LuBanService luBanService = lookUp(); luBanService.addAndPrint(a); } // @Lookup public LuBanService lookUp(){ return null; }}
方法注入 之 replace-method
方法注入还有一种方式,即通过replace-method这种形式,没有找到对应的注解,所以这里我们也就用XML的方式测试一下:
<?xml version="1.0" encoding="UTF-8"?><beans xmlns="http://www.springframework.org/schema/beans" xmlns:xsi="http://www.w3.org/2001/XMLSchema-instance" xsi:schemaLocation="http://www.springframework.org/schema/beans http://www.springframework.org/schema/beans/spring-beans.xsd"> <bean id="myService" class="com.dmz.official.service.MyService"> <replaced-method replacer="replacer" name="test"/> </bean> <bean id="replacer" class="com.dmz.official.service.MyReplacer"/></beans>
public class MyReplacer implements MethodReplacer { @Override public Object reimplement(Object obj, Method method, Object[] args) throws Throwable { System.out.println("替代"+obj+"中的方法,方法名称:"+method.getName()); System.out.println("执行新方法中的逻辑"); return null; }}public class MyService{ public void test(int a) { System.out.println(a); }}public class Main { public static void main(String[] args) { ClassPathXmlApplicationContext cc = new ClassPathXmlApplicationContext("application.xml"); MyService myService = ((MyService) cc.getBean("myService")); myService.test(1); }}
执行结果:
替代com.dmz.official.service.MyService$$EnhancerBySpringCGLIB$$61c14242@63e31ee中的方法,方法名称:test执行新方法中的逻辑
这里需要注意一点:
我在测试replace-method这种方法注入的方式时,受动态代理的影响,一直想将执行我们被替代的方法。用代码体现如下:
public class MyReplacer implements MethodReplacer { @Override public Object reimplement(Object obj, Method method, Object[] args) throws Throwable {// System.out.println("替代"+obj+"中的方法,方法名称:"+method.getName());// System.out.println("执行新方法中的逻辑"); method.invoke(obj,args); return null; }}
但是,这段代码是无法执行的,会报栈内存溢出。因为obj是我们的代理对象,method.invoke(obj,args)执行时会进入方法调用的死循环。最终我也没有找到一种合适的方式来执行被替代的方法。目前看来这可能也是Spring的设计,所以我们使用replace-method的场景应该是想完全替代某种方法的执行逻辑,而不是像AOP那样更多的用于在方法的执行前后等时机完成某些逻辑。
依赖注入跟方法注入的总结:
- 我们首先要明确一点,什么是依赖(Dependencies)?来看官网中的一段话:

可以说,一个对象的依赖就是它自身的属性,Spring中的 依赖注入就是属性注入 。
- 我们知道一个对象由两部分组成:属性+行为(方法),可以说Spring通过属性注入+方法注入的方式掌控的整个bean。
- 属性注入跟方法注入都是Spring提供给我们用来处理Bean之间协作关系的手段
- 属性注入有两种方式:构造函数,Setter方法。
- 方法注入(LookUp Method跟Replace Method)需要依赖动态代理完成
- 方法注入对属性注入进行了一定程度上的补充,因为属性注入的情况下,原型对象可能会失去原型的意义,见:为什么需要方法注入
画图如下:

这篇文章到这里就结束了,看完记得点个关注+分享,我们下篇文章再见!
正文到此结束
热门推荐


相关文章

近期评论
-
ws0132613@gmail.comhttps://getmacos.com/gopanel/william smith
-
谢谢
-
https://www.newcmy.com/register?aff=HBVX建议您试试草莓云机场,可以流畅观看youtube和tiktok,上reddit/x也没有问题,还有各种ai优化节点。
-
-
-
想购买您这个站,我的联系方式QQ741756694微信同步 能卖联系
-
-
-
-
Loading...
![[HBLOG]公众号](https://www.liuhaihua.cn/img/qrcode_gzh.jpg)

