// This is your class `UILabel`
extension AnimatedSink where Base: UILabel {
    // This is your property name `text` and value type `String`
    public var text: Binder<String> {
        let animation = self.type!
        return Binder(self.base) { label, text in
            animation.animate(view: label, block: {
                guard let label = label as? UILabel else { return }
                // Here you update the property
                label.text = text
            })
        }
    }
}
复制代码
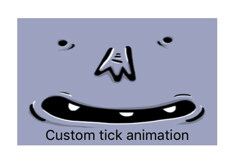
第二步:添加新的动画方法
// This is your class `UIView`
extension AnimatedSink where Base: UIView {
    // This is your animation name `tick`
    public func tick(_ direction: FlipDirection = .right, duration: TimeInterval) -> AnimatedSink<Base> {
        // use one of the animation types and provide `setup` and `animation` blocks
        let type = AnimationType<Base>(type: RxAnimationType.spring(damping: 0.33, velocity: 0), duration: duration, setup: { view in
            view.alpha = 0
            view.transform = CGAffineTransform(rotationAngle: direction == .right ?  -0.3 : 0.3)
        }, animations: { view in
            view.alpha = 1
            view.transform = CGAffineTransform.identity
        })

        //return AnimatedSink
        return AnimatedSink<Base>(base: self.base, type: type)
    }
}
复制代码
// 设置磁盘缓存大小
        // Default value is 0, which means no limit.
        // 50 MB
        ImageCache.default.maxDiskCacheSize = 50 * 1024 * 1024
复制代码
设置缓存过期时间(默认是3天)
// 设置缓存过期时间
        // Default value is 60 * 60 * 24 * 7, which means 1 week.
        // 3 days
        ImageCache.default.maxCachePeriodInSecond = 60 * 60 * 24 * 3
复制代码
设置超时时间(默认是15秒)
// Default value is 15.
        // 30 second
        ImageDownloader.default.downloadTimeout = 30.0
复制代码
其他设置相关
// 设置磁盘缓存大小
        // Default value is 0, which means no limit.
        // 50 MB
        ImageCache.default.maxDiskCacheSize = 50 * 1024 * 1024

        // 获取缓存磁盘使用大小
        ImageCache.default.calculateDiskCacheSize { size in
            print("Used disk size by bytes: /(size)")
        }

        // 设置缓存过期时间
        // Default value is 60 * 60 * 24 * 7, which means 1 week.
        // 3 days
        ImageCache.default.maxCachePeriodInSecond = 60 * 60 * 24 * 3

        // 设置超时时间
        // Default value is 15.
        // 30 second
        ImageDownloader.default.downloadTimeout = 30.0

    // Clear cache manually
     // Clear memory cache right away.
     cache.clearMemoryCache()

     // Clear disk cache. This is an async operation.
     cache.clearDiskCache()

     // Clean expired or size exceeded disk cache. This is an async operation.
     cache.cleanExpiredDiskCache()
复制代码
// MARK:- 下载图片
            imageView.kf.indicatorType = .activity
            let cachePath =  ImageCache.default.cachePath(forKey: PhotoConfig.init().cachePath)
            guard let path = (try? ImageCache.init(name: "cameraPath", cacheDirectoryURL: URL(fileURLWithPath: cachePath))) ?? nil else { return  }

            imageView.kf.setImage(with: URL(string: smallUrlStr), placeholder:UIImage(named: "PhotoRectangle") , options: [.targetCache(path)], progressBlock: { (receivedData, totolData) in
                // 这里用进度条或者绘制view都可以,然后根据 percentage% 表示进度就行了
                //let percentage = (Float(receivedData) / Float(totolData)) * 100.0
                //print("downloading progress is: /(percentage)%")


            }) { result in

//                switch result {
//
//                case .success(let imageResult):
//                    print(imageResult)
//
//                case .failure(let aError):
//                    print(aError)
//                }

            }
复制代码
预先获取要显示的图片,需要显示时在直接添加
let urls = ["http://www.baidu.com/image1.jpg", "http://www.baidu.com/image2.jpg"]
            .map { URL(string: $0)! }
        let prefetcher = ImagePrefetcher(urls: urls) {
            skippedResources, failedResources, completedResources in
            print("These resources are prefetched: /(completedResources)")
        }
        prefetcher.start()

        // Later when you need to display these images:
        imageView.kf.setImage(with: urls[0])
        anotherImageView.kf.setImage(with: urls[1])
复制代码
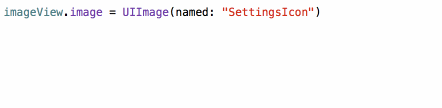
let icon = UIImage(named: "settings-icon")
let font = UIFont(name: "San Francisco", size: 42)
let color = UIColor(named: "indicator highlight")
let viewController = CustomViewController(nibName: "CustomView", bundle: nil)
let string = String(format: NSLocalizedString("welcome.withName", comment: ""), locale: NSLocale.current, "Arthur Dent")

复制代码
使用 R.swift 之后,你可以这样写代码:
let icon = R.image.settingsIcon()
let font = R.font.sanFrancisco(size: 42)
let color = R.color.indicatorHighlight()
let viewController = CustomViewController(nib: R.nib.customView)
let string = R.string.localizable.welcomeWithName("Arthur Dent")
复制代码
// Localized strings are grouped per table (.strings file)
let welcomeMessage = R.string.localizable.welcomeMessage()
let settingsTitle = R.string.settings.title()

// Functions with parameters are generated for format strings
let welcomeName = R.string.localizable.welcomeWithName("Alice")

// Functions with named argument labels are generated for stringsdict keys
let progress = R.string.localizable.copyProgress(completed: 4, total: 23)
复制代码
Storyboards
没有使用 R.swift 这样访问:
let storyboard = UIStoryboard(name: "Main", bundle: nil)
let initialTabBarController = storyboard.instantiateInitialViewController() as? UITabBarController
let settingsController = storyboard.instantiateViewController(withIdentifier: "settingsController") as? SettingsController

复制代码
使用 R.swift 后这样访问:
let storyboard = R.storyboard.main()
let initialTabBarController = R.storyboard.main.initialViewController()
let settingsController = R.storyboard.main.settingsController()
复制代码
Segues
没有使用 R.swift 这样访问:
// Trigger segue with:
performSegue(withIdentifier: "openSettings", sender: self)

// And then prepare it:
override func prepare(for segue: UIStoryboardSegue, sender: Any?) {
    if let settingsController = segue.destination as? SettingsController,
       let segue = segue as? CustomSettingsSegue, segue.identifier == "openSettings" {
      segue.animationType = .LockAnimation
      settingsController.lockSettings = true
    }
  }
复制代码
使用 R.swift 后这样访问:
// Trigger segue with:
performSegue(withIdentifier: R.segue.overviewController.openSettings, sender: self)

// And then prepare it:
override func prepare(for segue: UIStoryboardSegue, sender: Any?) {
  if let typedInfo = R.segue.overviewController.openSettings(segue: segue) {
    typedInfo.segue.animationType = .LockAnimation
    typedInfo.destinationViewController.lockSettings = true
  }
}

复制代码
提示:看看 SegueManager 库,它使segues块为基础,并与r.s ft兼容。
Nibs
没有使用 R.swift 这样访问:
let nameOfNib = "CustomView"
let customViewNib = UINib(nibName: "CustomView", bundle: nil)
let rootViews = customViewNib.instantiate(withOwner: nil, options: nil)
let customView = rootViews[0] as? CustomView

let viewControllerWithNib = CustomViewController(nibName: "CustomView", bundle: nil)
复制代码
使用 R.swift 后这样访问:
let nameOfNib = R.nib.customView.name
let customViewNib = R.nib.customView()
let rootViews = R.nib.customView.instantiate(withOwner: nil)
let customView = R.nib.customView.firstView(owner: nil)

let viewControllerWithNib = CustomViewController(nib: R.nib.customView)
复制代码


ws0132613@gmail.comhttps://getmacos.com/gopanel/william smith
谢谢
https://www.newcmy.com/register?aff=HBVX建议您试试草莓云机场,可以流畅观看youtube和tiktok,上reddit/x也没有问题,还有各种ai优化节点。
想购买您这个站,我的联系方式QQ741756694微信同步 能卖联系
![[HBLOG]公众号](https://www.liuhaihua.cn/img/qrcode_gzh.jpg)

