Spring Cloud Alibaba基础教程第一篇:使用Nacos实现服务注册与发现
Nacos(官方网站:http://nacos.io)是一个易于使用的平台,专为动态服务发现,配置和服务管理而设计。它可以帮助您轻松构建云本机应用程序和微服务平台。
安装并启动Nacos
下载地址: github.com/alibaba/nac… 本文版本:1.0.1
下载完成之后,解压。
cd 到nacos/bin目录下
根据不同平台,执行不同命令,启动Nacos服务:
启动命令(standalone代表着单机模式运行,非集群模式):
- Linux/Unix/Mac:
sh startup.sh -m standalone - Windows:
cmd startup.cmd -m standalone或者双击startup.cmd运行文件。
不出意外 你会启动成功 启动完成之后,访问: http://localhost:8848/nacos/ ,可以进入Nacos的服务管理页面,具体如下:
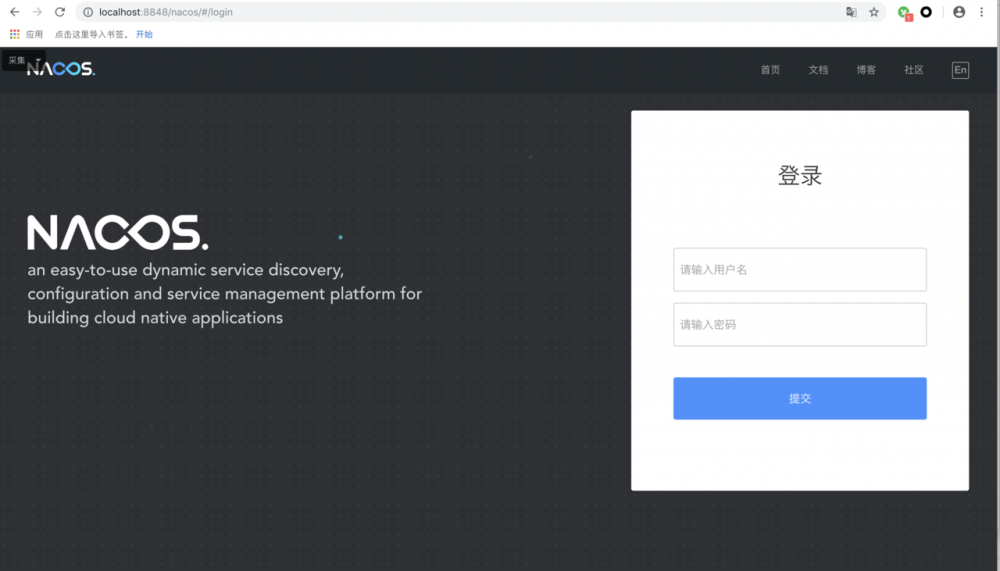
默认用户名/密码: nacos/nacos 登录即可 目前Nacos注册中心搭建完毕
创建服务模拟微服务
项目结构图:
-
Spring Boot:2.1.6.RELEASE -
Spring Cloud:Greenwich.SR1 -
Spring Cloud Alibaba:0.2.2.RELEASE
教程采用多模块化,先创建maven项目作为父项目,引入公共依赖
完整pom.xml
<?xml version="1.0" encoding="UTF-8"?>
<project xmlns="http://maven.apache.org/POM/4.0.0"
         xmlns:xsi="http://www.w3.org/2001/XMLSchema-instance"
         xsi:schemaLocation="http://maven.apache.org/POM/4.0.0 http://maven.apache.org/xsd/maven-4.0.0.xsd">
    <modelVersion>4.0.0</modelVersion>

    <groupId>com.xd</groupId>
    <artifactId>SpringCloudAlibabaLearn</artifactId>
    <version>1.0-SNAPSHOT</version>

    <parent>
        <groupId>org.springframework.boot</groupId>
        <artifactId>spring-boot-starter-parent</artifactId>
        <version>2.1.6.RELEASE</version>
        <relativePath/>
    </parent>

    <modules>
        <module>alibaba-nacos-provider-server</module>
        <module>alibaba-nacos-consumer-server</module>
    </modules>

    <dependencyManagement>
        <dependencies>
            <dependency>
                <groupId>org.springframework.cloud</groupId>
                <artifactId>spring-cloud-dependencies</artifactId>
                <version>Greenwich.SR1</version>
                <type>pom</type>
                <scope>import</scope>
            </dependency>
            <dependency>
                <groupId>org.springframework.cloud</groupId>
                <artifactId>spring-cloud-alibaba-dependencies</artifactId>
                <version>0.2.2.RELEASE</version>
                <type>pom</type>
                <scope>import</scope>
            </dependency>
        </dependencies>
    </dependencyManagement>

    <dependencies>
        <dependency>
            <groupId>org.springframework.boot</groupId>
            <artifactId>spring-boot-starter-web</artifactId>
        </dependency>

        <dependency>
            <groupId>org.springframework.boot</groupId>
            <artifactId>spring-boot-starter-test</artifactId>
            <scope>test</scope>
        </dependency>
    </dependencies>
</project>
复制代码
上述内容主要三部分:
parent
dependencyManagement
dependencies
spring-cloud-starter-alibaba-nacos-discovery 。由于在 dependencyManagement 中已经引入了版本,所以这里就不用指定具体版本了。还有就是spring-boot的起步依赖
下面在父模块上创建两个应用(服务提供者与服务消费者)来验证服务的注册与发现
创建服务提供者
1. 创建SpringBoot项目
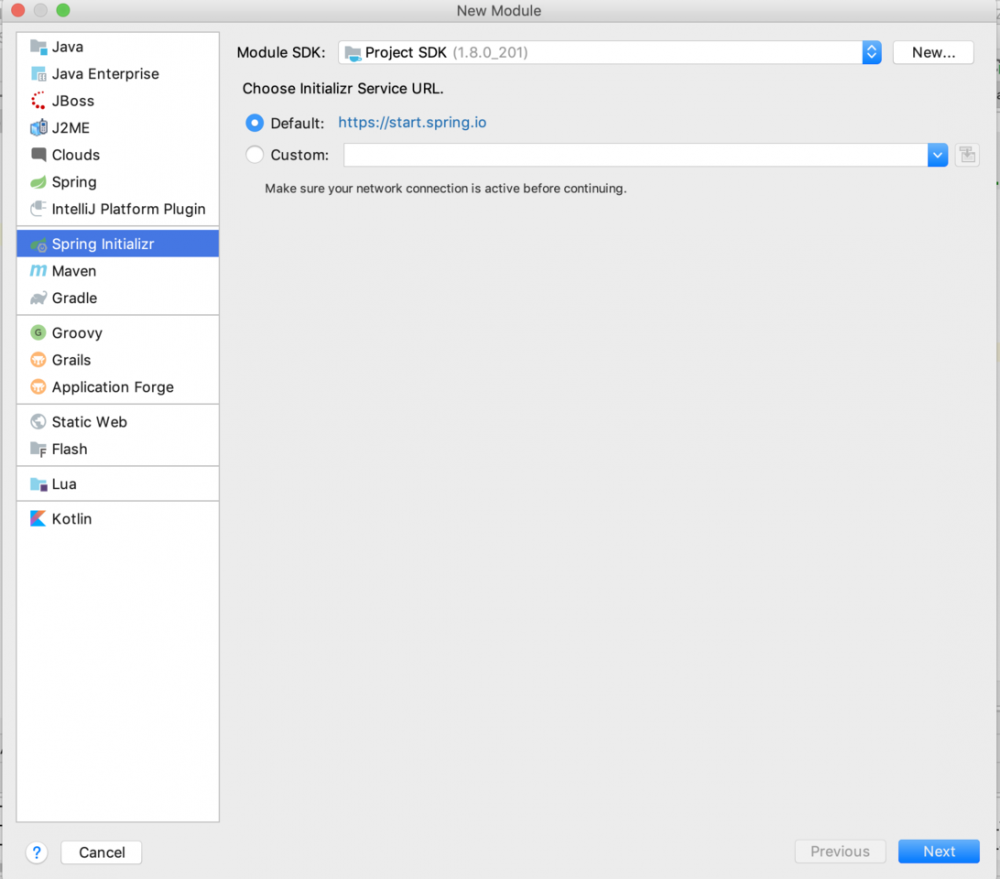
然后命项目名,组织名等即可
2.编辑pom.xml文件
<?xml version="1.0" encoding="UTF-8"?>
<project xmlns="http://maven.apache.org/POM/4.0.0" xmlns:xsi="http://www.w3.org/2001/XMLSchema-instance"
   xsi:schemaLocation="http://maven.apache.org/POM/4.0.0 http://maven.apache.org/xsd/maven-4.0.0.xsd">
   <modelVersion>4.0.0</modelVersion>
   <parent>
      <groupId>com.xd</groupId>
      <artifactId>SpringCloudAlibabaLearn</artifactId>
      <version>1.0-SNAPSHOT</version>
      <relativePath>../</relativePath>
   </parent>
   <artifactId>alibaba-nacos-provider-server</artifactId>
   <version>0.0.1-SNAPSHOT</version>
   <name>alibaba-nacos-provider-server</name>
   <description>服务提供者</description>

   <properties>
      <java.version>1.8</java.version>
   </properties>

   <dependencies>

   </dependencies>

   <build>
      <plugins>
         <plugin>
            <groupId>org.springframework.boot</groupId>
            <artifactId>spring-boot-maven-plugin</artifactId>
         </plugin>
      </plugins>
   </build>

</project>
复制代码
3.application.properties
配置服务名称和nacos注册地址
# 自定义端口号
server.port=8080
# 服务提供者
spring.application.name=provider-service
# 注册到nacos注册中心
spring.cloud.nacos.discovery.server-addr=127.0.0.1:8848
复制代码
4.创建请求类,并实现一个接口
package com.xd.alibabanacosproviderserver;

import org.springframework.boot.SpringApplication;
import org.springframework.boot.autoconfigure.SpringBootApplication;
import org.springframework.cloud.client.discovery.EnableDiscoveryClient;
import org.springframework.web.bind.annotation.GetMapping;
import org.springframework.web.bind.annotation.PathVariable;
import org.springframework.web.bind.annotation.RestController;

/**
 * @RestController 表示控制层
 * @EnableDiscoveryClient 开启服务注册发现功能
 */
@RestController
@EnableDiscoveryClient
@SpringBootApplication
public class AlibabaNacosProviderServerApplication {

   public static void main(String[] args) {
      SpringApplication.run(AlibabaNacosProviderServerApplication.class, args);
   }

   @GetMapping("/echo/{name}")
   public String echo(@PathVariable String name) {
      return "hello " + name;
   }
}
复制代码
主要表示:
@SpringBootApplication 定义是个Spring Boot应用;
@EnableDiscoveryClient 开启Spring Cloud的服务注册与发现,由于这里引入了 spring-cloud-starter-alibaba-nacos-discovery 模块,所以Spring Cloud Common中定义的那些与服务治理相关的接口将使用Nacos的实现
5.启动程序
启动程序完成后你会发现控制台打印的 说明已经向nacos完成注册

6.查看nacos注册中心查询是否注册
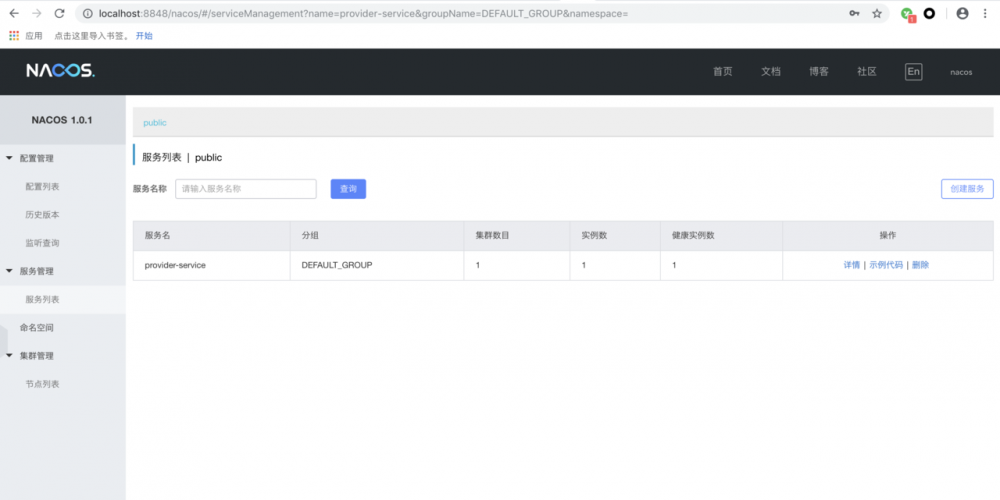
切换到服务列表: 这里会显示当前注册的所有服务,以及每个服务的集群数目、实例数、健康实例数。
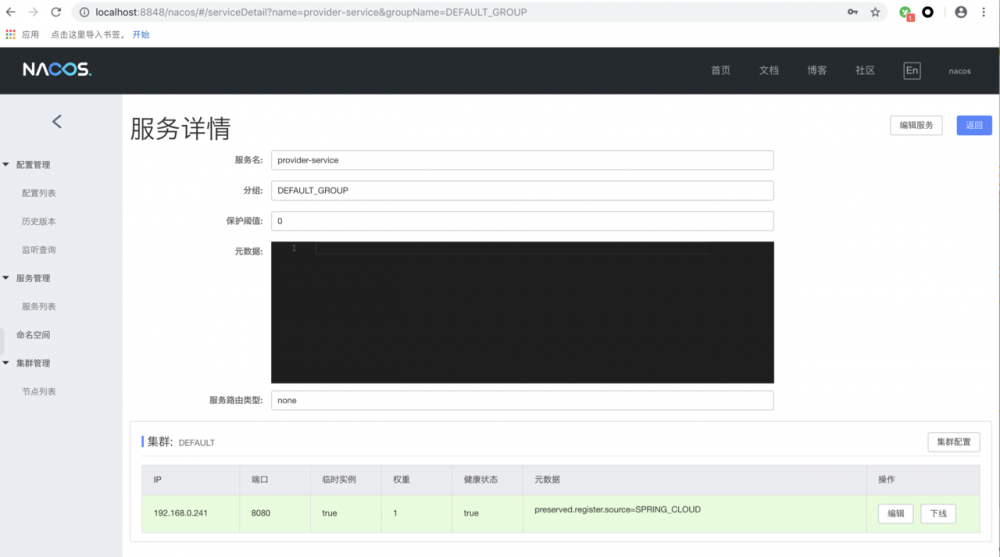
点击详情,我们还能看到每个服务具体的实例信息,如下图所示:
目前为止服务提供者创建完毕
创建服务消费者
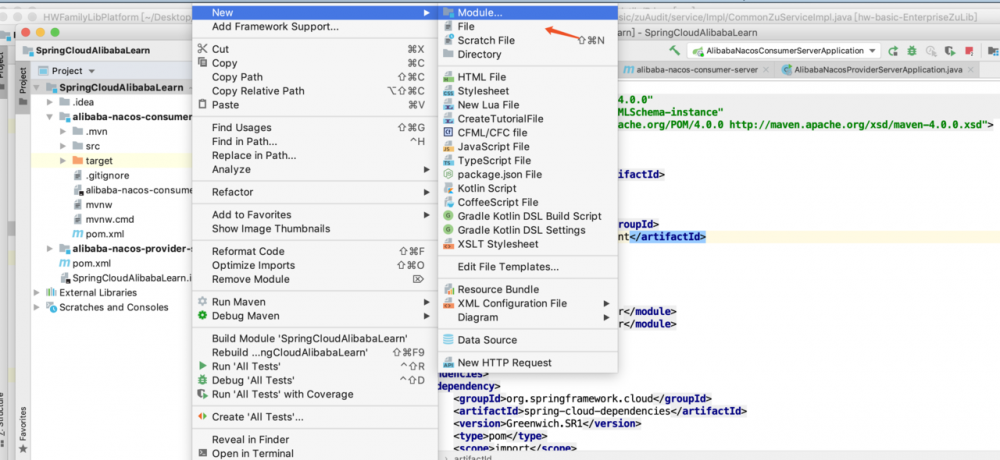
1.创建Spring Boot项目
步骤同上,这里不做多解释
2.编辑pom.xml文件
<?xml version="1.0" encoding="UTF-8"?>
<project xmlns="http://maven.apache.org/POM/4.0.0" xmlns:xsi="http://www.w3.org/2001/XMLSchema-instance"
   xsi:schemaLocation="http://maven.apache.org/POM/4.0.0 http://maven.apache.org/xsd/maven-4.0.0.xsd">
   <modelVersion>4.0.0</modelVersion>
   <parent>
      <groupId>com.xd</groupId>
      <artifactId>SpringCloudAlibabaLearn</artifactId>
      <version>1.0-SNAPSHOT</version>
      <relativePath>../</relativePath>
   </parent>
   <artifactId>alibaba-nacos-provider-server</artifactId>
   <version>0.0.1-SNAPSHOT</version>
   <name>alibaba-nacos-provider-server</name>
   <description>服务消费者</description>

   <properties>
      <java.version>1.8</java.version>
   </properties>

   <dependencies>

   </dependencies>

   <build>
      <plugins>
         <plugin>
            <groupId>org.springframework.boot</groupId>
            <artifactId>spring-boot-maven-plugin</artifactId>
         </plugin>
      </plugins>
   </build>

</project>
复制代码
3.application.properties
配置服务名称和nacos注册地址
server.port=8081
#服务消费者
spring.application.name=consumer-service
#注册服务到nacos
spring.cloud.nacos.discovery.server-addr=127.0.0.1:8848
复制代码
4.创建应用主类,并实现一个接口,在该接口中调用服务提供方的接口。
package com.xd.alibabanacosconsumerserver;

import org.springframework.beans.factory.annotation.Autowired;
import org.springframework.boot.SpringApplication;
import org.springframework.boot.autoconfigure.SpringBootApplication;
import org.springframework.cloud.client.ServiceInstance;
import org.springframework.cloud.client.discovery.EnableDiscoveryClient;
import org.springframework.cloud.client.loadbalancer.LoadBalancerClient;
import org.springframework.web.bind.annotation.GetMapping;
import org.springframework.web.bind.annotation.PathVariable;
import org.springframework.web.bind.annotation.RestController;
import org.springframework.web.client.RestTemplate;

/**
 * @RestController 表示控制层
 * @EnableDiscoveryClient 开启服务注册发现功能
 */
@RestController
@EnableDiscoveryClient
@SpringBootApplication
public class AlibabaNacosConsumerServerApplication {

    public static void main(String[] args) {
        SpringApplication.run(AlibabaNacosConsumerServerApplication.class, args);
    }


    @Autowired
    LoadBalancerClient loadBalancerClient;

    @GetMapping("/echo/{name}")
    public String test(@PathVariable("name") String name) {
        // 通过spring cloud common中的负载均衡接口选取服务提供节点实现接口调用
        // serviceId为spring.application.name
        ServiceInstance serviceInstance = loadBalancerClient.choose("provider-service");
        String url = serviceInstance.getUri() + "/echo/" + name;
        RestTemplate restTemplate = new RestTemplate();
        String result = restTemplate.getForObject(url, String.class);
        return "from: " + url + ",return: " + result;
    }
}
复制代码
这里使用了Spring Cloud Common中的 LoadBalancerClient 接口来挑选服务实例信息。然后从挑选出的实例信息中获取可访问的URI,拼接上服务提供方的接口规则来发起调用。
5.启动服务消费者程序
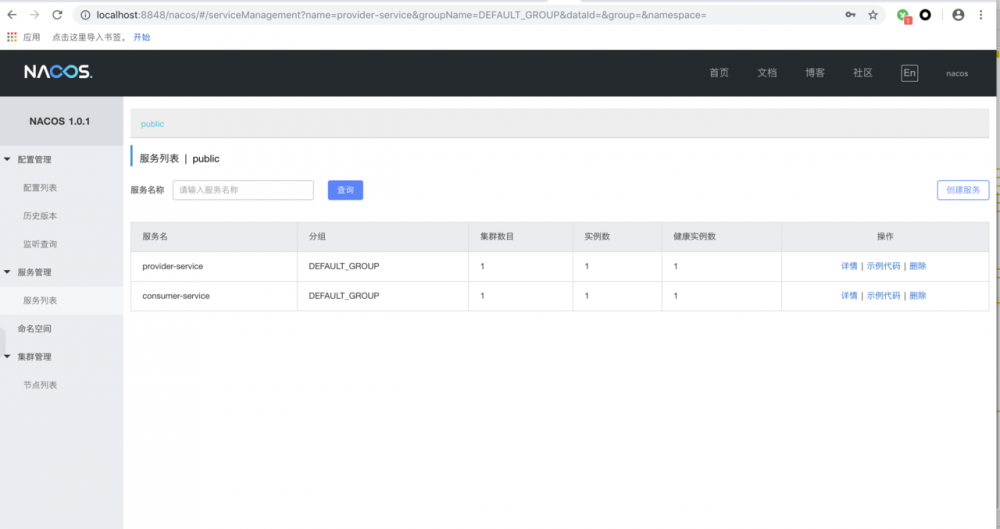
同样的打开nacos注册中心有没有注册成功
看来都已经注册成功,然后打开浏览器访问: http://localhost:8081/echo/lhd
可以看到,发送请求时,已经成功调用并返回信息 本文模拟在微服务中服务与服务之间相互调用的过程,但是很明显,这样的实现还是比较繁琐,后面讲解服务消费的几种方式
正文到此结束
- 本文标签: tar IO IDE REST apache http ip 集群 springcloud CTO linux schema windows plugin UI 微服务 组织 java src pom 网站 springboot 代码 consumer cmd 负载均衡 bean 配置 服务注册 XML spring lib maven cat Spring Boot GitHub provider unix https Service 安装 注册中心 实例 目录 client db description id 管理 dependencies web 下载 git map Spring cloud App 云 build 端口
- 版权声明: 本文为互联网转载文章,出处已在文章中说明(部分除外)。如果侵权,请联系本站长删除,谢谢。
- 本文海报: 生成海报一 生成海报二
热门推荐


相关文章

近期评论
-
ws0132613@gmail.comhttps://getmacos.com/gopanel/william smith
-
谢谢
-
https://www.newcmy.com/register?aff=HBVX建议您试试草莓云机场,可以流畅观看youtube和tiktok,上reddit/x也没有问题,还有各种ai优化节点。
-
-
-
想购买您这个站,我的联系方式QQ741756694微信同步 能卖联系
-
-
-
-
Loading...
![[HBLOG]公众号](https://www.liuhaihua.cn/img/qrcode_gzh.jpg)

