Spring Boot 微服务框架
| 编辑推荐: |
| 文章介绍了Spring Boot的优缺点,限制,安装介绍及一些实例,希望对大家的学习有所帮助。 本文来自于简书,由火龙果软件Delores编辑、推荐。 |
1. Spring Boot
1). 简介
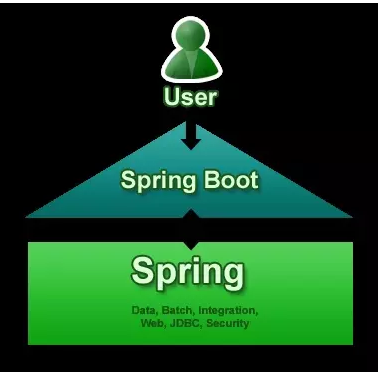
Spring Boot 是由 Pivotal 团队提供的全新框架,其设计目的是用来简化新 Spring 应用的初始搭建以及开发过程。该框架使用了特定的方式来进行配置,从而使开发人员不再需要定义样板化的配置。
2). 好处
(1)它是Spring的升级版,Spring容器能做到的事情,它都能做到,而且更简便,从配置形式上来说,SpringBoot完全抛弃了繁琐的XML文件配置方式,而是替代性地用注解方式来实现,虽然本质来说,是差不多的(类似包扫描,注解扫描,类加载之类)。
(2)SpringBoot集成的插件更多,从而使用很多服务,都只是引入一个依赖,几个注解和Java类就可以用了,具体的参考相关手册。
(3)在Web应用开发这一块,之前的应用一般来说是打包成war包,再发布到相关服务器容器下(例如Tomcat),虽然SpringBoot也可以这么做,但在SpringBoot下更常见的形式是将SpringBoot应用打包成可执行jar包文件。之所以这么做,源于你可以直接将SpringBoot应用看成是一个Java Application,其Web应用可以没有webapp目录(更不用说web.xml了),它推荐使用html页面,并将其作为静态资源使用。
3). Spring Boot是什么
Spring Boot不是一个框架,它是一种用来轻松创建具有最小或零配置的独立应用程序的方式。这是方法用来开发基于Spring的应用,但只需非常少的配置。它提供了默认的代码和注释配置,快速启动新的Spring项目而不需要太多时间。它利用现有的Spring项目以及第三方项目来开发生产就绪(投入生产)的应用程序。它提供了一组pom或gradle构建文件,可以使用它们添加所需的依赖项,并且还便于自动配置。
Spring Boot根据其类路径上的库自动配置所需的类。假设应用程序想要与数据库交互,如果在类路径上有Spring数据库,那么它会自动建立与数据源类的连接。
4). 主要目标
为所有Spring开发提供一个基本的,更快,更广泛的入门体验。
开箱即用,但随着需求开始偏离默认值,快速启动。
提供大型项目(例如嵌入式服务器,安全性,度量,运行状况检查,外部化配置)常见的一系列非功能特性。
绝对没有代码生成以及不需要XML配置,完全避免XML配置。
为了避免定义更多的注释配置(它将一些现有的 Spring Framework 注释组合成一个简单的单一注释)
避免编写大量import语句。
提供一些默认值,以便在短时间内快速启动新项目。
5). 新项目使用Spring Boot
简化基于Java的应用程序开发,单元测试和集成测试过程。
通过提供一些默认值来减少开发,单元测试和集成测试时间。
提高生产力。
当使用默认值时,Spring Boot有自己的看法。如果不指定详细信息,它将使用其自己的默认配置。如果想要持久化,但是没有在POM文件中指定任何东西,那么Spring Boot会- 将Hibernate带有HSQLDB数据库的配置作为JPA提供者。
为大型项目(例如嵌入式服务器,安全性,度量,健康检查,外部化配置)提供许多非常常见的非功能特性/解决方案。
6). 优缺点
Spring Boot的优点:
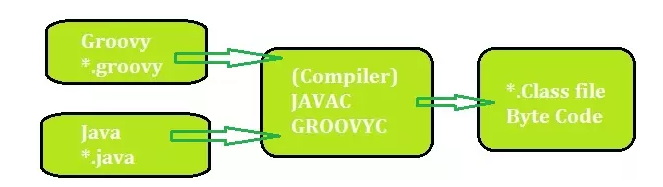
使用Java或Groovy开发基于Spring的应用程序非常容易。
它减少了大量的开发时间并提高了生产力。
它避免了编写大量的样板代码,注释和XML配置。
Spring Boot应用程序与其Spring生态系统(如Spring JDBC,Spring ORM,Spring Data,Spring Security等)集成非常容易。
它遵循“自用默认配置”方法,以减少开发工作量。
它提供嵌入式HTTP服务器,如Tomcat,Jetty等,以开发和测试Web应用程序非常容易。
它提供CLI(命令行界面)工具从命令提示符,非常容易和快速地开发和测试Spring Boot(Java或Groovy)应用程序。
它提供了许多插件来开发和测试Spring启动应用程序非常容易使用构建工具,如Maven和Gradle。
它提供了许多插件,以便与嵌入式和内存数据库工作非常容易。
Spring Boot的限制:
将现有或传统的Spring Framework项目转换为Spring Boot应用程序是一个非常困难和耗时的过程。它仅适用于全新Spring项目。
2. Spring Boot
1). 入门
Spring Boot项目归根只是一个常规的Spring项目,只是利用了Spring Boot启动程序和自动配置。要创建Spring Boot应用程序的方法,Spring团队(The Pivotal Team)提供了以下三种方法。
使用Spring Boot CLI工具
使用Spring STS IDE
使用Spring Initializr
可以使用Spring Boot开发两种基于Spring的应用程序:
基于Java的应用程序
基于Groovy的应用程序
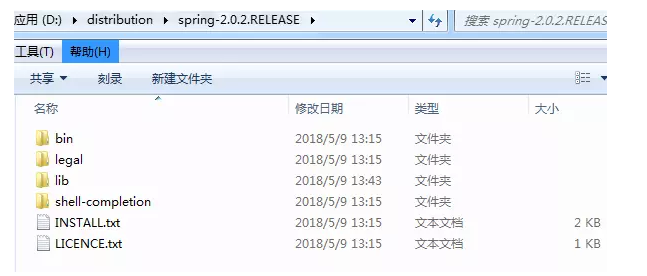
2). Spring Boot CLI
I. 下载并解压
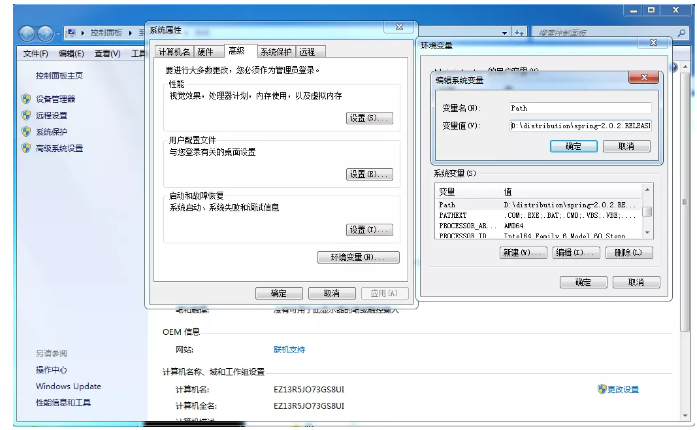
在Windows系统中命令提示符中设置Spring Boot CLI环境变量:
右键“我的电脑”->”高级系统设置”->”高级”->”环境变量”->选择”PATH”并新建并加上面的路径
D:/distribution/spring-2.0.2.RELEASE/bin;
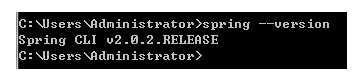
验证:
spring --version
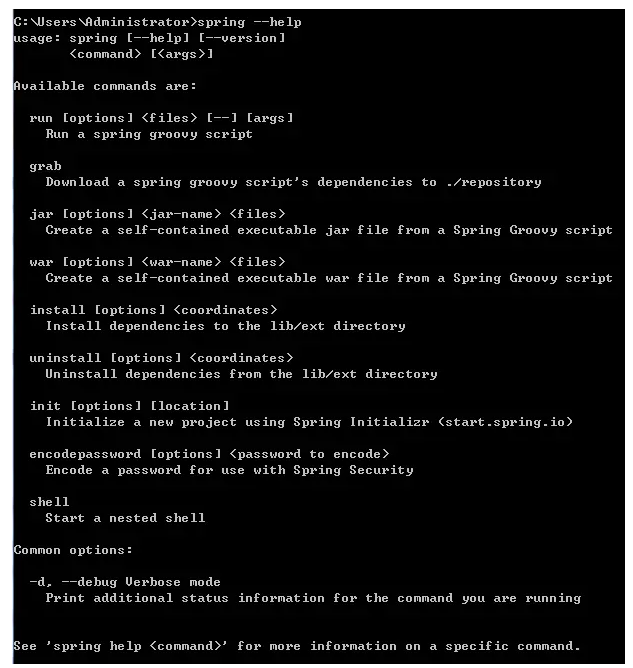
II. spring 命令语法查看spring --help
III. 创建HelloWorld.groovy文件
 @RestController
 class HelloWorld {
 @RequestMapping("/")
 String hello() {
 "Hello mazaiting."
 }
 }

IV. 运行
spring run HelloWorld.groovy

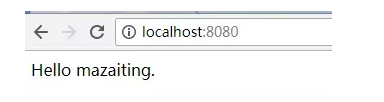
V. 测试
在浏览器输入http://localhost:8080/即可访问
3). Maven 安装Spring Boot
 <!-- Inherit defaults from
 Spring Boot -->
 <parent>
 <groupId>org.springframework.boot
 </groupId>
 <artifactId>spring-boot-starter-parent
 </artifactId>
 <version>2.0.2.RELEASE</version>
 </parent>
 <!-- Add typical dependencies
 for a web application -->
 <dependencies>
 <dependency>
 <groupId>org.springframework.boot
 </groupId>
 <artifactId>spring-boot-starter-web
 </artifactId>
 </dependency>
 </dependencies>
4). Eclipse 使用 Spring Boot
I. 在pom.xml文件中添加SpringBoot的依赖
 <project xmlns="http://maven.apache.org
/POM/4.0.0" xmlns:xsi="http://
www.w3.org/2001/XMLSchema-instance"
 xsi:schemaLocation="http://
maven.apache.org/POM/4.0.0 http://
maven.apache.org/
xsd/maven-4.0.0.xsd">
 <modelVersion>4.0.0</modelVersion>
 <groupId>com.mazaiting</groupId>
 <artifactId>SpringBootTest</artifactId>
 <version>0.0.1-SNAPSHOT</version>
 <packaging>jar</packaging>
<name>SpringBootTest</name>
 <url>http://maven.apache.org</url>
 <properties>
 <project.build.sourceEncoding>UTF-8</project.build.sourceEncoding>
 </properties>
 <!-- Spring-Boot -->
 <parent>
 <groupId>org.springframework.boot
</groupId>
 <artifactId>spring-boot-starter-parent
</artifactId>
 <version>2.0.2.RELEASE</version>
 </parent>
 <dependencies>
 <dependency>
 <groupId>junit</groupId>
 <artifactId>junit</artifactId>
 <scope>test</scope>
 </dependency>
 <!-- Spring-Boot -->
 <dependency>
 <groupId>org.springframework.boot
</groupId>
 <artifactId>spring-boot-starter-web
</artifactId>
 </dependency>
 </dependencies>
 </project>
II. 创建HelloWorld类
@RestController
 @EnableAutoConfiguration
 public class HelloWorld {
 @RequestMapping("/")
 String home() {
 return "Hello mazaiting";
 }
 public static void main
(String[] args) {
 SpringApplication.run
(HelloWorld.class, args);
 }
 }
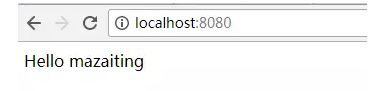
III. 执行结果
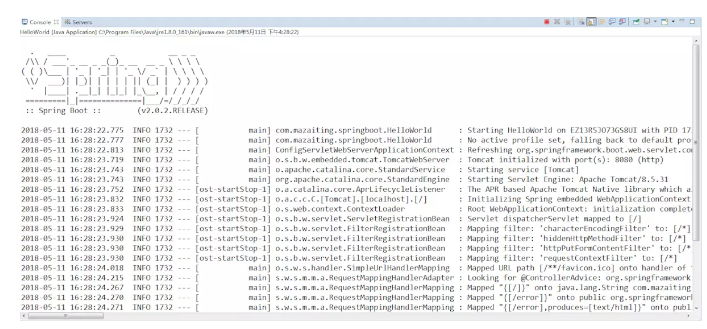
在浏览器输入http://localhost:8080/
IV. 注解解释
@RestController: 构造型注释, 指定控制器,Spring会在处理传入的Web请求时考虑它.
@RequestMapping:注解提供了“路由”信息。它告诉Spring任何带有路径“/”的HTTP请求应该映射到home方法。[@RestController](https://github.com/RestController "@RestController")注解告诉Spring将生成的字符串直接返回给调用者。
@EnableAutoConfiguration: 允许自动配置
V. 创建可执行的jar包
在pom.xml的project节点下添加
 <build>
 <plugins>
 <!-- 用于创建可执行jar -->
 <plugin>
 <groupId>org.springframework.
boot</groupId>
 <artifactId>spring-boot-
maven-plugin</artifactId>
 </plugin>
 </plugins>
 </build>
在项目的根目录下执行dos命令mvn package
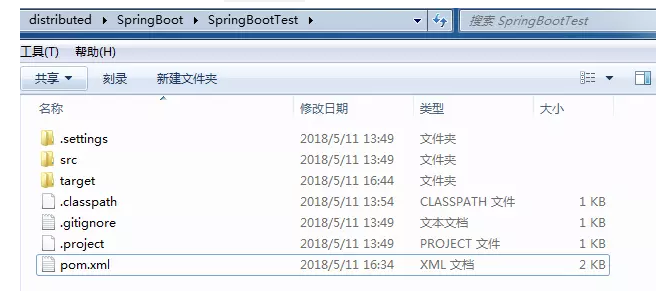
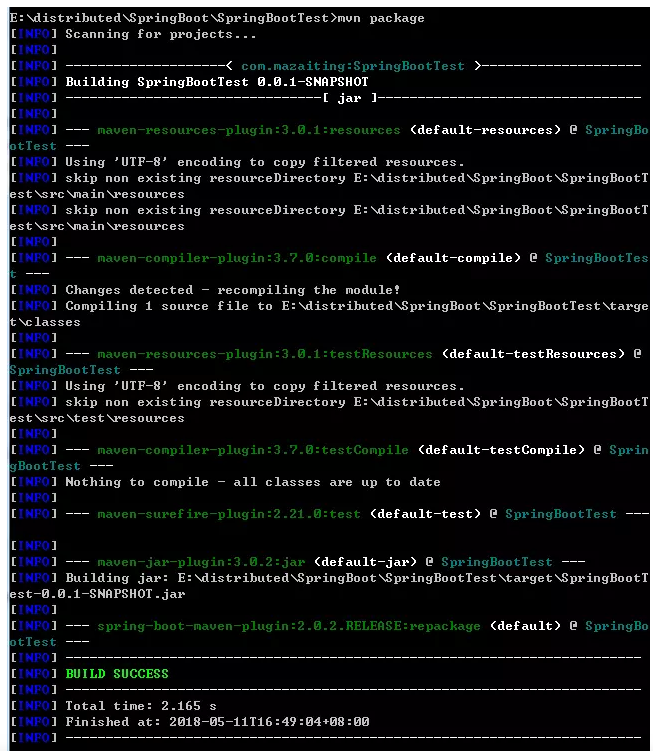
执行完成后/SpringBootTest/target/目录下生成SpringBootTest-0.0.1-SNAPSHOT.jar文件

执行java -jar target/SpringBootTest-0.0.1-SNAPSHOT.jar命令运行,并在浏览器输入http://localhost:8080/,同样可看到执行效果.
5). Spring Boot JSP 实例
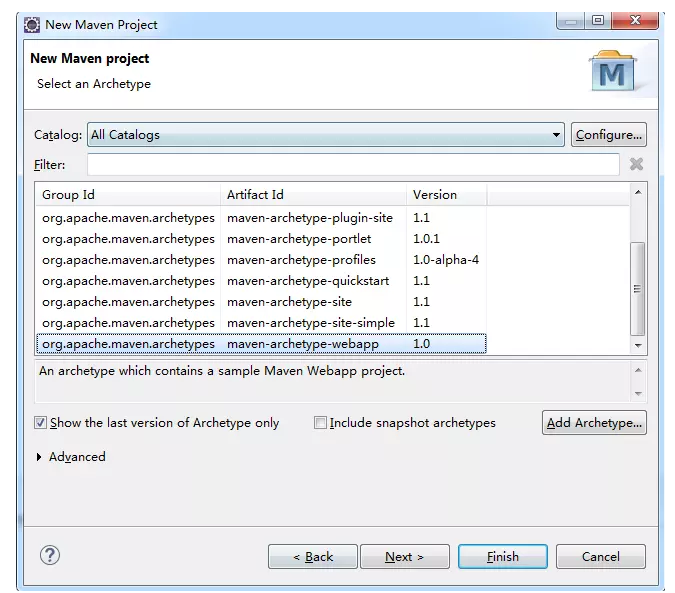
I. 创建Maven Web项目
II. 在pom文件中添加依赖
 <project xmlns="http://
maven.apache.org/POM/4.0.0"
 xmlns:xsi="http://www.w3.org
/2001/XMLSchema-instance"
 xsi:schemaLocation="http://
maven.apache.org/POM/4.0.0
 http://maven.apache.org/
maven-v4_0_0.xsd">
 <modelVersion>4.0.0</modelVersion>
 <groupId>com.mazaiting</groupId>
 <artifactId>SpringBoot-JSP
</artifactId>
 <packaging>war</packaging>
 <version>0.0.1-SNAPSHOT</version>
 <name>SpringBoot-JSP Maven
Webapp</name>
 <url>http://maven.apache.org</url>
 <!-- Spring-Boot -->
 <parent>
 <groupId>org.springframework.
boot</groupId>
 <artifactId>spring-boot-
starter-parent</artifactId>
 <version>2.0.2.RELEASE</version>
 </parent>
 <!-- 配置Java版本 -->
 <properties>
 <java.version>1.8</java.version>
 </properties>
 <dependencies>
 <dependency>
 <groupId>junit</groupId>
 <artifactId>junit</artifactId>
 <scope>test</scope>
 </dependency>
 <!-- Spring-Boot:
This is a web application -->
 <dependency>
 <groupId>org.springframework.
boot</groupId>
 <artifactId>spring-boot-
starter-web</artifactId>
 </dependency>
 <!-- Tomcat embedded container-->
 <dependency>
 <groupId>org.springframework.
boot</groupId>
 <artifactId>spring-boot-
starter-tomcat</artifactId>
 <scope>provided</scope>
 </dependency>
 <!-- Need this to compile JSP -->
 <dependency>
 <groupId>org.apache.tomcat.embed
</groupId>
 <artifactId>tomcat-embed-jasper
</artifactId>
 <scope>provided</scope>
 </dependency>
 <!-- JSTL for JSP -->
 <!-- https://mvnrepository.com
/artifact/javax.servlet/jstl -->
 <dependency>
 <groupId>javax.servlet</groupId>
 <artifactId>jstl</artifactId>
 </dependency>
 <!-- https://mvnrepository.com/
artifact/taglibs/standard -->
 <dependency>
 <groupId>taglibs</groupId>
 <artifactId>standard</artifactId>
 <version>1.1.2</version>
 </dependency>
<!-- Optional, test for static
 content, bootstrap CSS-->
 <dependency>
 <groupId>org.webjars</groupId>
 <artifactId>bootstrap</artifactId>
 <version>3.3.7</version>
 </dependency>
 </dependencies>
 <build>
 <finalName>SpringBoot-JSP
</finalName>
 <plugins>
 <!-- Package as an executable
 jar/war -->
 <plugin>
 <groupId>org.springframework
.boot</groupId>
 <artifactId>spring-boot-
maven-plugin</artifactId>
 </plugin>
 </plugins>
 </build>
 </project>
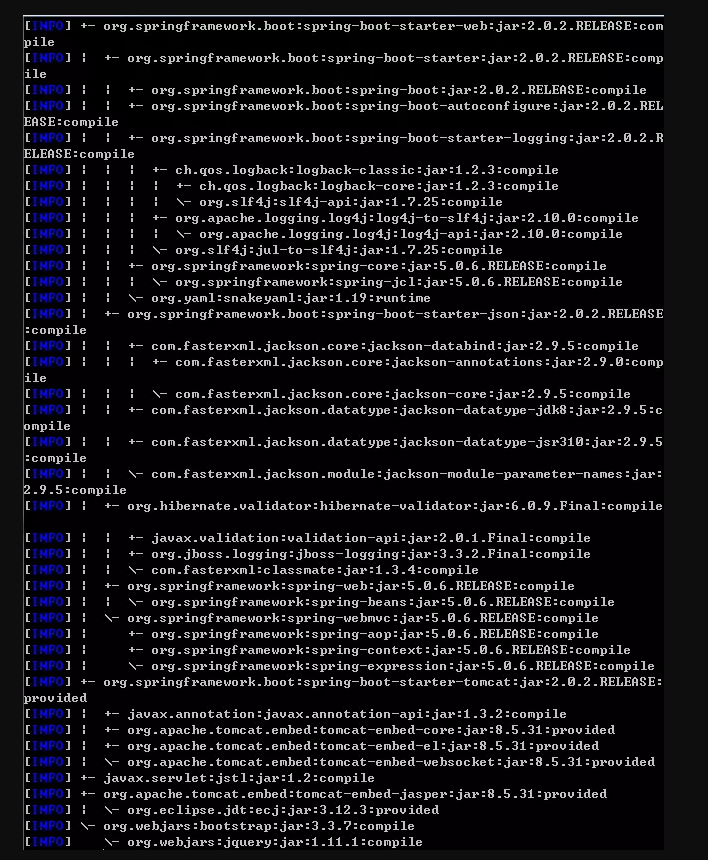
实现依赖关系:mvn dependency:tree
III. SpringBootServletInitializer执行传统的WAR部署运行SpringApplication
// 注解为SpringBoot应用
 @SpringBootApplication
 public class SpringBoot
WebApplication extends
SpringBootServletInitializer{
 @Override
 protected SpringApplication
Builder configure
(SpringApplicationBuilder builder) {
 return builder.sources
(SpringBootWebApplication.class);
 }
 public static void main
(String[] args) {
 SpringApplication.run
(SpringBootWebApplication.class, args);
 }
 }
IV. 创建控制器
 @Controller
 public class WelcomeController {
 // 注入应用配置 application.
properties
 @Value("${welcome.message}")
 private String message =
 "Hello World";
 @RequestMapping("/")
 public String welcome
(Map<String, Object> model) {
 model.put("message", this.message);
 return "welcome";
 }
 }
V. welcome.jsp页面
 <%@ page language="java"
 contentType="text/html; charset=UTF-8"
 pageEncoding="UTF-8" isELIgnored="false"%>
 <%@ taglib prefix="spring" uri="http://www.springframework.org/tags"%>
 <%@ taglib prefix="c" uri="http://
java.sun.com/jsp/jstl/core"%>
 <!DOCTYPE html>
 <html lang="en">
 <head>
 <meta http-equiv="Content-Type"
content="text/html; charset=UTF-8">
 <!-- 链接bootstrap -->
 <!--
 href中的内容写为:webjars/
bootstrap/3.3.7/css/bootstrap.css
 加载地址为:http://localhost:8080/SpringBoot-JSP/webjars/bootstrap/3.3.7/css/bootstrap.css
 href中的内容写为:/webjars/
bootstrap/3.3.7/css/bootstrap.css
 加载地址为:http://localhost:8080/webjars/
bootstrap/3.3.7/css/bootstrap.css
 使用中建议写为webjars/bootstrap/
3.3.7/css/bootstrap.css
 -->
 <link rel="stylesheet" type="text/css" href="webjars/bootstrap/3.3.7/
css/bootstrap.css"/>
 <%-- <spring:url value="/css/
main.css" var="springCss"/>
 <link href="${springCss}"
 rel="stylesheet"/> --%>
 <script type="text/javascript"
 src="webjars/jquery/1.11.1/
jquery.min.js"></script>
 <c:url value="/css/main.
css" var="jstlCss"></c:url>
 <link href="${jstlCss }"
 rel="stylesheet"/>
 <title>SpringBootTest</title>
 </head>
 <body>
 <nav class="navbar navbar-inverse">
 <div class="container">
 <div class="navbar-header">
 <a class="navbar-brand" href="#">
Spring Boot</a>
 </div>
 </div>
 <div id="navbar" class=
"collapse navbar-collapse">
 <ul class="nav nav-bar-nav">
 <li class="active">
<a href="#">Home</a></li>
 <li><a href="#about">About</a></li>
 </ul>
 </div>
 </nav>
 <div class="container">
 <div class="starter-template">
 <h1>Spring Boot Web JSP Example</h1>
 <h2>Message: ${message }</h2>
 </div>
 </div>
 <script type="text/javascript"
 src="webjars/bootstrap/3.3.7/
js/bootstrap.min.js"></script>
 </body>
 </html>
注
href中的内容写为:webjars/bootstrap/
 3.3.7/css/bootstrap.css
 加载地址为:http://localhost:
8080/SpringBoot-JSP/webjars/
bootstrap/3.3.7/css/bootstrap.css
href中的内容写为:/webjars/bootstrap
/3.3.7/css/bootstrap.css
 加载地址为:http://localhost:
8080/webjars/
bootstrap/3.3.7/css/bootstrap.css
使用中建议写为webjars/bootstrap/3.3.7
/css/bootstrap.css
main.css
h1 {
color: #00F;
}
h2 {
color: #F00;
}
VI. 在/src/main/resources/目录下创建application.properties及application-dev.properties、
application-prod.properties、application-test.properties。
application-dev.properties:用于开发环境
application-test.properties:用于测试环境
application-prod.properties:用于生产环境
在application.properties文件中配置使用哪一类型的配置文件, prefix和suffix配置视图层的前后缀。
spring.mvc.view.prefix: /jsp/
spring.mvc.view.suffix: .jsp
spring.profiles.active= dev
application-dev.properties
welcome.message: Hello mazaiting1
application-test.properties
welcome.message: Hello mazaiting2
application-prod.properties
welcome.message: Hello mazaiting3
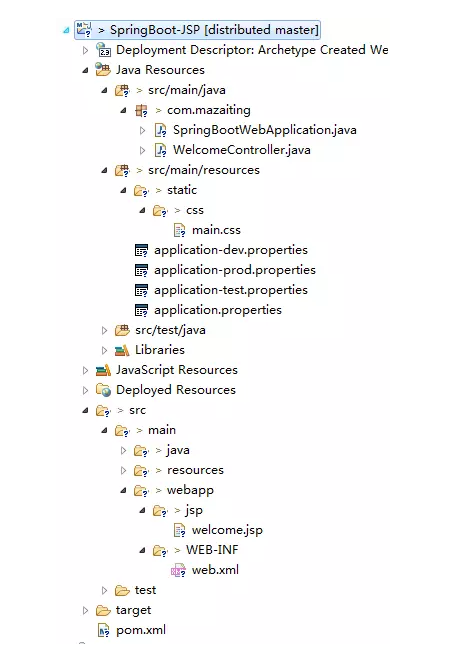
VII. 代码结构
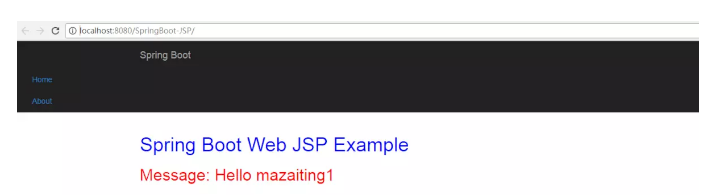
VIII. 运行测试一:在SpringBootWebApplication类上右键Run As -> Java Application, 在浏览器中输入http://localhost:8080/

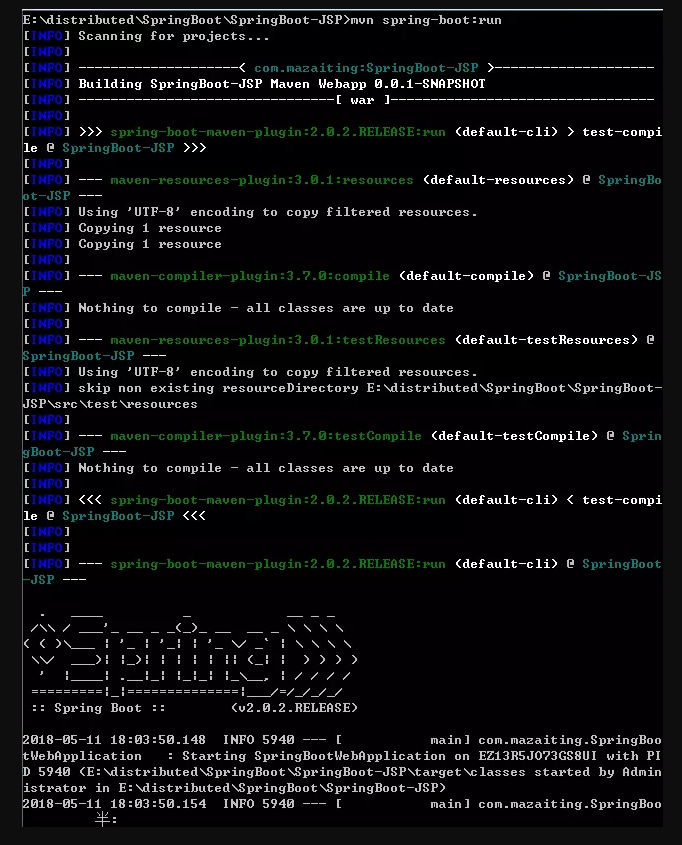
IX.. 运行测试二:在项目的根目录下,在命令提示符输入mvn spring-boot:run,然后在浏览器输入http://localhost:8080/也可呈现效果
X. 运行测试三:在工程右键-> Run As -> Run on Server部署在Tomcat容器中, 然后再浏览器中输入http://localhost:8080/SpringBoot-JSP/即可访问
XI. JSP限制
不能创建可执行jar来运行这个嵌入式Tomcat + JSP Web示例,因为Tomcat中有一个硬编码文件模式。
6). Spring Boot创建war包,并部署在Tomcat
I. 使用命令提示符进入项目根目录
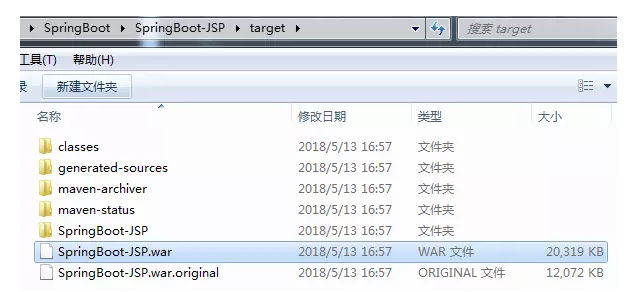
mvn clean package
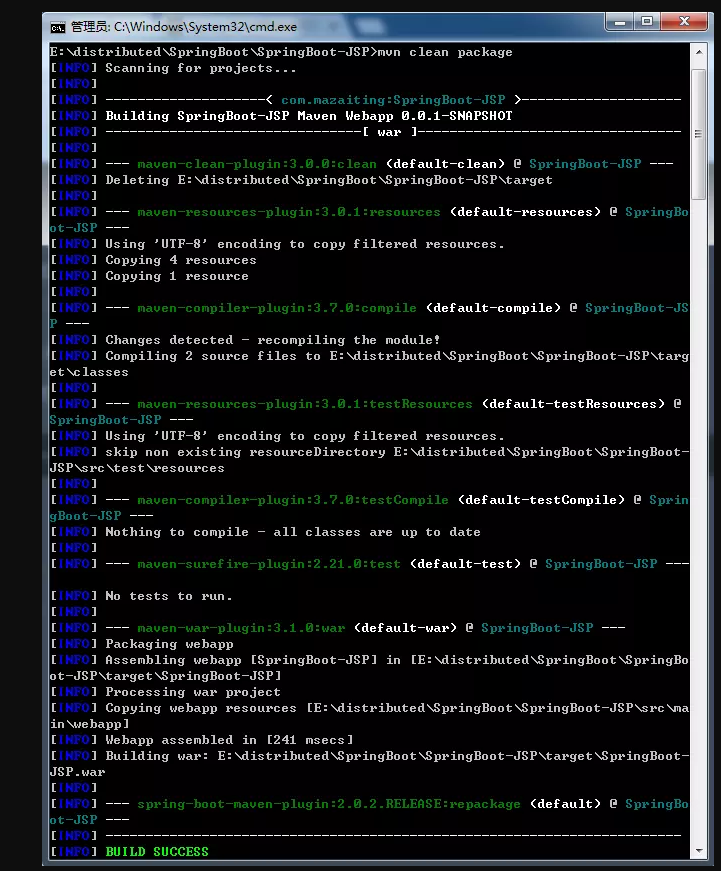
II. 执行成功后,项目的/SpringBoot-JSP/target/目录下出现SpringBoot-JSP.war
7). Spring Boot + Thymeleaf 模板引擎 -- 可执行JAR文件
I. 引入依赖
 <project xmlns="http://
maven.apache.org/POM/4.0.0"
 xmlns:xsi="http://www.w3.org/
2001/XMLSchema-instance"
 xsi:schemaLocation="http://
maven.apache.org/POM/4.0.0
 http://maven.apache.org/
maven-v4_0_0.xsd">
 <modelVersion>4.0.0</modelVersion>
 <groupId>com.mazaiting</groupId>
 <artifactId>SpringBoot-Thymeleaf
</artifactId>
 <version>0.0.1-SNAPSHOT</version>
 <name>SpringBoot-Thymeleaf Maven
 Webapp</name>
 <url>http://maven.apache.org</url>
 <parent>
 <groupId>org.springframework.
boot</groupId>
 <artifactId>spring-boot-
starter-parent</artifactId>
 <version>1.4.2.RELEASE</version>
 </parent>
 <!-- Java版本 -->
 <properties>
 <java.version>1.8</java.version>
 </properties>
<dependencies>
 <dependency>
 <groupId>junit</groupId>
 <artifactId>junit</artifactId>
 <scope>test</scope>
 </dependency>
 <dependency>
 <groupId>org.springframework.
boot</groupId>
 <artifactId>spring-boot-starter
-thymeleaf</artifactId>
 </dependency>
<!-- hot swapping, disable cache
 for template, enable live reload -->
 <dependency>
 <groupId>org.springframework.boot
</groupId>
 <artifactId>spring-boot-devtools
</artifactId>
 <optional>true</optional>
 </dependency>
 <!-- Optional, for bootstrap -->
 <dependency>
 <groupId>org.webjars</groupId>
 <artifactId>bootstrap</artifactId>
 <version>3.3.7</version>
 </dependency>
 </dependencies>
 <build>
 <finalName>SpringBoot-Thymeleaf
</finalName>
 <plugins>
 <!-- Package as an executable
jar/war -->
 <plugin>
 <groupId>org.springframework.
boot</groupId>
 <artifactId>spring-boot-
maven-plugin</artifactId>
 </plugin>
 </plugins>
 </build>
 </project>
spring-boot-devtools有助于禁用缓存并启用热插拔,以便开发人员总是看到最后的更改。尝试修改Thymeleaf模板或属性文件,刷新浏览器以查看更改立即生效。
II. 创建SpringBootWebApplication
 @SpringBootApplication
 public class SpringBoot
WebApplication {
 public static void main
(String[] args) {
 SpringApplication.run
(SpringBootWebApplication.
class, args);
 }
 }
III. 创建WelcomeController
@Controller
 public class WelcomeController {
 @Value("${welcome.message}")
 private String message=
 "Hello World";
 @RequestMapping("/")
 public String welcome
(Map<String, Object> model){
 model.put("message", this.message);
 return "welcome";
 }
 }
IV. Thymeleaf +资源+静态文件
welcome.html
 <!DOCTYPE html>
 <html xmlns:th=
"http://www.thymeleaf.org">
 <head>
 <meta http-equiv=
"Content-Type" content=
"text/html; charset=UTF-8"/>
 <title>Spring Boot Thymeleaf
 Hello World 示例</title>
 <link rel="stylesheet"
 type="text/css" href=
"webjars/bootstrap/3.3.7
/css/bootstrap.css"/>
 <link rel="stylesheet"
th:href="@{/css/main.css}"
 href="../../css/main.css"/>
 <script type="text/javascript"
src="webjars/jquery/1.11.1/
jquery.min.js"></script>
 </head>
 <body>
 <nav class="navbar navbar-inverse">
 <div class="container">
 <div class="navbar-header">
 <a class="navbar-brand" href="#">
Spring Boot</a>
 </div>
 <div id="navbar"
 class="collapse navbar-collapse">
 <ul class="nav navbar-nav">
 <li class="avtive">
<a href="#">首页</a></li>
 <li><a href="#about">关于</a></li>
 </ul>
 </div>
 </div>
 </nav>
 <div class="container">
 <div class="starter-template">
 <h1>Spring Boot Web
Thymeleaf 示例</h1>
 <h2>
 <span th:text="'Message: '
 + ${message}"></span>
 </h2>
 </div>
 </div>
 <script type="text/javascript" src="webjars/bootstrap/3.3.7/
js/bootstrap.min.js"></script>
 </body>
 </html>
main.css
h1 {
font-size: 20pt;
}
h2 {
font-size: 16pt;
}
application.properties
welcome.message: Hello, mazaiting
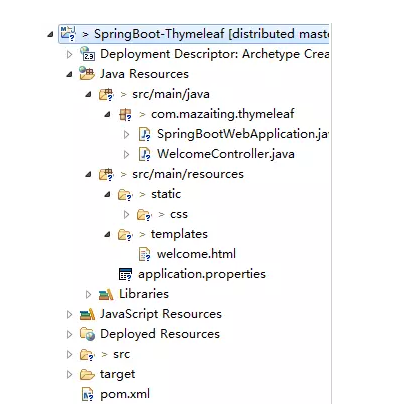
目录结构
V. 运行方式一:运行SpringBootWebApplication,浏览器输入http://localhost:8080/
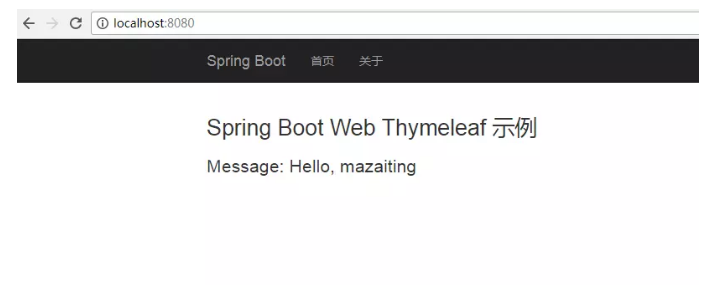
VI. 运行方式二:在命令提示符的项目根目录下执行mvn spring-boot:run,浏览器输入http://localhost:8080/即可显示效果
VII. 运行方式三:在命令提示符的项目根目录下执行mvn clean package,创建可执行jar包,运行jar包,浏览器输入http://localhost:8080/即可显示效果。想要生成jar包,在pom.xml文件中,一定有此行<packaging>war</packaging >
8). Spring Boot 非Web应用--命令行应用
I. 创建Maven的普通Java工程,并在pom.xml文件中添加依赖
 <project xmlns="http://
maven.apache.org/POM/4.0.0"
 xmlns:xsi="http://www.w3.org
/2001/XMLSchema-instance"
 xsi:schemaLocation="http://
maven.apache.org/POM/4.0.0
 http://maven.apache.org/xsd
/maven-4.0.0.xsd">
 <modelVersion>4.0.0</modelVersion>
 <groupId>com.mazaiting</groupId>
 <artifactId>SpringBoot-Console
</artifactId>
 <version>0.0.1-SNAPSHOT</version>
 <packaging>jar</packaging>
 <name>SpringBoot-Console</name>
 <url>http://maven.apache.org</url>
 <!-- Spring-Boot -->
 <parent>
 <groupId>org.springframework.boot
</groupId>
 <artifactId>spring-boot-starter-parent
</artifactId>
 <version>2.0.2.RELEASE</version>
 </parent>
 <properties>
 <project.build.sourceEncoding>UTF-8</project.build.sourceEncoding>
 </properties>
<dependencies>
 <dependency>
 <groupId>junit</groupId>
 <artifactId>junit</artifactId>
 <scope>test</scope>
 </dependency>
 <dependency>
 <groupId>org.springframework.boot
</groupId>
 <artifactId>spring-boot-starter
</artifactId>
 </dependency>
 </dependencies>
 <build>
 <plugins>
 <!-- Package as an executable
 jar/war -->
 <plugin>
 <groupId>org.springframework.
boot</groupId>
 <artifactId>spring-boot-
maven-plugin</artifactId>
 </plugin>
 </plugins>
 </build>
 </project>
II. 创建HelloService服务
@Service
 public class HelloMessage
Service {
 @Value("${name}")
 private String name;
 public String getMessage() {
 return getMessage(name);
 }
 public String getMessage
(String name) {
 return "Hello " + name;
 }
 }
III. application.properties内容
name=mazaiting
IV. SpringBootConsoleApplication应用
 @SpringBootApplication
 public class SpringBoot
ConsoleApplication implements
 CommandLineRunner{
 @Autowired
 private HelloMessageService
helloService;
 public static void main
(String[] args) {
 SpringApplication application =
 new SpringApplication
(SpringBootConsoleApplication.class);
 application.setBannerMode
(Banner.Mode.OFF);
 application.run(args);
 }
 @Override
 public void run(String... args)
 throws Exception {
 if (args.length > 0) {
 System.out.println(helloService.
getMessage(args[0].toString()));
 } else {
 System.out.println
(helloService.getMessage());
 }
 }
}
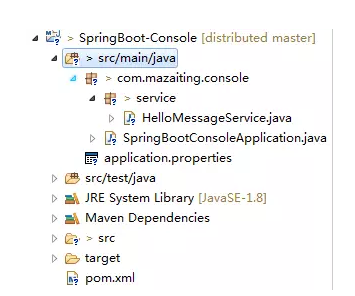
V. 目录结构
VI. 运行
生成jar包
mvn package
运行1
java -jar target/SpringBoot-
Console-0.0.1-SNAPSHOT.jar
结果:Hello mazaiting
运行2
java -jar target/SpringBoot-
Console-0.0.1-SNAPSHOT.
jar spring-boot
结果:Hello spring-boot
9). Spring Boot 属性配置
I. pom.xml文件
 <project xmlns="http://
maven.apache.org/POM/4.0.0"
 xmlns:xsi="http://www.w3.org
/2001/XMLSchema-instance"
 xsi:schemaLocation="http://
maven.apache.org/POM/4.0.0
 http://maven.apache.org/xsd/
maven-4.0.0.xsd">
 <modelVersion>4.0.0</modelVersion>
 <groupId>com.mazaiting</groupId>
 <artifactId>SpringBoot-Config
</artifactId>
 <version>0.0.1-SNAPSHOT</version>
 <packaging>jar</packaging>
 <name>SpringBoot-Config</name>
 <url>http://maven.apache.org</url>
 <!-- Spring-Boot -->
 <parent>
 <groupId>org.springframework.boot
</groupId>
 <artifactId>spring-boot-starter-parent
</artifactId>
 <version>2.0.2.RELEASE</version>
 </parent>
 <properties>
 <project.build.sourceEncoding>UTF-8</project.build.sourceEncoding>
 </properties>
 <dependencies>
 <dependency>
 <groupId>junit</groupId>
 <artifactId>junit</artifactId>
 <scope>test</scope>
 </dependency>
 <dependency>
 <groupId>org.springframework.boot
</groupId>
 <artifactId>spring-boot-starter
</artifactId>
 </dependency>
 <!-- Spring-Boot:
This is a web application -->
 <dependency>
 <groupId>org.springframework.boot
</groupId>
 <artifactId>spring-boot-starter-web
</artifactId>
 </dependency>
 </dependencies>
<build>
 <plugins>
 <!-- Package as an executable
jar/war -->
 <plugin>
 <groupId>org.springframework.
boot</groupId>
 <artifactId>spring-boot-
maven-plugin</artifactId>
 </plugin>
 </plugins>
 </build>
 </project>
II. @Value使用
 @Component
 @PropertySource
("classpath:global.properties")
 public class GlobalProperties {
@Value("${thread-pool}")
 private int threadPool;
 @Value("${email}")
 private String email;
 //getters and setters
}
III. ConfigurationProperties
 @Component
 @PropertySource
("classpath:global.properties")
 @ConfigurationProperties
 public class GlobalProperties {
 private int threadPool;
 private String email;
 //getters and setters
}
IV. 配置文件
global.properties文件
email=zaitingma@foxmail.com
thread-pool=12
application.properties文件
#Logging
 logging.level.org.
springframework.web=ERROR
 logging.level.com.mazaiting=DEBUG
#Global
 email=1425941077@qq.com
 thread-pool=10
#App
 app.menus[0].title=Home
 app.menus[0].name=Home
 app.menus[0].path=/
 app.menus[1].title=Login
 app.menus[1].name=Login
 app.menus[1].path=/login
app.compiler.timeout=5
 app.compiler.output-folder=/temp/
app.error=/error/
注: 如果在application.properties文件中有与global.properties中有相同的属性,取值时则取application.properties中的配置
V. 对应的java文件
AppProperties.java
@Component
 //prefix app, find app.* values
 @ConfigurationProperties("app")
 public class AppProperties {
 private String error;
 private List<Menu> menus
= new ArrayList<>();
 private Compiler compiler
 = new Compiler();

 public String getError() {
 return error;
 }
public void setError
(String error) {
 this.error = error;
 }
 public List<Menu> getMenus() {
 return menus;
 }
 public void setMenus
(List<Menu> menus) {
 this.menus = menus;
 }
 public Compiler getCompiler() {
 return compiler;
 }
 public void setCompiler
(Compiler compiler) {
 this.compiler = compiler;
 }
 public static class Menu {
 private String name;
 private String path;
 private String title;
 public String getName() {
 return name;
 }
 public void setName
(String name) {
 this.name = name;
 }
 public String getPath() {
 return path;
 }
public void setPath
(String path) {
 this.path = path;
 }
 public String getTitle() {
 return title;
 }
 public void setTitle
(String title) {
 this.title = title;
 }
 @Override
 public String toString() {
 return "Menu [name=" + name + ",
 path=" + path + ", title=" + title + "]";
 }
 }
 public static class Compiler {
 private String timeout;
 private String outputFolder;
 public String getTimeout() {
 return timeout;
 }
 public void setTimeout
(String timeout) {
 this.timeout = timeout;
 }
 public String getOutputFolder() {
 return outputFolder;
 }
 public void setOutputFolder
(String outputFolder) {
 this.outputFolder = outputFolder;
 }
 @Override
 public String toString() {
 return "Compiler [timeout=" +
timeout + ", outputFolder=" +
 outputFolder + "]";
 }
 }
 @Override
 public String toString() {
 return "AppProperties
[error=" + error + ", menus="
+ menus + ", compiler=
" + compiler + "]";
 }
 }
GlobalProperties.java
 @Component
 @PropertySource
("classpath:global.properties")
 public class GlobalProperties {
 @Value("${thread-pool}")
 private int threadPool;
 @Value("${email}")
 private String email;
 public int getThreadPool() {
 return threadPool;
 }
 public void setThreadPool
(int threadPool) {
 this.threadPool = threadPool;
 }
 public String getEmail() {
 return email;
 }
 public void setEmail
(String email) {
 this.email = email;
 }
 @Override
 public String toString() {
 return "GlobalProperties
[threadPool=" + threadPool + ",
 email=" + email + "]";
 }
 }
VI. 应用入口SpringBootWebApplication
 @SpringBootApplication
 public class SpringBoot
WebApplication {
 public static void main
(String[] args) {
 SpringApplication.run
(SpringBootWebApplication.class, args);
 }
 }
VII. 控制器
@Controller
 public class WelcomeController {
 private static final
Logger LOGGER =
 LoggerFactory.getLogger
(WelcomeController.class);
 private GlobalProperties global;
 private AppProperties app;
 @Autowired
 public void setApp
(AppProperties app) {
 this.app = app;
 }
 @Autowired
 public void setGlobalProperties
(GlobalProperties global) {
 this.global = global;
 }
 @RequestMapping("/")
 public String welcome
(Map<String, Object> model) {
 String globalProperties
= global.toString();
 String appProperties
 = app.toString();
 LOGGER.debug
("Welcome {}, {}", app, global);
 model.put("message",
 appProperties + globalProperties);
 return "welcome";
 }
 }
VIII. 运行SpringBootWebApplication,浏览器输入http://localhost:8080/,查看控制台
 2018-05-14 13:07:22.056
 DEBUG 4228 --- [nio-8080-exec-3]
 com.mazaiting.config.
WelcomeController :
 Welcome AppProperties
 [error=/error/, menus=
[Menu [name=Home, path=/, title=Home],
 Menu [name=Login,
path=/login, title=Login]],
compiler=Compiler
[timeout=5, outputFolder=/temp/]],
 GlobalProperties
[threadPool=10, email=1425941077@qq.com]
IX. 验证
 @Component
 @ConfigurationProperties
 public class
GlobalProperties {
 @Max(5)
 @Min(0)
 private int threadPool;
@NotEmpty
 private String email;
 //getters and setters
 }
10). 配置文件中配置logging
 #Logging
 # log level 日志等级
 logging.level.org.
springframework.web=ERROR
 logging.level.com.mazaiting=DEBUG
 # log file 日志文件存放路径
 #logging.file=$
{java.io.tmpdir}/application.log
 # output to a file 存放路径
 logging.file=C:/Users/
Administrator/Desktop/mylog.log
 # pattern 格式化文件内容
 logging.pattern.file="%d
{yyyy-MM-dd HH:mm:ss}
 [%thread] %-5level
 %logger{36} - %msg%n"
正文到此结束
- 本文标签: App Service jetty dependencies Spring Security tar lib 目录 单元测试 配置 代码 message windows value NIO tomcat Java类 EnableAutoConfiguration cat IDE 文章 web rand CTO Property eclipse REST Spring Boot js dist 测试环境 安装 GitHub Logging tab XML cache servlet setTimeout 本质 数据库 数据 http apache tag 注释 HTTP服务器 pom 软件 id https build 缓存 map Menu 系统设置 classpath 实例 plugin final bug find UI core java junit 时间 JavaScript maven 插件 希望 git example JDBC sql 2019 CSS JPA 测试 HTML ORM mail 开发 springboot swap jquery src spring 微服务 需求 Security db list IO ip schema ArrayList 安全 部署 Bootstrap 下载 服务器
- 版权声明: 本文为互联网转载文章,出处已在文章中说明(部分除外)。如果侵权,请联系本站长删除,谢谢。
- 本文海报: 生成海报一 生成海报二
热门推荐


相关文章

近期评论
-
ws0132613@gmail.comhttps://getmacos.com/gopanel/william smith
-
谢谢
-
https://www.newcmy.com/register?aff=HBVX建议您试试草莓云机场,可以流畅观看youtube和tiktok,上reddit/x也没有问题,还有各种ai优化节点。
-
-
-
想购买您这个站,我的联系方式QQ741756694微信同步 能卖联系
-
-
-
-
Loading...
![[HBLOG]公众号](https://www.liuhaihua.cn/img/qrcode_gzh.jpg)

