SpringBoot系列之Elasticsearch极速入门与实际教程
@
目录
- 一、什么Elasticsearch?
- 二、Elasticsearch安装部署
- 2.1 Elasticsearch安装环境准备
- 2.2 Docker环境安装Elasticsearch
- 2.3 Elasticsearch目录结构介绍
- 2.4 Elasticsearch cat命令使用
- 三、Elasticsearch基本概念
- 四、Elasticsearch基本使用
- 五、Spring Data Elasticsearch
- 5.3 ElasticsearchRepository
- 5.4 Junit 测试Elasticsearch
一、什么Elasticsearch?
 Elasticsearch是一款开源的分布式搜索引擎,基于 JSON 开发而来,具有 RESTful 风格,基于 Apache Lucene 的基础上开发而成的
引用官网的说法:
引用官网的说法,Elasticsearch的用途:
Elasticsearch 的用途是什么?
- 应用程序搜索
- 网站搜索
- 企业搜索
- 日志处理和分析
- 基础设施指标和容器监测
- 应用程序性能监测
- 地理空间数据分析和可视化
- 安全分析
- 业务分析
二、Elasticsearch安装部署
2.1 Elasticsearch安装环境准备
环境准备:
- elasticsearch7.2.0
- docker环境
相关工具软件:
- VM VisualBox
- xShell,Xftp
docker入门博客可以参考我的docker系统博客专栏: 链接
2.2 Docker环境安装Elasticsearch
docker镜像搜索:
docker search elasticsearch
需要加上版本,不加版本默认是laster(最新)版本,貌似没提供laster版本
docker pull elasticsearch:7.2.0
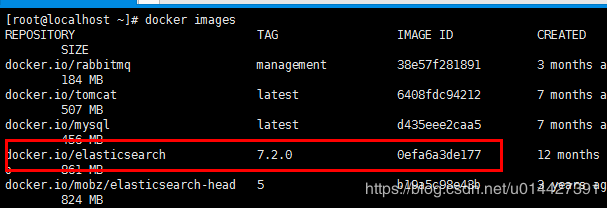
查看所有镜像:
docker images
 运行docker镜像:
- -p 隐射端口
- -e 设置参数,discovery.type=single-node,设置单节点,ES_JAVA_OPTS="-Xms256m -Xmx256m",设置JVM参数
- -d 后台运行
- --name 节点名称
docker run -p 9200:9200 -p 9300:9300 -e "discovery.type=single-node" -e ES_JAVA_OPTS="-Xms256m -Xmx256m" -d --name ES01 elasticsearch:7.2.0
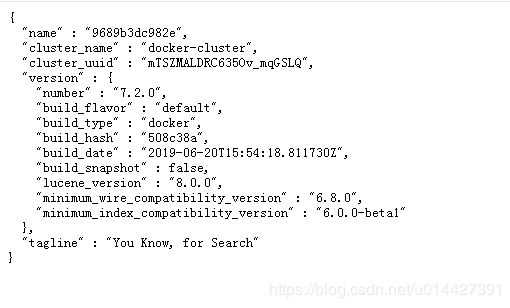
linux内用curl访问:
curl http://localhost:9200
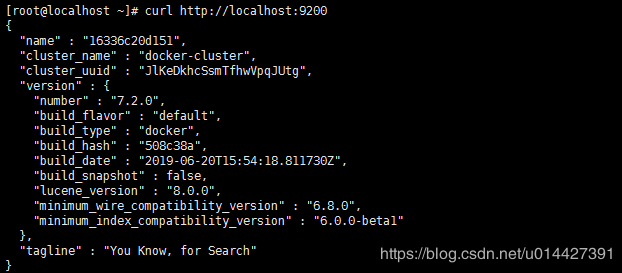
浏览器直接访问也是可以的: http://your_ip_addr:9200
ps:详情可以参考官方文档: Install Elasticsearch with Docker
2.3 Elasticsearch目录结构介绍

| 目录 | 配置文件 | 描述 |
|---|---|---|
| bin | 脚本文件,包括启动 Elasticsearch、安装插件,运行统计数据等。 | |
| config | elasticsearch.yml | 集群配置文件 |
| JDK | Java 运行环境 | |
| data | path.data | 数据文件 |
| lib | Java 类库 | |
| logs | path.logs | 日志文件 |
| modules | 包含所有 ES 模块 | |
| plugins | 包含所有已安装插件 |
ps:Elasticsearch也有linux版和window版,本博客不做介绍
2.4 Elasticsearch cat命令使用
cat 命令可以帮助开发者快速查询 Elasticsearch 的相关信息
-
_cat 参数
_cat 参数可以查看支持的命令
[root@localhost ~]#  curl localhost:9200/_cat
=^.^=
/_cat/allocation
/_cat/shards
/_cat/shards/{index}
/_cat/master
/_cat/nodes
/_cat/tasks
/_cat/indices
/_cat/indices/{index}
/_cat/segments
/_cat/segments/{index}
/_cat/count
/_cat/count/{index}
/_cat/recovery
/_cat/recovery/{index}
/_cat/health
/_cat/pending_tasks
/_cat/aliases
/_cat/aliases/{alias}
/_cat/thread_pool
/_cat/thread_pool/{thread_pools}
/_cat/plugins
/_cat/fielddata
/_cat/fielddata/{fields}
/_cat/nodeattrs
/_cat/repositories
/_cat/snapshots/{repository}
/_cat/templates
-
?v 参数
?v 参数,来显示详细的信息
[root@localhost ~]# curl localhost:9200/_cat/master?v
id                     host       ip         node
8x63m-D8Q2CP4xRbq7rEFA 172.17.0.2 172.17.0.2 7610b4e6e11b
-
其它常用命令:
- 查看所有插件:http://your_ip_addr:9200/_cat/plugins?v
- 查看所有索引:http://your_ip_addr:9200/_cat/indices?v
- 对ES进行健康检查:http://your_ip_addr:9200/_cat/health?v
- 查看当前的磁盘占用率:http://your_ip_addr:9200/_cat/allocation?v
-
help参数
help 参数,来输出可以显示的列
[root@localhost ~]# curl localhost:9200/_cat/master?help
id   |   | node id
host | h | host name
ip   |   | ip address
node | n | node name
-
h参数
h 参数,可以指定输出的字段
[root@localhost ~]# curl localhost:9200/_cat/master?h=host,ip,node
172.17.0.2 172.17.0.2 7610b4e6e11b
三、Elasticsearch基本概念
3.1 索引(Index)
ElasticSearch把数据存放到一个或者多个索引(indices)中。如果用关系型数据库模型对比,索引(index)的地位与数据库实例(database)相当,Elastic 数据管理的顶层单位就叫做 Index(索引)。它是单个数据库的同义词。每个 Index (即数据库)的名字必须是小写。
3.2 文档类型(Type)
如果一个索引(index)有多个文档的情况,可以根据类型(type)进行归类,如果用关系型数据库模型对比,索引(index)的地位与数据表(table)相当。文档类型使得同一个索引中在存储结构不同文档时,只需要依据文档类型就可以找到对应的参数映射(Mapping)信息
3.3 文档(Document)
文档(Document)由一个或者多个域(Field)组成,每个域(Field)由一个域名(此域名非彼域名)和一个或者多个值组成(有多个值的值称为多值域(multi-valued))
3.4 属性/域(Field)
如果用关系型数据库模型对比,域(Field)的地位与数据库模型中的列(column)相当
3.5 节点(Node)
每台服务器可以运行多个 Elastic 实例,单独一个ElasticSearch服务器实例称为一个节点
3.6 集群(Cluster)
集群是多个ElasticSearch节点的集合,Elastic 本质上是一个分布式数据库,允许多台服务器协同工作,每台服务器可以运行多个 Elastic 实例。
3.7 分片索引(Shard)
集群能够存储超出单机容量的信息。为了实现这种需求,ElasticSearch把数据分发到多个存储Lucene索引的物理机上。这些Lucene索引称为分片索引,这个分发的过程称为索引分片(Sharding)。在ElasticSearch集群中,索引分片(Sharding)是自动完成的,而且所有分片索引(Shard)是作为一个整体呈现给用户的
3.8 索引副本(Replica)
索引副本(Replica)机制的的思路很简单:为索引分片创建一份新的拷贝,它可以像原来的主分片一样处理用户搜索请求
3.9 网关(Gateway)
在运行的过程中,ElasticSearch会收集集群的状态、索引的参数等信息。这些数据被存储在Gateway中。
下面用一张表格简单记录对比:
| Elasticsearch | 关系数据库 |
|---|---|
| 索引 (Index) | 数据库(Database) |
| 类型(Type) | 数据表(Table) |
| 文档(Document) | 表中记录/数据行(Row) |
| 域(Field) | 数据列(Column) |
| 参数映射(Mapping) | 模式(Schema) |
一个 ElasticSearch 集群可以 包含多个 索引 ,相应的每个索引可以包含多
个 类型 。 这些不同的类型存储着多个 文档 ,每个文档又有 多个域
四、Elasticsearch基本使用
4.1 RESTFul API
Elasticsearch是支持RESTFul API格式的,所以先补充一些RESTFul API知识:
-
GET 请求:获取服务器中的对象
- 相当于SQL的Select命令
- GET /emps:列出所有员工信息
-
POST 请求:在服务器上更新对象
- 相当于SQL的Update命令
- POST /emps/ID:更新指定的员工信息
-
PUT 请求:在服务器上创建对象
- 相当于SQL的Create命令
- PUT /emps/ID:新建一个员工信息
-
DELETE 请求:删除服务器中的对象
- 相当于SQL的Delete命令
- DELETE /blogs/ID:删除指定的博客
-
HEAD 请求:仅仅用于获取对象的基础信息
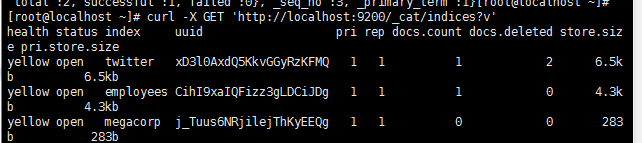
4.2 查询所有索引
查询所有的索引:
curl -X GET 'http://localhost:9200/_cat/indices?v'
ok,进行索引实践,建议以官网对应版本文档为准,本博客参考7.2版本的,链接: https://www.elastic.co/guide/en/elasticsearch/reference/7.2/docs.html
4.3 Elastic索引创建
- PUT,创建索引:
[root@localhost ~]# curl -H "Content-Type:application/json" -X PUT localhost:9200/company/employees/1 -d '{"id" :1,"name":"admin","password":"123"}'
返回json:
{
    "_index":"company",
    "_type":"employees",
    "_id":"1",
    "_version":1,
    "result":"created",
    "_shards":{
        "total":2,
        "successful":1,
        "failed":0
    },
    "_seq_no":0,
    "_primary_term":1
}
4.4 Elastic索引查询
- GET,查询索引:
[root@localhost ~]# curl -X GET localhost:9200/company/employees/1?pretty=true
{
  "_index" : "company",
  "_type" : "employees",
  "_id" : "1",
  "_version" : 1,
  "_seq_no" : 0,
  "_primary_term" : 1,
  "found" : true,
  "_source" : {
    "id":1,
    "name":"admin",
    "password":"123"
	}
}
4.5 Elastic索引删除
- DELETE,删除索引:
[root@localhost ~]# curl -X DELETE localhost:9200/company/employees/1
{
    "_index":"company",
    "_type":"employees",
    "_id":"1",
    "_version":2,
    "result":"deleted",
    "_shards":{
        "total":2,
        "successful":1,
        "failed":0
    },
    "_seq_no":1,
    "_primary_term":1
}
4.6 Elastic索引更新
- POST,更新索引:
curl -H "Content-Type:application/json" -X POST localhost:9200/company/employees/1 -d '{"id" :1,"name":"admin","password":"111"}'
{
    "_index":"company",
    "_type":"employees",
    "_id":"1",
    "_version":2,
    "result":"updated",
    "_shards":{
        "total":2,
        "successful":1,
        "failed":0
    },
    "_seq_no":3,
    "_primary_term":1
}
五、Spring Data Elasticsearch
5.1 开发环境准备
实验环境:
- SpringBoot2.2.1
- Elasticsearch7.2.0
maven配置:
<?xml version="1.0" encoding="UTF-8"?>
<project xmlns="http://maven.apache.org/POM/4.0.0" xmlns:xsi="http://www.w3.org/2001/XMLSchema-instance"
         xsi:schemaLocation="http://maven.apache.org/POM/4.0.0 https://maven.apache.org/xsd/maven-4.0.0.xsd">
    <modelVersion>4.0.0</modelVersion>
    <parent>
        <groupId>org.springframework.boot</groupId>
        <artifactId>spring-boot-starter-parent</artifactId>
        <version>2.2.1.RELEASE</version>
        <relativePath/> <!-- lookup parent from repository -->
    </parent>
    <groupId>com.example.springboot</groupId>
    <artifactId>springboot-elasticsearch</artifactId>
    <version>0.0.1-SNAPSHOT</version>
    <name>springboot-elasticsearch</name>
    <description>Demo project for Spring Boot</description>

    <properties>
        <java.version>1.8</java.version>
    </properties>

    <dependencies>
        <dependency>
            <groupId>org.springframework.boot</groupId>
            <artifactId>spring-boot-starter-data-elasticsearch</artifactId>
        </dependency>
        <dependency>
            <groupId>org.springframework.boot</groupId>
            <artifactId>spring-boot-starter-web</artifactId>
        </dependency>

        <dependency>
            <groupId>org.projectlombok</groupId>
            <artifactId>lombok</artifactId>
            <optional>true</optional>
        </dependency>
        <dependency>
            <groupId>org.springframework.boot</groupId>
            <artifactId>spring-boot-starter-test</artifactId>
            <scope>test</scope>
            <exclusions>
                <exclusion>
                    <groupId>org.junit.vintage</groupId>
                    <artifactId>junit-vintage-engine</artifactId>
                </exclusion>
            </exclusions>
        </dependency>
    </dependencies>

    <build>
        <plugins>
            <plugin>
                <groupId>org.springframework.boot</groupId>
                <artifactId>spring-boot-maven-plugin</artifactId>
            </plugin>
        </plugins>
    </build>

</project>
2.2.1版本,只要指定uris,旧版本要配置cluster-nodes和cluster-name
spring:
  elasticsearch:
    rest:
      uris: 192.168.7.96:9200
5.2 @Document使用
指定index和type
package com.example.springboot.elasticsearch.bean;

import lombok.Data;
import org.springframework.data.annotation.Id;
import org.springframework.data.elasticsearch.annotations.Document;
import org.springframework.data.elasticsearch.annotations.Field;
import org.springframework.data.elasticsearch.annotations.FieldType;

import java.io.Serializable;

/**
 * <pre>
 *  Employee
 * </pre>
 *
 * <pre>
 * @author mazq
 * 修改记录
 *    修改后版本:     修改人:  修改日期: 2020/07/16 17:02  修改内容:
 * </pre>
 */
@Data
@Document(indexName = "company",type = "employees",shards = 5,replicas = 1)
public class Employee implements Serializable {
    @Id
    private Long id;
    @Field(type = FieldType.Text)
    private String name;
    @Field(type = FieldType.Text)
    private String password;

    @Override
    public String toString() {
        return "Employee{" +
                "id='" + id + '/'' +
                ", name='" + name + '/'' +
                ", password='" + password + '/'' +
                '}';
    }
}
5.3 ElasticsearchRepository
实现ElasticsearchRepository
package com.example.springboot.elasticsearch.repository;

import com.example.springboot.elasticsearch.bean.Employee;
import org.springframework.data.elasticsearch.repository.ElasticsearchRepository;
import org.springframework.stereotype.Repository;

/**
 * <pre>
 *  EmployeeRepository
 * </pre>
 *
 * <pre>
 * @author mazq
 * 修改记录
 *    修改后版本:     修改人:  修改日期: 2020/07/16 17:24  修改内容:
 * </pre>
 */
@Repository
public interface EmployeeRepository extends ElasticsearchRepository<Employee,Long>{

}
5.4 Junit 测试Elasticsearch
新增索引:
@Autowired
    EmployeeRepository employeeRepository;

    @Test
    void createIndex(){
        Employee employee = new Employee();
        employee.setId(2L);
        employee.setName("sys");
        employee.setPassword("123");
        employeeRepository.save(employee);
    }
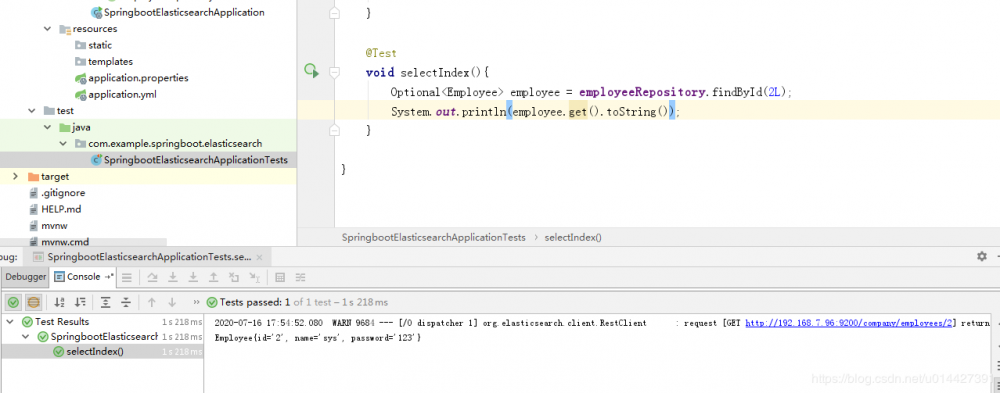
 查询索引:
查询索引:
@Autowired
    EmployeeRepository employeeRepository;
    @Test
    void selectIndex(){
        Optional<Employee> employee = employeeRepository.findById(2L);
        System.out.println(employee.get().toString());
    }
代码例子下载: code download
-
附录 优质博客:
全文搜索引擎 Elasticsearch 入门教程
正文到此结束
- 本文标签: HTML plugin maven 软件 模型 description 安装 schema linux 代码 博客 测试 json id ip dependencies JVM 搜索引擎 数据 src update App bean db 插件 Elasticsearch find ftp 部署 map API 删除 服务器 实例 Master shell 参数 索引 网站 开发者 lib java 域名 下载 node value springboot tar 企业 tag sql RESTful http root Select MQ 入门教程 sharding cat UI build spring 空间 ACE 端口 XML 分布式 js 开源 junit 安全 管理 ask web Document IO pom REST 本质 数据库 配置 example 目录 需求 Word tab Docker Spring Boot https 开发 zab 集群 IDE 统计 apache
- 版权声明: 本文为互联网转载文章,出处已在文章中说明(部分除外)。如果侵权,请联系本站长删除,谢谢。
- 本文海报: 生成海报一 生成海报二
热门推荐


相关文章


Loading...
![[HBLOG]公众号](https://www.liuhaihua.cn/img/qrcode_gzh.jpg)

