Android - DrawerLayout
Android DrawerLayout 的使用
Android L Android Studio 1.4
从主视图左侧能抽出一个导航栏,效果图:
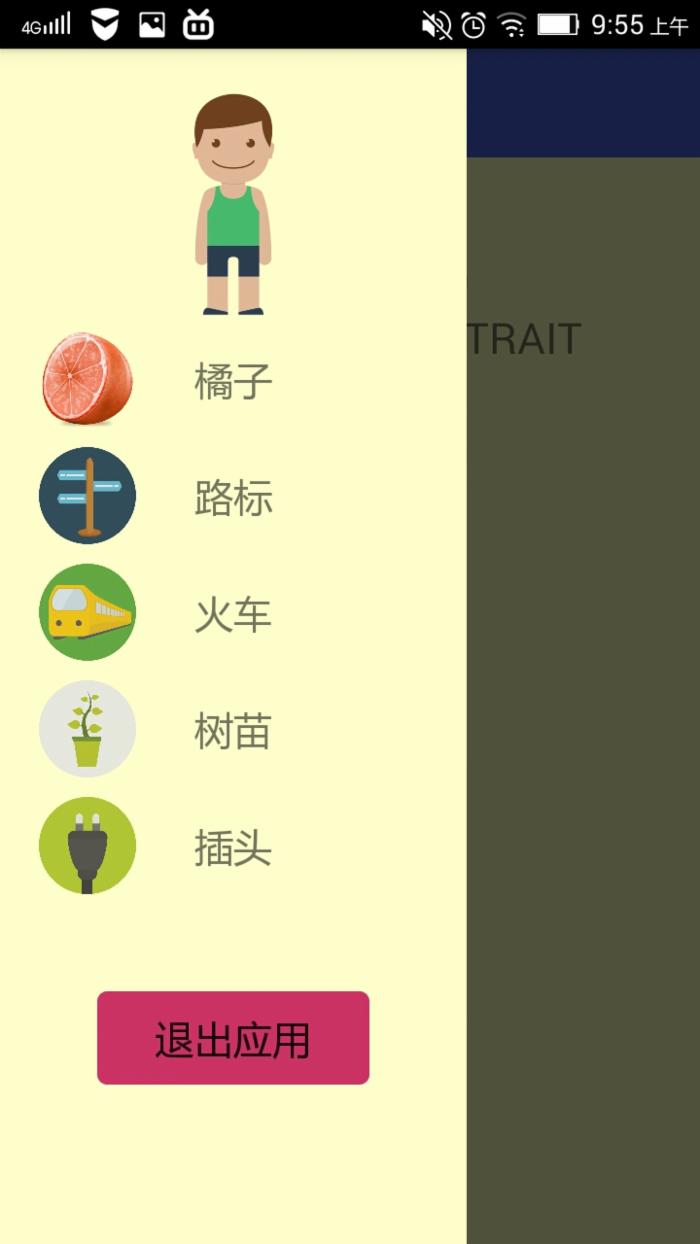 点击后弹出新界面:
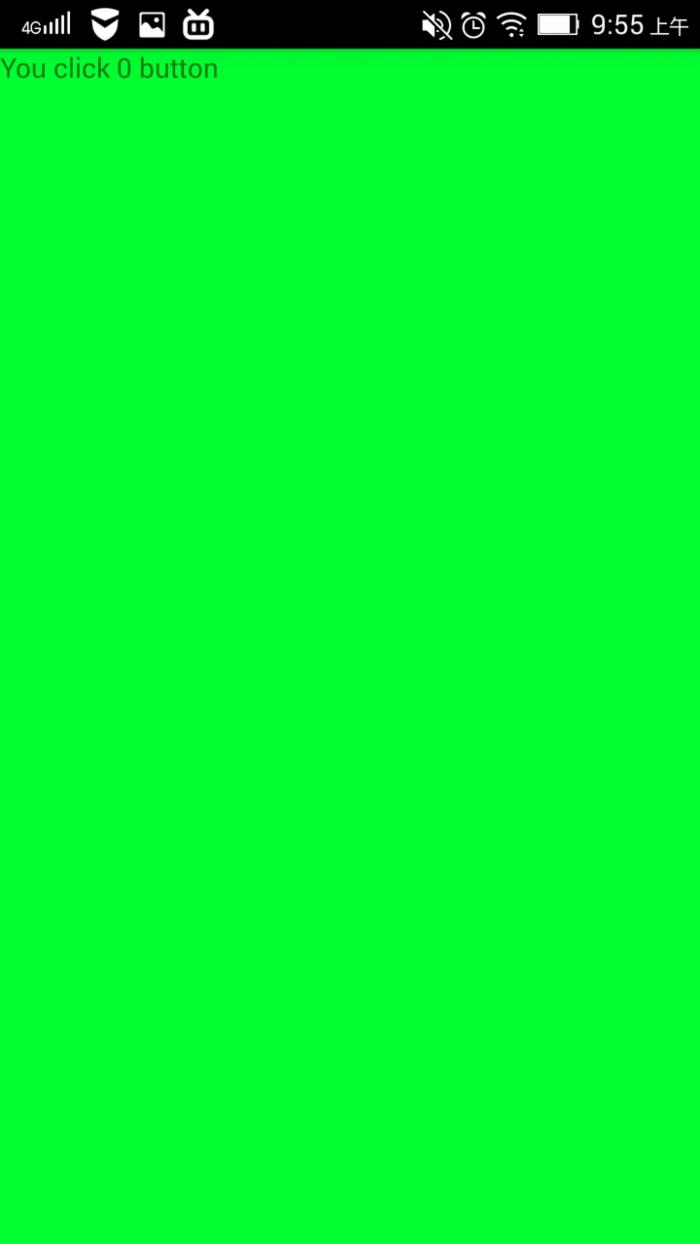
新界面也可以抽出左侧导航栏

1.配置xml文件,指定根视图和左右抽屉视图
2.Activity中加载xml文件,设定UI动作
代码
首先配置 main_layout.xml 文件;用v4包里的DrawerLayout,指定一个FrameLayout作为根视图,后续可以把Fragment插入到这个FrameLayout中
抽屉视图是一个RelativeLayout,里面承载着几个UI,ListView用于装按钮,下面是退出按键
1 <android.support.v4.widget.DrawerLayout xmlns:android="http://schemas.android.com/apk/res/android" 2 android:id="@+id/drawer_layout" 3 android:layout_width="match_parent" 4 android:layout_height="match_parent"> 5 <!-- 指定Framelayout为根视图 --> 6 <FrameLayout 7 android:id="@+id/root_framelayout" 8 android:layout_width="match_parent" 9 android:layout_height="match_parent"></FrameLayout> 10 11 <!-- The left navigation drawer --> 12 <RelativeLayout 13 android:id="@+id/left_relative_drawer" 14 android:layout_width="240dp" 15 android:layout_height="match_parent" 16 android:layout_gravity="start" 17 android:background="#ffffcc" 18 android:clickable="true"><!-- clickable="true" 防止点击事件穿透 --> 19 20 21 <ImageButton 22 android:id="@+id/imagebtn_left_head" 23 android:layout_width="120dp" 24 android:layout_height="120dp" 25 android:layout_centerHorizontal="true" 26 android:layout_marginTop="20dp" 27 android:background="@drawable/littleboygreen" 28 android:scaleType="fitXY" /> 29 30 <ListView 31 android:id="@+id/left_list" 32 android:layout_width="match_parent" 33 android:layout_height="wrap_content" 34 android:layout_below="@id/imagebtn_left_head" 35 android:choiceMode="singleChoice" 36 android:divider="@android:color/transparent" 37 android:dividerHeight="10dp" 38 android:paddingTop="5dp"></ListView> 39 40 <Button 41 android:id="@+id/btn_left_exit" 42 android:layout_width="140dp" 43 android:layout_height="wrap_content" 44 android:layout_below="@id/left_list" 45 android:layout_centerInParent="true" 46 android:layout_marginTop="50dp" 47 android:background="@drawable/button_corner_shape" 48 android:text="退出应用" 49 android:textSize="20sp" /> 50 51 <Button 52 android:id="@+id/btn_left_confirm" 53 android:layout_width="70dp" 54 android:layout_height="wrap_content" 55 android:layout_below="@id/left_list" 56 android:layout_marginLeft="30dp" 57 android:layout_marginTop="50dp" 58 android:background="@drawable/button_corner_shape" 59 android:text="退出" 60 android:textSize="20sp" /> 61 62 <Button 63 android:id="@+id/btn_left_cancel" 64 android:layout_width="70dp" 65 android:layout_height="wrap_content" 66 android:layout_below="@id/left_list" 67 android:layout_marginLeft="40dp" 68 android:layout_marginTop="50dp" 69 android:layout_toRightOf="@id/btn_left_confirm" 70 android:background="@drawable/button_cancel_corner_shape" 71 android:text="取消" 72 android:textSize="20sp" /> 73 74 </RelativeLayout> 75 76 77 </android.support.v4.widget.DrawerLayout>
在MainActivity.java的onCreate方法中加载这个layout
setContentView(R.layout.main_layout);
主视图就只有一张背景,新写一个MainFragment加载进去
MainFragment.java
public class MainFragment extends Fragment { ...... private Toolbar toolbar; ...... @Nullable @Override public View onCreateView(LayoutInflater inflater, ViewGroup container, Bundle savedInstanceState) { View rootView = inflater.inflate(R.layout.main_relativelayout, container,false); /* 这里设置UI,设置按钮监听等等 */ /* 为防止单调,显示放屏幕分辨率和屏幕方向 */ return rootView; } /* 屏幕分辨率 */ private String getScreenRatio(){ StringBuilder ratio = new StringBuilder(""); mDisplay = ((WindowManager)getActivity().getSystemService(Context.WINDOW_SERVICE)) .getDefaultDisplay();/* 先getActivity */ DisplayMetrics mDisplayMetrics = new DisplayMetrics(); mDisplay.getMetrics(mDisplayMetrics); mDisplay.getSize(mCurrentDisplaySize);/* 竖屏Point(1536, 1964) 横屏Point(2048, 1452) */ Log.d("rust","mCurrentDisplaySize "+ mCurrentDisplaySize); int screenWidth = mDisplayMetrics.widthPixels; int screenHeight = mDisplayMetrics.heightPixels; ratio.append(screenWidth); ratio.append(" x "); ratio.append(screenHeight); return ratio.toString(); } /* 获取屏幕方向 */ private void getOrientation() { config = getResources().getConfiguration();/* 检查屏幕方向 */ if (config.orientation == Configuration.ORIENTATION_LANDSCAPE){ screenOrientation = "LANDSCAPE"; } else if (config.orientation == Configuration.ORIENTATION_PORTRAIT) { screenOrientation = "PORTRAIT"; } else { screenOrientation = "Unknow"; } } } 回到MainActivity.java的onCreate方法,把MainFragment加载进去
mainFragment = new MainFragment();/* 指定一个单独的Fragment */ ...... final FragmentManager fragmentManager = getFragmentManager();/* 加载到root容器 */ fragmentManager.beginTransaction().add(R.id.root_framelayout, mainFragment).commit();
同样在MainActivity.java的onCreate方法中加载一下导航栏
/* 左抽屉 */ leftDrawer = (RelativeLayout) findViewById(R.id.left_relative_drawer); /* 左列表在左抽屉里 */ leftList = (ListView) leftDrawer.findViewById(R.id.left_list); /* 适配器装载数据;即初始化导航列表;这里使用SimpleAdapter,加载自定义的LinearLayout作为按钮 */ contentLeftAdapter = new SimpleAdapter(this, leftDrawerListData(), R.layout.list_item_linearlayout, new String[]{"image","text"}, new int[]{R.id.image_left_item,R.id.tv_left_item}); leftList.setAdapter(contentLeftAdapter); /* 为list设置ClickListener;DrawerOnItemClickListener定义在下面*/ leftList.setOnItemClickListener(new DrawerOnItemClickListener()); imageBtnLeft.setOnClickListener(new View.OnClickListener() { @Override public void onClick(View v) { fragmentManager.beginTransaction() .replace(R.id.root_framelayout, mainFragment) .commit(); mDrawerLayout.closeDrawer(leftDrawer); } }); btnExit.setOnClickListener(new View.OnClickListener() { @Override public void onClick(View v) { btnConfirmExit.setVisibility(View.VISIBLE); btnCancelExit.setVisibility(View.VISIBLE); btnExit.setVisibility(View.INVISIBLE); } }); btnCancelExit.setOnClickListener(new View.OnClickListener() { @Override public void onClick(View v) { btnCancelExit.setVisibility(View.INVISIBLE); btnConfirmExit.setVisibility(View.INVISIBLE); btnExit.setVisibility(View.VISIBLE); } }); btnConfirmExit.setOnClickListener(new View.OnClickListener() { @Override public void onClick(View v) { // finish(); android.os.Process.killProcess(android.os.Process.myPid()); } }); 往listview中添加内容的方法
private List<Map<String, Object>> leftDrawerListData(){ List<Map<String, Object>> list = new ArrayList<Map<String, Object>>(); Map<String, Object> map = new HashMap<String, Object>(); map.put("image", R.drawable.orange01); map.put("text", "橘子"); list.add(map); map = new HashMap<String, Object>(); map.put("image", R.drawable.sixtraveltransportation); map.put("text", "路标"); list.add(map); map = new HashMap<String, Object>(); map.put("image", R.drawable.traintraveltransportation); map.put("text", "火车"); list.add(map); map = new HashMap<String, Object>(); map.put("image", R.drawable.ecologytree); map.put("text", "树苗"); list.add(map); map = new HashMap<String, Object>(); map.put("image", R.drawable.ecology); map.put("text", "插头"); list.add(map); return list; } 导航栏按钮监听
private class DrawerOnItemClickListener implements AdapterView.OnItemClickListener{ @Override public void onItemClick(AdapterView<?> parent, View view, int position, long id) { seleteItem(position);/* 按钮选择 */ } } private void seleteItem(int position){ leftList.setItemChecked(position, true); Fragment newFragment = new ContentFragment();/* new 一个子fragment */ Bundle args = new Bundle(); args.putInt(ContentFragment.ARG_SHOW_FRAGMENT,position); newFragment.setArguments(args);/* 装载数据 */ FragmentManager childFragmentManager = getFragmentManager(); childFragmentManager.beginTransaction() .replace(R.id.root_framelayout, newFragment) .commit();/* 替换当前fragment */ /* 最后关闭左侧抽屉 */ mDrawerLayout.closeDrawer(leftDrawer); } 点击一下导航栏的按钮,就会把原来的MainFragment替换掉
DrawerLayout往往和Fragment结合起来使用;布局界面可以更丰富和灵活
如果跳到另一个Activity,就抽不出MainActivity的DrawerLayout
正文到此结束
热门推荐


相关文章


Loading...
![[HBLOG]公众号](http://www.liuhaihua.cn/img/qrcode_gzh.jpg)

