Uproot:使用powershell编写基于主机的IDS
概述
Uproot是一款基于主机的入侵检测系统(HIDS),其利用持续运行的Windows管理规范服务(WMI)事件订阅,在一个网络中检测恶意行为。更多有关WMI事件订阅可以参见 WMIEventing Module
为达到最佳效果,建议使用Uproot的AS_GenericHTTP consumer以及Uproot Listening Post提取事件,将系统日志聚合一起,再用Splunk进行处理。
注意:Uproot最好是在powershell版本>=v3环境下使用,当然你也可以在PowerShell v2下使用,只是功能方面会大打折扣。微软从Windows NT 4.0和Windows 95时代一来一贯坚持着可恨又可爱的WMI,正因如此对于Windows NT 4.0之后的版本我们都可以使用Uproot
Cmdlets
签名设置 - 预建的filters,consumers,subscriptions设置
Install-UprootSignature - 在指定计算机上增加预建的签名(设置filters和consumers).
Uproot Listening Post
Uproot项目包括了一个可用作Listening Post(在网络中聚合并转发事件)的服务执行,Listening Post接收HTTP POST请求,将接收到的数据转换为系统日志,然后将数据转发到特定位置(例如Splunk)
在你的网络载荷分布,或使用的防火墙限制允许的情况下你可以部署多个Listening Posts。
下面为使用Cmdlets安装/配置Uproot Listening Post的清单:
Get-UprootLP - 在本地或远程计算机列出Uproot Listening Posts. New-UprootLP - 在本地或远程计算机创建一个新的Uproot Listening Post. Remove-UprootLP - 在本地或远程计算机移除Uproot Listening Post. Restart-UprootLP - 在本地或远程计算机上重置Uproot Listening Post. Start-UprootLP - 在本地或远程计算机上开启Uproot Listening Post. Stop-UprootLP - 在本地或远程计算机上停止Uproot Listening Post.
注意:为了避免造成特权提升漏洞,我们建议在使用New-UprootLP命令前将uprootd.exe移动到C:/Windows/system32/
签名
只要有可能,使用Extrinsic事件替换Intrinsic事件。Intrinsic事件请求轮询,相对于Extrinsic事件需要更多的资源。
过滤
DriverCreation - Intrinsic事件监控系统驱动的创建/注册 LoggedOnUserCreation - NetworkConnectionCreation - ProcessCreation - Intrinsic事件监控进程的创建 ProcessStartTrace - Extrinsic事件监控进程的创建 ScheduledJobCreation - Intrinsic事件监控"AT"的创建/注册 ServerConnectionCreation - ServiceCreation - ShadowCopyCreation - Intrinsic事件监控卷备份的创建 ShareCreation - Intrinsic事件监控文件分享的创建 StartupCommandCreation - UserCreation - Intrinsic事件监控本地用户的创建 UserProfileCreation -
ActiveScriptEventConsumers
AS_GenericHTTP - Generic ActiveScriptEventConsumer for All Events (this is the recommended consumer) AS_ExtrinsicHTTP - Generic ActiveScriptEventConsumer for Extrinsic Events (Win32_ProcessStartTrace) AS_IntrinsicHTTP - Generic ActiveScriptEventConsumer for Intrinsic Events (Win32_ProcessCreation)
LogFileEventConsumers
LF_ProcessCreation_CSV_PSv2 LF_ProcessCreation_txt
Prebuilt Sigs
Basic - An example signature file
安装模块
Jakub Jareš写了一篇十分优秀的文章来 介绍如何安装模块 ,借着这篇优秀的文章我们应用到Uproot上。
打开浏览器,并来到 Uproot github page ,你需要下载并提取模块到你的模块目录下。

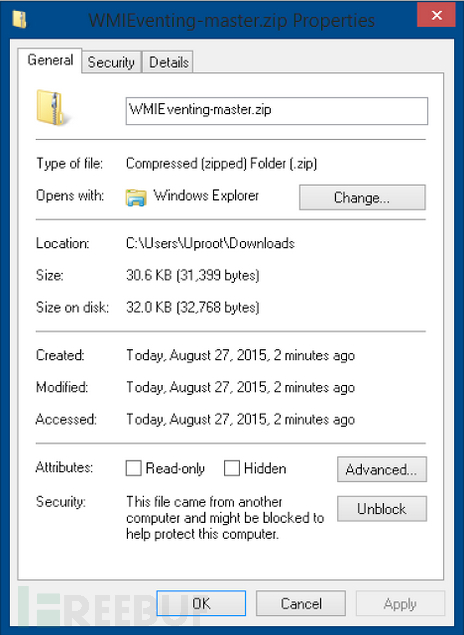
如果你使用IE下载这些存档,在提取前你需要先打开存档,否则当你导入的时候Powershell就会开始罢工了哟。如果你使用的是PowerShell 3.0或更新版本,那你可以使用Unblock-File命令来进行操作:
Unblock-File -Path "$env:UserProfile/Downloads/Uproot-master.zip"
使用老版本PowerShell的你,则需要手动打开文件。到下载目录中右键单击Uproot-master.zip并选择“属性”,在常规选项卡中单击开启。
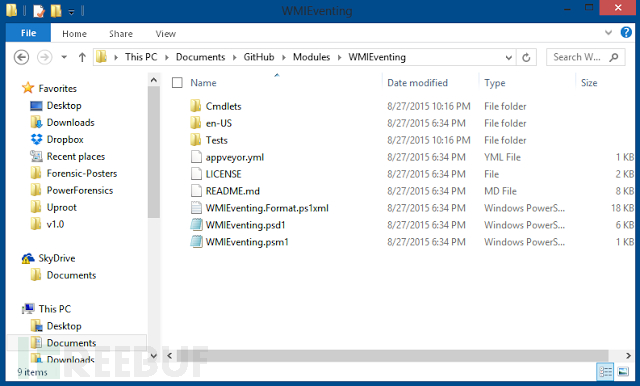
打开你的模块目录,再创建一个名为Uproot的文件夹。使用下面的脚本你看毫无压力的打开正确的文件夹:
function Get-UserModulePath { $Path = $env:PSModulePath -split ";" -match $env:USERNAME if (-not (Test-Path -Path $Path)) { New-Item -Path $Path -ItemType Container | Out-Null } $Path } Invoke-Item (Get-UserModulePath) 将文档提取到Uproot文件夹,完成这一步之后你应该可以在文件夹下看到这些文件:
开启一个新的PowerShell会话,然后使用以下命令导入Uproot模块
Get-Module -ListAvailable -Name Uproot Import-Module Uproot Get-Command -Module Uproot
从现在开始你就可以使用Uproot PowerShell模块了。
栗子
安装签名文件
Install-UprootSignature -ComputerName (Get-Content ./hostlist.txt) -SigFile Basic
安装本地Listening Post
Copy-Item $PSModulePath/Uproot/bin/uprootd.exe C:/windows/System32/uprootd.exe New-UprootLP -BinaryPathName C:/windows/System32/uprootd.exe Start-UprootLP -Server 192.168.1.100
安装远程Listening Post
Copy-Item $PSModulePath/Uproot/bin/uprootd.exe //LPHost/C$/windows/System32/uprootd.exe New-UprootLP -ComputerName LPHost -BinaryPathName C:/windows/System32/uprootd.exe Start-UprootLP -ComputerName LPHost -Server 192.168.1.100
移除本地Listening Post
Get-UprootLP Stop-UprootLP Remove-UprootLP
移除远程Listening Post
Get-UprootLP -ComputerName LPHost Stop-UprootLP -ComputerName LPHost Remove-UprootLP -ComputerName LPHost
*参考来源: github ,编译/FB小编鸢尾,转载请注明来自FreeBuf黑客与极客(FreeBuf.COM)
正文到此结束
热门推荐


相关文章


Loading...
![[HBLOG]公众号](http://www.liuhaihua.cn/img/qrcode_gzh.jpg)

