初试Spring Boot:构建第一个Web程序

Spring Boot主要提供快速构建项目的功能。本文中我们会使用Spring Boot构建第一个Web程序,同时介绍Spring Boot最简单的功能,例如运行单元测试,发布与调用REST服务等。本文选自《Spring Boot 2+Thymeleaf企业应用实战》。
Spring Boot主要提供快速构建项目的功能。本文中我们会使用Spring Boot构建第一个Web程序,同时介绍Spring Boot最简单的功能,例如运行单元测试,发布与调用REST服务等。
1Spring Boot介绍1Spring Boot介绍
我们先来了解一下Spring Boot项目。
1.1Spring Boot简介
开发一个全新的项目,需要先搭建开发环境,例如确定要使用的技术框架及版本,还要考虑各个框架之间的版本兼容问题。完成这些烦琐的工作后,还要对新项目进行配置,测试其能否正常运行,最后才将搭建好的环境提交给项目组的其他成员使用。经常会出现的情形是,项目表面上已经成功运行,但部分项目组成员仍然无法运行项目。对于每一个项目,在初期都会浪费大量的时间做这些固定的事情。
受Ruby On Rails、Node.js等技术的影响,Java EE领域需要一种更为简便的开发方式,来取代这些烦琐的项目搭建工作。在此背景下,Spring推出了Spring Boot项目,该项目可以让使用者更快速地搭建项目,从而使用者可以更专注于业务系统的开发。系统配置、基础代码、项目依赖的jar包,甚至开发时所用到的应用服务器等,Spring Boot都可以帮我们准备好。只要在建立项目时,使用构建工具加入相应的Spring Boot依赖包,项目即可运行,使用者无须关心版本兼容等问题。
Spring Boot支持Maven和Gradle这两款构建工具。Gradle使用Groovy语言编写构建脚本,与Maven、Ant等构建工具有良好的兼容性。鉴于笔者使用Maven较多,因此本文使用Maven作为项目构建工具。本文写作时,Spring Boot最新的正式版本为2.0.1,其要求Maven版本为3.2或以上。
1.2starter模块
Spring Boot提供了许多starter模块,starter为我们提供了“一站式”服务,在项目中另加入对应框架的starter的依赖,可以免去我们到处寻找依赖包的烦恼。只需要加入一个依赖,项目就可以运行,这就是starter的作用。例如,如果你想让你的项目拥有访问关系型数据库的能力,则只需要在你的项目中加入spring-boot-starter-data-jpa依赖就可以实现:
<dependency>
    <groupId>org.springframework.boot</groupId>
    <artifactId>spring-boot-starter-data-jpa</artifactId>
    <version>2.0.1.RELEASE</version>
</dependency>
Spring Boot官方提供的starter模块,命名规则为“spring-boot-starter- ”,其中“ ”代表对应的应用类型,这些starter的名称,可以帮助我们快速地找到相应的依赖。如果想构建自己的starter模块,官方建议命名规则为“project-spring-boot-starter”。
下面介绍一些比较常用的starter模块。
spring-boot-starter-web:用于构建Web应用的starter模块,加入该依赖后,会包含Spring MVC框架,默认内嵌Tomcat容器。
spring-boot-starter-jpa:用于构建Spring Data JPA应用,使用Hibernate作为ORM框架。
spring-boot-starter-mongodb:用于构建Spring Data MongoDB应用,底层使用MongoDB驱动操作MongoDB数据库。
spring-boot-starter-redis:用于构建Spring Data Redis应用,使用Jedis框架操作Redis数据库。
spring-boot-starter-thymeleaf:构建一个使用Thymeleaf作为视图的Web应用。
spring-boot-starter-test:顾名思义,这个starter模块主要用于进行单元测试。
2构建第一个Spring Boot程序
这一节,我们使用Spring Boot构建一个最简单的Web应用。
2.1新建Maven项目
Spring Boot使用3.2以上版本的Maven,这里我们使用的版本为3.5。在Eclipse的菜单中选择“File→New→Other”命令,选中“Maven”下的“Maven Project”,单击“Next”按钮,在“New Maven Project”页面中,选择“Create a simple project”项,创建一个简单的Maven项目。在弹出的创建项目页面中,输入相应的项目信息,如下图。
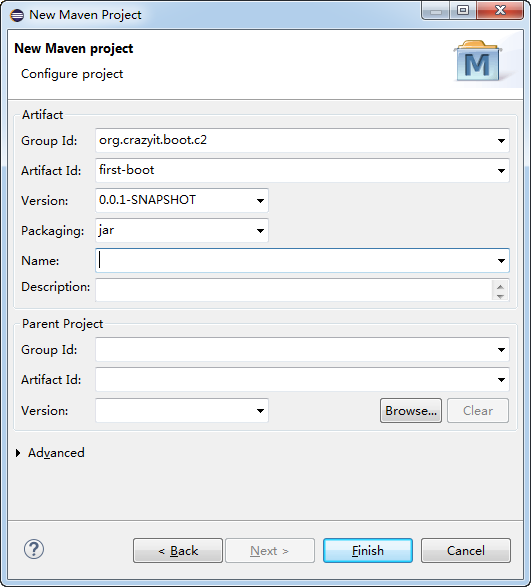
新建Maven项目
新建的Maven项目,其结构如下。
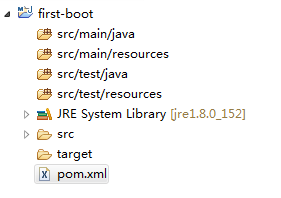
Maven项目结构
src/main/java用于存放主应用程序的类,src/main/resources用于存放主应用程序的资源文件,src/test用于存放测试相关的Java类和资源,pom.xml则是Maven的构建脚本。
一般情况下,Maven脚本文件需要继承“spring-boot-starter-parent”项目,并在脚本中根据需要声明一个或多个starter。修改项目的pom.xml文件,如代码清单2-1所示。
代码清单2-1:codes/02/first-boot/pom.xml
<project xmlns="http://maven.apache.org/POM/4.0.0"
    xmlns:xsi="http://www.w3.org/2001/XMLSchema-instance"
    xsi:schemaLocation="http://maven.apache.org/POM/4.0.0
    http://maven.apache.org/xsd/maven-4.0.0.xsd">
    <modelVersion>4.0.0</modelVersion>
    <groupId>org.crazyit.boot.c2</groupId>
    <artifactId>first-boot</artifactId>
    <version>0.0.1-SNAPSHOT</version>

    <!-- 继承spring boot的starter -->
    <parent>
        <groupId>org.springframework.boot</groupId>
        <artifactId>spring-boot-starter-parent</artifactId>
        <version>2.0.1.RELEASE</version>
    </parent>

    <!-- 添加web starter的依赖 -->
    <dependencies>
        <dependency>
            <groupId>org.springframework.boot</groupId>
            <artifactId>spring-boot-starter-web</artifactId>
        </dependency>
    </dependencies>

</project>
注意:在加入依赖后,如果Eclipse中的Maven项目存在错误,则可以选中项目,鼠标右击,在弹出的菜单中选择“Maven→Update Project”命令来解决问题。
加入依赖后,由于starter的作用,Maven会自动帮我们引用Spring框架的各个模块,例如spring-context、spring-web等,还会引入嵌入式的Tomcat。具体会帮我们的项目加入哪些依赖包,我们在Eclipse下面看一下,有个大概印象即可。
2.2编写启动类
编写一个简单的启动类,就可以直接启动Web服务,启动类如代码清单2-2所示。
代码清单2-2:codes/02/first-boot/src/main/java/org/crazyit/boot/c2/FirstApp.java
@SpringBootApplication
public class FirstApp {

    public static void main(String[] args) {
        SpringApplication.run(FirstApp.class, args);
    }

}
FirstApp类使用了 @SpringBootApplication 注解,该注解声明该类是一个Spring Boot应用,该注解具有 @SpringBootConfiguration 、 @EnableAutoConfiguration 、 @ComponentScan 等注解的功能。直接运行MyApp的main方法,看到以下输出信息后,证明启动成功:
2017-10-30 11:40:49.968  INFO 5916 --- [           main] o.s.j.e.a.AnnotationMBeanExporter        : Registering beans for JMX exposure on startup
2017-10-30 11:40:50.199  INFO 5916 --- [           main] s.b.c.e.t.TomcatEmbeddedServletContainer : Tomcat started on port(s): 8080 (http)
2017-10-30 11:40:50.208  INFO 5916 --- [           main] org.crazyit.boot.c2.FirstApp             : Started FirstApp in 6.226 seconds (JVM running for 6.888)
根据输出信息可知,启动的Tomcat端口为8080。打开浏览器访问 http://localhost:8080,可以看到错误页面,表示应用已经成功启动。
注意:在默认情况下,启动端口为8080,如果需要修改Tomcat端口,则可以在src/main/ resources目录下面,新建application.properties文件,通过设置server.port属性来配置Tomcat端口。
2.3编写控制器
前面我们加入了spring-boot-starter-web模块,默认集成了Spring MVC,因此只需要编写一个Controller,即可实现一个最简单的HelloWorld程序。代码清单2-3为该控制器的代码。
代码清单2-3:codes/02/first-boot/src/main/java/org/crazyit/boot/c2/MyController.java
@Controller
public class MyController {

    @GetMapping("/hello")
    @ResponseBody
    public String hello() {
    return "Hello World";
    }
}
在代码清单2-3中,使用了 @Controller 注解来修饰MyController,由于启动类中使用了 @SpringBootApplication 注解,该注解具有 @ComponentScan 的功能,因此 @Controller 会被扫描并注册。在hello方法中使用了 @GetMapping 与 @ResponseBody 注解,以声明hello方法的访问地址及返回内容。重新运行启动类,打开浏览器并访问地址 http://localhost:8080/hello,则可以看到控制器的返回内容。
至此,我们的第一个Spring Boot Web程序已经完成了,整个过程非常简单。大家可以看到,使用Spring Boot后,使我们节省了很多搭建项目框架的时间,Spring Boot的starter提供了这种“一站式”的服务,帮助我们开发Web应用。
2.4开发环境的热部署
每次修改Java后,都需要重新运行main方法才能生效,这样会降低开发效率。我们可以使用Spring Boot提供的开发工具来实现热部署,为项目加上以下依赖:
<dependency>
            <groupId>org.springframework.boot</groupId>
            <artifactId>spring-boot-devtools</artifactId>
        </dependency>
修改Java文件后,容器会重新加载本项目的Java类。
3运行单元测试
单元测试对于程序来说非常重要,它不仅能增强程序的健壮性,而且也为程序的重构提供了依据,目前很多开源项目的测试覆盖率高达90%以上,可见大家对单元测试的重视。Spring Boot运行Web应用,只需要执行main方法即可,那么如何测试这个Web程序?如何测试Spring Boot中的组件呢?这一节,将简单介绍Spring Boot的单元测试。
3.1 测试Web服务
Spring Boot提供了 @SpringBootTest 注解,可以让我们在单元测试中测试Spring Boot的程序。先为我们的项目加入“spring-boot-starter-test”依赖:
<dependency>
            <groupId>org.springframework.boot</groupId>
            <artifactId>spring-boot-starter-test</artifactId>
        </dependency>
新建测试类,用于测试第一个Spring Boot程序的“/hello”服务,测试类请见代码清单3-1。
代码清单3-1:codes/02/first-boot/src/test/java/org/crazyit/boot/c2/RandomPortTest.java
@RunWith(SpringRunner.class)
@SpringBootTest(webEnvironment = WebEnvironment.RANDOM_PORT)
public class RandomPortTest {

    @Autowired
    private TestRestTemplate restTemplate;

    @Test
    public void testHello() {
        // 测试hello方法
        String result = restTemplate.getForObject("/hello", String.class);
        assertEquals("Hello World", result);
    }
}
在代码清单3-1中,为测试类加入了 @RunWith 、 @SpringBootTest 注解,其中为SpringBootTest配置了webEnvironment属性,表示在运行测试时,会为Web容器随机分配端口。在测试方法中,使用 @Test 注解修饰,使用TestRestTemplate调用“/hello”服务。
这个TestRestTemplate对象,实际上是对RestTemplate进行了封装,可以让我们在测试环境更方便使用RestTemplate的功能,例如代码清单3-1,我们不需要知道Web容器的端口是多少,就可以直接进行测试。
在代码清单3-1中配置了随机端口,如果想使用固定的端口,则可以将webEnvironment配置为WebEnvironment.DEFINED_PORT。使用该属性,会读取项目配置文件(例如application.properties)中的端口(server.port属性)来启动Web容器,如果没有配置,则使用默认端口8080。
3.2模拟Web测试
在设置 @SpringBootTest 的webEnvironment属性时,不管设置为RANDOM_PORT还是设置为DEFINED_PORT,在运行单元测试时,都会启动一个真实的Web容器。如果不想启动真实的Web容器,则可以将webEnvironment属性设置为WebEnvironment.MOCK,来启动一个模拟的Web容器,如代码清单3-2所示。
代码清单3-2:codes/02/first-boot/src/test/java/org/crazyit/boot/c2/MockEnvTest.java
@RunWith(SpringRunner.class)
@SpringBootTest(webEnvironment = WebEnvironment.MOCK)
@AutoConfigureMockMvc
public class MockEnvTest {

    @Autowired
    private MockMvc mvc;

    @Test
    public void testHello() throws Exception {
        ResultActions ra = mvc.perform(MockMvcRequestBuilders.get(new URI(
                "/hello")));
        MvcResult result = ra.andReturn();
        System.out.println(result.getResponse().getContentAsString());
    }
}
为测试类加入 @AutoConfigureMockMvc 注解,让其进行mock相关的自动配置。在测试方法中,使用Spring的MockMvc进行模拟测试,向“/hello”发送请求并得到回应。
注意:webEnvironment属性的默认值是WebEnvironment.MOCK,只所以在代码清单3-2中“多此一举”,是为了展示该配置。
3.3测试业务组件
前面都是针对Web容器进行测试,如果不想测试Web容器,只是想测试容器中的bean,则可以只启动Spring的容器,请见代码清单3-3。
代码清单3-3:codes/02/first-boot/src/main/java/org/crazyit/boot/c2/MyService.java
codes/02/first-boot/src/test/java/org/crazyit/boot/c2/MyServiceTest.java
@Service
public class MyService {

    public String helloService() {
        return "hello";
    }
}

@RunWith(SpringRunner.class)
@SpringBootTest(webEnvironment = WebEnvironment.NONE)
public class MyServiceTest {

    @Autowired
    private MyService myService;

    @Test
    public void testHello() {
        String result = myService.helloService();
        System.out.println(result);
    }
}
在代码清单3-3中,新建了一个MyService的服务类,MyServiceTest会对该类进行测试,直接在测试类中注入MyService的实例。注意,SpringBootTest的webEnvironment属性被设置为NONE,因而Web容器将不会被启动。
3.4模拟业务组件
在实际应用中,我们的程序可能会操作数据库,也有可能调用第三方接口,为了不让这些外部的不稳定因素影响单元测试的运行结果,可以使用mock来模拟某些组件的返回结果,确保被测试组件代码的健壮性。代码清单3-4显示了两个业务组件。
代码清单3-4:codes/02/first-boot/src/main/java/org/crazyit/boot/c2/MainService.java
codes/02/first-boot/src/main/java/org/crazyit/boot/c2/RemoteService.java
@Service
public class RemoteService {

    public String call() {
        return "hello";
    }
}

@Service
public class MainService {

    @Autowired
    private RemoteService remoteService;

    public void mainService() {
        System.out.println("这是需要测试的业务方法");
        String result = remoteService.call();
        System.out.println("调用结果:" + result);
    }
}
RemoteService的call方法在正常情况下会返回hello字符串,MainService中的mainService方法会调用call方法。假设call方法无法正常运行,为了能测试MainService,我们需要模拟call方法的返回结果。代码清单3-5为MainService的测试方法。
代码清单3-5:codes/02/first-boot/src/test/java/org/crazyit/boot/c2/MockTest.java
@RunWith(SpringRunner.class)
@SpringBootTest
public class MockTest {

    @MockBean
    private RemoteService remoteService;

    @Autowired
    private MainService mainService;

    @Test
    public void testMainService() {
        // 模拟remoteService 的 call 方法返回 angus
        BDDMockito.given(this.remoteService.call()).willReturn("angus");
        mainService.mainService();
    }
}
在测试类中,使用MockBean来修饰需要模拟的组件,在测试方法中使用了Mockito的API来模拟remoteService的call方法返回。在模拟中这个方法被调用后,将会返回“angus”字符串,运行代码清单3-5,输出结果如下:
这是需要测试的业务方法
调用结果:angus
根据结果可知,RemoteService的call方法被成功模拟。
这一节,简单介绍了如何在Spring Boot中进行单元测试,本节的知识基本上能满足大部分的需求,由于篇幅所限,在此不展开讨论。我们下面介绍如何使用Spring Boot来发布和调用REST服务。
4发布与调用REST服务
在系统间进行通信,很多系统都会选择SOAP协议,随着REST的兴起,现在很多系统在发布与调用Web Service时,都首选REST。这一节,我们介绍如何在Spring Boot中发布和调用REST服务。
4.1REST
REST是英文Representational State Transfer的缩写,一般翻译为“表述性状态转移”,是Roy Thomas Fielding博士在他的论文“Architectural Styles and the Design of Network-based Software Architectures”中提出的一个术语。REST本身只是分布式系统设计中的一种架构风格,并不是某种标准或者规范,而是一种轻量级的基于HTTP协议的Web Service风格。从另外一个角度看,REST更像是一种设计原则,更可以将其理解为一种思想。
4.2发布REST服务
在Spring Boot中发布REST服务非常简单,只需要在控制器中使用 @RestController 即可。下面我们来看一个示例。新建一个rest-server的Maven项目,加入“spring-boot-starter-web”依赖,将启动类和控制器写入同一个类中,请见代码清单4-1。
代码清单4-1:codes/02/rest-server/src/main/java/org/crazyit/boot/c2/RestApp.java
@SpringBootApplication
@RestController
public class RestApp {

    public static void main(String[] args) {
        SpringApplication.run(RestApp.class, args);
    }

    @GetMapping(value = "/person/{name}", produces = MediaType.APPLICATION_JSON_VALUE)
    public Person person(@PathVariable String name) {
        Person p = new Person();
        p.setName(name);
        p.setAge(33);
        return p;
    }

    static class Person {
        String name;
        Integer age;
        public String getName() {
            return name;
        }
        public void setName(String name) {
            this.name = name;
        }
        public Integer getAge() {
            return age;
        }
        public void setAge(Integer age) {
            this.age = age;
        }

    }
}
在代码清单4-1中,发布了一个“/person/name”的服务,调用该服务后,会返回一个Person实例的JSON字符串,该服务对应的方法使用了组合注解 @GetMapping ,该注解的作用相当于 @RequestMapping (method = RequestMethod.GET)。运行代码清单4-1,在浏览器中访问: http://localhost:8080/person/angus,则返回以下信息:{"name":"angus","age":33}。
很简单的一个注解就帮我们完成了发布REST服务的工作,这再一次展示了Spring Boot的便捷。如果不使用Spring Boot,估计你还要为寻找依赖包而疲于奔命。
4.3使用RestTemplate调用服务
下面,我们使用Spring的RestTemplate来调用服务。RestTemplate是Spring Framework的一个类,其主要用来调用REST服务,它提供了拦截器机制,我们可以对它进行个性化定制。另外,在Spring Cloud中也可以使用RestTemplate来调用服务,而且还可以实现负载均衡的功能,有兴趣的朋友可参考笔者的另外一本书《疯狂Spring Cloud微服务架构实战》。
我们来看一个例子。
新建一个rest-client的Maven项目,加入“spring-boot-starter-web”与“spring-boot-starter-test”的依赖,新建一个最普通的main方法,直接调用前面的服务,请见代码清单4-2。
代码清单4-2:codes/02/rest-client/src/main/java/org/crazyit/boot/c2/RestTemplateMain.java
/**
 * 在main方法中使用RestTemplate
 * @author 杨恩雄
 *
 */
public class RestTemplateMain {

    public static void main(String[] args) {
        RestTemplate tpl = new RestTemplate();
        Person p = tpl.getForObject("http://localhost:8080/person/angus", Person.class);
        System.out.println(p.getName() + "---" + p.getAge());
    }
}
在main方法中,直接创建RestTemplate的实例并调用服务,操作非常简单。如果想在Spring的bean里面使用RestTemplate,则可以使用RestTemplateBuilder,请见代码清单4-3。
代码清单4-3:codes/02/rest-client/src/main/java/org/crazyit/boot/c2/MyService.java
@Service
public class MyService {

    @Autowired
    private RestTemplateBuilder builder;

    @Bean
    public RestTemplate restTemplate() {
        return builder.rootUri("http://localhost:8080").build();
    }

    /**
     * 使用 RestTemplateBuilder 来创建template
     */
    public Person useBuilder() {
        Person p = restTemplate().getForObject("/person/angus", Person.class);
        return p;
    }
}
在我们自已的bean里面注入RestTemplateBuilder,创建一个RestTemplate的bean。在创建RestTemplate实例时,使用RestTemplateBuilder的rootUri方法设置访问的URI。除了rootUri方法外,RestTemplateBuilder还提供了很多方法用于设置RestTemplate,在此不再赘述。接下来,编写一个单元测试类,来测试我们这个MyService的bean,请见代码清单4-4。
代码清单4-4:codes/02/rest-client/src/test/java/org/crazyit/boot/c2/MyServiceTest.java
@RunWith(SpringRunner.class)
@SpringBootTest(webEnvironment = WebEnvironment.NONE)
public class MyServiceTest {

    @Autowired
    private MyService myService;

    @Test
    public void testUserTemplate() {
        Person p = myService.useBuilder();
        System.out.println(p.getName() + "===" + p.getAge());
    }
}
与前面的单元测试类似,直接注入MyService即可。
注意:在运行单元测试时,项目中一定要有Spring Boot的启动类,否则会得到以下异常:java.lang.IllegalStateException: Unable to find a @SpringBootConfiguration , you need to use @ContextConfiguration or @SpringBootTest (classes=…) with your test
Spring的RestTemplate只是众多REST客户端中的一个。接下来,我们介绍另外一个REST客户端Feign。
4.4使用Feign调用服务
Feign是Github上的一个开源项目,其目的是简化Web Service客户端的开发。Spring Cloud项目将Feign整合进来,让其作为REST客户端。这一节,我们来了解如何使用Feign框架调用REST服务。在rest-client项目中加入以下依赖:
<dependency>
            <groupId>io.github.openfeign</groupId>
            <artifactId>feign-core</artifactId>
            <version>9.5.0</version>
        </dependency>
        <dependency>
            <groupId>io.github.openfeign</groupId>
            <artifactId>feign-gson</artifactId>
            <version>9.5.0</version>
        </dependency>
新建PersonClient接口,请见代码清单4-5。
代码清单4-5:codes/02/rest-client/src/main/java/org/crazyit/boot/c2/feign/PersonClient.java
/**
 * Feign客户端接口
 * @author 杨恩雄
 */
public interface PersonClient {

      @RequestLine("GET /person/{name}")
      Person getPerson(@Param("name") String name);

}
在接口中,使用了 @RequestLine 和 @Param 注解,这两个注解是Feign的注解。使用注解修饰后,getPerson方法被调用,然后使用HTTP的GET方法向“/person/name”服务发送请求。接下来编写客户端运行类,请见代码清单4-6。
代码清单4-6:codes/02/rest-client/src/main/java/org/crazyit/boot/c2/feign/FeignMain.java
public class FeignMain {

    public static void main(String[] args) {
        // 调用Hello接口
        PersonClient pc = Feign.builder()
                .decoder(new GsonDecoder())
                .target(PersonClient.class, "http://localhost:8080/");
        Person p = pc.getPerson("angus");
        System.out.println(p.getName() + "---" + p.getAge());
    }
}
在代码清单4-6中,使用Feign来创建PersonClient接口的实例,最后通过调用接口方法来访问服务。熟悉AOP的朋友可能已经猜到,Feign实际上帮助我们动态生成了代理类,Feign使用的是JDK的动态代理,代理类会将请求的信息封装,最终使用java.netHttpURLConnection来发送HTTP请求。如果想将这里的PersonClient作为bean放到Spring容器中,则可以添加一个创建该实例的方法:
@Bean
    public PersonClient personClient() {
        return Feign.builder()
                .decoder(new GsonDecoder())
                .target(PersonClient.class, "http://localhost:8080/");
    }
使用Feign来调用REST服务,使人感觉更加面向对象了。除了RestTemplate和Feign之外,还可以使用诸如Restlet、CXF等框架来调用REST服务,在此不再赘述。
5本文小结
本文主要运行了第一个Spring Boot程序,通过这个程序,大家可以了解什么是Spring Boot,在此过程中,大家应该也能感受到Spring Boot的便捷。除了这个简单的Spring Boot程序外,还介绍了如何在Spring Boot环境中运行单元测试,包括对Web应用的测试、对Spring组件的模拟测试。最后,介绍了如何在Spring Boot中发布和调用REST服务,其中重点介绍了RestTemplate和Feign框架。本文作为Spring Boot入门的文章,涉及的知识较为简单,在《Spring Boot 2+Thymeleaf企业应用实战》一书中我们会继续学习Spring Boot。
正文到此结束
- 本文标签: JPA CXF Spring cloud 覆盖率 update 测试 tar redis 时间 REST build 文章 HTTP协议 mongo 微服务 java 定制 eclipse 负载均衡 数据 需求 value schema Architect AOP 专注 单元测试 spring 翻译 pom js UI 代码 XML Connection ACE IO 分布式系统 测试环境 目录 协议 maven https 配置 GitHub json 企业 http ORM springboot JVM 服务器 db git map Node.js 实例 Java类 core bean 分布式 equals root node ip cat API DOM 开源 src Service Spring Boot EnableAutoConfiguration web remote tomcat 数据库 SOA MongoDB 开发 Action id Feign tag apache 端口 servlet find 开源项目 App dependencies client
- 版权声明: 本文为互联网转载文章,出处已在文章中说明(部分除外)。如果侵权,请联系本站长删除,谢谢。
- 本文海报: 生成海报一 生成海报二
热门推荐


相关文章


Loading...
![[HBLOG]公众号](http://www.liuhaihua.cn/img/qrcode_gzh.jpg)

