SpringCloud无废话入门05:Spring Cloud Gateway路由、filter、熔断
1.什么是路由网关
截至目前为止的例子中,我们创建了一个service,叫做:HelloService,然后我们把它部署到了两台服务器(即提供了两个provider),然后我们又使用ribbon将其做了负载均衡。目前为止这一切都看上运作的很好,我们通过地址访问地址http://localhost:9291/hello,实际是路由到了http://localhost:9191/hello和http://localhost:9192/hello两个服务器上。
紧接着,随着业务更进一步,我们又创建了UserService,又创建了ProductService,我们提供的服务器也越来越多,但是我们发现一个问题,即:即提供一种服务,前端程序员都需要通过IP+端口的形式去访问,很快URL地址就多的爆炸了,而且,甚至某些别有用心的同学因为知道了这些目标地址,开始采用非常规的手段去做些坏事。所以,我们必须做些手段来规避这些糟糕的事情。
路由网关出现了。
当我们输入URL,比如zuikc.com/hello或者zuikc.com/user的时候,路由网关会去分析这个地址,并且根据地址的pattern,
1:去决定到底是访问helloservice还是userservice;
2:到eureka注册中心拿到该服务的id;
3:通过ribbon去访问该服务id中的一台provider;
4:拿到response,返回给调用者;
并且,由于路由网关能做这些事情,还有额外的一些事情,比如权限验证(shiro,springsecurity等),就天然的适合放到路由网关也一并实现了。
关于路由网关,以前有zuul,但是zuul已经停止更新了,Spring Cloud Gateway被Spring Cloud官方推出来,作为第二代网关框架,取代Zuul网关。
总结一下,路由网关的作用就是:路由转发、权限校验、限流控制。
2.路由网关原理
来看Spring Cloud Gateway官方提供的架构图,
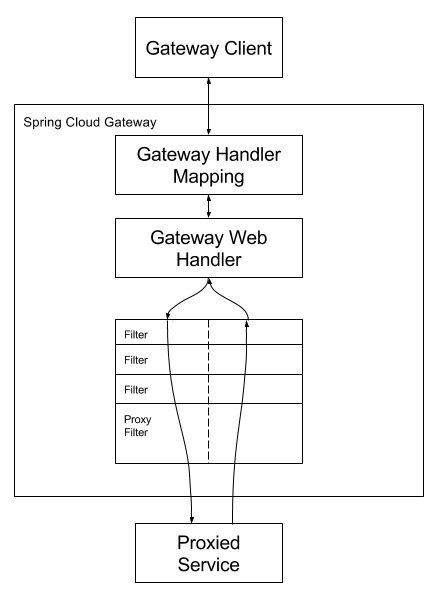
客户端向Spring Cloud Gateway发出请求。 Gateway Handler Mapping匹配路径并将其发送到Gateway web handler处理。 Gateway web handler处理请求,将其发送给过滤器链。
过滤器链主要分两大类:pre和post。“pre”过滤器一般进行权限、限流、日志输出等功能,以及请求头的更改、协议的转换;“post”过滤器是在收到响应后,可以对响应数据做统一修改,比如响应头、协议的转换等。
3.实现
现在,让我们用代码实现一下吧。
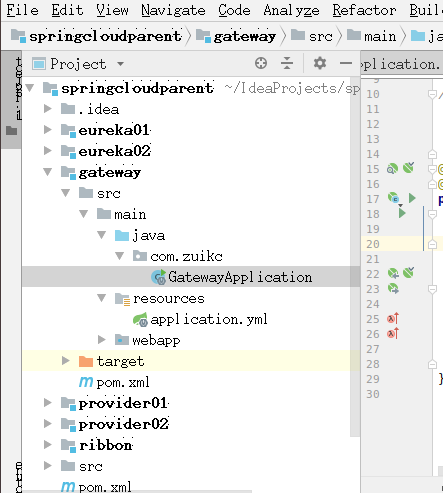
首先,创建子模块,在我们的例子中,创建完毕后,解决方案像如下这样,
现在,导入依赖如下:
<?xml version="1.0" encoding="UTF-8"?>
<project xmlns="http://maven.apache.org/POM/4.0.0" xmlns:xsi="http://www.w3.org/2001/XMLSchema-instance"
xsi:schemaLocation="http://maven.apache.org/POM/4.0.0 http://maven.apache.org/maven-v4_0_0.xsd">
<parent>
<artifactId>springcloud.parent</artifactId>
<groupId>com.zuikc</groupId>
<version>1.0-SNAPSHOT</version>
</parent>
<modelVersion>4.0.0</modelVersion>
<packaging>war</packaging>
<name>gateway</name>
<artifactId>gateway</artifactId>
<dependencyManagement>
<dependencies>
<dependency>
<groupId>org.springframework.cloud</groupId>
<artifactId>spring-cloud-dependencies</artifactId>
<version>Greenwich.RELEASE</version>
<type>pom</type>
<scope>import</scope>
</dependency>
</dependencies>
</dependencyManagement>
<dependencies>
<dependency>
<groupId>org.springframework.cloud</groupId>
<artifactId>spring-cloud-starter-gateway</artifactId>
</dependency>
</dependencies>
</project>
先创建一个最简单的application.yml,
server:
port: 8880
然后,让我们创建application类,
package com.zuikc;
import org.springframework.boot.SpringApplication;
import org.springframework.boot.autoconfigure.SpringBootApplication;
import org.springframework.cloud.gateway.route.RouteLocator;
import org.springframework.cloud.gateway.route.builder.RouteLocatorBuilder;
import org.springframework.context.annotation.Bean;
import org.springframework.web.bind.annotation.RestController;
/**
* @ClassName GatewayApplication
* @Description 我们提供咨询和培训服务,关于本文有任何困惑,请关注并联系“码农星球”
* @Author 码农星球
**/
@SpringBootApplication
@RestController
public class GatewayApplication {
public static void main(String[] args) {
SpringApplication.run(GatewayApplication.class, args);
}
@Bean
public RouteLocator myRoutes(RouteLocatorBuilder builder) {
return builder.routes()
.route("host_route", r -> r.path("/hello/**").filters(f -> f.stripPrefix(1)).uri("http://localhost:9291"))
.route("host_route", r -> r.path("/user/**").filters(f -> f.stripPrefix(1)).uri("http://localhost:9391"))
.build();
}
}
在这个类中,我们将“域名/hello”下的所有请求转发到了HelloService所在ribbon服务器中,将“域名/user”下所有的请求转到User所在的ribbon下。
然后,启动application。这个时候,让我们输入地址:http://localhost:8880/hello/hello,可以看到结果类似如下:
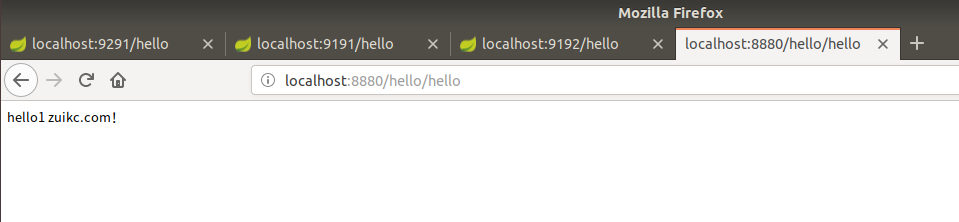
服务将在两个provider中切换。注意,上述url中,第一个hello,是指路由到helloservice中,第二个hello,是具体的服务。
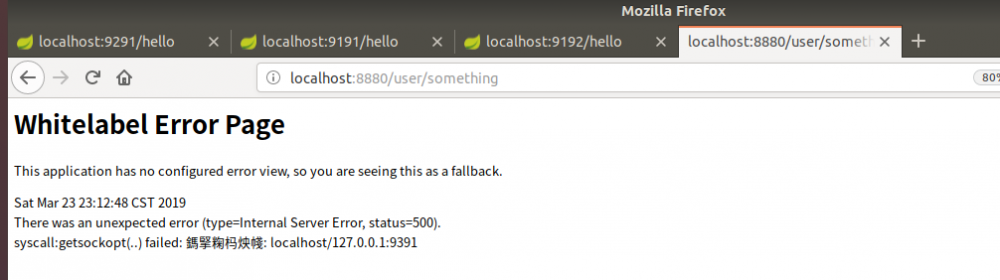
接下来,让我们试一下,http://localhost:8880/user/something。由于我们目前并没有开发UserService,所以就出现errorpage了~~
4.使用配置实现
我们也可以使用配置来实现路由。
在上面的代码中,我们首先去掉application中的bean,
package com.zuikc;
import org.springframework.boot.SpringApplication;
import org.springframework.boot.autoconfigure.SpringBootApplication;
import org.springframework.cloud.gateway.route.RouteLocator;
import org.springframework.cloud.gateway.route.builder.RouteLocatorBuilder;
import org.springframework.context.annotation.Bean;
import org.springframework.web.bind.annotation.RestController;
/**
* @ClassName GatewayApplication
* @Description 我们提供咨询和培训服务,关于本文有任何困惑,请关注并联系“码农星球”
* @Author 码农星球
**/
@SpringBootApplication
@RestController
public class GatewayApplication {
public static void main(String[] args) {
SpringApplication.run(GatewayApplication.class, args);
}
}
然后,修改application.yml,
server:
port: 8880
spring:
cloud:
gateway:
routes:
- id: host_route
uri: http://localhost:9291
predicates:
- Path=/hello/**
filters:
- StripPrefix=1
- id: host_route
uri: http://localhost:9391
predicates:
- Path=/user/**
filters:
- StripPrefix=1
然后,重启application,得到的效果是一样一样滴。
5.通过filters使用Hystrix
如果注意上文中的http://localhost:8880/user/something,我们发现原来在gateway中也是可以指定熔断器fallback的。
那就好办了,首先,让我们引入hystrix,
<dependency>
<groupId>org.springframework.cloud</groupId>
<artifactId>spring-cloud-starter-netflix-hystrix</artifactId>
</dependency>
其次,创建一个fallback,
package com.zuikc;
import org.springframework.stereotype.Component;
import org.springframework.web.bind.annotation.RequestMapping;
import org.springframework.web.bind.annotation.RestController;
/**
* @ClassName FallBack
* @Description 我们提供咨询和培训服务,关于本文有任何困惑,请关注并联系“码农星球”
* @Author 码农星球
**/
@RestController
@RequestMapping("/fallback")
public class FallBack {
@RequestMapping("")
public String fallback(){
return "error";
}
}
再次,修改我们的配置文件,
server:
port: 8880
spring:
cloud:
gateway:
routes:
- id: host_route
uri: http://localhost:9291
predicates:
- Path=/hello/**
filters:
- StripPrefix=1
- id: host_route
uri: http://localhost:9391
predicates:
- Path=/user/**
filters:
- StripPrefix=1
- name: Hystrix
args:
name: fallbackcmd
fallbackUri: forward:/fallback
重启application。
这个时候,再次访问http://localhost:8880/user/something,页面输出为error。
感谢关注“码农星球”。本文版权属于“码农星球”。我们提供咨询和培训服务,关于本文有任何困惑,请关注并联系我们。
本文参考: https://spring.io/guides/gs/gateway/
一些官方的例子在:
http://cloud.spring.io/spring-cloud-static/spring-cloud-gateway/2.0.0.RELEASE/single/spring-cloud-gateway.html
正文到此结束
- 本文标签: apache 配置 HTML schema IO zuul spring pom map 程序员 provider bean Netflix maven cat App 总结 Service ribbon 端口 description 域名 开发 前端程序员 Spring cloud cmd tar 代码 dependencies Security springcloud 部署 协议 负载均衡 IDE REST http Hystrix 限流 服务器 https 数据 Eureka src springboot 注册中心 web ip UI XML build id 路由网关
- 版权声明: 本文为互联网转载文章,出处已在文章中说明(部分除外)。如果侵权,请联系本站长删除,谢谢。
- 本文海报: 生成海报一 生成海报二
热门推荐


相关文章


Loading...
![[HBLOG]公众号](http://www.liuhaihua.cn/img/qrcode_gzh.jpg)

