在spring boot中3分钟上手分布式任务调度系统xxl-job
xxl-job在鼎鼎大名的 quartz 任务调度系统上进行了二次封装,变得更好用了 项目地址: github.com/xuxueli/xxl…
虽然官方文档也很全,很详细,需要多花些时间上手,以下是我根据官方文档整理出的快速上手步骤,可以减少上手需要花费的时间和一些生产使用需要注意的点
在mysql中执行以下sqltables_xxl_job.sql
这个sql创建xxl-job和调度任务的表 记下mysql的地址,用户名和密码
使用docker一键启动调度中心
docker run -d --rm /
    -e PARAMS="--spring.datasource.url=jdbc:mysql://你的mysql数据库ip:3306/xxl-job?Unicode=true&characterEncoding=UTF-8 --spring.datasource.username=你的mysql数据库用户名 --spring.datasource.password=你的mysql数据库密码" /
    -p 8680:8080 /
    --name xxl-job-admin xuxueli/xxl-job-admin:2.0.2
复制代码
在浏览器中使用默认用户名和密码 admin 123456 登陆查看效果
将一个spring boot项目变成一个xxl-job任务的执行器
在现有项目的pom.xml加上xxl-job core依赖
<!-- xxl-job-core -->
<dependency>
    <groupId>com.xuxueli</groupId>
    <artifactId>xxl-job-core</artifactId>
    <version>2.0.2</version>
</dependency>
复制代码
在现有的配置文件src/main/resources/application.properties文件中添加xxl-job调度中心的配置
### xxl-job admin address list, such as "http://address" or "http://address01,http://address02"
xxl.job.admin.addresses=http://127.0.0.1:8680/xxl-job-admin

### xxl-job executor address
xxl.job.executor.appname=xxl-job-executor-sample
xxl.job.executor.ip=
xxl.job.executor.port=9999

### xxl-job, access token
xxl.job.accessToken=

### xxl-job log path
xxl.job.executor.logpath=logs/xxl-job/jobhandler
### xxl-job log retention days
xxl.job.executor.logretentiondays=-1
复制代码
然后在spring boot中把xxl job注册成服务,参考:XxlJobConfig.java 核心代码如下:
@Bean(initMethod = "start", destroyMethod = "destroy")
public XxlJobSpringExecutor xxlJobExecutor() {
    logger.info(">>>>>>>>>>> xxl-job config init.");
    XxlJobSpringExecutor xxlJobSpringExecutor = new XxlJobSpringExecutor();
    xxlJobSpringExecutor.setAdminAddresses(adminAddresses);
    xxlJobSpringExecutor.setAppName(appName);
    xxlJobSpringExecutor.setIp(ip);
    xxlJobSpringExecutor.setPort(port);
    xxlJobSpringExecutor.setAccessToken(accessToken);
    xxlJobSpringExecutor.setLogPath(logPath);
    xxlJobSpringExecutor.setLogRetentionDays(logRetentionDays);

    return xxlJobSpringExecutor;
}
复制代码
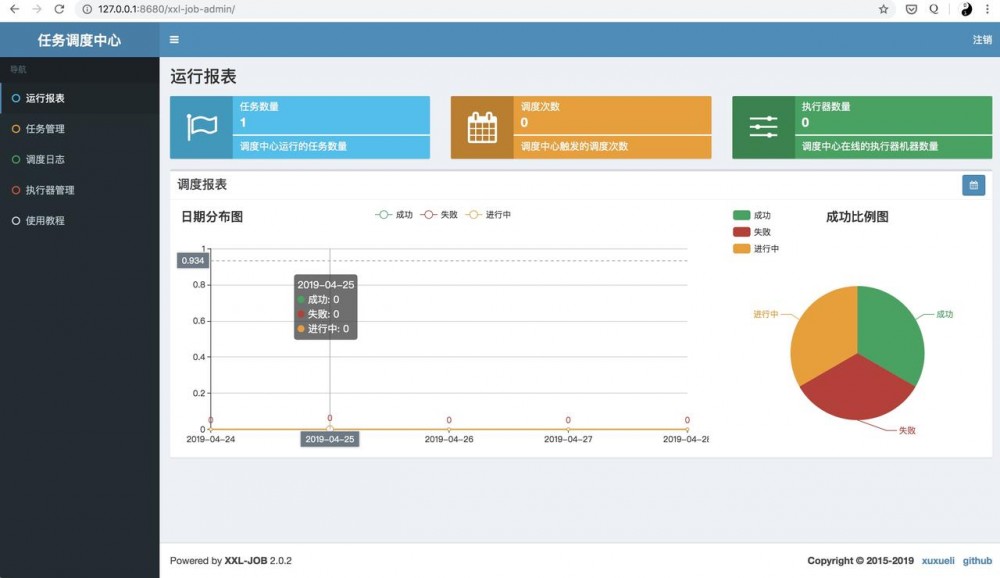
启动项目,在调度中心查看效果

可以看到我们的执行器上线了
编写任务
用到spring boot了,一般都会在任务中调用spring boot项目的资源,比如 jpa, service, util等
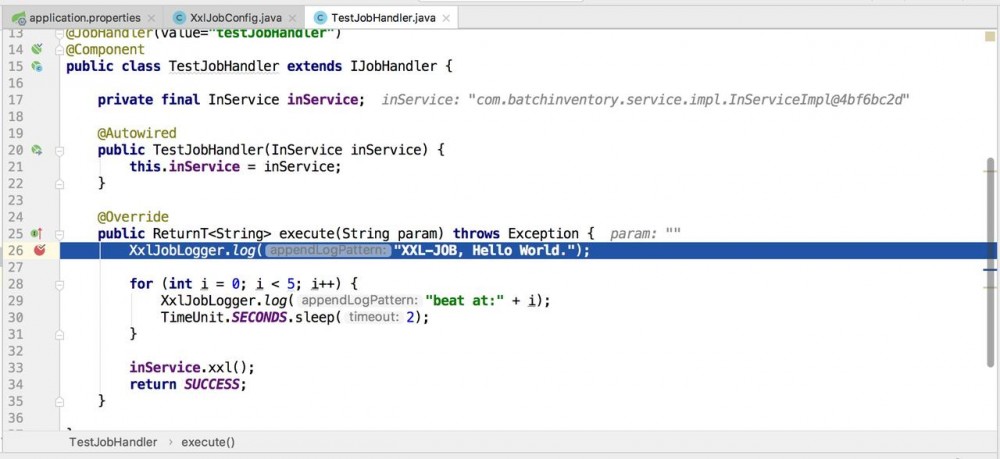
在spring boot项目中创建一个测试任务,比如 TestJobHandler.java 核心代码如下
@JobHandler(value="testJobHandler")
@Component
public class TestJobHandler extends IJobHandler {

    private final InService inService;

    @Autowired
    public TestJobHandler(InService inService) {
        this.inService = inService;
    }

    @Override
    public ReturnT<String> execute(String param) throws Exception {
        XxlJobLogger.log("XXL-JOB, Hello World.");

        for (int i = 0; i < 5; i++) {
            XxlJobLogger.log("beat at:" + i);
            TimeUnit.SECONDS.sleep(2);
        }

        inService.xxl();
        return SUCCESS;
    }
}
复制代码
其中inService便是spring boot中的一个普通的service
执行任务
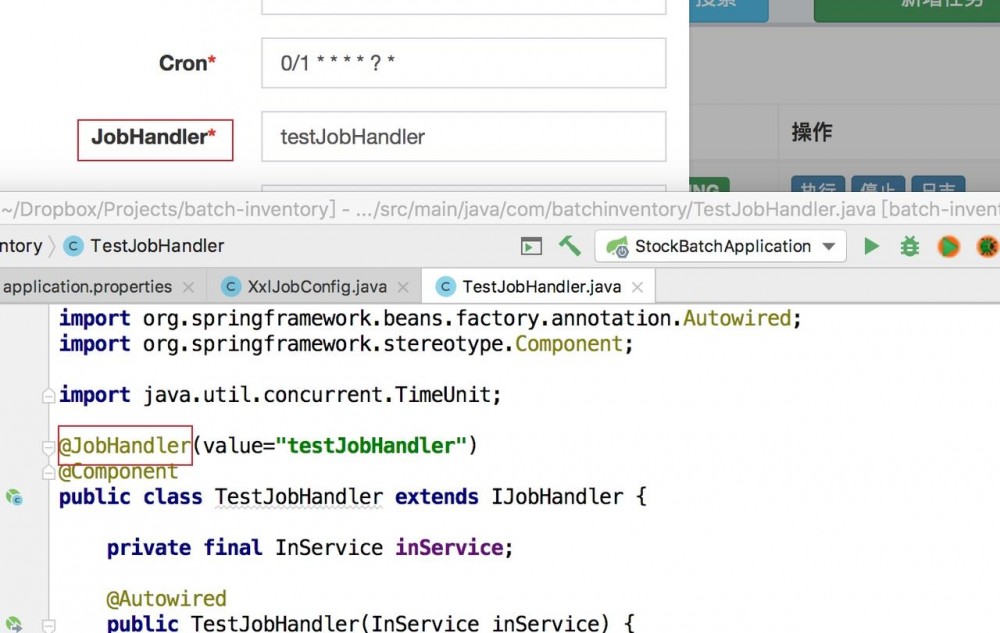
然后在调度中心创建任务运行我们刚才创建的任务

点击启动任务,在任务执行代码中断个点查看效果
任务触发成功!
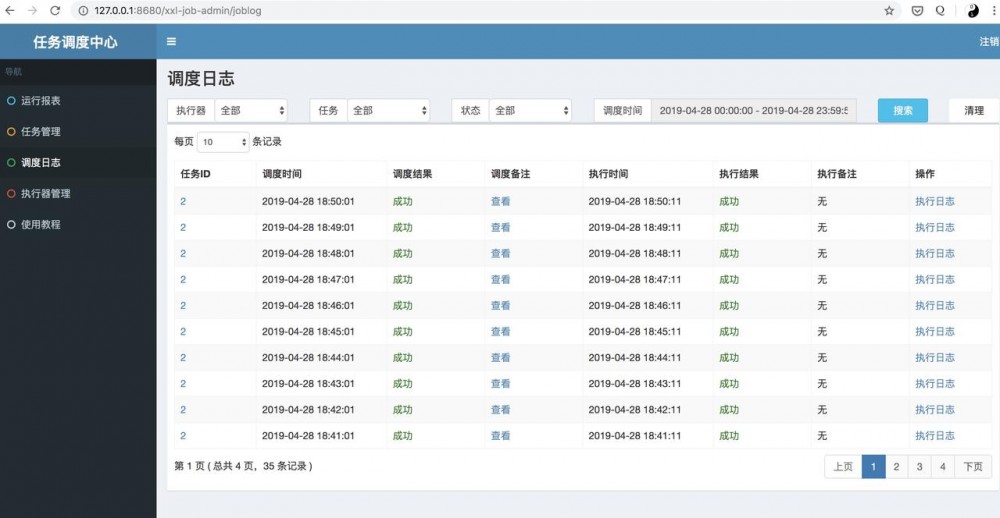
同时可以在调度中心看到执行的记录和日志
一些注意的点
调度中心的JobHandler必须和代码里的JobHandler的值一致才能匹配到执行的任务
生产环节使用要保证任务执行客户端的高可用,开启高可用参考:执行器集群
调度中心也需要高可用,参考:调度中心集群
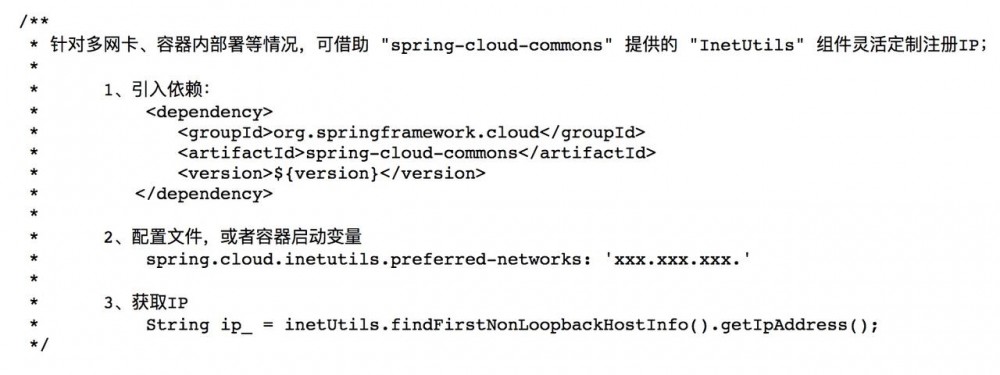
一般微服务都在容器里部署,容器部署需要特别注意ip地址,参考:XxlJobConfig.java 的说明
正文到此结束
- 本文标签: 高可用 spring sql App core Service 分布式 mysql mina 集群 时间 src Jobs Spring Boot pom cat 代码 dataSource Job id 部署 db 数据库 GitHub final 任务调度 微服务 db2 tar IDE list Quartz MQ JDBC tab https 数据 value JPA IO token 测试 git UI XML Word executor Mysql数据库 java ip 配置 Docker http bean
- 版权声明: 本文为互联网转载文章,出处已在文章中说明(部分除外)。如果侵权,请联系本站长删除,谢谢。
- 本文海报: 生成海报一 生成海报二
热门推荐


相关文章


Loading...
![[HBLOG]公众号](http://www.liuhaihua.cn/img/qrcode_gzh.jpg)

