『互联网架构』软件架构-Spring boot集成模板引擎swagger2实现(87)
上次说过springboot其实就是一个CI工具,如何体验出来CI的作用就是持续集成,它可以集成各种的工具,这里说说关于模板的集成引擎和Swagger。源码:https://github.com/limingios/netFuture/tree/master/源码/『互联网架构』软件架构-Spring boot集成模板引擎实现(86)/
(一)Spring boot 集成模板引擎实现web应用
-
静态资源访问
>静态资源
js, css, html, 图片,音视频
静态资源路径
系统可以直接访问的路径,且路径下的所有文件均可被用户直接读取。
Spring Boot默认提供静态资源目录位置需置于classpath下,目录名需符合如下规则:
/static,/public,/resources,/META-INF/resources
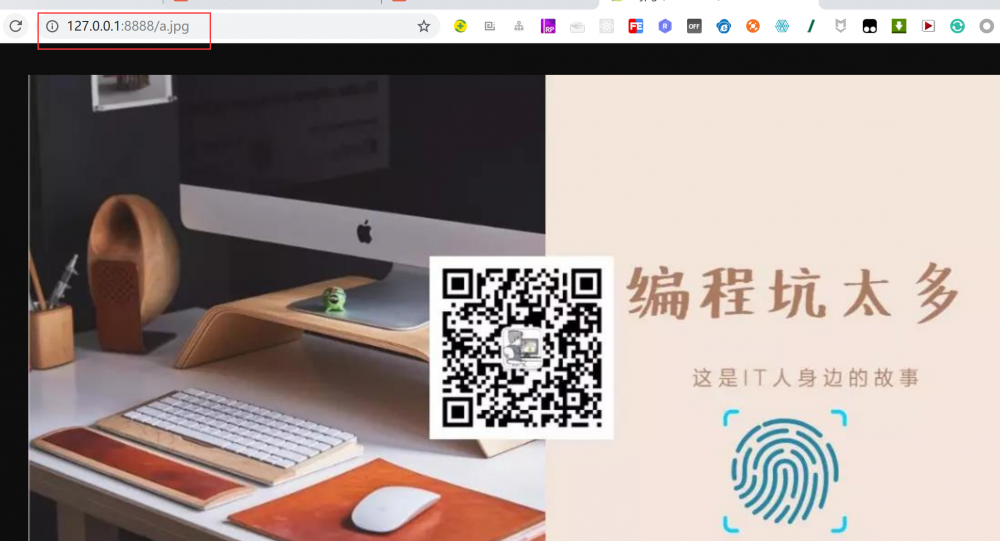
在classpath下面创建static目录,并且加入一个图片a.png
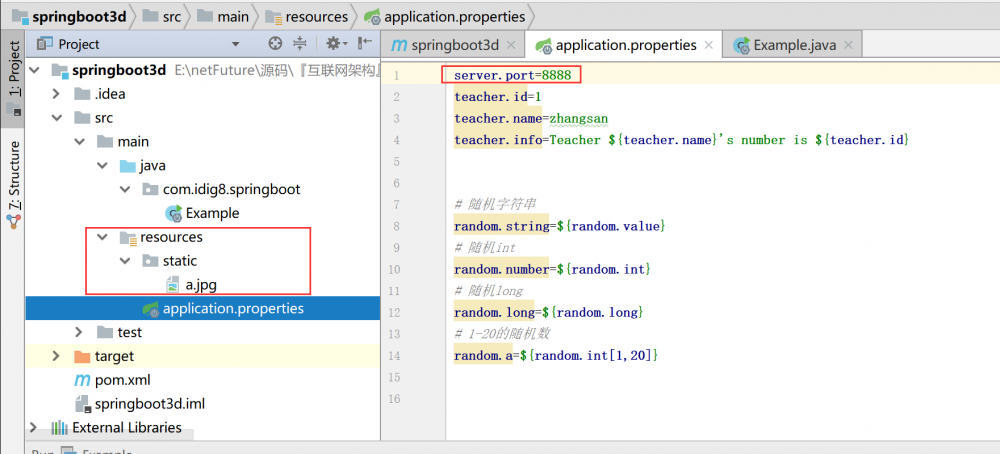
加入之后,然后不需要重启直接访问:http://localhost:8888/a.jpg
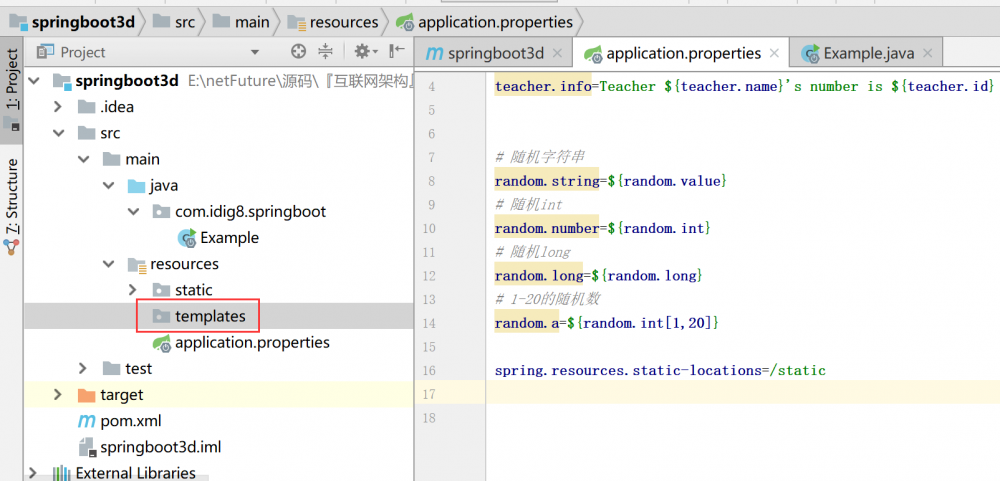
properties 内修改默认的静态资源目录
spring.resources.static-locations
(二)集成模板引擎
Spring Boot强烈建议使用模板引擎渲染html页面,避免使用JSP,若一定要使用JSP将无法实现Spring Boot的多种特性。Thymeleaf(spring boot推荐), FreeMarker。
-
Thymeleaf
> Spring boot默认的模板配置路径为:src/main/resources/templates。当然也可以修改这个路径,通过配置文件的属性,这个在上次的配置的文件的里面有详细的解释配置里面有。
集成Thymeleaf步骤
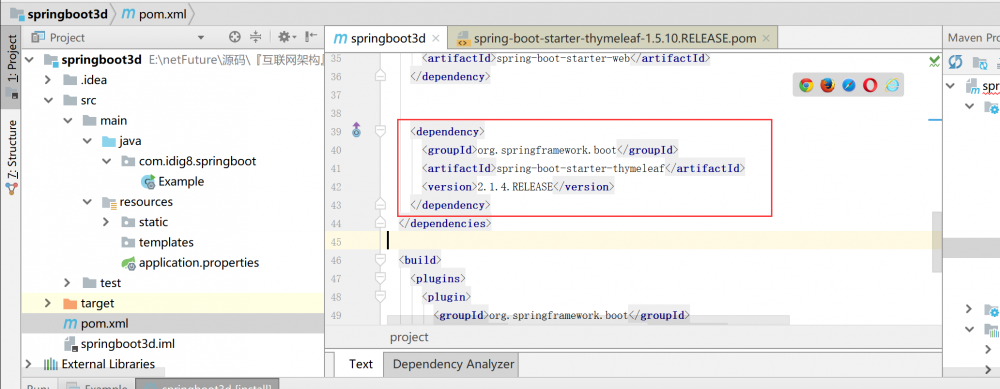
1.修改pom.xml, 增加如下依赖。
<dependency>
      <groupId>org.springframework.boot</groupId>
      <artifactId>spring-boot-starter-thymeleaf</artifactId>
    </dependency>
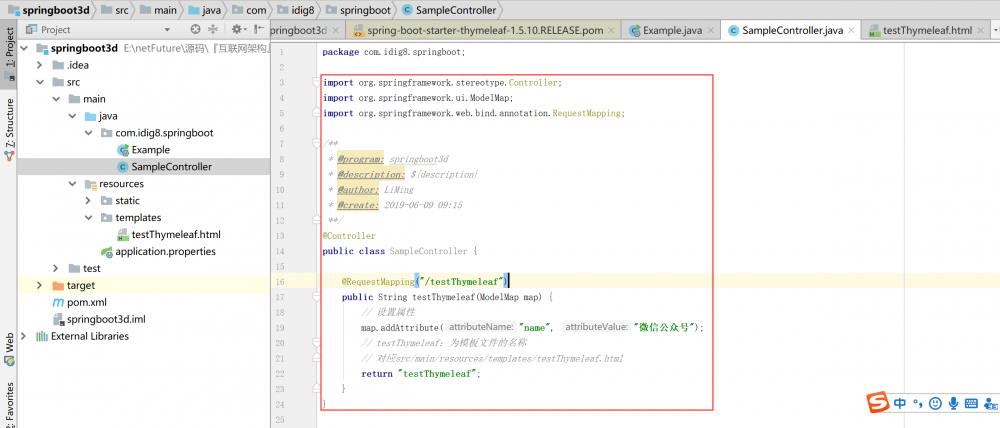
2.编写Controller
import org.springframework.stereotype.Controller;
import org.springframework.ui.ModelMap;
import org.springframework.web.bind.annotation.RequestMapping;

/**
 * @program: springboot3d
 * @description: ${description}
 * @author: LiMing
 * @create: 2019-06-09 09:15
 **/
@Controller
public class SampleController {

    @RequestMapping("/testThymeleaf")
    public String testThymeleaf(ModelMap map) {
        // 设置属性
        map.addAttribute("name", "idig8");
        // testThymeleaf:为模板文件的名称
        // 对应src/main/resources/templates/testThymeleaf.html
        return "testThymeleaf";
    }
}
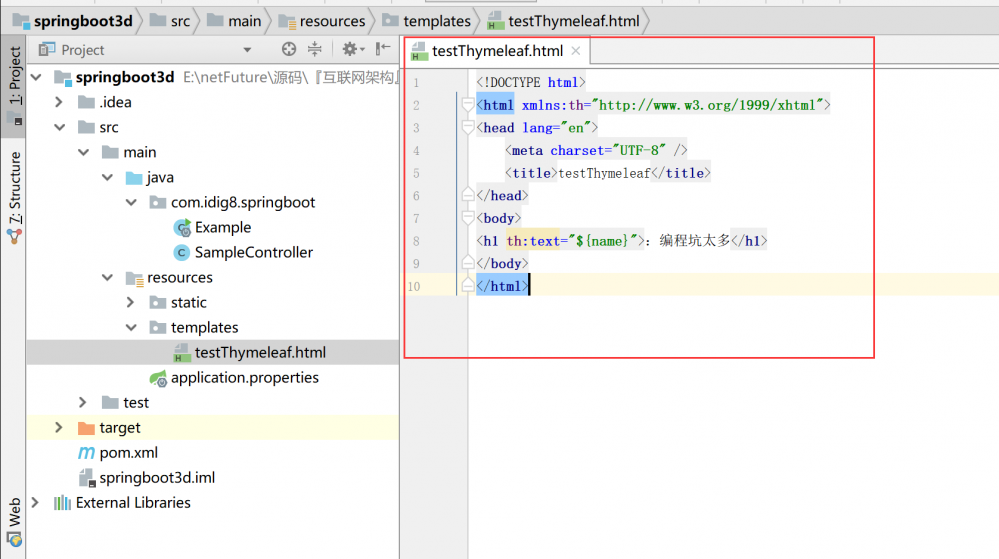
3.在src/main/resources/下面建立templates/testThymeleaf.html
<!DOCTYPE html>
<html xmlns:th="http://www.w3.org/1999/xhtml">
<head lang="en">
    <meta charset="UTF-8" />
    <title>testThymeleaf</title>
</head>
<body>
<h1 th:text="${name}">idig88</h1>
</body>
</html>
4.运行spring boot,浏览器输入:http://localhost:8888/testThymeleaf
-
FreeMarker
1.修改pom.xml,增加依赖
<dependency>
            <groupId>org.springframework.boot</groupId>
            <artifactId>spring-boot-starter-freemarker</artifactId>
</dependency>

2.Controller
@RequestMapping("/testFreemarker")
    public String testFreemarker(Map<String,String> map) {
        map.put("name", "张三");
        return "hello"; //默认为src/main/resources/templates/hello.flt
    }
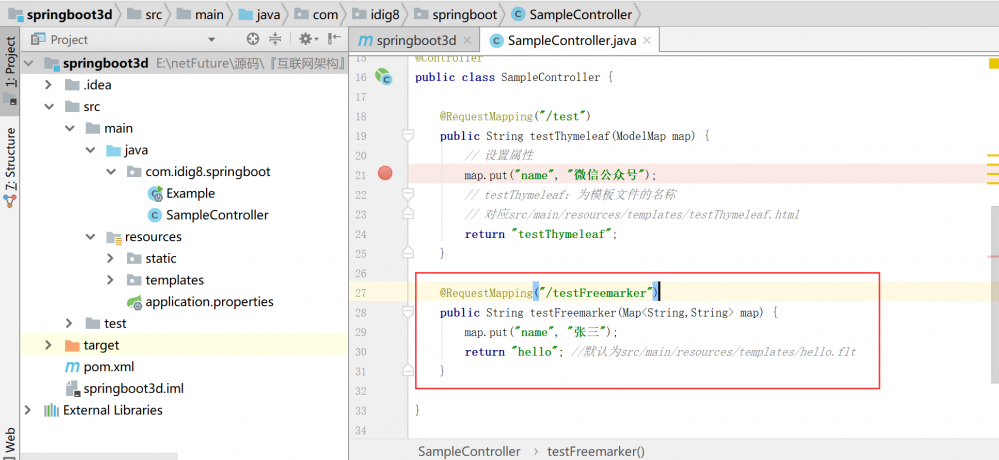
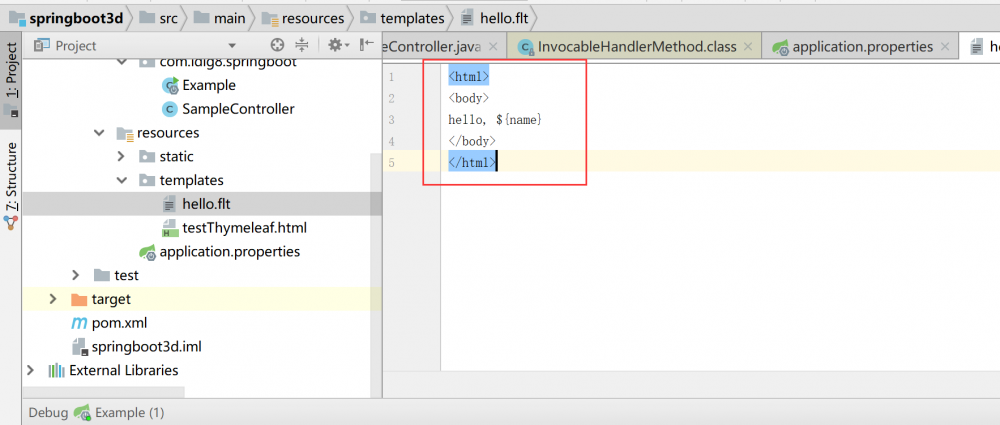
3.hello.flt,目录为:src/main/resources/templates
<html>
<body>
    hello, ${name}
</body>
</html>
4.运行spring boot main,浏览器输入如下地址:http://localhost:8881/testFreemarker
(二)集成Swagger2构建RESTful API文档
- Swagger2
1.随项目自动生成强大RESTful API文档,减少工作量
2.API文档与代码整合在一起,便于同步更新API说明
3.页面测试功能来调试每个RESTful API -
集成Swagger2步骤
1.修改pom.xml, 添加Swagger2依赖
<dependency>
    <groupId>io.springfox</groupId>
    <artifactId>springfox-swagger2</artifactId>
    <version>2.2.2</version>
</dependency>
<dependency>
    <groupId>io.springfox</groupId>
    <artifactId>springfox-swagger-ui</artifactId>
    <version>2.2.2</version>
</dependency>

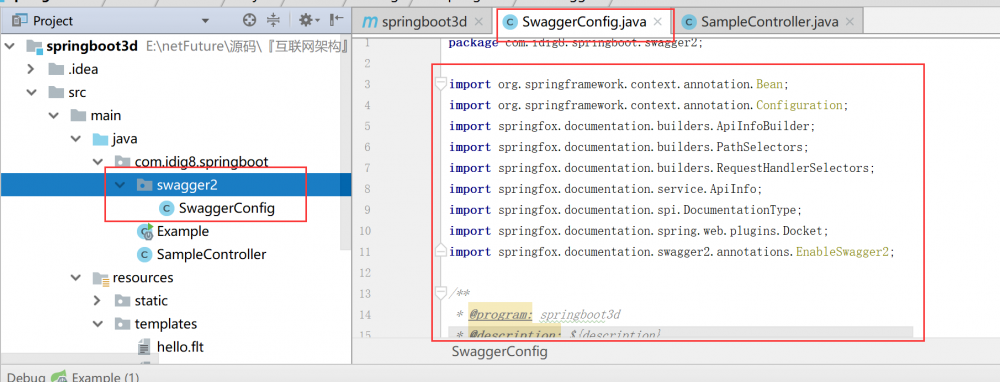
2.创建Swagger2配置类
import org.springframework.context.annotation.Bean;
import org.springframework.context.annotation.Configuration;
import springfox.documentation.builders.ApiInfoBuilder;
import springfox.documentation.builders.PathSelectors;
import springfox.documentation.builders.RequestHandlerSelectors;
import springfox.documentation.service.ApiInfo;
import springfox.documentation.spi.DocumentationType;
import springfox.documentation.spring.web.plugins.Docket;
import springfox.documentation.swagger2.annotations.EnableSwagger2;

/**
 * @program: springboot3d
 * @description: ${description}
 * @author: LiMing
 * @create: 2019-06-09 10:20
 **/
@Configuration
@EnableSwagger2
public class SwaggerConfig {
    @Bean
    public Docket createRestApi() {
        return new Docket(DocumentationType.SWAGGER_2)
                .apiInfo(apiInfo())
                .select()
                .apis(RequestHandlerSelectors.basePackage("com.idig8.springboot"))// 指定扫描包下面的注解
                .paths(PathSelectors.any())
                .build();
    }
    // 创建api的基本信息
    private ApiInfo apiInfo() {
        return new ApiInfoBuilder()
                .title("集成Swagger2构建RESTful APIs")
                .description("集成Swagger2构建RESTful APIs")
                .termsOfServiceUrl("https://www.idig8.com")
                .contact("欢迎关注:编程坑太多")
                .version("1.0.0")
                .build();
    }
}
2.创建Controller: SwaggerController.java
import io.swagger.annotations.ApiImplicitParam;
import io.swagger.annotations.ApiOperation;
import org.springframework.web.bind.annotation.PathVariable;
import org.springframework.web.bind.annotation.RequestMapping;
import org.springframework.web.bind.annotation.RequestMethod;
import org.springframework.web.bind.annotation.RestController;

import java.util.HashMap;
import java.util.Map;

/**
 * @program: springboot3d
 * @description: ${description}
 * @author: LiMing
 * @create: 2019-06-09 10:22
 **/
@RestController
@RequestMapping(value="/swagger")
public class SwaggerController {
    @ApiOperation(value="获取用户信息", notes="根据id来获取用户详细信息")
    @ApiImplicitParam(name="id", value="用户ID", required=true, dataType="String")
    @RequestMapping(value="/{id}", method= RequestMethod.GET)
    public Map<String,String> getInfo(@PathVariable String id) {
        Map<String ,String> map = new HashMap<String, String>();
        map.put("name", "张三");
        map.put("age", "34");
        return map;
    }
}
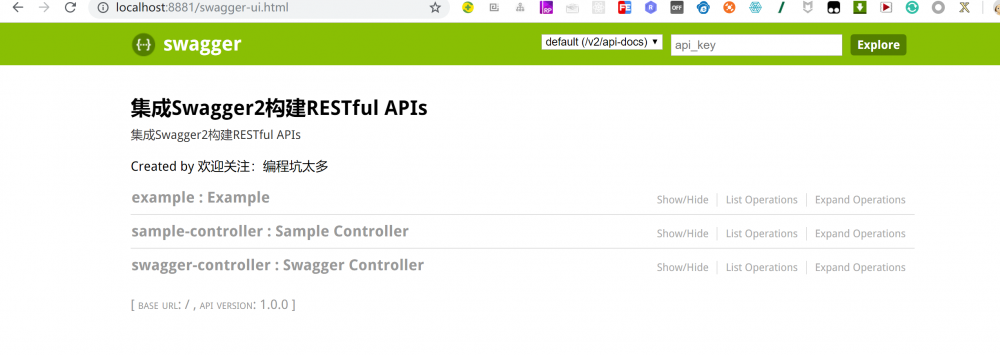
4.启动Spring boot,访问Swagger UI界面:http://localhost:8881/swagger-ui.html
PS:今天说了简单模板引擎和swagger2的介绍,只是功能介绍详细的细节没有做阐述。先从会用开始吧,具体的细节还是看官方的api更详细,这里只是从入门开始说起。
百度未收录
>>原创文章,欢迎转载。转载请注明:转载自IT人故事会,谢谢!
>>原文链接地址:上一篇:已是最新文章
正文到此结束
- 本文标签: pom 互联网 API Select build plugin HashMap 源码 description RESTful Document 同步 bean springboot classpath tar CSS HTML Service Spring Boot 测试 调试 App 百度 Freemarker id web js UI CTO REST IOS Master java https 配置 代码 软件 文章 IO spring git map IT人 value http 图片 目录 ip cat GitHub XML src 自动生成 2019
- 版权声明: 本文为互联网转载文章,出处已在文章中说明(部分除外)。如果侵权,请联系本站长删除,谢谢。
- 本文海报: 生成海报一 生成海报二
热门推荐


相关文章


Loading...
![[HBLOG]公众号](http://www.liuhaihua.cn/img/qrcode_gzh.jpg)

