释放双手自定义Maven ArcheType实现简单的项目骨架
什么是ArcheType?
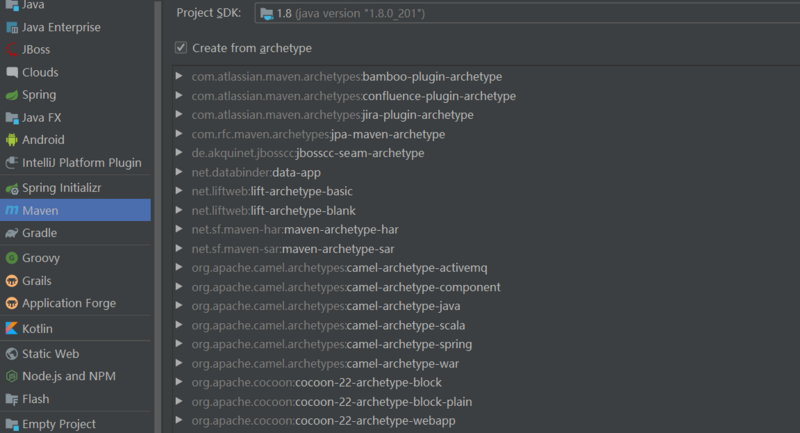
Archetype是一个Maven项目模板工具包。通过Archetype我们可以快速搭建Maven项目。通常我们使用idea创建maven工程的时候都会选择Archetype来创建项目maven中常用的Archetype
- maven-archetype-quickstart
- maven-archetype-webapp
创建自定义的Archetype项目
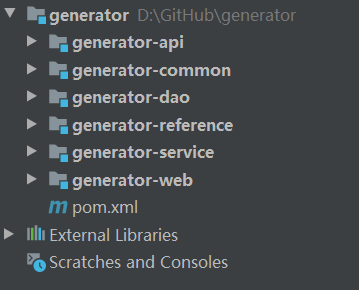
一,创建一个多模块的maven project
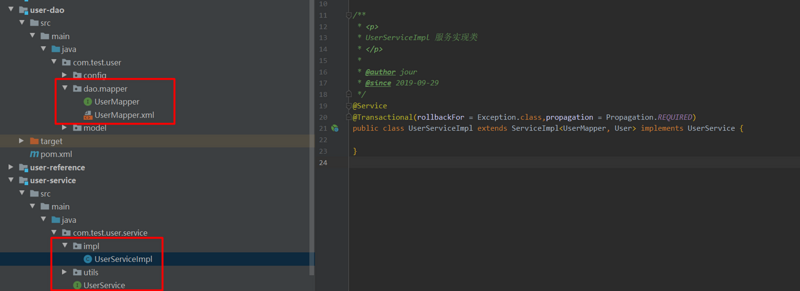
使用maven创建一个的多模块project作为模板项目如下:
二,在项目根pom文件中添加maven archetype插件
<plugins>
    <plugin>
        <groupId>org.apache.maven.plugins</groupId>
        <artifactId>maven-archetype-plugin</artifactId>
        <version>3.0.1</version>
    </plugin>
    <plugin>
        <groupId>org.apache.maven.plugins</groupId>
        <artifactId>maven-compiler-plugin</artifactId>
        <version>3.6.1</version>
        <configuration>
            <source>1.8</source>
            <target>1.8</target>
        </configuration>
    </plugin>
    <plugin>
        <groupId>org.apache.maven.plugins</groupId>
        <artifactId>maven-resources-plugin</artifactId>
        <version>3.0.2</version>
        <configuration>
            <encoding>UTF-8</encoding>
        </configuration>
    </plugin>
</plugins>
三,运行项目制作模板自定义archetype
1,创建archetype到本地仓库
# 到项目根目录执行命令
mvn archetype:create-from-project
此时在项目的target目录下生成了很多文件

2,生成archetype模板
## 进入archetype目录
cd target/generated-sources/archetype/
mvn install
## 生成archetype-catalog.xml文件
mvn archetype:crawl
执行以上命令后在本地仓库的根目录中会生成archetype-catalog.xml文件

archetype的内容如下,其中artifactId和groupId待会我们生成的时候要用到
<?xml version="1.0" encoding="UTF-8"?>
<archetype-catalog xsi:schemaLocation="http://maven.apache.org/plugins/maven-archetype-plugin/archetype-catalog/1.0.0 http://maven.apache.org/xsd/archetype-catalog-1.0.0.xsd"
    xmlns="http://maven.apache.org/plugins/maven-archetype-plugin/archetype-catalog/1.0.0"
    xmlns:xsi="http://www.w3.org/2001/XMLSchema-instance">
  <archetypes>
    <archetype>
      <groupId>com.generated.boot</groupId>
      <artifactId>generated-archetype</artifactId>
      <version>1.0-SNAPSHOT</version>
      <description>generated</description>
    </archetype>
    <archetype>
      <groupId>org.apache.maven.archetypes</groupId>
      <artifactId>maven-archetype-quickstart</artifactId>
      <version>1.1</version>
      <description>quickstart</description>
    </archetype>
  </archetypes>
</archetype-catalog>
3,使用archetype模板生成我们想要的工程
mvn archetype:generate /
-DarchetypeGroupId=com.generated.boot /
-DarchetypeArtifactId=generated-archetype /
-DarchetypeVersion=1.0-SNAPSHOT /
-DarchetypeCatalog=local /
-DgroupId=com.test.user /
-DartifactId=user /
-Dversion=1.0-SNAPSHOT
-DarchetypeGroupId :archetype-catalog.xml中的groupId
-DarchetypeArtifactId :archetype-catalog.xml中的artifactId
-DarchetypeVersion :archetype-catalog.xml中的version
-DarchetypeCatalog :使用模式本地和远程
-DgroupId :需要生成project的maven groupId
-DartifactId :需要生成project的maven artifactId
-Dversion :需要生成project的maven version

释放双手让项目跑起来
生成的项目自带mybatis代码生成工具,开箱即用,直接修改关键参数如:数据库,表明等及其他简单配置就可以直接生成默认的赠删改查功能,直接运行!!!直接使用!!!
1,配置代码生成器
public class Generator {
    public static void main(String[] args) {
        //module 自己想要生成的根工程名称 本工程为user
        String module = "user";
        //package name 在使用命令生成的时候指定的-DgroupId,本案例为com.test.user
        String packageName = "com.test.user";
        //author 作者名称
        String author = "jour";
        //database user name
        String dbUserName = "root";
        //database user password
        String dbUserPassWord = "root";
        //database
        String dbDatabaseName = "user";
        //table name
        String tablePrefix = "user";
        //database ip
        String dbIpAddress = "127.0.0.1";
        //当前生成类所在的模块名称 当前生成器所在的工程的名称 本案例在user-service中
        MyBatisTemplate.setProjectPath("user-service");
        MyBatisTemplate.generator(module, tablePrefix, packageName, author, dbUserName, dbUserPassWord, dbIpAddress, dbDatabaseName);
    }
}
2,配置运行测试
修改application.yml数据库配置添加需要使用的数据库(mysql)
spring:
  application:
    name: user
  datasource:
    username: root
    url: jdbc:mysql://127.0.0.1:3306/user?useUnicode=true
    password: root
修改启动类的MapperScan配置(指定mapper目录)
@SpringBootApplication
//修改value为生成的mapper路径本例为:
@MapperScan("com.generator.dao.mapper")
public class Main {
    public static void main(String[] args) {
        SpringApplication.run(Main.class, args);
    }
}
运行Main启动类启动测试
@RestController
public class HelloController {

    @Autowired
    private UserService userService;

    @GetMapping("/hello")
    public Object hello() {
        return userService.selectById(1);
    }
}
// 20190929201927
// http://localhost:9090/hello

{
  "id": 1,
  "userName": "jour",
  "age": 11
}
正文到此结束
- 本文标签: 代码 参数 Service 2019 mysql db 数据库 IDE mybatis 代码生成器 JDBC tab description 数据 REST FAQ bus 测试 tar 插件 Word springboot root UI value http id web https 配置 XML src IO apache ip map Select schema plugin spring pom sql App dataSource mapper 目录 maven cat
- 版权声明: 本文为互联网转载文章,出处已在文章中说明(部分除外)。如果侵权,请联系本站长删除,谢谢。
- 本文海报: 生成海报一 生成海报二
热门推荐


相关文章


Loading...
![[HBLOG]公众号](http://www.liuhaihua.cn/img/qrcode_gzh.jpg)

