Springboot简单练手的记账本
Springboot简单练手的记账本
昨天看雷哥的教程写了个简单的记账本练练手,没有把笔记整理下来放在博客上,今天补上。言归正传,进入正题。
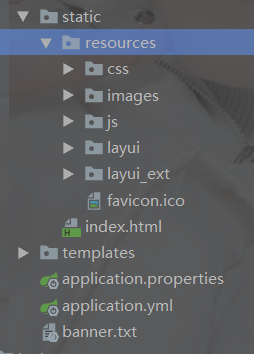
老规矩,我们还是先看看项目的目录结构,以及登陆界面
每个包都是什么含义这里就不再细说了

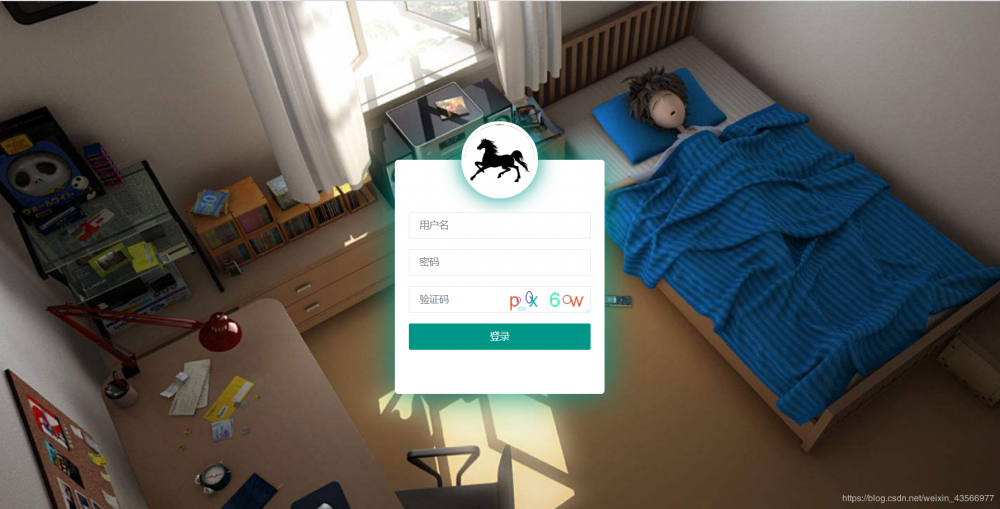
登陆界面:
一、准备工作
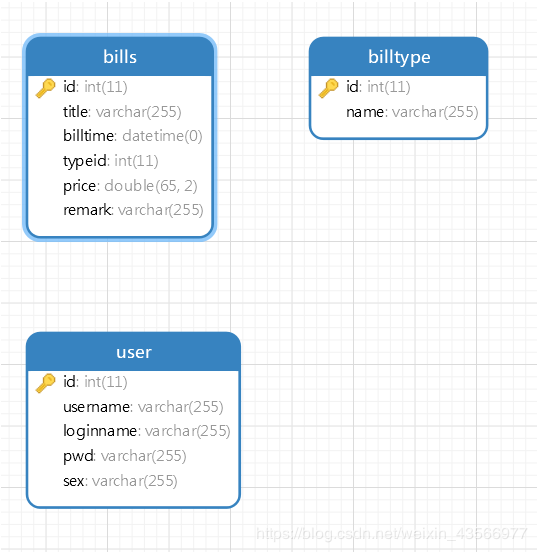
创建数据库
二、生成代码
添加对应的pom依赖,修改yml文件,以及对应的vo(domain),mapper,service,controller,还有mapper映射文件)
三、导入资源文件
四、完成登录
- 创建ResultObj
@Data
@AllArgsConstructor
@NoArgsConstructor
public class ResultObj {

    //业务响应码
    private int code;
    //业务消息
    private String msg;
}
- 创建LoginController(代码太多,这里不再详细给出)
@Controller
@RequestMapping("/login")
public class LoginController {

    @Autowired
    private UserService userService;

    /**
     * 跳转到登陆页面
     */
    @RequestMapping("toLogin")
    public String toLogin() {
        return "login";
    }
- 创建static/index.html(代码太多,这里不再详细给出)
<!DOCTYPE html>
<html>
<head>
<meta charset="UTF-8">
<title>Insert title here</title>
</head>
<body>

	<script type="text/javascript">
		window.location.href="/login/toLogin"
	</script>
</body>
</html>
- 创建templates/login.html
- 创建templates/list.html
(上述两条代码过长,不再赘述,到时候会一并上传的,有迫切需要的可以联系我)
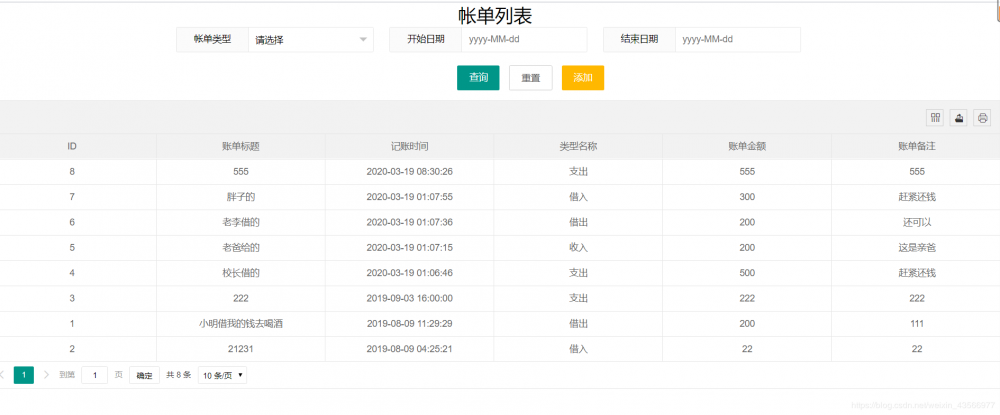
五、账单列表(这里代码就不再给出了,过于冗余,之后会上传代码的)
- 创建DataGridView
@Data
@AllArgsConstructor
@NoArgsConstructor
public class DataGridView {

    private Long code=0L;
    private String msg="";
    private Long count;
    private Object data;
    public DataGridView(Long count,Object data){
        super();
        this.count=count;
        this.data=data;
    }
}
- 创建MyBatisPlusConfig
/**
 *mybatisplus的配置类(分页)
 */
@Configuration
@ConditionalOnClass(value = {PaginationInterceptor.class})
public class MybatisPlusConfig {

    @Bean
    public PaginationInterceptor paginationInterceptor(){
        return new PaginationInterceptor();
    }
}
- 创建BillsController
@Controller
@RequestMapping("/bills")
public class BillsController {

    @Autowired
    private BillsService billsService;

    @Autowired
    private BilltypeService billtypeService;

    /**
     * 跳转到系统主页
     */
    @RequestMapping("toBillsList")
    public String toBillsList(){
        return "list";
    }

    /**
     *加载账单数据
     */
    @RequestMapping("loadAllBills")
    @ResponseBody
    public DataGridView loadAllBills(BillsVo billsVo){
        //这里使用分页插件
        IPage<Bills> page=new Page<>(billsVo.getPage(),billsVo.getLimit());
        QueryWrapper<Bills> queryWrapper=new QueryWrapper<>();
        //等于
        queryWrapper.eq(null!=billsVo.getTypeid()&&billsVo.getTypeid()!=0,"typeid",billsVo.getTypeid());
        //大于
        queryWrapper.ge(billsVo.getStartDate()!=null,"billtime",billsVo.getStartDate());
        //小于
        queryWrapper.le(billsVo.getEndDate()!=null,"billtime",billsVo.getEndDate());
        //排序
        queryWrapper.orderByDesc("billtime");
        billsService.page(page,queryWrapper);

        List<Bills> records=page.getRecords();
        for (Bills bills:records){
            Billtype billtype=this.billtypeService.getById(bills.getTypeid());
            bills.setTypeName(billtype.getName());
        }
        return new DataGridView(page.getTotal(),records);
    }

    /**
     * 添加账单
     */
    @RequestMapping("addBills")
    @ResponseBody
    public ResultObj addBills(BillsVo billsVo){
        try {
            this.billsService.save(billsVo);
            return new ResultObj(200, "录入成功");
        } catch (Exception e) {
            e.printStackTrace();
            return new ResultObj(-1, "录入失败");
        }
    }
}
- 创建Bills
- 创建BillsVo
- 创建BillsTypeServiceImpl
- 创建缓存处理切面类
- 加入依赖
- 创建BillTypeController
- 创建list.html
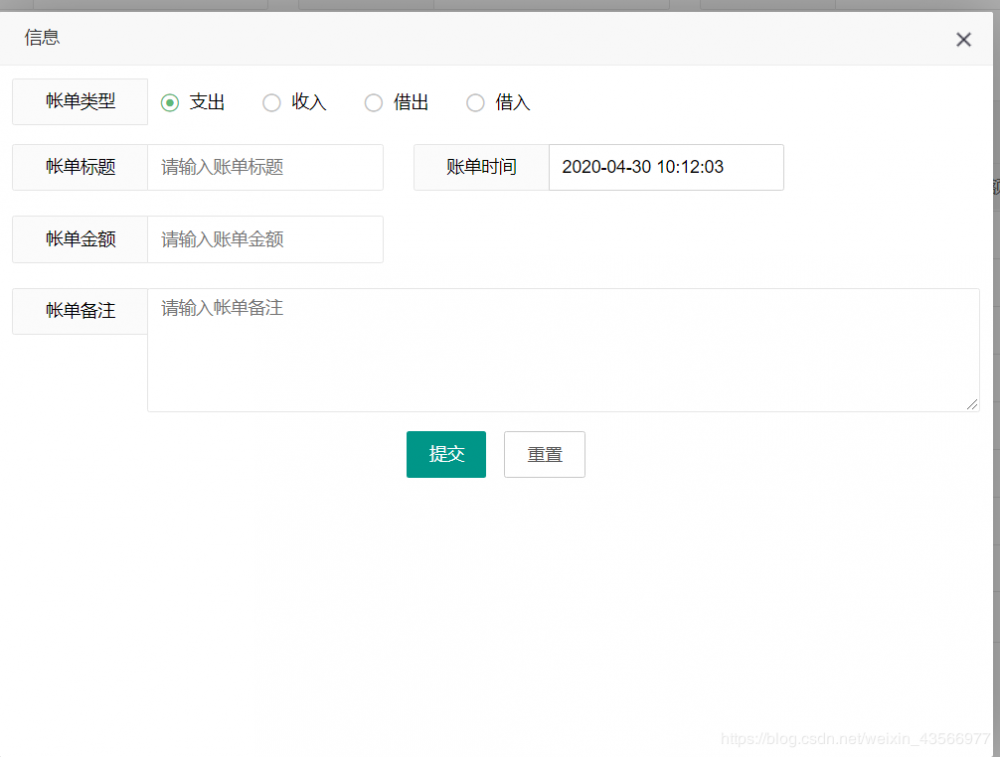
六、添加账单
- 修改list.html
- 修改BillsController
七、这篇文章说到这里,关于Mapper(即dao层),service,serviceImpl,以及xxxMapper.xml文件,这里并没有提到,不是没有,只是这里是通过mybatis-plus,使用接口进行操作的,省去了自己写代码的那一步,本篇就不再介绍了,之后会专门写一篇进行记录的。
八、看看效果:
添加记录:
九、 大致就是这么多,对了该项目使用的是mybatis-plus,还有huTool工具包,很多地方都是使用的接口,不用自己去写代码,之后,会写一篇有关mybatis-plus和huTool工具包的博客,希望大家可以留意一下!谢谢!
天涯志
正文到此结束
热门推荐


相关文章

近期评论
-
ws0132613@gmail.comhttps://getmacos.com/gopanel/william smith
-
谢谢
-
https://www.newcmy.com/register?aff=HBVX建议您试试草莓云机场,可以流畅观看youtube和tiktok,上reddit/x也没有问题,还有各种ai优化节点。
-
-
-
想购买您这个站,我的联系方式QQ741756694微信同步 能卖联系
-
-
-
-
Loading...
![[HBLOG]公众号](https://www.liuhaihua.cn/img/qrcode_gzh.jpg)

