Mac OS X 上基于 FreeBSD/bhyve 的虚拟技术 xhyve
FreeBSD 下的虚拟技术 bhyve (The BSD Hypervisor) 是去年1月份正式发布的,包含在了 FreeBSD 10.0 发行版中。今天要玩的这个 xhyve 是基于 bhyve 的 Mac OS X 移植版本,也就是说我们想在 Mac 上运行 Linux 的话除了 VirtualBox, VMware Fusion 外,现在有了第三种选择。
xhyve 超级小,只有 230 KB,不依赖其他软件或库。下面的步骤基本按照 xhyve 作者的文档 xhyve – Lightweight Virtualization on OS X Based on bhyve 实现,不过跟着别人的文档并不总会一帆风顺,虽然文档已经很详细,总有碰到自己的问题的时候,有人报告说在自己的 Macbook (OS X 10.10.3) 上运行不成功。我在测试的过程中遇到的一个问题是硬盘分区问题,稍后会提到。我的编译和测试环境是 OS X Yosemite 10.10.4 + Xcode 6.3.2.

xhyve 发布的是源代码,需要编译后运行,所以 Mac 上没有安装 Xcode 的话需要先到 App Store 安装。
使用 git 下载源码后编译,运行 xhyverun.sh 后会启动一个简单的 Tiny Core Linux 虚拟机:
$ git clone https://github.com/mist64/xhyve.git $ cd xhyve $ make $ ./xhyverun.sh
上面的 Tiny Core Linux 只是测试和确定 xhyve 能运行,下面我们将在 xhyve 上安装和运行完整的 Ubuntu 14.04 Server 虚拟机。
在上面的 xhyve 目录里新建一个 ubuntu 目录用来存放所有和 ubuntu 虚拟机相关的东东。下载 ubuntu-14.04.2-server-amd64.iso,并把 iso 里面的两个系统启动需要的文件 vmlinuz 和 initrd.gz 拷贝出来:
$ mkdir ubuntu $ cd ubuntu $ wget http://releases.ubuntu.com/14.04/ubuntu-14.04.2-server-amd64.iso $ dd if=/dev/zero bs=2k count=1 of=/tmp/ubuntu.iso $ dd if=ubuntu-14.04.2-server-amd64.iso bs=2k skip=1 >> /tmp/ubuntu.iso $ hdiutil attach /tmp/ubuntu.iso $ cp /Volumes/Ubuntu-Server/ 14/install/vmlinuz . $ cp /Volumes/Ubuntu-Server/ 14/install/initrd.gz .
创建一个 10GB 大小的硬盘文件当作 ubuntu 虚拟机的硬盘:
$ dd if=/dev/zero of=hdd.img bs=1g count=10
转到上层目录(xhyve)后新建一个脚本文件 ubuntu_install.sh,然后修改脚本文件为可执行:
$ cd .. $ vi ubuntu_install.sh #!/bin/sh KERNEL="ubuntu/vmlinuz" INITRD="ubuntu/initrd.gz" CMDLINE="earlyprintk=serial console=ttyS0 acpi=off" MEM="-m 1G" #SMP="-c 2" NET="-s 2:0,virtio-net" IMG_CD="-s 3,ahci-cd,ubuntu/ubuntu-14.04.2-server-amd64.iso" IMG_HDD="-s 4,virtio-blk,ubuntu/ubuntu.img" PCI_DEV="-s 0:0,hostbridge -s 31,lpc" LPC_DEV="-l com1,stdio" build/xhyve $MEM $SMP $PCI_DEV $LPC_DEV $NET $IMG_CD $IMG_HDD -f kexec,$KERNEL,$INITRD,"$CMDLINE" $ chmod +x ubuntu_install.sh
启动这个文件需要 sudo 权限哦:
$ ./ubuntu_install.sh virtio_net: Could not create vmnet interface, permission denied or no entitlement? $ sudo ./ubuntu_install.sh
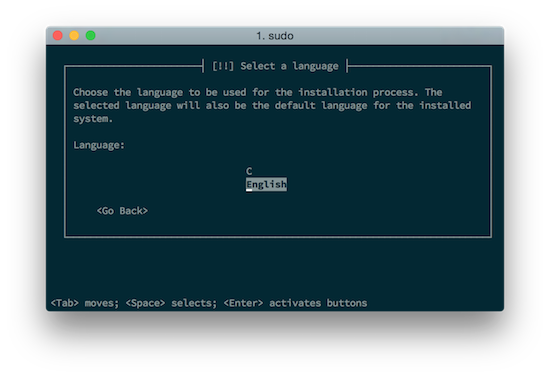
这时候会看到 ubuntu 的标准文本格式的安装程序,安装过程中唯一要注意的是硬盘分区的时候不要选择自动分区,也不要选择 LVM 分区,选择手动分区,使用最简单的一个 root 区一个 swap 区。我碰到的一个问题就是选择自动分区后到后来安装完毕启动系统的时候挂在那里不动。
还有一个要注意的地方,安装完毕后,这时候选择 Go Back,因为我们要到 Execute a shell 命令行界面把里面的内核文件拷贝出来留作以后启动用:
┌─────────┤ [!!] Finish the installation ├──────────┐ │ │ ┌│ Installation complete │ ││ Installation is complete, so it is time to boot into your new system. │ ││ Make sure to remove the installation media (CD-ROM, floppies), so │ ││ that you boot into the new system rather than restarting the │ ││ installation. │ ││ │ └│ <Go Back> <Continue> │ │ │ └────────────────────────────────────┘
选择 Execute a shell 后转到目标目录,知道虚拟机的 IP 地址后用 nc 把虚拟机和外面的世界(Mac)连起来传输文件:
BusyBox v1.21.1 (Ubuntu 1:1.21.0-1ubuntu1) built-in shell (ash) Enter 'help' for a list of built-in commands. ~ # cd /target/ /target # sbin/ifconfig eth0 Link encap:Ethernet HWaddr da:ae:82:16:cf:32 inet addr:192.168.64.3 Bcast:192.168.64.255 Mask:255.255.255.0 inet6 addr: fe80::d8ae:82ff:fe16:cf32/64 Scope:Link UP BROADCAST RUNNING MULTICAST MTU:1500 Metric:1 RX packets:24426 errors:0 dropped:0 overruns:0 frame:104 TX packets:13283 errors:0 dropped:0 overruns:0 carrier:0 collisions:0 txqueuelen:1000 RX bytes:32881668 (32.8 MB) TX bytes:924462 (924.4 KB) lo Link encap:Local Loopback inet addr:127.0.0.1 Mask:255.0.0.0 inet6 addr: ::1/128 Scope:Host UP LOOPBACK RUNNING MTU:65536 Metric:1 RX packets:0 errors:0 dropped:0 overruns:0 frame:0 TX packets:0 errors:0 dropped:0 overruns:0 carrier:0 collisions:0 txqueuelen:0 RX bytes:0 (0.0 B) TX bytes:0 (0.0 B) /target # tar c boot | nc -l -p 9000
在 Mac 上接受文件:
$ cd xhyve/ubuntu $ nc 192.168.64.3 9000 | tar x
有了 vmlinuz-3.16.0-30-generic 和 initrd.img-3.16.0-30-generic 内核文件,我们就可以启动 ubuntu 虚拟机了,注意这时候 root=/dev/vda1 哦:
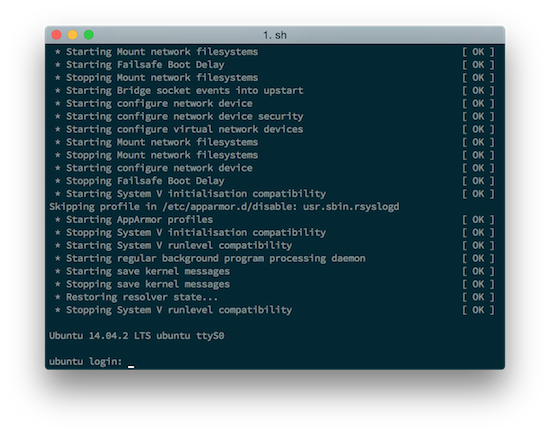
$ cd .. $ vi ubuntu_boot.sh #!/bin/sh KERNEL="ubuntu/boot/vmlinuz-3.16.0-30-generic" INITRD="ubuntu/boot/initrd.img-3.16.0-30-generic" CMDLINE="earlyprintk=serial console=ttyS0 acpi=off root=/dev/vda1 ro" MEM="-m 1G" #SMP="-c 2" NET="-s 2:0,virtio-net" #IMG_CD="-s 3,ahci-cd,ubuntu/ubuntu-14.04.2-server-amd64.iso" IMG_HDD="-s 4,virtio-blk,ubuntu/ubuntu.img" PCI_DEV="-s 0:0,hostbridge -s 31,lpc" LPC_DEV="-l com1,stdio" build/xhyve $MEM $SMP $PCI_DEV $LPC_DEV $NET $IMG_CD $IMG_HDD -f kexec,$KERNEL,$INITRD,"$CMDLINE" $ chmod +x ubuntu_boot.sh $ sudo ./ubuntu_boot.sh
运行成功:
正文到此结束
热门推荐


相关文章

近期评论
-
ws0132613@gmail.comhttps://getmacos.com/gopanel/william smith
-
谢谢
-
https://www.newcmy.com/register?aff=HBVX建议您试试草莓云机场,可以流畅观看youtube和tiktok,上reddit/x也没有问题,还有各种ai优化节点。
-
-
-
想购买您这个站,我的联系方式QQ741756694微信同步 能卖联系
-
-
-
-
Loading...
![[HBLOG]公众号](https://www.liuhaihua.cn/img/qrcode_gzh.jpg)

