开坑,写点Polymer 1.0 教程第2篇(下)——hello world篇
书接 上回 ,上回叔说到如何注册(创建)一个自定义组件,这回我们来讲讲它的数据绑定。
使用数据绑定
当然,你可能不会仅仅满足上文教的简单的静态自定义组件,你通常需要动态的更新你的dom组件。
数据绑定是一个非常屌的的办法能让你快速的传播组件的变化,减少代码的行数。你可以用双大括弧{{}}来声明你需要绑定的属性,大括弧在运行时会被替换成括弧内的属性值。
name-tag.html
<link rel="import" href="bower_components/polymer/polymer.html"> <dom-module id="name-tag"> <template> <!-- bind to the "owner" property --> This is <b>{{owner}}</b>'s name-tag element. </template> <script> Polymer({ is: "name-tag", ready: function() { // set this element's owner property this.owner = "Daniel"; } }); </script> </dom-module>index.html
<!DOCTYPE html> <html> <head> <script src="bower_components/webcomponentsjs/webcomponents-lite.min.js"></script> <link rel="import" href="name-tag.html"> </head> <body> <name-tag></name-tag> </body> </html>运行结果

声明properties
我们可以看到owner这一变量已经和<b/>标签绑定在一起了,但是这是在组件ready阶段才给owner赋的值,下面会介绍另外一种定义绑定属性的方式定义——声明properties属性(如同声明is属性来定义自定义的组件的标签名一样)
properties是自定义组件公共api中非常重要的一个组成部分,你可以通过它来定义默认值,配置标签上的属性值,也可以用啦观测属性的变化等等
在接下去的例子中,我们将声明一个带有默认值的owner属性,并将index.html中对这个属性进行赋值操作
configurable-name-tag.html
<link rel="import" href="bower_components/polymer/polymer.html"> <dom-module id="configurable-name-tag"> <template> <!-- bind to the "owner" property --> This is <b>{{owner}}</b>'s configurable-name-tag element. </template> <script> Polymer({ is: "configurable-name-tag", properties: { // declare the owner property owner: { type: String, value: "Daniel" //默认值 } } }); </script> </dom-module>index.html
<!DOCTYPE html> <html> <head> <script src="bower_components/webcomponentsjs/webcomponents-lite.min.js"></script> <link rel="import" href="configurable-name-tag.html"> </head> <body> <!-- configure a property from markup by setting the corresponding attribute --> <configurable-name-tag owner="Scott"></configurable-name-tag> <!--在这里我们队owner进行了赋值,就像操作input的value一样对其进行赋值--> </body> </html>双向绑定
除了绑定文本(如上例, 变量 -> 组件)以外,Polymer还支持双向绑定(变量 -> 组件 -> 组件change -> 变量)
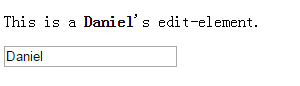
edit-element.html
<dom-module id="edit-element"> <template> <p> This is a <strong>{{owner}}</strong>'s edit-element. </p> <input value="{{owner::input}}" placeholder="Your name here..."> </template> <script> Polymer({ is: "edit-element", properties: { owner: { type: String, value: "Daniel" } } }); </script> </dom-module> index.html
<!DOCTYPE html> <html> <head> <script src="bower_components/webcomponentsjs/webcomponents-lite.min.js"></script> <link rel="import" href="edit-element.html"> </head> <body> <edit-element></edit-element> </body> </html> 运行结果
Polymer是通过事件名的约定来实现双向绑定的(关于数据绑定以后会开一张自己讲),但是原生标签一开始并不在Polymer的生态圈内,所以没有遵循这一约定,因此对于原生标签,我们需要按照下面的格式来给它这是一个自定义的change事件声明,格式如下
target-prop="{{hostProp::target-change-event}}"举个例子:如果是对input type=”text”的文本框进行双向绑定,你就可以这样写
<input type="text" value="{{owner::input}}"或者
<input type="text" value="{{owner::change}}"::符号后的都是事件名,两者区别是input事件每次按下键盘都会触发双向绑定的更新,而change事件只在光标失去焦点的时候触发双向绑定的更新。
本篇完,下篇还没想好要写啥。
正文到此结束
热门推荐


相关文章


Loading...
![[HBLOG]公众号](http://www.liuhaihua.cn/img/qrcode_gzh.jpg)

