App 引导界面
App 引导界面
1、前言
最近在学习实现App的引导界面,本篇文章对设计流程及需要注意的地方做一个浅显的总结。
附上项目链接,供和我水平类似的初学者参考—— http://files.cnblogs.com/files/tgyf/Tutorial.rar 。
对于有引导界面的App,刚安装或使用后将其数据清除(Setting-Apps-...),启动后就会出现引导界面,目的是向用户介绍本款应用的使用方法或主要功能。
App引导过程的页面数一般为为3到6个,特殊的如刷机后的SetupWizard设置页面将近10个。除了非常必要,放过多页面会影响用户体验,虽然可以在界面上添加“跳过”按钮(最近较为常用的按钮为“立即体验”)为不需要被引导的用户提供进入App的捷径。
有两种操作方式让用户左/右翻动页面:点击按钮和手势滑动。前者需要在界面上添加两个按钮(一般以左/右箭头图标作为显示内容),而后者直接识别用户手指在屏幕上的滑动操作,不过两者最终实现的页面切换方法是相同的。随着时间的推移,很多App为了界面的简洁及美观而只为用户提供手势滑动来翻动页面,当然还是有一些App仍然同时提供了上述的两种操作方式。
先给出一张常见的引导界面图(网络上找的):

2、判断是否是第一次启动
无论之前有没有这方面的开发经验,都不难想到:要判断App是否是第一次启动,需要从某个地方读取一个记录启动状态(或者说启动次数)的变量值,而且这个变量值不能随着应用的关闭而消失,除非将其数据清除或卸载。将这种类型的数据保存在文件中是不错的方法,但这里不用File类,因为Android提供了一个非常好用的类——SharedPreferences。
记录启动状态的数据是在App启动后的类中进行读写的(非引导界面相关类),这里是主类MainActivity。直接上代码:
1 package com.example.tutorial; 2 3 import android.content.Context; 4 import android.content.Intent; 5 import android.content.SharedPreferences; 6 import android.content.SharedPreferences.Editor; 7 import android.os.Bundle; 8 import android.support.v7.app.ActionBarActivity; 9 import android.widget.Toast; 10 11 public class MainActivity extends ActionBarActivity { 12 13 @Override 14 protected void onCreate(Bundle savedInstanceState) { 15 super.onCreate(savedInstanceState); 16 setContentView(R.layout.activity_main); 17 18 SharedPreferences googleActivitySP = getSharedPreferences("Tutorial", Context.MODE_PRIVATE); 19 boolean firstStart = googleActivitySP.getBoolean("first_start", true); 20 if(firstStart == true){ 21 22 Intent intent = new Intent(this, TutorialIntroPageActivity.class); 23 startActivity(intent); 24 25 Toast.makeText(this, "Tutorial first start", Toast.LENGTH_SHORT).show(); 26 Editor edit = googleActivitySP.edit(); 27 edit.putBoolean("first_start", false); 28 edit.commit(); 29 } 30 31 } 32 33 } 如代码中所示,记录App启动状态的变量为boolean型first_start,约定第一次启动时其值为true,否则为false。
刚开始这样使用SharedPreferences类的时候,相信也有人和我一样会疑惑:如代码18、19行,一上来就是获取文件与变量值,原来不存在怎么办?这就是该类智能的地方,类似File又胜于File,当文件不存在时就创建,当变量不存在时就返回给定的默认值。 即:
a、App初次启动时会在相应目录中新建一个文件,这里是data/data/com.example.tutorial/Tutorial.xml,私有模式。注意默认是xml格式,文件名称与模式分别 由方法 getSharedPreferences()的 第一 、二参数决定。若想看其是否生成可以通过Eclipse的DDMS,若想看其内容可以通过在CMD下的adb shell命令进入Shell模式,cd定位到目录后用cat filename查看。
b、初次启动时start_first变量并不存在,所以返回值为给定的默认值true,方法 getBoolean( )第一、二参数分别指定了需要获取的变量名与默认返回值,若变量存在就返回实际值,不存在就返回给定的默认值,不会因为变量不存在而报异常。不过该类还提供了判断变量是否存在的方法,感兴趣的朋友可以自己研究。
第一次启动App,获取的start_first变量值为true,所以如代码22、23行利用Intent类打开引导界面—— TutorialIntroPageActivity类实现的Activity(稍候会讲解)。接着如代码26-28行将变量值设置为false,以后运行该App获取的start_first变量值均为false,就不会打开引导界面了。
实现过后会发现,这些曾不敢触碰以为会很高深的点也不过如此。所以,要成长就要勇于探索、犯错、总结。
3、引导界面的实现
常见Activity的差别除了打开次数外,引导界面做的事情简单,主要是向用户展示App的使用说明与主要功能,做多加上几个按钮。
引导界面Activity在类TutorialIntroPageActivity中进行实现,先给出代码:
1、布局文件
1 <?xml version="1.0" encoding="utf-8"?> 2 <RelativeLayout xmlns:android="http://schemas.android.com/apk/res/android" 3 android:layout_width="match_parent" 4 android:layout_height="match_parent" > 5 6 <LinearLayout android:id="@+id/tutorial_layout" 7 android:layout_width="match_parent" 8 android:layout_height="wrap_content" 9 android:layout_centerInParent="true" 10 android:layout_marginLeft="60dp" 11 android:layout_marginRight="60dp" 12 android:gravity="center" 13 android:orientation="horizontal" > 14 15 <ImageView 16 android:id="@+id/image_tutorial" 17 android:layout_width="310dp" 18 android:layout_height="564dp" 19 android:background="@drawable/image1" /> 20 21 </LinearLayout> 22 23 <RelativeLayout 24 android:layout_width="match_parent" 25 android:layout_height="60dp" 26 android:layout_alignParentBottom="true" 27 android:layout_marginLeft="60dp" 28 android:layout_marginRight="60dp" 29 android:layout_marginBottom="20dp" > 30 31 <LinearLayout 32 android:layout_width="wrap_content" 33 android:layout_height="wrap_content" 34 android:layout_centerInParent="true" 35 android:gravity="center" 36 android:orientation="horizontal" > 37 38 <ImageView 39 android:id="@+id/tutorial_indicator1" 40 android:layout_width="wrap_content" 41 android:layout_height="wrap_content" 42 android:background="@drawable/indicator_page" /> 43 44 <ImageView 45 android:id="@+id/tutorial_indicator2" 46 android:layout_width="wrap_content" 47 android:layout_height="wrap_content" 48 android:background="@drawable/indicator_dot" /> 49 50 <ImageView 51 android:id="@+id/tutorial_indicator3" 52 android:layout_width="wrap_content" 53 android:layout_height="wrap_content" 54 android:background="@drawable/indicator_dot" /> 55 56 <ImageView 57 android:id="@+id/tutorial_indicator4" 58 android:layout_width="wrap_content" 59 android:layout_height="wrap_content" 60 android:background="@drawable/indicator_dot" /> 61 62 </LinearLayout> 63 64 <LinearLayout 65 android:layout_width="wrap_content" 66 android:layout_height="60dp" 67 android:layout_alignParentRight="true" 68 android:gravity="center" 69 android:orientation="horizontal" > 70 71 <Button 72 android:id="@+id/skip_button" 73 android:layout_width="wrap_content" 74 android:layout_height="wrap_content" 75 android:text="skip" 76 android:textSize="20dp" 77 android:textColor="#323232" 78 android:background="@android:color/transparent" 79 android:drawableRight="@drawable/skip" 80 android:drawablePadding="10dp" /> 81 82 <Button 83 android:id="@+id/done_button" 84 android:layout_width="wrap_content" 85 android:layout_height="wrap_content" 86 android:text="done" 87 android:textSize="20dp" 88 android:textColor="#323232" 89 android:background="@android:color/transparent" 90 android:drawableRight="@drawable/done" 91 android:drawablePadding="10dp" 92 android:visibility="gone" /> 93 94 </LinearLayout> 95 96 </RelativeLayout> 97 98 </RelativeLayout>
界面上的组件很简单:
a、中间为一个显示主要信息的ImageView,页面切换时只需要改变其显示的图片;
b、下方为四个指示点+一个按钮,四个指示点对应着有四个页面,按钮用来结束该引导界面;
注意在文件的最后其实放置了两个按钮,当页面在前三页时显示前者——“跳过”(Skip),第四页时显示后者——完成(Done),默认将完成按钮隐藏,切换在Java代码中随着页面的改变而进行。当然,也可以只放置一个按钮,在Java中另加文本及图标的改变。
2、Java实现文件
1 package com.example.tutorial; 2 3 import com.example.tutorial.R; 4 5 import android.app.Activity; 6 import android.content.Intent; 7 import android.content.res.Configuration; 8 import android.os.Bundle; 9 import android.view.GestureDetector; 10 import android.view.MotionEvent; 11 import android.view.View; 12 import android.view.GestureDetector.OnGestureListener; 13 import android.view.View.OnClickListener; 14 import android.view.View.OnTouchListener; 15 import android.widget.Button; 16 import android.widget.ImageButton; 17 import android.widget.ImageView; 18 import android.widget.TextView; 19 20 public class TutorialIntroPageActivity extends Activity implements OnTouchListener{ 21 private static final float LIMIT_ANGLE_TAN = 1.5f; 22 23 private ImageView mTutorialImage; 24 25 private ImageView mIndicator1; 26 private ImageView mIndicator2; 27 private ImageView mIndicator3; 28 private ImageView mIndicator4; 29 30 private Button mSkipButton; 31 private Button mDoneButton; 32 33 private GestureDetector mDetector = null; 34 private int mStep = 0; 35 36 @Override 37 protected void onCreate(Bundle savedInstanceState) { 38 super.onCreate(savedInstanceState); 39 40 setContentView(R.layout.tutorial_info_page); 41 42 mIndicator1 = (ImageView)findViewById(R.id.tutorial_indicator1); 43 mIndicator2 = (ImageView)findViewById(R.id.tutorial_indicator2); 44 mIndicator3 = (ImageView)findViewById(R.id.tutorial_indicator3); 45 mIndicator4 = (ImageView)findViewById(R.id.tutorial_indicator4); 46 47 mTutorialImage = (ImageView)findViewById(R.id.image_tutorial); 48 mDetector = new GestureDetector(this, new TutorialImageGesture()); 49 mTutorialImage.setOnTouchListener(this); 50 51 mSkipButton = (Button) findViewById(R.id.skip_button); 52 mSkipButton.setOnClickListener(mOnSkipOrDoneButtonClickListener); 53 mDoneButton = (Button) findViewById(R.id.done_button); 54 mDoneButton.setOnClickListener(mOnSkipOrDoneButtonClickListener); 55 56 if(savedInstanceState != null) 57 { 58 mStep = savedInstanceState.getInt("pageStep"); 59 } 60 61 boolean isLandscape = getResources().getConfiguration().orientation == Configuration.ORIENTATION_LANDSCAPE; 62 63 switch(mStep){ 64 case 0: 65 break; 66 case 1: 67 mIndicator1.setBackgroundResource(R.drawable.indicator_dot); 68 mIndicator2.setBackgroundResource(R.drawable.indicator_page); 69 if(isLandscape) 70 mTutorialImage.setBackgroundResource(R.drawable.image2); 71 else 72 mTutorialImage.setBackgroundResource(R.drawable.image2); 73 break; 74 case 2: 75 mIndicator1.setBackgroundResource(R.drawable.indicator_dot); 76 mIndicator3.setBackgroundResource(R.drawable.indicator_page); 77 if(isLandscape) 78 mTutorialImage.setBackgroundResource(R.drawable.image3); 79 else 80 mTutorialImage.setBackgroundResource(R.drawable.image3); 81 break; 82 case 3: 83 mIndicator1.setBackgroundResource(R.drawable.indicator_dot); 84 mIndicator4.setBackgroundResource(R.drawable.indicator_page); 85 if(isLandscape) 86 mTutorialImage.setBackgroundResource(R.drawable.image4); 87 else 88 mTutorialImage.setBackgroundResource(R.drawable.image4); 89 mDoneButton.setVisibility(View.VISIBLE); 90 mSkipButton.setVisibility(View.GONE); 91 break; 92 } 93 } 94 95 @Override 96 protected void onSaveInstanceState(Bundle outState) { 97 super.onSaveInstanceState(outState); 98 outState.putInt("pageStep", mStep); 99 } 100 101 private void showPrePage(){ 102 boolean isLandscape = getResources().getConfiguration().orientation == Configuration.ORIENTATION_LANDSCAPE; 103 104 if(mStep == 3){ 105 mIndicator3.setBackgroundResource(R.drawable.indicator_page); 106 mIndicator4.setBackgroundResource(R.drawable.indicator_dot); 107 if(isLandscape) 108 mTutorialImage.setBackgroundResource(R.drawable.image3); 109 else 110 mTutorialImage.setBackgroundResource(R.drawable.image3); 111 mDoneButton.setVisibility(View.GONE); 112 mSkipButton.setVisibility(View.VISIBLE); 113 mStep--; 114 }else if(mStep == 2){ 115 mIndicator2.setBackgroundResource(R.drawable.indicator_page); 116 mIndicator3.setBackgroundResource(R.drawable.indicator_dot); 117 if(isLandscape) 118 mTutorialImage.setBackgroundResource(R.drawable.image2); 119 else 120 mTutorialImage.setBackgroundResource(R.drawable.image2); 121 mStep--; 122 }else if(mStep == 1){ 123 mIndicator1.setBackgroundResource(R.drawable.indicator_page); 124 mIndicator2.setBackgroundResource(R.drawable.indicator_dot); 125 if(isLandscape) 126 mTutorialImage.setBackgroundResource(R.drawable.image1); 127 else 128 mTutorialImage.setBackgroundResource(R.drawable.image1); 129 mStep--; 130 } 131 } 132 133 private void showNextPage(){ 134 boolean isLandscape = getResources().getConfiguration().orientation == Configuration.ORIENTATION_LANDSCAPE; 135 136 if(mStep == 0){ 137 mIndicator1.setBackgroundResource(R.drawable.indicator_dot); 138 mIndicator2.setBackgroundResource(R.drawable.indicator_page); 139 if(isLandscape) 140 mTutorialImage.setBackgroundResource(R.drawable.image2); 141 else 142 mTutorialImage.setBackgroundResource(R.drawable.image2); 143 mStep++; 144 }else if(mStep == 1){ 145 mIndicator2.setBackgroundResource(R.drawable.indicator_dot); 146 mIndicator3.setBackgroundResource(R.drawable.indicator_page); 147 if(isLandscape) 148 mTutorialImage.setBackgroundResource(R.drawable.image3); 149 else 150 mTutorialImage.setBackgroundResource(R.drawable.image3); 151 mStep++; 152 }else if(mStep == 2){ 153 mIndicator3.setBackgroundResource(R.drawable.indicator_dot); 154 mIndicator4.setBackgroundResource(R.drawable.indicator_page); 155 if(isLandscape) 156 mTutorialImage.setBackgroundResource(R.drawable.image4); 157 else 158 mTutorialImage.setBackgroundResource(R.drawable.image4); 159 mDoneButton.setVisibility(View.VISIBLE); 160 mSkipButton.setVisibility(View.GONE); 161 mStep++; 162 } 163 } 164 165 private OnClickListener mOnSkipOrDoneButtonClickListener = new OnClickListener() { 166 167 @Override 168 public void onClick(View arg0) { 169 Intent intent = new Intent(TutorialIntroPageActivity.this, MainActivity.class); 170 if(getIntent().getParcelableExtra(Intent.EXTRA_INTENT) != null){ 171 intent.putExtra(Intent.EXTRA_INTENT, getIntent().getParcelableExtra(Intent.EXTRA_INTENT)); 172 } 173 intent.setFlags(Intent.FLAG_ACTIVITY_CLEAR_TOP); 174 startActivity(intent); 175 //finish(); 176 } 177 178 }; 179 180 @Override 181 public boolean onTouchEvent(MotionEvent event) { 182 mDetector.onTouchEvent(event); 183 return true; 184 } 185 186 public class TutorialImageGesture implements OnGestureListener { 187 188 @Override 189 public boolean onDown(MotionEvent arg0) { 190 // TODO Auto-generated method stub 191 return false; 192 } 193 194 @Override 195 public boolean onFling(MotionEvent e1, MotionEvent e2, float velocityX, float velocityY) { 196 float ver = Math.abs(e1.getY() - e2.getY()); 197 float hor = Math.abs(e1.getX() - e2.getX()); 198 if ( ver / hor > LIMIT_ANGLE_TAN || Math.abs(velocityX)<500) { 199 return false; 200 } 201 202 if (e2.getX() - e1.getX() < 0) { 203 showNextPage(); 204 } 205 else { 206 showPrePage(); 207 } 208 return true; 209 } 210 211 @Override 212 public void onLongPress(MotionEvent arg0) { 213 // TODO Auto-generated method stub 214 215 } 216 217 @Override 218 public boolean onScroll(MotionEvent arg0, MotionEvent arg1, float arg2, 219 float arg3) { 220 // TODO Auto-generated method stub 221 return false; 222 } 223 224 @Override 225 public void onShowPress(MotionEvent arg0) { 226 // TODO Auto-generated method stub 227 228 } 229 230 @Override 231 public boolean onSingleTapUp(MotionEvent arg0) { 232 // TODO Auto-generated method stub 233 return false; 234 } 235 236 } 237 238 @Override 239 public boolean onTouch(View arg0, MotionEvent arg1) { 240 // TODO Auto-generated method stub 241 return false; 242 } 243 } 实现过程没有特别复杂的地方,接下来对几个地方值得回味的进行讲解,以后也许会用到。
a、代码61、102、134行对设备方向的获取,因为一般Activity会随着设备的横/竖屏切换时而重启,且两种状态下的布局样式往往是不一样的,所以需要根据方向来实时调整显示的界面组件。本例给出的图像是一样的,所以看不出差别。
b、showprePage()和showNextPage()除了判断设备方向以外,主要负责引导页面、页面指示点及按钮状态的切换。
c、前面a中提到横/竖屏转换时Activity会重启(再次调用onCreate()方法,还有其他一些原因也会引起该结果),那么就需要暂时记录重启前用户看到哪 个页面,以便重启后能马上恢复。代码95-99行重载了Acticity的onSaveInstanceState(),利用变量mStep作为页面的索引。Activity重启后,获取mStep值并恢复引导界面的工作由onCreate()方法完成。
d、手势识别类 TutorialImageGesture重载的方法onFling(),当手势滑动的斜率大于1.5或水平距离小于500时,设定此种情形为不满足页面切换条件,不进行页面切换;否则,根据水平方向上的X坐标来判断向左还是向右切换页面。
4、结果图
虽然界面寒酸,还是拉出来溜溜。
四张引导界面(细心的朋友会发现其实是一张图片截成了四部分):
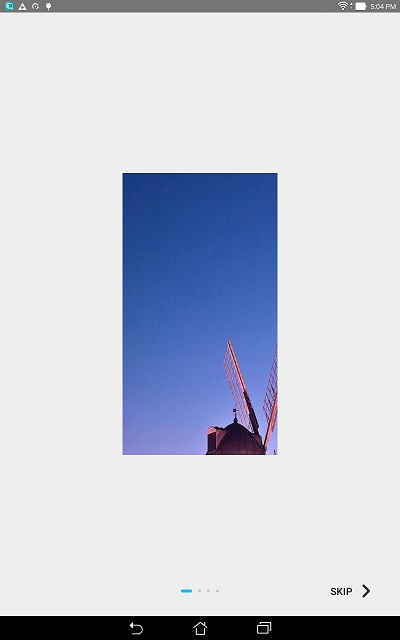


手指在屏幕的图片上进行滑动时,页面会进行相应的切换;按SKIP、DONE按钮或Back键时引导过程结束,App界面出现。
注意,当点击界面上的SKIP或者DONE按钮时,如代码169-178行打开App对应的Activity,并设置其Flag属性为 Intent.FLAG_ACTIVITY_CLEAR_TOP ,效果和按手机Back类似,将引导Activity彻底销毁。
正文到此结束
热门推荐


相关文章


Loading...
![[HBLOG]公众号](http://www.liuhaihua.cn/img/qrcode_gzh.jpg)

