【SpringBoot2.x】-SpringBoot Web开发中Thymeleaf、Web、Tomcat以及Favicon

github: github.com/Ccww-lx/Spr…
模块:spring-boot-starter-base-web
Web 开发是开发中至关重要的一部分, Web 开发的核心内容主要包括内嵌 Servlet 容器和 Spring MVC 。更重要的是, Spring Boot``为web 开发提供了快捷便利的方式进行开发,使用依赖jar: spring-boot-starter-web ,提供了嵌入式服务器 Tomcat 以及 Spring MVC 的依赖,且自动配置 web 相关配置,可查看 org.springframework.boot.autoconfigure.web 。
Web 相关的核心功能:
Thymeleaf
Web
Tomcat
Favicon
1.模板配置
1.1原理以及源码分析
Spring Boot 提供了大量模板引擎, 包含括 FreeMarker 、 Groovy 、 Thymeleaf 、 Velocity和Mustache , Spring Boot 中推荐 使用 Thymeleaf 作为模板引擎, 因为 Thymeleaf 提供了完美的 Spring MVC 的支持。
在 Spring Boot 的 org.springframework.boot.autoconfigure.thymeleaf 包下实现自动配置,如下所示:
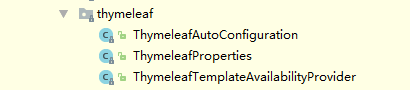
ThymeleafAutoConfiguration 源码:
@Configuration
@EnableConfigurationProperties(ThymeleafProperties.class)
@ConditionalOnClass({ TemplateMode.class, SpringTemplateEngine.class })
@AutoConfigureAfter({ WebMvcAutoConfiguration.class, WebFluxAutoConfiguration.class })
public class ThymeleafAutoConfiguration {

        //配置TemplateResolver
	@Configuration
	@ConditionalOnMissingBean(name = "defaultTemplateResolver")
	static class DefaultTemplateResolverConfiguration {
            ...
	}

        //配置TemplateEngine
	@Configuration
	protected static class ThymeleafDefaultConfiguration {
            ...
	}
        //配置SpringWebFluxTemplateEngine
	@Configuration
	@ConditionalOnWebApplication(type = Type.SERVLET)
	@ConditionalOnProperty(name = "spring.thymeleaf.enabled", matchIfMissing = true)
	static class ThymeleafWebMvcConfiguration {
    	   ...
	}

        //配置thymeleafViewResolver
	@Configuration
	@ConditionalOnWebApplication(type = Type.REACTIVE)
	@ConditionalOnProperty(name = "spring.thymeleaf.enabled", matchIfMissing = true)
	static class ThymeleafWebFluxConfiguration {
           ...
	}
    ...
}
复制代码
ThymeleafAutoConfiguration 自动加载 Web 所需的 TemplateResolver 、 TemplateEngine 、 SpringWebFluxTemplateEngine 以及 thymeleafViewResolver ,并通过 ThymeleafProperties 进行 Thymeleaf 属性配置。详细细节查看官方源码。
ThymeleafProperties 源码:
//读取application.properties配置文件的属性
@ConfigurationProperties(prefix = "spring.thymeleaf")
public class ThymeleafProperties {

	private static final Charset DEFAULT_ENCODING = StandardCharsets.UTF_8;

	public static final String DEFAULT_PREFIX = "classpath:/templates/";

	public static final String DEFAULT_SUFFIX = ".html";

	/**
	 *Web模板文件前缀路径属性,Spring boot默认路径为classpath:/templates/
	 */
	private String prefix = DEFAULT_PREFIX;

	/**
	 * Web模板文件后缀属性,默认为html
	 */
	private String suffix = DEFAULT_SUFFIX;

	/**
	 * Web模板模式属性,默认为HTML
	 */
	private String mode = "HTML";

	/**
	 *  Web模板文件编码属性,默认为UTF_8
	 */
	private Charset encoding = DEFAULT_ENCODING;

        ....
}
复制代码
可以从 ThymeleafProperties 中看出, Thymeleaf 的默认设置,以及可以通过前缀为 spring.thymeleaf 属性修改 Thymeleaf 默认配置。
1.2 示例
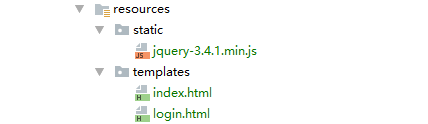
1).根据默认 Thymeleaf 配置,在 src/main/resources/ 下,创建 static 文件夹存放脚本样式静态文件以及 templates 文件夹存放后缀为html的页面,如下所示:
2)index.html页面
<!DOCTYPE html>
<!-- 导入xmlns: th=http://www.thymeleaf.org命名空间 -->
<html xmlns:th="http://www.thymeleaf.org">
<html lang="en">
 <head>
     <meta charset="UTF-8">
    <title>首面详细</title>
 </head>
  <body>
    <div class="user" align="center"  width="400px" height="400px">
        message:<span th:text="${user.message}"/><br/>
       用户名:<span th:text="${user.username}"/><br/>
         密码:<span th:text="${user.password}"/>
    </div>
 </body>
</html>
复制代码
3). controller 配置:
@Controller
public class LoginController {
    @Autowired
    private LoginService loginService;

    /**
     * 将首页设置为登陆页面login.html
     * @return
     */
    @RequestMapping("/")
    public String startIndex() {
        return "login";
    }

    /**
     *  登陆验证
     * @param username
     * @param password
     * @param model
     * @return
     */
    @RequestMapping("/login")
    public String login(@RequestParam("username") String username, @RequestParam("password") String password, Model model) {
        UserDTO userDTO = loginService.login(username, password);
        model.addAttribute("user", userDTO);
        return "index";
    }
}
复制代码
2. web 相关配置
根据 WebMvcAutoConfiguration 以及 WebMvcProperties 理解 Spring Boot 提供的自动配置原理。
2.1 ViewResolver 以及静态资源
Spring boot自动配置ViewResolver:
-
ContentNegotiatingViewResolver(最高优先级Ordered.HIGHEST_PRECEDENCE) -
BeanNameViewResolver -
InternalResourceViewResolver
静态资源:
addResourceHandlers 方法默认定义了 /static 、 /public 、 /resources 和 /METAINF/resources 文件夹下的静态文件直接映射为 /**
2.2 Formatter和Converter类型转换器
addFormatters 方法会自动加载 Converter 、 GenericConverter 以及 Formatter 的实现类、并注册到Spring MVC中,因此自定义类型转换器只需继承其三个接口即可。
自定义 Formatter :
/**
 * 将格式为 ccww:ccww88转为UserDTO
 *
 * @Auther: ccww
 * @Date: 2019/10/4 16:25
 * @Description:
 */
public class StringToUserConverter implements Converter<String, UserDTO> {
    @Nullable
    public UserDTO convert(String s) {
        UserDTO userDTO = new UserDTO();
        if (StringUtils.isEmpty(s))
            return userDTO;
        String[] item = s.split(":");
        userDTO.setUsername(item[0]);
        userDTO.setPassword(item[1]);
        return userDTO;
    }
}
复制代码
2.3 HttpMessageConverters ( HTTP request (请求)和 response (响应)的转换器)
configureMessageConverters 方法自动配置HttpMessageConverters:
public void configureMessageConverters(List<HttpMessageConverter<?>> converters) {
			this.messageConvertersProvider.ifAvailable((customConverters) -> converters
					.addAll(customConverters.getConverters()));
		}
复制代码
通过加载由 HttpMessageConvertersAutoConfiguration 定义的 HttpMessageConverters ,会自动注册一系列 HttpMessage Converter 类,比如 Spring MVC 默认:
ByteArrayHttpMessageConverter
StringHttpMessageConverter
ResourceHttpMessageConverter
SourceHttpMessageConverter
AllEncompassingFormHttpMessageConverter
自定义 HttpMessageConverters ,只需要在自定义的 HttpMessageConverters 的 Bean 注册自定义 HttpMessageConverter 即可。 如下:
注册自定义的 HttpMessageConverter :
@Configuration
public class CustomHttpMessageConverterConfig {
    @Bean
    public HttpMessageConverters converter(){
        HttpMessageConverter<?> userJsonHttpMessageConverter=new UserJsonHttpMessageConverter();
        return new HttpMessageConverters(userJsonHttpMessageConverter);
    }
}
复制代码
自定义 HttpMessageConverter :
public class UserJsonHttpMessageConverter extends AbstractHttpMessageConverter<UserDTO> {
    private static Charset DEFUALT_ENCODE=Charset.forName("UTF-8");
    public UserJsonHttpMessageConverter(){
        super(new MediaType("application", "xxx-ccww", DEFUALT_ENCODE));
    }
    protected boolean supports(Class aClass) {
            return UserDTO.class == aClass;
    }

    protected UserDTO readInternal(Class aClass, HttpInputMessage httpInputMessage) throws IOException, HttpMessageNotReadableException {
        String message = StreamUtils.copyToString(httpInputMessage.getBody(), DEFUALT_ENCODE);
        String[] messages = message.split("-");
        UserDTO userDTO = new UserDTO();
        userDTO.setUsername(messages[0]);
        userDTO.setMessage(messages[1]);
        return userDTO;
    }

    protected void writeInternal(UserDTO userDTO, HttpOutputMessage httpOutputMessage) throws IOException, HttpMessageNotWritableException {
        String out = "ccww: " + userDTO.getUsername() + "-" + userDTO.getMessage();
        httpOutputMessage.getBody().write(out.getBytes());
    }
}
复制代码
同理,可以将Servlet、Filter以及Listener相对于的注册即可。
2.4 MVC相关配置
自定义的MVC配置类上加 @EnableWebMvc 将废弃到 Spring boot 默认配置,完全由自己去控制 MVC 配置,但通常 是Springboot 默认配置+所需的额外 MVC 配置,只需要配置类继承 WebMvcConfigurerAdapter 即可
2.5 Tomcat 配置
可以使用两种方式进行 Tomcat 配置属性
- 在
application.properties配置属性即可,Tomcat是以"server.tomcat"为前缀的特有配置属性,通用的是以"server"作为前缀; - 通过实现
WebServerFactoryCustomizer接口自定义属性配置类即可,同理其他服务器实现对应的接口即可。
application.properties 配置属性:
#通用Servlet容器配置
server.port=8888

#tomcat容器配置
#配置Tomcat编码, 默认为UTF-8
server.tomcat.uri-encoding = UTF-8
# Tomcat是否开启压缩, 默认为关闭off
server.tomcat.compression=off
复制代码
实现 WebServerFactoryCustomizer 接口自定义:
/**
 * 配置tomcat属性
 * @Auther: ccww
 * @Date: 2019/10/5 23:22
 * @Description:
 */
@Component
public class CustomTomcatServletContainer implements WebServerFactoryCustomizer<ConfigurableServletWebServerFactory> {
    public void customize(ConfigurableServletWebServerFactory configurableServletWebServerFactory) {
        ((TomcatServletWebServerFactory)configurableServletWebServerFactory).addConnectorCustomizers(new TomcatConnectorCustomizer() {
            public void customize(Connector connector) {
                Http11NioProtocol protocol = (Http11NioProtocol) connector.getProtocolHandler();
                protocol.setMaxConnections(200);
                protocol.setMaxThreads(200);
                protocol.setSelectorTimeout(3000);
                protocol.setSessionTimeout(3000);
                protocol.setConnectionTimeout(3000);
                protocol.setPort(8888);
            }
        });
    }
}
复制代码
替换 spring boot 默认 Servle t容器 tomcat ,直接在依赖中排除,并导入相应的 Servlet 容器依赖:
<dependency>
    <groupId>org.springframework.boot</groupId>
    <artifactId>spring-boot-starterweb</artifactId>
    <exclusions>
        <exclusion>
            <groupId>org.springframework.boot</groupId>
            <artifactId>spring-boot-startertomcat</artifactId>
        </exclusion>
    </exclusions>
</dependency>
<dependency>
    <groupId>org.springframework.boot</groupId>
    <artifactId>spring-boot-starterjetty</artifactId>
</dependency
复制代码
2.6 自定义 Favicon
自定义 Favicon 只需要则只需将自己的 favicon.ico ( 文件名不能变动) 文件放置在类路径根目录、 类路径 META-INF/resources/ 下、 类路径 resources/ 下、 类路径 static/ 下或类路径 public/ 下。
最后可关注公众号:【ccww笔记】 一起学习,每天会分享干货,还有学习视频领取!

正文到此结束
- 本文标签: 开发 Freemarker Spring Boot 目录 servlet description 空间 list message id jetty tar 代码 XML Word IO tab GitHub json http NIO 源码 js IDE Select src ORM 2019 classpath https UI HTML Connection bean stream 服务器 git 配置 App provider Service session web ip map CTO final Property springboot spring tomcat cat
- 版权声明: 本文为互联网转载文章,出处已在文章中说明(部分除外)。如果侵权,请联系本站长删除,谢谢。
- 本文海报: 生成海报一 生成海报二
热门推荐


相关文章


Loading...
![[HBLOG]公众号](http://www.liuhaihua.cn/img/qrcode_gzh.jpg)

