Spring cache整合redis代码实例
Spring-Cache是Spring3.1引入的基于注解的缓存技术,本质上它并不是一个具体的缓存实现,而是一个对缓存使用的抽象,通过Spring AOP技术,在原有的代码上添加少量的注解来实现将这个方法转成缓存方法的效果。
本来想来个分析源码,奈何水平有限,先从实战搞起。
先引入依赖:
<dependency>
  <groupId>org.springframework.boot</groupId>
  <artifactId>spring-boot-starter-data-redis</artifactId>
  <version>2.1.6.RELEASE</version>
</dependency>
<dependency>
  <groupId>redis.clients</groupId>
  <artifactId>jedis</artifactId>
  <version>2.9.3</version>
</dependency>
redis配置:
server:
 port: 8000

spring:
 redis:
  host: 23.95.x.x
  port: 6379
  timeout: 20s
  database: 0
  jedis:
   pool:
    max-active: 5
    max-idle: 3
    max-wait: 5s
  password: testtest
配置类:
package me.yanand.config;
import org.springframework.cache.annotation.EnableCaching;
import org.springframework.context.annotation.Bean;
import org.springframework.context.annotation.Configuration;
import org.springframework.data.redis.cache.RedisCacheConfiguration;
import org.springframework.data.redis.cache.RedisCacheManager;
import org.springframework.data.redis.connection.RedisConnectionFactory;
import org.springframework.data.redis.serializer.GenericJackson2JsonRedisSerializer;
import org.springframework.data.redis.serializer.RedisSerializationContext;
import org.springframework.data.redis.serializer.StringRedisSerializer;
import java.time.Duration;
@Configuration
@EnableCaching
public class RedisConfig{

  private Duration timeOut = Duration.ofMinutes(30);
  @Bean
  public RedisCacheManager cacheManager(RedisConnectionFactory redisConnectionFactory) {
    RedisCacheConfiguration config = RedisCacheConfiguration.defaultCacheConfig()
        //设置缓存超时时间 30分钟
        .entryTtl(timeOut)
        //设置key序列化方式
        .serializeKeysWith(RedisSerializationContext.SerializationPair.fromSerializer(new StringRedisSerializer()))
        //设置value序列化方式
        .serializeValuesWith(RedisSerializationContext.SerializationPair.fromSerializer(new GenericJackson2JsonRedisSerializer()))
        .disableCachingNullValues();
    return RedisCacheManager.builder(redisConnectionFactory).cacheDefaults(config).transactionAware().build();
  }
}
主要看@EnableCaching注解,这个注解引入了@Import(CachingConfigurationSelector.class),通过CachingConfigurationSelector把代理创建类、CacheInterceptor、CacheOperationSource、BeanFactoryCacheOperationSourceAdvisor注入到容器,spring通过CacheInterceptor拦截器拦截相关带有@Cacheable、@CacheEvict、@CachePut注解的方法并执行相关缓存操作。
CacheInterceptor相关源码:
@Nullable
private Object execute(final CacheOperationInvoker invoker, Method method, CacheOperationContexts contexts) {
 if (contexts.isSynchronized()) {
  CacheOperationContext context = contexts.get(CacheableOperation.class).iterator().next();
  //满足条件执行
  if (isConditionPassing(context, CacheOperationExpressionEvaluator.NO_RESULT)) {
   Object key = generateKey(context, CacheOperationExpressionEvaluator.NO_RESULT);
   Cache cache = context.getCaches().iterator().next();
   try {
     //这里主要看RedisCache的get方法
    return wrapCacheValue(method, cache.get(key, () -> unwrapReturnValue(invokeOperation(invoker))));
   }
   catch (Cache.ValueRetrievalException ex) {
    // The invoker wraps any Throwable in a ThrowableWrapper instance so we
    // can just make sure that one bubbles up the stack.
    throw (CacheOperationInvoker.ThrowableWrapper) ex.getCause();
   }
  }
  else {
   //不满足直接执行相关方法
   return invokeOperation(invoker);
  }
 }
 ...省略
}
RedisCache相关代码:
public synchronized <T> T get(Object key, Callable<T> valueLoader) {
  ValueWrapper result = get(key);
        //缓存中有值则返回
  if (result != null) {
   return (T) result.get();
  }
        //缓存中不存在则执行相关方法
  T value = valueFromLoader(key, valueLoader);
  put(key, value);
  return value;
 }
注解使用:
package me.yanand.dao;
import me.yanand.pojo.User;
import org.springframework.cache.annotation.CacheEvict;
import org.springframework.cache.annotation.Cacheable;
import org.springframework.stereotype.Component;
@Component
public class UserDao {
  @Cacheable(cacheNames = "users",key = "#root.targetClass+#name", unless = "#result eq null")
  public User getUser(String name){
    return new User("张三",30);
  }
  @CacheEvict(cacheNames = "users", key = "#root.targetClass+#name")
  public void delUser(String name){
  }
}
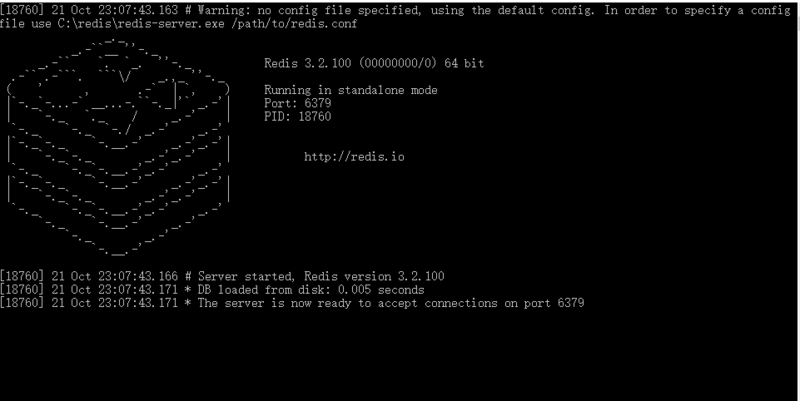
测试:
通过postman触发相关方法,现在我们连上redis查看缓存写入情况
这里我们看到key已经写入,过期时间也存在
现在我们删除缓存
以上就是本文的全部内容,希望对大家的学习有所帮助,也希望大家多多支持我们。
时间:2020-04-28
spring整合redis缓存并以注解(@Cacheable、@CachePut、@CacheEvict)形式使用
maven项目中在pom.xml中依赖2个jar包,其他的spring的jar包省略: <dependency> <groupId>redis.clients</groupId> <artifactId>jedis</artifactId> <version>2.8.1</version> </dependency> <dependency> <groupId>org.springfra
spring boot+spring cache实现两级缓存(redis+caffeine)
spring boot中集成了spring cache,并有多种缓存方式的实现,如:Redis.Caffeine.JCache.EhCache等等.但如果只用一种缓存,要么会有较大的网络消耗(如Redis),要么就是内存占用太大(如Caffeine这种应用内存缓存).在很多场景下,可以结合起来实现一.二级缓存的方式,能够很大程度提高应用的处理效率. 内容说明: 缓存.两级缓存 spring cache:主要包含spring cache定义的接口方法说明和注解中的属性说明 spring boot
SpringBoot中Shiro缓存使用Redis、Ehcache的方法
SpringBoot 中配置redis作为session 缓存器. 让shiro引用 本文是建立在你是使用这shiro基础之上的补充内容 第一种:Redis缓存,将数据存储到redis 并且开启session存入redis中. 引入pom <dependency> <groupId>org.springframework.boot</groupId> <artifactId>spring-boot-starter-data-redis</artifac
配置Spring4.0注解Cache+Redis缓存的用法
前言: 目前公司项目在上一个技术架构的处理,已经搭建好了Redis,但redis只用在了做session的管理,然而 后台的对象缓存没有用上 1. redis 和 ehcache的区别: 简单了解了下,个人觉得 从部署上而言,redis更适合分布式部署,ehcache是在每台应用服务器上开辟一块内存做缓存,集群时还得考虑缓存的情况, redis就不需要考虑缓存了.单独部署在一台服务器中(也可以是在某一台应用服务器中) 2. 项目配置(spring mvc+maven+mybaits+redis)
Spring Cache手动清理Redis缓存
这篇文章主要介绍了Spring Cache手动清理Redis缓存,文中通过示例代码介绍的非常详细,对大家的学习或者工作具有一定的参考学习价值,需要的朋友可以参考下 注册cacheRedisTemplate 将 cache 的 RedisTemplate 注册为Bean @Bean(name = "cacheRedisTemplate") public RedisTemplate cacheRedisTemplate(@Qualifier("jedisConnectionFac
Spring boot redis cache的key的使用方法
在数据库查询中我们往往会使用增加缓存来提高程序的性能,@Cacheable 可以方便的对数据库查询方法加缓存.本文主要来探究一下缓存使用的key. 搭建项目 数据库 mysql> select * from t_student; +----+--------+-------------+ | id | name | grade_class | +----+--------+-------------+ | 1 | Simone | 3-2 | +----+--------+-----------
浅谈SpringCache与redis集成实现缓存解决方案
缓存可以说是加速服务响应速度的一种非常有效并且简单的方式.在缓存领域,有很多知名的框架,如EhCache .Guava.HazelCast等.Redis作为key-value型数据库,由于他的这一特性,Redis也成为一种流行的数据缓存工具. 在传统方式下对于缓存的处理代码是非常臃肿的. 例如:我们要把一个查询函数加入缓存功能,大致需要三步. 一.在函数执行前,我们需要先检查缓存中是否存在数据,如果存在则返回缓存数据 二.如果不存在,就需要在数据库的数据查询出来. 三.最后把数据存放在缓存中,当
springboot接入cachecloud redis示例实践
最近项目中需要接入 Redis CacheCloud, CacheCloud是一个开源的 Redis 运维监控云平台,功能十分强大,支持Redis 实例自动部署.扩容.碎片管理.统计.监控等功能, 特别是支持单机.sentinel .cluster三种模式的自动部署,搭建redis集群一步到位轻松搞定. java项目中 接入 CacheCloud redis的方式主要有两种. 第一种就是在 CacheCloud 上创建好redis实例后将对应的IP,端口直接配置以配置形式应用到项目中,优点
Docker 部署 SpringBoot 项目整合 Redis 镜像做访问计数示例代码
最终效果如下 大概就几个步骤 1.安装 Docker CE 2.运行 Redis 镜像 3.Java 环境准备 4.项目准备 5.编写 Dockerfile 6.发布项目 7.测试服务 环境准备 系统:Ubuntu 17.04 x64 Docker 17.12.0-ce IP:45.32.31.101 一.安装 Docker CE 国内不建议使用:"脚本进行安装",会下载安装很慢,使用步骤 1 安装,看下面的链接:常规安装方式 1.常规安装方式 Ubuntu 17.04 x64 安装
springboot中使用redis由浅入深解析

正文 很多时候,我们会在springboot中配置redis,但是就那么几个配置就配好了,没办法知道为什么,这里就详细的讲解一下 这里假设已经成功创建了一个springboot项目. redis连接工厂类 第一步,需要加上springboot的redis jar包 <dependency> <groupId>org.springframework.boot</groupId> <artifactId>spring-boot-starter-data-redi
SpringBoot初步连接redis详解
在初次用springboot连接redis的时候查看官方文档和一些博客会发现配置文件非常的多,这就导致了在学习的开始的时候是没有体验的,其实利用springboot连接redis的时候并不需要那么多的配置 首先开启redis服务器: 然后在springboot里面添加配置文件: # Redis数据库索引(默认为0) spring.redis.database=0 # Redis服务器地址 spring.redis.host=localhost # Redis服务器连接端口 spring.redi
SpringBoot集成JPA的示例代码
本文介绍了SpringBoot集成JPA的示例代码,分享给大家,具体如下: 1.创建新的maven项目 2. 添加必须的依赖 <!--springboot的必须依赖--> <parent> <groupId>org.springframework.boot</groupId> <artifactId>spring-boot-starter-parent</artifactId> <version>1.5.9.RELEASE
springboot中使用redis的方法代码详解
特别说明: 本文针对的是新版 spring boot 2.1.3,其 spring data 依赖为 spring-boot-starter-data-redis,且其默认连接池为 lettuce redis 作为一个高性能的内存数据库,如果不会用就太落伍了,之前在 node.js 中用过 redis,本篇记录如何将 redis 集成到 spring boot 中.提供 redis 操作类,和注解使用 redis 两种方式.主要内容如下: •docker 安装 redis •springboo
在SpringBoot中添加Redis及配置方法
在实际的开发中,会有这样的场景.有一个微服务需要提供一个查询的服务,但是需要查询的数据库表的数据量十分庞大,查询所需要的时间很长. 此时就可以考虑在项目中加入缓存. 引入依赖 在maven项目中引入如下依赖.并且需要在本地安装redis. <dependency> <groupId>org.springframework.boot</groupId> <artifactId>spring-boot-starter-data-redis</artifac
SpringBoot+MybatisPlus+代码生成器整合示例
项目目录结构: pom文件: <?xml version="1.0" encoding="UTF-8"?> <project xmlns="http://maven.apache.org/POM/4.0.0" xmlns:xsi="http://www.w3.org/2001/XMLSchema-instance" xsi:schemaLocation="http://maven.apache.or
SpringBoot AOP控制Redis自动缓存和更新的示例
导入redis的jar包 <!-- redis --> <dependency> <groupId>org.springframework.boot</groupId> <artifactId>spring-boot-starter-data-redis</artifactId> <version>2.0.4.RELEASE</version> </dependency> 编写自定义缓存注解 /**
SpringBoot 整合 Lettuce Redis的实现方法
SpringBoot 是为了简化 Spring 应用的创建.运行.调试.部署等一系列问题而诞生的产物,自动装配的特性让我们可以更好的关注业务本身而不是外部的XML配置,我们只需遵循规范,引入相关的依赖就可以轻易的搭建出一个 WEB 工程 Spring Boot 除了支持常见的ORM框架外,更是对常用的中间件提供了非常好封装,随着Spring Boot2.x的到来,支持的组件越来越丰富,也越来越成熟,其中对Redis的支持不仅仅是丰富了它的API,更是替换掉底层Jedis的依赖,取而代之换成了Le
正文到此结束
- 本文标签: 自动缓存 本质 Qualifier Ubuntu 源码 https 安装 API 实例 final 统计 connectionFactory 二级缓存 springboot 连接池 目录 测试 ip sql 管理 Select 开发 src JPA 分布式 synchronized 云 服务器 apr NSA 解析 mybatis dist 下载 数据缓存 Spring Boot 索引 mysql root pom 集群 redis App value client 文章 cache id session web maven cat 数据 CTO key build Word ORM 希望 Lua 部署 apache node 数据库 调试 时间 XML schema 博客 bean AOP Sentinel 微服务 java 端口 tar UI 代码 Docker Connection 删除 Action IO Dockerfile 缓存 spring tab js 配置 Node.js json 开源 http 代码生成器
- 版权声明: 本文为互联网转载文章,出处已在文章中说明(部分除外)。如果侵权,请联系本站长删除,谢谢。
- 本文海报: 生成海报一 生成海报二
热门推荐


相关文章


Loading...
![[HBLOG]公众号](http://www.liuhaihua.cn/img/qrcode_gzh.jpg)

