JAVA基于SSM框架实现简历生成
SSM 实现个人简历在线生成与导出
一、实验内容
1.1 实验介绍
本次实验中,我们将使用Spring+Spring MVC+Mybatis+freemarker 来实现一个简单的个人在线简历系统,主要完成简历的生成和导出功能。
1.2 实验知识点
- Spring
- Spring MVC
- Mybatis
- freemarker 使用模板文件导出 word 文档
- JSP
- CSS
1.3 实验环境
- JDK1.7
- Eclipse
- Tomcat7.0
- freemarker
- SSM 框架
1.4 项目源码
本次实验的源码可以通过以下地址获取
wget http://labfile.oss.aliyuncs.com/courses/875/Resume.zip
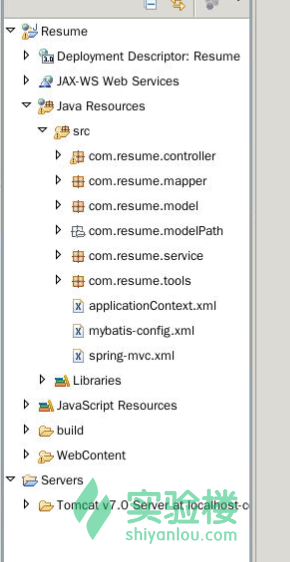
二、项目文件结构
三、实验步骤
3.1 实验准备
3.1.1 JAR 包的导入
本次实验所需要得 JAR 包可以通过以下命令获取:
wget http://labfile.oss.aliyuncs.com/courses/875/SSMf.zip
下载完成后,通过使用命令:
unzip SSMf.zip
将压缩包解压,解压的目录在主文件夹下。将JAR包解压后,接下来打开环境中的 eclipse,创建本次实验的项目。打开 eclipse 后,创建一个名为 Resume 的Dynamic Web Project项目,创建时记得勾选自动生成 web.xml 文件。项目创建完成后,将刚才下载并解压的JAR包复制到新建项目的 WEB-INF/lib 目录下,复制完成后,右键点击项目,依次点击 Build Path-->Configure Build Path-->Libraries-->Add JARs ,然后选择我们刚才新建的项目Resume,打开lib目录,将目录下全部的Jar包选中,点击 OK,然后在 Order And Export 中选中全部的 JAR 包,点击 OK,这样就完成了 JAR 包的导入。
3.1.2 数据库准备。
由于 Mybatis 框架不能像 Hibernate 那样通过配置文件或者注解自动建表,所以本次实验所需的数据库和数据表需要我们自己建立。首先在在线环境中打开数据库服务。打开环境桌面上的 Xfce 终端,使用以下命令打开服务:
sudo service mysql start
然后使用命令:
mysql -u root
进入数据库(在线环境中的数据库用户名为 root,密码为无),进入数据库后,创建我们本次实验所需的数据库 resume,命令如下:
create database resume;
创建完成后,我们进入resume数据库,创建数据表。用命令:
use resume;
进入数据库,然后使用命令创建数据表basic_info:
CREATE TABLE `basic_info` (
  `Id` int(10) NOT NULL AUTO_INCREMENT,
  `Name` varchar(20) DEFAULT NULL,
  `Gender` varchar(20) DEFAULT NULL,
  `Age` int(10) DEFAULT NULL,
  `Address` varchar(20) DEFAULT NULL,
  `Email` varchar(20) DEFAULT NULL,
  `Tel` varchar(20) DEFAULT NULL,
  `School` varchar(20) DEFAULT NULL,
  `Introduce` varchar(10000) DEFAULT NULL,
  `UserId` int(20) DEFAULT NULL,
  PRIMARY KEY (`Id`)
);
使用命令:
CREATE TABLE `educational_info` (
  `Eduid` int(20) NOT NULL AUTO_INCREMENT,
  `School` varchar(20) DEFAULT NULL,
  `Major` varchar(20) DEFAULT NULL,
  `Education` varchar(20) DEFAULT NULL,
  `Graduation` varchar(40) DEFAULT NULL,
  `Userid` int(20) NOT NULL,
  PRIMARY KEY (`Eduid`,`Userid`)
);
创建数据表 education_info 。然后创建 user_info 数据表:
CREATE TABLE `user_info` (
  `userId` int(20) NOT NULL AUTO_INCREMENT,
  `Name` varchar(20) NOT NULL,
  `Password` varchar(20) NOT NULL,
  PRIMARY KEY (`userId`)
);
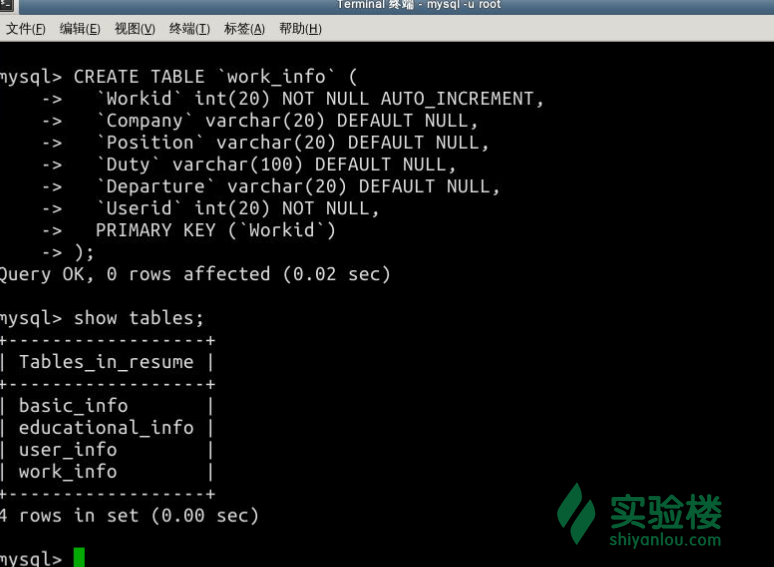
最后还需创建一个数据表,用来存储工作信息:
CREATE TABLE `work_info` (
  `Workid` int(20) NOT NULL AUTO_INCREMENT,
  `Company` varchar(20) DEFAULT NULL,
  `Position` varchar(20) DEFAULT NULL,
  `Duty` varchar(100) DEFAULT NULL,
  `Departure` varchar(20) DEFAULT NULL,
  `Userid` int(20) NOT NULL,
  PRIMARY KEY (`Workid`)
);
这样,本次课程的说有数据库就全部建立完成了,使用命令
show tables
可以检查刚才我们的表是否建立成功。如果结果如下,那么建立就成功了
数据库准备完成后,我们就可以进入开发阶段了。
3.2 JSP 页面和 CSS 样式
JSP页面包括用户的登录页面、添加简历信息页面和其他的结果跳转页面。所有的JSP 页面都放在根目录 WebContent 下。
3.2.1 CSS 样式
CSS 样式文件放在项目的 WebCotent 目录下,名为 All.css ,主要是设置表单、提交按钮等的格式。具体信息见如下代码:
@CHARSET "UTF-8";
.list_center{
}
.list_center input{
width:278px;
height:30px;
border:1px solid #b2bfc8;
line-height:30px;
}
.submit input{
    width:70px;
    heigth:40px;
    border:1px;
}
.word_center{
    width:100%;height:600px;  /*设置div的大小*/
    border:0px;    /*边框*/
    text-align: center;        /*文字水平居中对齐*/
    line-height: 600px;        /*设置文字行距等于div的高度*/
    overflow:hidden;
}
3.2.2 login.jsp
login.jsp 即用户登录页面,登录成功跳转至用于添加简历基础信息的 basic.jsp 页面,失败跳转至 error.jsp 页面。login.jsp 的具体代码如下:
<%@ page language="java" contentType="text/html; charset=ISO-8859-1"
    pageEncoding="ISO-8859-1"%>
<!DOCTYPE html PUBLIC "-//W3C//DTD HTML 4.01 Transitional//EN" "http://www.w3.org/TR/html4/loose.dtd">
<html>
<head>
<meta http-equiv="Content-Type" content="text/html; charset=ISO-8859-1">
<title>Login Page</title>
</head>
<body>
    <form action="login" method="post">
    <table border="1" >
      <tr>
      <td>name:</td>
      <td><input type="text" name="name"></td>
      </tr>
      <tr>
      <td>Password:</td>
      <td><input type="password" name="password"></td>
      </tr>
      <tr>
        </tr>
        </table>
        <input type="submit"  value="login">
        <input type="reset"  value="reset">
        </form>
</body>
</html>
3.2.3 basic.jsp
本页面是用于添加基础信息的,添加的基础信息需要对应我们数据库中的字段。其中userid是用隐藏表单的形式提交到后台的。具体代码如下:
<%@ page language="java" contentType="text/html; charset=utf-8"
    pageEncoding="utf-8"%>
<!DOCTYPE html PUBLIC "-//W3C//DTD HTML 4.01 Transitional//EN" "http://www.w3.org/TR/html4/loose.dtd">
<html>
<head>
<meta http-equiv="Content-Type" content="text/html; charset=utf-8">
<link rel="stylesheet" type="text/css" href="css/All.css" />
<title>Basic Page</title>
</head>
<body>
<center><h2>Welcome To Curriculum Vitae System</h2></center>
<center><h4>Please Input Your Essential information</h4></center>
<div class="list_center">
<form action="basic" method="post">
    <table width="300" height="500" border="0" align="center">
    <tr>
        <td align="center">Name:</td>
        <td><input type="text" name="Name"></td>
    </tr>
    <tr>
        <td align="center">Address:</td>
        <td><input type="text" name="Address"></td>
    </tr>
    <tr>
        <td align="center">Gender:</td>
        <td><input type="text" name="Gender"></td>
    </tr>
    <tr>
        <td align="center">Age:</td>
        <td><input type="text" name="Age"></td>
    </tr>
    <tr>
        <td align="center">Email:</td>
        <td><input type="text" name="Email"></td>
    </tr>
    <tr>
        <td align="center">Tel:</td>
        <td><input type="text" name="Tel"></td>
    </tr>
    <tr>
        <td align="center">School:</td>
        <td><input type="text" name="School"></td>
    </tr>
        <tr>
         <td><input type="hidden" name="Userid" value="<%=session.getAttribute("loginuser") %>"></td>

    </tr>
    <tr>
    <td >
        <div class="submit">

        <input type="submit" value="continue" >

        </div>
        </td>
        </tr>
    </table>
    </form>
    </div>
</body>
</html>
拓展:输入内容未进行合法性验证,如果用户输入的数据和数据库的字段类型不匹配会报错。大家想想这里该如何优化呢?
3.3.4 Educational.jsp、addEsuccess.jso
Educational.jsp 是用于添加教育信息的页面,教育信息可以添加多次,每添加成功一次,由用户选择继续添加还是进行下一步操作。addEsuccess.jsp 是添加成功过后进行选择的页面。Educational.jsp 的具体代码如下:
<%@ page language="java" contentType="text/html; charset=ISO-8859-1"
    pageEncoding="ISO-8859-1"%>
<!DOCTYPE html PUBLIC "-//W3C//DTD HTML 4.01 Transitional//EN" "http://www.w3.org/TR/html4/loose.dtd">
<html>
<head>
<meta http-equiv="Content-Type" content="text/html; charset=ISO-8859-1">
<link rel="stylesheet" type="text/css" href="css/All.css" />
<title>Educational Page</title>
</head>
<body>
        <center><h2>Welcome To Curriculum Vitae System</h2></center>
<center><h4>Please Input Your Educational experience.You can add more than one</h4></center>
<div class="list_center">
<form action="addEducational" method="post">
    <table width="300" height="500" border="0" align="center">
    <tr>
        <td align="center">School:</td>
        <td><input type="text" name="School"></td>
    </tr>
    <tr>
        <td align="center">Major:</td>
        <td><input type="text" name="Major"></td>
    </tr>
        <tr>
        <td align="center">Education:</td>
        <td><input type="text" name="Education"></td>
    </tr>
        <tr>
        <td align="center">Graduation Time:</td>
        <td><input type="text" name="Graduation"></td>
    </tr>
    <tr>
         <td><input type="hidden" name="Userid" value="<%=session.getAttribute("loginuser") %>"></td>

    </tr>
    <tr>
    <td >
        <div class="submit">

        <input type="submit" value="Add" >

        </div>
        </td>
        </tr>
    </table>
    </form>
    </div>
</body>
</html>
addEsuccess.jsp 的具体代码如下:
<%@ page language="java" contentType="text/html; charset=ISO-8859-1"
    pageEncoding="ISO-8859-1"%>
<!DOCTYPE html PUBLIC "-//W3C//DTD HTML 4.01 Transitional//EN" "http://www.w3.org/TR/html4/loose.dtd">
<html>
<head>
<meta http-equiv="Content-Type" content="text/html; charset=ISO-8859-1">
<link rel="stylesheet" type="text/css" href="css/All.css" />
<title>Add Educational Success</title>
</head>
<body>
    <div class="word_center">
        Add success
        <a href="Educational.jsp?loginuser=<%=session.getAttribute("loginuser") %>"><input type="submit" value="Continue"></a>
        <a href="Work.jsp?loginuser=<%=session.getAttribute("loginuser") %>"><input type="submit" value="Next"></a>
    </div>
</body>
</html>
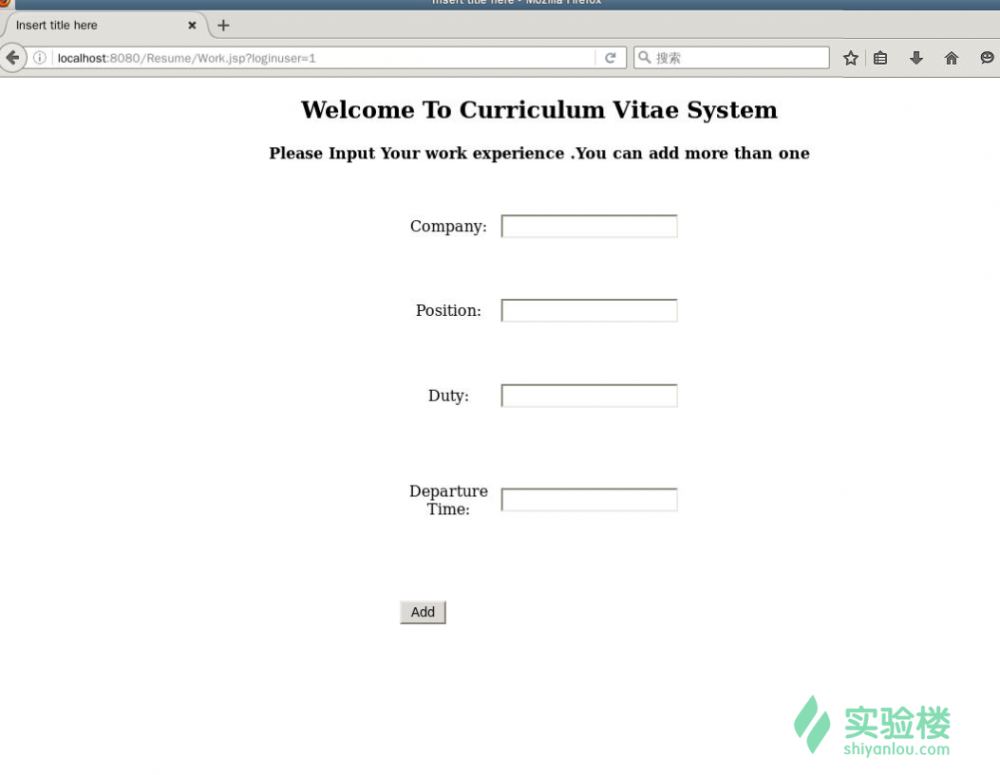
3.2.5 Work.jsp、addWsuccess.jsp
Work.jsp 是用于添加工作经历的页面,addWsuccess.jsp 是用来给用户选择继续添加还是进行下一步操作的页面,类似与上面的添加教育信息页面。Work.jsp 的具体代码如下:
<%@ page language="java" contentType="text/html; charset=ISO-8859-1"
    pageEncoding="ISO-8859-1"%>
<!DOCTYPE html PUBLIC "-//W3C//DTD HTML 4.01 Transitional//EN" "http://www.w3.org/TR/html4/loose.dtd">
<html>
<head>
<meta http-equiv="Content-Type" content="text/html; charset=ISO-8859-1">
<link rel="stylesheet" type="text/css" href="css/All.css" />
<title>Insert title here</title>
</head>
<body>
<center><h2>Welcome To Curriculum Vitae System</h2></center>
<center><h4>Please Input Your work experience .You can add more than one</h4></center>
<div class="list_center">
<form action="addWork" method="post">
    <table width="300" height="500" border="0" align="center">
    <tr>
        <td align="center">Company:</td>
        <td><input type="text" name="Company"></td>
    </tr>
    <tr>
        <td align="center">Position:</td>
        <td><input type="text" name="Position"></td>
    </tr>
        <tr>
        <td align="center">Duty:</td>
        <td><input type="text" name="Duty"></td>
    </tr>
        <tr>
        <td align="center">Departure Time:</td>
        <td><input type="text" name="Departure"></td>
    </tr>
    <tr>
         <td><input type="hidden" name="Userid" value="<%=session.getAttribute("loginuser") %>"></td>

    </tr>
    <tr>
    <td >
        <div class="submit">

        <input type="submit" value="Add" >

        </div>
        </td>
        </tr>
    </table>
    </form>
    </div>
</body>
</html>
addWsuccess.jsp 的具体代码如下:
<%@ page language="java" contentType="text/html; charset=ISO-8859-1"
    pageEncoding="ISO-8859-1"%>
<!DOCTYPE html PUBLIC "-//W3C//DTD HTML 4.01 Transitional//EN" "http://www.w3.org/TR/html4/loose.dtd">
<html>
<head>
<meta http-equiv="Content-Type" content="text/html; charset=ISO-8859-1">
<link rel="stylesheet" type="text/css" href="css/All.css" />
<title>Add Work Success</title>
</head>
<body>
    <div class="word_center">
        Add success
            <a href="Work.jsp?loginuser=<%=session.getAttribute("loginuser") %>"><input type="submit" value="Continue"></a>
        <a href="Introduce.jsp?loginuser=<%=session.getAttribute("loginuser") %>"><input type="submit" value="Next"></a>
    </div>
</body>
</html>
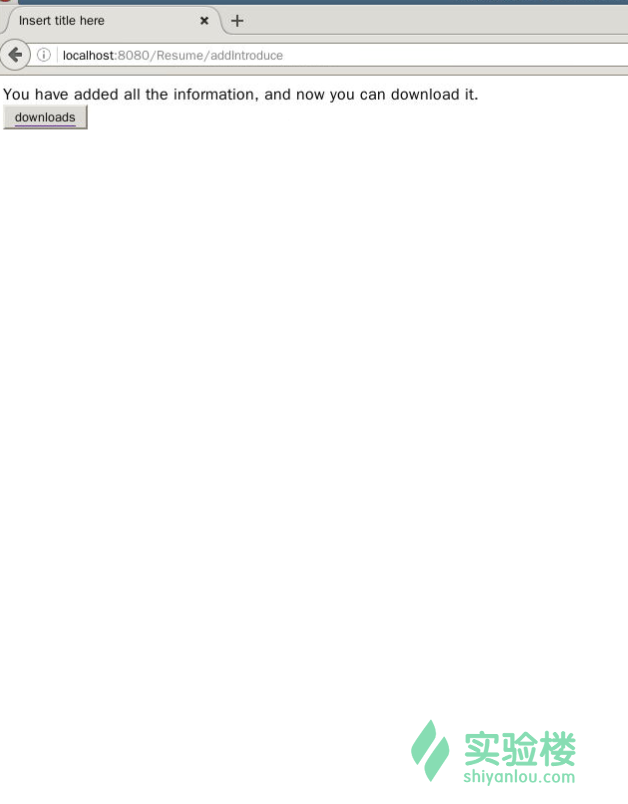
3.2.6 Introduce.jsp、addIsuccess.jsp
Introduce.jsp 是用于添加简历中的自我介绍的页面,是简历生成的最后一步。添加成功则可以导出简历了,addIsuccess.jso 就是选择导出简历的页面。Introduce.jsp 的具体代码如下:
<%@ page language="java" contentType="text/html; charset=ISO-8859-1"
    pageEncoding="ISO-8859-1"%>
<!DOCTYPE html PUBLIC "-//W3C//DTD HTML 4.01 Transitional//EN" "http://www.w3.org/TR/html4/loose.dtd">
<html>
<head>
<meta http-equiv="Content-Type" content="text/html; charset=ISO-8859-1">
<link rel="stylesheet" type="text/css" href="css/All.css" />
<title>Introduce</title>
</head>
<body>
<center><h2>Welcome To Curriculum Vitae System</h2></center>
<center><h4>Please Introduce yourself.</h4></center>
<div class="list_center">
<form action="addIntroduce" method="post">
    <table width="300" height="500" border="0" align="center">
    <tr>
        <td align="center">Introduce:</td>
        <td><textarea id="ta1"  name="Introduce" style="width:500px;height:300px;" ></textarea></td>
    </tr>
    <tr>
         <td><input type="hidden" name="Userid" value="<%=session.getAttribute("loginuser") %>"></td>

    </tr>
    <tr>
    <td >
        <div class="submit">

        <input type="submit" value="Add" >

        </div>
        </td>
        </tr>
    </table>
    </form>
    </div>
</body>
</html>
addIsuccess.jsp 的具体代码如下:
<%@ page language="java" contentType="text/html; charset=ISO-8859-1"
    pageEncoding="ISO-8859-1"%>
<!DOCTYPE html PUBLIC "-//W3C//DTD HTML 4.01 Transitional//EN" "http://www.w3.org/TR/html4/loose.dtd">
<html>
<head>
<meta http-equiv="Content-Type" content="text/html; charset=ISO-8859-1">
<link rel="stylesheet" type="text/css" href="css/All.css" />
<title>Insert title here</title>
</head>
<body>
    <div class="word_center">
        You have added all the information, and now you can  download it.
        <br>
        <a href="download?Userid=<%=session.getAttribute("loginuser") %>"><input type="submit" value="downloads"></a>
    </div>
</body>
</html>
3.2.7 over.jsp、error.jsp
over.jsp 是导出简历成功后的提示页面,error.jsp 是错误页面。二者皆是输出一句提示 语。
over.jsp:
<%@ page language="java" contentType="text/html; charset=ISO-8859-1"
    pageEncoding="ISO-8859-1"%>
<!DOCTYPE html PUBLIC "-//W3C//DTD HTML 4.01 Transitional//EN" "http://www.w3.org/TR/html4/loose.dtd">
<html>
<head>
<meta http-equiv="Content-Type" content="text/html; charset=ISO-8859-1">
<title>over</title>
</head>
<body>
    <center><h2>
Export successful</h2></center>
</body>
</html>
error.jsp:
<%@ page language="java" contentType="text/html; charset=ISO-8859-1"
    pageEncoding="ISO-8859-1"%>
<!DOCTYPE html PUBLIC "-//W3C//DTD HTML 4.01 Transitional//EN" "http://www.w3.org/TR/html4/loose.dtd">
<html>
<head>
<meta http-equiv="Content-Type" content="text/html; charset=ISO-8859-1">
<title>Insert title here</title>
</head>
<body>
<center><h2>
There is a mistake here</h2></center>
</body>
</html>
3.3 创建实体类
实体类放在com.resume.model包下,为每个数据表创建一个对应的Java实体类。本次实验的实体类放在com.resume.model包下。
3.3.1 User_info实体类
User_info是用户信息实体类,对应数据库中的user_info表。其具体的属性如下:
package com.resume.model;
/**
 * User_info实体类
 * 对应数据库中的user_info表
 * 用户登录信息实体类
 */
public class User_info {
    private int userid;//用户id,主键

    private String  Name;//登录名

    private String Password;//登录密码

    public int getUserid() {
        return userid;
    }

    public void setUserid(int userid) {
        this.userid = userid;
    }

    public String getName() {
        return Name;
    }

    public void setName(String name) {
        Name = name;
    }

    public String getPassword() {
        return Password;
    }

    public void setPassword(String password) {
        Password = password;
    }


}
3.3.2 Basic_info 实体类
Basic_info 是简历的基本信息实体类,对应数据库中的basic_info表。其具体属性如下:
package com.resume.model;
/**
 * Basic_info实体类
 * 对应数据库中的basic_info表
 * 简历的基本信息实体类
 */
public class Basic_info {

    private int ID;//主键,ID
    private String Name;//姓名
    private String Gender;//性别
    private int Age;//年龄
    private String Address;//地址
    private String Email;//邮件
    private String Tel;//电话
    private String School;//毕业院校
    private String Introduce;//自我介绍
    private int UserId;//用户ID
    public int getID() {
        return ID;
    }
    public void setID(int iD) {
        ID = iD;
    }
    public String getName() {
        return Name;
    }
    public void setName(String name) {
        Name = name;
    }
    public String getGender() {
        return Gender;
    }
    public void setGender(String gender) {
        Gender = gender;
    }
    public int getAge() {
        return Age;
    }
    public void setAge(int age) {
        Age = age;
    }
    public String getAddress() {
        return Address;
    }
    public void setAddress(String address) {
        Address = address;
    }
    public String getEmail() {
        return Email;
    }
    public void setEmail(String email) {
        Email = email;
    }
    public String getTel() {
        return Tel;
    }
    public void setTel(String tel) {
        Tel = tel;
    }
    public String getSchool() {
        return School;
    }
    public void setSchool(String school) {
        School = school;
    }
    public String getIntroduce() {
        return Introduce;
    }
    public void setIntroduce(String introduce) {
        Introduce = introduce;
    }
    public int getUserId() {
        return UserId;
    }
    public void setUserId(int userId) {
        this.UserId = userId;
    }


}
3.3.3 Edcuational_info 实体类
Edcuational_info 实体类是教育信息实体类,对应的是 edcuational_info 数据表,其具体属性如下:
package com.resume.model;
/**
 * 教育信息实体类Educational_info
 * 对应数据库中的educational_info表
 *
 */
public class Educational_info {
    private int Eduid;//主键
    private String School;//学校
    private String Major;//专业
    private String Education;//学历
    private String Graduation;//毕业时间
    private int Userid;//用户
    public int getEduid() {
        return Eduid;
    }
    public void setEduid(int eduid) {
        Eduid = eduid;
    }
    public String getSchool() {
        return School;
    }
    public void setSchool(String school) {
        School = school;
    }
    public String getMajor() {
        return Major;
    }
    public void setMajor(String major) {
        Major = major;
    }
    public String getEducation() {
        return Education;
    }
    public void setEducation(String education) {
        Education = education;
    }
    public String getGraduation() {
        return Graduation;
    }
    public void setGraduation(String graduation) {
        Graduation = graduation;
    }
    public int getUserid() {
        return Userid;
    }
    public void setUserid(int userid) {
        Userid = userid;
    }

}
3.3.4 Work_info 实体类
Work_info 是工作经历实体类,对应数据库中的 work_info 表,其具体属性如下:
package com.resume.model;
/**
 * 工作经历实体类Work_info
 * 对应数据库中的work_info表
 *
 */
public class Work_info {
    private int Workid;//主键
    private String Company;//企业名
    private String Position;//职位
    private String Duty;//职责
    private String Departure;//离职时间
    private int Userid;//用户
    public int getWorkid() {
        return Workid;
    }
    public void setWorkid(int workid) {
        Workid = workid;
    }
    public String getCompany() {
        return Company;
    }
    public void setCompany(String company) {
        Company = company;
    }
    public String getPosition() {
        return Position;
    }
    public void setPosition(String position) {
        Position = position;
    }
    public String getDuty() {
        return Duty;
    }
    public void setDuty(String duty) {
        Duty = duty;
    }
    public String getDeparture() {
        return Departure;
    }
    public void setDeparture(String departure) {
        Departure = departure;
    }
    public int getUserid() {
        return Userid;
    }
    public void setUserid(int userid) {
        Userid = userid;
    }

}
3.4 Controller 控制层
Controller 控制层类似与 SSH 框架中的 Action 控制层,都是调用 service 层与控制结果跳转。在本次实验中,Controller 控制层的所有类都放在 com.resume.Controller 包下。
3.4.1 UserController
UserController 是用于处理用户登录的类,包括验证登录名和密码以及根据验证结果跳转不同页面。UserController 的具体代码和注释如下所示:
package com.resume.controller;

import javax.servlet.http.HttpSession;

import org.springframework.beans.factory.annotation.Autowired;
import org.springframework.stereotype.Controller;
import org.springframework.web.bind.annotation.RequestMapping;

import com.resume.model.User_info;
import com.resume.service.UserService;

/**
 * UserController类
 * 用于控制和user实体相关的操作
 *用@Controller标注控制层
 */
@Controller
public class UserController {
    /*
     * spring自动扫描注入bean
     */
    @Autowired
    public UserService userservice;
    //登录
    @RequestMapping("/login")
    //User_info user用于获取表单信息,这是其中一种方法:用实体类来接收
    public String login(User_info user,HttpSession session){
        String ret = "";
        System.out.println("user"+user.getName());
        //调用service层的登录方法
        User_info loginuser = userservice.login(user.getName());
        //将登录者放入session,向后面的功能模块传递
        session.setAttribute("loginuser", loginuser.getUserid());
        //验证用户名和密码
        if (user.getName()!=null) {
            if (loginuser.getName().equals(user.getName()) && loginuser.getPassword().equals(user.getPassword())) {
                //返回的是xxx.jsp中的xxx字段
                ret =  "basic";
            }else{
                ret = "error";
            }
        }else {
            ret = "error";
        }
        return ret;
    }
}
3.4.2 NewresumeController
NewresumeController 是用于处理关于生成简历的类,包括存储用户输入的基础信息、教育信息、工作经历、简历的 word 文档导出以及各自的结果跳转,其具体的代码如下所示:
package com.resume.controller;

import java.util.List;

import javax.servlet.http.HttpServletRequest;
import javax.servlet.http.HttpSession;
import javax.websocket.RemoteEndpoint.Basic;

import org.springframework.beans.factory.annotation.Autowired;
import org.springframework.stereotype.Controller;
import org.springframework.web.bind.annotation.RequestMapping;

import com.resume.model.Basic_info;
import com.resume.model.Educational_info;
import com.resume.model.Work_info;
import com.resume.service.NewresumeService;
import com.resume.tools.WordGenerator;

import sun.security.acl.WorldGroupImpl;
/**
 * NewresumeController类
 * 用于控制所有的操作简历的操作
 */

@Controller
public class NewresumeController {

    /*
     * spring自动扫描注入bean
     */
    @Autowired
    public NewresumeService newresumeservice;

    /*
     *用于插入用户输入的基本信息
     */
    @RequestMapping("/basic")
    /*
     * basicinfo:用于接收用户输入表单的数据
     * request:用于接收隐藏表单数据
     * session:传值
     */
    public String insertbasic(Basic_info basicinfo,HttpServletRequest request,
            HttpSession session){
        String ret=null;
        //接收隐藏表单hidden的值
        int userid = Integer.parseInt(request.getParameter("Userid"));
        //将userid赋值给basicinfo的Userid
        basicinfo.setUserId(userid);
        session.setAttribute("loginuser", userid);
        try {
            //插入用户的基本信息
            newresumeservice.insertbasic(basicinfo);
            ret="Educational";
        } catch (Exception e) {
            System.out.println(e);
            ret ="error";
        }
        return ret;
    }

    /*
     * 用于插入用户输入的教育经历信息
     */

    @RequestMapping("/addEducational")
    /*
     * 三个参数的作用同上个方法
     */
    public String addEducational(Educational_info edu,HttpServletRequest request,
            HttpSession session){

        String ret=null;
        int userid = Integer.parseInt(request.getParameter("Userid"));
        edu.setUserid(userid);
        session.setAttribute("loginuser", userid);
        try {
            //添加教育信息,可以添加多次多条
            newresumeservice.addEducational(edu);
            ret="addEsuccess";
        } catch (Exception e) {
            System.out.println(e);
            ret ="error";
        }
        return ret;

    }
    /*
     * 用于插入用户输入的工作经历信息
     */

    @RequestMapping("/addWork")
    /*
     * 三个参数的作用同上
     */
    public String addWork(Work_info work,HttpServletRequest request,
            HttpSession session){
        String ret=null;
        int userid = Integer.parseInt(request.getParameter("Userid"));
        work.setUserid(userid);
        session.setAttribute("loginuser", userid);
        try {
            //添加工作经验
            newresumeservice.addWork(work);
            ret="addWsuccess";
        } catch (Exception e) {
            System.out.println(e);
            ret ="error";
        }
        return ret;

    }
    /*
     * 用于插入用户自我介绍
     */

    @RequestMapping("/addIntroduce")
    /*
     * 由于用户的自我信息是在Basic_info表中,所以这里是update而不是insert
     */
    public String addIntroduce(Basic_info intro,HttpServletRequest request,
            HttpSession session){

        String ret=null;
        int userid = Integer.parseInt(request.getParameter("Userid"));
        intro.setUserId(userid);
        session.setAttribute("loginuser", userid);
        try {
            //添加自我介绍信息
            newresumeservice.addIntroduce(intro);
            ret="addIsuccess";
        } catch (Exception e) {
            System.out.println(e);
            ret ="error";
        }
        return ret;

    }
    /*
     * 用于下载简历
     */

    @RequestMapping("/download")
    public String preview(HttpServletRequest request,
            HttpSession session){

        String ret=null;
        //获取该用户的id
        int userid = Integer.parseInt(request.getParameter("Userid"));
        session.setAttribute("loginuser", userid);
        try {
            //查找基础信息
            List<Basic_info> basic_info = newresumeservice.selectBasic_info(userid);
            //查找教育信息
            List<Educational_info> educational_info = newresumeservice.selectEducational_info(userid);
            //查找工作信息
            List<Work_info> work_info = newresumeservice.selectWork_info(userid);
            //调用工具类,根据模板ftl文件生成word文档
            WordGenerator wordGenerator = new WordGenerator();
            wordGenerator.createDoc(basic_info, educational_info,work_info);
            ret="over";
        } catch (Exception e) {
            System.out.println(e);
            ret ="error";
        }
        return ret;


    }
}
3.5 Service 层
Service 层是被 Controller 调用,然后调用 mapper 层进行数据处理的中间层,与SSH框架中的 Service 层的作用相同。本次实验的 Service 层都放在 com.resume.service 包下。
3.5.1 UserService、UserServiceImpl
UserService 接口被 UserController 调用,然后其实现类 UserServiceImpl 去调用 userMapper 层的相关方法并返回结果。 UserService 具体代码:
package com.resume.service;
import com.resume.model.User_info;

public interface UserService {
        User_info login(String Name);

}
UserServiceImpl 具体代码:
package com.resume.service;

import org.springframework.beans.factory.annotation.Autowired;
import org.springframework.stereotype.Service;
import org.springframework.transaction.annotation.Transactional;

import com.resume.mapper.UserMapper;
import com.resume.model.User_info;

/**
 * 将当前类注释为一个 Spring 的 bean
 **/
@Service
@Transactional
public class UserServiceImpl implements UserService{
    //自动扫描注入
    @Autowired
    public UserMapper usermapper;
    //重写方法
    @Override
    public User_info login(String Name) {
        return usermapper.login(Name);
    }


}
3.5.2 NewresumeService、NewresumeServiceImpl
NewresumeService 接口被 NewresumeController 调用,然后其实现类 NewresumeServiceImpl 调用 NewresumeMapper 的相关方法并返回结果。NewresumeService 的具体代码如下:
package com.resume.service;

import java.util.List;

import com.resume.model.Basic_info;
import com.resume.model.Educational_info;
import com.resume.model.Work_info;
/**
 *
 * NewresumeService接口
 * service层的接口
 *
 */

public interface NewresumeService {

    void insertbasic(Basic_info basicinfo);

    void addEducational(Educational_info edu);

    void addWork(Work_info work);

    void addIntroduce(Basic_info intro);

    List<Basic_info> selectBasic_info(int userid);

    List<Educational_info> selectEducational_info(int userid);

    List<Work_info> selectWork_info(int userid);

}
NewresumeServiceImpl的具体代码:
package com.resume.service;

import java.util.List;

import org.springframework.beans.factory.annotation.Autowired;
import org.springframework.stereotype.Service;
import org.springframework.transaction.annotation.Transactional;

import com.resume.mapper.NewresumeMapper;
import com.resume.model.Basic_info;
import com.resume.model.Educational_info;
import com.resume.model.Work_info;

/**
 * 将当前类注释为一个 Spring 的 bean
 **/
@Service
@Transactional
public class NewresumeServiceImpl implements NewresumeService{
    //通过自动扫描注入Bean
    @Autowired
    public NewresumeMapper newresumeMapper;
    //重写方法
    @Override
    public void insertbasic(Basic_info basicinfo) {
        newresumeMapper.insertbasic(basicinfo);
    }
    @Override
    public void addEducational(Educational_info edu) {
        newresumeMapper.addEducational(edu);

    }
    @Override
    public void addWork(Work_info work) {
        newresumeMapper.addWork(work);

    }
    @Override
    public void addIntroduce(Basic_info intro) {
        newresumeMapper.addIntroduce(intro);

    }
    @Override
    public List<Basic_info> selectBasic_info(int userid) {
        return newresumeMapper.selectBasic_info(userid);
    }
    @Override
    public List<Educational_info> selectEducational_info(int userid) {
        return newresumeMapper.selectEducational_info(userid);
    }
    @Override
    public List<Work_info> selectWork_info(int userid) {
        return newresumeMapper.selectWork_info(userid);
        }
    }
3.6 Mapper 层
Mapper 层类似与 SSH 框架中的 Dao 层,但是与 SSH 框架不同的是,SSM 框架将处理数据的SQL语句配置到了xml文件中,所以 Mapper 层是 Mapper 接口与对应的Mapper.xml文件。本次实验的Mapper层(包括接口和 xml 文件)放在了com.resume.mapper包下。
3.6.1 UserMapper、UserMapper.xml
UserMapper 接口被 UserSerivceImpl 调用,UserMapper.xml 是与 UserMapper 接口中方法对应的SQL语句。接口中的方法名要和 xml 文件中的id属性对应。
UserMapper 的具体代码如下:
package com.resume.mapper;
/**
 * mapper层相当于SSH中的dao层
 */

import com.resume.model.User_info;

public interface UserMapper {
    //登录查询
    public User_info login(String Name);

}
在 mapper.xml 文件中,如果有需要返回结果的sql语句,比如 select 语句等,还需要配置自定义结果集。如 UserMapper.xml :
<?xml version="1.0" encoding="UTF-8"?>
<!DOCTYPE mapper PUBLIC "-//mybatis.org//DTD Mapper 3.0//EN"
"http://mybatis.org/dtd/mybatis-3-mapper.dtd">
<mapper namespace="com.resume.mapper.UserMapper">
    <!-- 自定义结果集 -->
    <resultMap type="User_info" id="userResultMap">
        <id property="id" column="id" />
        <result property="Name" column="Name" />
        <result property="Password" column="Password" />
    </resultMap>
    <!-- 登录查询 -->
    <select id="login" parameterType="User_info" resultMap="userResultMap">
        select *
        from user_info where name=#{Name}
    </select>

</mapper>
对传入 mapper 层的参数,在 xml 文件中我们需要使用表达式 ${参数名} 来进行调用。
3.6.2 NewresumeMapper、NewresumeMapper.xml
NewresumeMapper、NewresumeMapper.xml 与前面的 UserMapper、UserMapper.xml 是相同的对应关系。NewresumeMapper 接口的具体代码如下:
package com.resume.mapper;

import java.util.List;

import com.resume.model.Basic_info;
import com.resume.model.Educational_info;
import com.resume.model.Work_info;
/**
 * 新建一个简历
 * 导出简历时查询的数据
 */
public interface NewresumeMapper {
    //插入基础信息
    public void insertbasic(Basic_info basicinfo);
    //添加教育信息
    public void addEducational(Educational_info edu);
    //添加工作信息
    public void addWork(Work_info work);
    //添加自我介绍
    public void addIntroduce(Basic_info intro);
    //查找基本信息
    public List<Basic_info> selectBasic_info(int userid);
    //查找教育信息
    public List<Educational_info>  selectEducational_info(int userid);
    //查找工作信息
    public List<Work_info>  selectWork_info(int userid);


}
NewresumeMapper.xml 的具体代码如下:
<?xml version="1.0" encoding="UTF-8"?>
<!DOCTYPE mapper PUBLIC "-//mybatis.org//DTD Mapper 3.0//EN"
"http://mybatis.org/dtd/mybatis-3-mapper.dtd">
<mapper namespace="com.resume.mapper.NewresumeMapper">
    <!-- 自定义结果集 -->
     <resultMap type="Basic_info" id="basicResultMap">
        <id property="ID" column="ID" />
        <result property="Name" column="Name" />
        <result property="Gender" column="Gender" />
        <result property="Age" column="Age" />
        <result property="Address" column="Address" />
        <result property="Email" column="Email" />
        <result property="Tel" column="Tel" />
        <result property="School" column="School" />
        <result property="Introduce" column="Introduce" />
    </resultMap>
         <resultMap type="Educational_info" id="eduResultMap">
        <id property="Eduid" column="Eduid" />
        <result property="School" column="School" />
        <result property="Major" column="Major" />
        <result property="Education" column="Education" />
        <result property="Graducation" column="Graducation" />
    </resultMap>
     <resultMap type="Work_info" id="workResultMap">
        <id property="Workid" column="Workid" />
        <result property="Company" column="Company" />
        <result property="Position" column="Position" />
        <result property="Duty" column="Duty" />
        <result property="Depature" column="Depature" />
    </resultMap>
    <!-- 插入基本信息(除自我介绍) -->
       <insert id="insertbasic" parameterType="Basic_info"  useGeneratedKeys="true" keyProperty="id">
       insert
        into basic_info(name,gender,age,address,email,tel,school,userId)
        values(#{name},#{gender},#{age},#{address},#{email},#{tel},#{school},#{userId})
    </insert>
       <!-- 插入教育信息 -->
     <insert id="addEducational" parameterType="Educational_info"  useGeneratedKeys="true" keyProperty="Eduid">
       insert
        into educational_info(school,major,education,graduation,userid)
        values(#{School},#{Major},#{Education},#{Graduation},#{Userid})
    </insert>
     <!-- 插入工作经历信息 -->
     <insert id="addWork" parameterType="Work_info"  useGeneratedKeys="true" keyProperty="Workid">
       insert
        into work_info(company,position,duty,departure,userid)
        values(#{Company},#{Position},#{Duty},#{Departure},#{Userid})
    </insert>
         <!-- 插入自我介绍,因为放在已有记录下,所以用update语句 -->
     <update id="addIntroduce" parameterType="Basic_info"  >
       update basic_info
        set introduce=#{Introduce} where UserId=#{UserId}
    </update>
     <!-- 查询基础信息 -->
    <select id="selectBasic_info" parameterType="Basic_info" resultMap="basicResultMap">
        select *
        from basic_info where userId=#{userid}
    </select>
      <!-- 查询教育信息 -->
    <select id="selectEducational_info" parameterType="Educational_info" resultMap="eduResultMap">
        select *
        from educational_info where userid=#{userid}
    </select>
      <!-- 查询工作经历信息 -->
    <select id="selectWork_info" parameterType="Work_info" resultMap="workResultMap">
        select *
        from work_info where userid=#{userid}
    </select>

</mapper>
3.7 WordGenerator 工具类
这个工具类是用来让简历根据我们预先写好的模板文件 muban.ftl,生成一个 word 文档并在指定位置输出。使用的是 freemarker 模板引擎,freemarker 是一种基于模板和要改变的数据来生成要输出的文本,输出的文本不仅仅能是 word,还能是 HTML,电子邮件等等格式。WordGenerator 工具类放在 com.resume.tools 包下。
3.7.1 WordGenerator类
WordGenerator 工具类的作用已经在前面介绍了,接下来就让我们看看它的具体代码吧:
package com.resume.tools;

import java.io.BufferedWriter;
import java.io.File;
import java.io.FileOutputStream;
import java.io.IOException;
import java.io.OutputStreamWriter;
import java.io.Writer;
import java.util.ArrayList;
import java.util.HashMap;
import java.util.List;
import java.util.Map;

import com.resume.model.Basic_info;
import com.resume.model.Educational_info;
import com.resume.model.Work_info;

import freemarker.template.Configuration;
import freemarker.template.Template;
import freemarker.template.TemplateException;

public class WordGenerator {
    private Configuration configuration = null;

    public WordGenerator() {
        configuration = new Configuration();
        //设置编码格式
        configuration.setDefaultEncoding("UTF-8");
    }

    // 3个参数分别是:基础信息、教育信息和工作经历,通过数据库查找所得
    public void createDoc(List<Basic_info> basic_info, List<Educational_info> educational_info,
            List<Work_info> work_info) {
        String modelName = "muban.ftl";//模板路径
        String exportFilePath = "/home/shiyanlou/outFile.doc";//文件导出路径,为doc格式
        Template t = null;
        // 1、导入模板
        configuration.setClassForTemplateLoading(this.getClass(), "/com/resume/modelPath");

        try {
            // modelName为要装载的模板,是ftl格式
            t = configuration.getTemplate(modelName,"UTF-8");
        } catch (IOException e) {
            e.printStackTrace();
        }

        // 2、打包数据--每次导出的word文件模板不同,打包数据的方法要单独写
        Map<String, Object> dataMap = new HashMap<String, Object>();
        getData(basic_info,educational_info,work_info,dataMap);

        // 3、导出文件
        // 输出文档路径及名称
        File outFile = new File(exportFilePath);
        Writer out = null;
        try {
            //输出文件
            out = new BufferedWriter(new OutputStreamWriter(new FileOutputStream(outFile), "utf-8"));
        } catch (Exception e1) {
            e1.printStackTrace();
        }

        try {
            t.process(dataMap, out);
        } catch (TemplateException e) {
            e.printStackTrace();
        } catch (IOException e) {
            e.printStackTrace();
        }
    }

    //把数据打包成map;dataMap里存放的数据Key值要与模板中的参数相对应
    private void getData(List<Basic_info> basic_info, List<Educational_info> educational_info,
            List<Work_info> work_info,Map<String, Object> dataMap) {
        dataMap.put("Name", basic_info.get(0).getName());//说明:模板文件中有${Name}与之对应,下同
        dataMap.put("Age", basic_info.get(0).getAge());
        dataMap.put("Gender", basic_info.get(0).getGender());
        dataMap.put("School", basic_info.get(0).getSchool());
        dataMap.put("Address", basic_info.get(0).getAddress());
        dataMap.put("Introduce", basic_info.get(0).getIntroduce());
        dataMap.put("Email", basic_info.get(0).getEmail());
        dataMap.put("Tel", basic_info.get(0).getTel());
        dataMap.put("educational_info", educational_info);
        dataMap.put("work_info", work_info);
        //由于word中包含两个table,table1对应教育信息,table2对应工作经历
                List<Educational_info> _table1 = new ArrayList<Educational_info>();
                //循环将所有信息放入Educational_info的list中
                for (int i = 0; i < educational_info.size(); i++) {
                    Educational_info _t1 = new Educational_info();
                    _t1.setSchool(educational_info.get(i).getSchool());
                    _t1.setEducation(educational_info.get(i).getEducation());
                    _t1.setGraduation(educational_info.get(i).getGraduation());
                    _t1.setMajor(educational_info.get(i).getMajor());
                    _table1.add(_t1);

                }
                //将list放入dataMap
                dataMap.put("table1", _table1);
                //table2过程同table1
                List<Work_info> _table2 = new ArrayList<Work_info>();
                for (int i = 0; i < work_info.size(); i++) {
                    Work_info _t2 = new Work_info();
                    _t2.setCompany(work_info.get(i).getCompany());
                    _t2.setDeparture(work_info.get(i).getDeparture());
                    _t2.setDuty(work_info.get(i).getDuty());
                    _t2.setPosition(work_info.get(i).getPosition());
                    _table2.add(_t2);

                }
                dataMap.put("table2", _table2);
    }


}
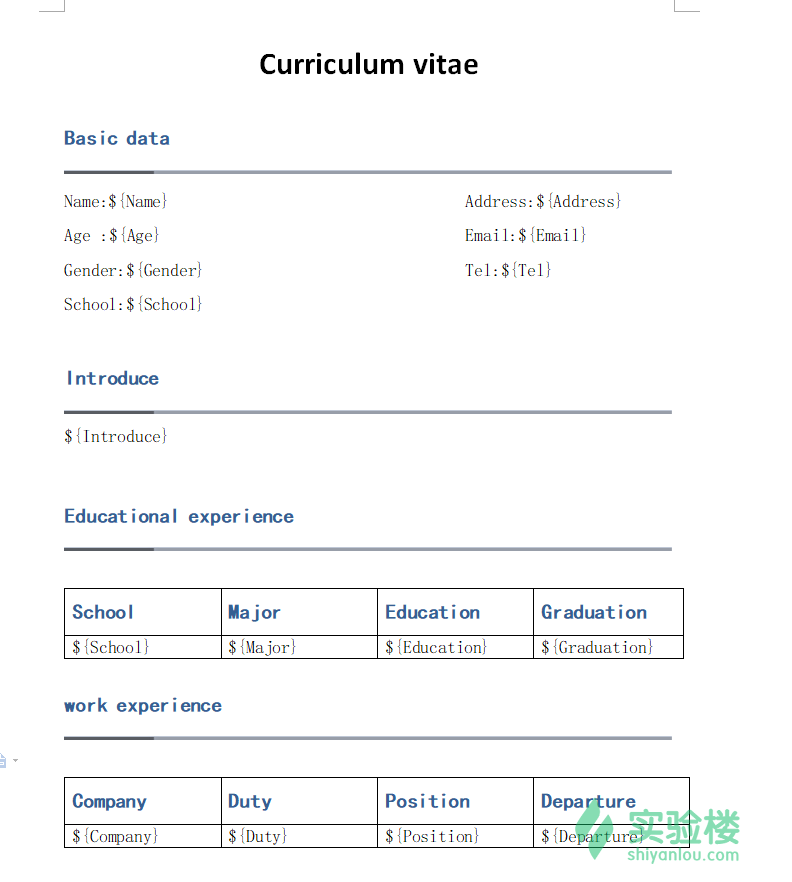
3.7.2 模板文件muban.ftl
常见的创建 ftl 文件的步骤:首先使用 word 或者其他的软件新建一个 word 文档,然后在在这个 word 文档中调整格式,包括字体的大小等等。在需要动态变化的地方使用 ${参数名} 表达式来标记。本次实验所用的模板样式如下图(表格中的表达式需要修改):
然后将文档另存为 xml 格式:

存为 xml 格式后,在使用 EditPlus 等编辑软件打开,在这里修改表格中的表达式,即在 ftl 文件中遍历 list 并循环输出:

图中红色边框的地方就是需要修改的地方。修改完成后另存为 ftl 文件就行了。
本次实验所需的模板文件可以通过命令:
wget http://labfile.oss.aliyuncs.com/courses/875/muban.ftl
下载到环境中,然后将其复制放在项目的 com.resune.modelPath 包下。
3.8 xml 配置文件
配置文件包括 web.xml、spring-mvc.xml、mybatis-config.xml、applicationContext.xml。其中 web.xml 在 WEB-INF 目录下,其余三个在src目录下。每个配置文件的具体代码如下。web.xml:
<?xml version="1.0" encoding="UTF-8"?>
<web-app xmlns:xsi="http://www.w3.org/2001/XMLSchema-instance"
    xmlns="http://java.sun.com/xml/ns/javaee" xmlns:web="http://java.sun.com/xml/ns/javaee/web-app_2_5.xsd"
    xsi:schemaLocation="http://java.sun.com/xml/ns/javaee http://java.sun.com/xml/ns/javaee/web-app_3_0.xsd"
    id="WebApp_ID" version="3.0">
    <display-name>SSMTest</display-name>

    <!-- 配置 Spring 核心监听器 -->
    <listener>
        <listener-class>org.springframework.web.context.ContextLoaderListener</listener-class>
    </listener>

    <!-- 指定 Spring 的配置文件 -->
    <context-param>
        <param-name>contextConfigLocation</param-name>
        <param-value>classpath:applicationContext.xml</param-value>
    </context-param>

    <!-- 定义 Spring MVC 前端控制器 -->
    <servlet>
        <servlet-name>springMVC</servlet-name>
        <servlet-class>org.springframework.web.servlet.DispatcherServlet</servlet-class>

        <init-param>
            <param-name>contextConfigLocation</param-name>
            <param-value>classpath:spring-mvc.xml</param-value>
        </init-param>
        <load-on-startup>1</load-on-startup>
    </servlet>

    <!-- 为 DispatcherServlet 建立映射 -->
    <servlet-mapping>
        <servlet-name>springMVC</servlet-name>
        <url-pattern>/</url-pattern>
    </servlet-mapping>
    <listener>
        <listener-class>org.springframework.web.util.IntrospectorCleanupListener</listener-class>
    </listener>

    <!-- 编码过滤器 -->
    <filter>
        <filter-name>encodingFilter</filter-name>
        <filter-class>org.springframework.web.filter.CharacterEncodingFilter</filter-class>
        <init-param>
            <param-name>encoding</param-name>
            <param-value>UTF-8</param-value>
        </init-param>
        <init-param>
            <param-name>forceEncoding</param-name>
            <param-value>true</param-value>
        </init-param>
    </filter>

    <filter-mapping>
        <filter-name>encodingFilter</filter-name>
        <url-pattern>/*</url-pattern>
    </filter-mapping>

    <!-- 设置首页 -->
    <welcome-file-list>
        <welcome-file>login.jsp</welcome-file>
    </welcome-file-list>
</web-app>
spring-mvc.xml 类似与SSH框架中的 struts.xml,但是相比后者繁琐的配置,前者明显要更加简洁。spring-mvc.xml:
<?xml version="1.0" encoding="UTF-8"?>
<beans xmlns="http://www.springframework.org/schema/beans"
    xmlns:xsi="http://www.w3.org/2001/XMLSchema-instance" xmlns:context="http://www.springframework.org/schema/context"
    xmlns:mvc="http://www.springframework.org/schema/mvc"
    xsi:schemaLocation="http://www.springframework.org/schema/beans
      http://www.springframework.org/schema/beans/spring-beans.xsd
      http://www.springframework.org/schema/context
      http://www.springframework.org/schema/context/spring-context-4.2.xsd
      http://www.springframework.org/schema/mvc
     http://www.springframework.org/schema/mvc/spring-mvc-4.2.xsd">

    <!-- 自动扫描该包,Spring MVC 会将包下用 @Controller 注解的类注册为 Spring 的 controller -->
    <context:component-scan base-package="com.resume.controller" />
    <!-- 设置默认配置方案 -->
    <mvc:annotation-driven />
    <!-- 视图解析器 -->
    <bean id="viewResolver"
        class="org.springframework.web.servlet.view.InternalResourceViewResolver">
        <!-- 执行完action后会返回xxx,xxx会和下面的property组合,形成跳转页面的路径 -->
        <property name="prefix" value="" />
        <property name="suffix" value=".jsp" />
    </bean>
</beans>
mybatis-config.xml 通过扫描 mapper.xml 和实体类JavaBean,使mapper.xml 文件中的SQL语句执行。mybatis-config.xml:
<?xml version="1.0" encoding="UTF-8"?>
<!DOCTYPE configuration PUBLIC "-//mybatis.org//DTD Config 3.0//EN"
"http://mybatis.org/dtd/mybatis-3-config.dtd">
<configuration>
    <!-- 为JavaBean起类别名 -->
    <typeAliases>
        <package name="com.resume.model" />
    </typeAliases>
    <!-- 通过 mapper 接口包加载整个包的映射文件 -->
    <mappers>
        <package name="com/resume/mapper" />
    </mappers>
</configuration>
applicationContext.xml 是 spring 配置文件,在这里将SSM框架整合。applicationContext.xml:
<?xml version="1.0" encoding="UTF-8"?>
<beans xmlns="http://www.springframework.org/schema/beans"
    xmlns:xsi="http://www.w3.org/2001/XMLSchema-instance" xmlns:p="http://www.springframework.org/schema/p"
    xmlns:context="http://www.springframework.org/schema/context" xmlns:tx="http://www.springframework.org/schema/tx"
    xsi:schemaLocation="
          http://www.springframework.org/schema/beans
          http://www.springframework.org/schema/beans/spring-beans-4.2.xsd
          http://www.springframework.org/schema/context
          http://www.springframework.org/schema/context/spring-context-4.2.xsd
          http://www.springframework.org/schema/tx
          http://www.springframework.org/schema/tx/spring-tx-4.1.xsd">

    <!-- 自动扫描有 Spring 相关注解的类,并把这些类注册为 bean -->
    <context:component-scan base-package="com.resume" />
    <!-- 配置数据源 -->
    <bean id="dataSource"
        class="org.springframework.jdbc.datasource.DriverManagerDataSource">
        <property name="driverClassName" value="com.mysql.jdbc.Driver" />
        <property name="url" value="jdbc:mysql://localhost:3306/resume" />
        <property name="username" value="root" />
        <property name="password" value="" />
    </bean>
    <!-- MyBatis 的 SqlSession 的工厂,并引用数据源,扫描 MyBatis 的配置文件 -->
    <bean id="sqlSessionFactory" class="org.mybatis.spring.SqlSessionFactoryBean">
        <property name="dataSource" ref="dataSource"></property>
        <property name="configLocation" value="classpath:mybatis-config.xml" />
    </bean>

    <!-- MyBatis 自动扫描加载 Sql 映射文件/接口 -->
    <bean class="org.mybatis.spring.mapper.MapperScannerConfigurer">
        <property name="basePackage" value="com.resume.mapper"></property>
        <property name="sqlSessionFactory" ref="sqlSessionFactory"></property>
    </bean>
    <!-- JDBC 事务管理器 -->
    <bean id="txManager"
        class="org.springframework.jdbc.datasource.DataSourceTransactionManager">
        <property name="dataSource" ref="dataSource"></property>
    </bean>
    <!-- 启用支持 annotation 注解方式事务管理 -->
    <tx:annotation-driven transaction-manager="txManager" />

</beans>
至此,所有的开发和准备结束,接下来就让我们来运行测试一下。
四、运行结果
在运行前,我们需要先将项目部署到Tomcat服务器下,然后启动服务器。或者直接右击项目名,选择 Run As-->Run On Server,然后 Eclipse 会自动识别Tomcat 7.0 服务器,点击finish,静静的等待服务器启动。在启动的过程中可能会遇到启动的时间不足的问题,你只需要在下方的Server栏中双击Tomcat 7.0 服务器。
然后点击右上角的 Timeouts 按钮,将启动时间调整一下,保存退出就行了。
4.1 登录页面
用户的登录信息需要先在数据库中插入记录。使用命令:
INSERT INTO user_info(name,password) values('shiyanlou','123456');
可以插入名为 shiyanlou,密码为 123456 的用户。(主键自动递增,无需手动添加)

4.2 基础信息页面

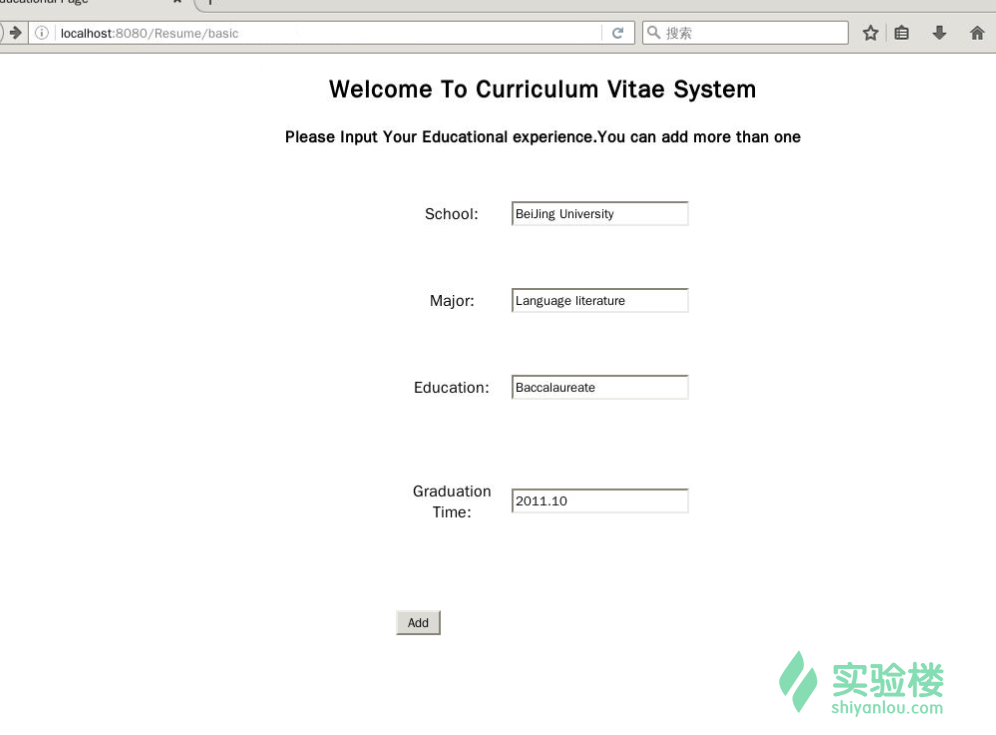
4.3 教育信息页面
4.4 工作经历页面
4.4 下载页面
 导出的文档在主文件夹下,名为 outFile.doc 。由于在线环境无法发开 doc 文档,所以大家可以将文档放到 code 文件夹下,然后点击右方的下载代码,就可以将文档下载到本地,将文件解压后就可以查看了。
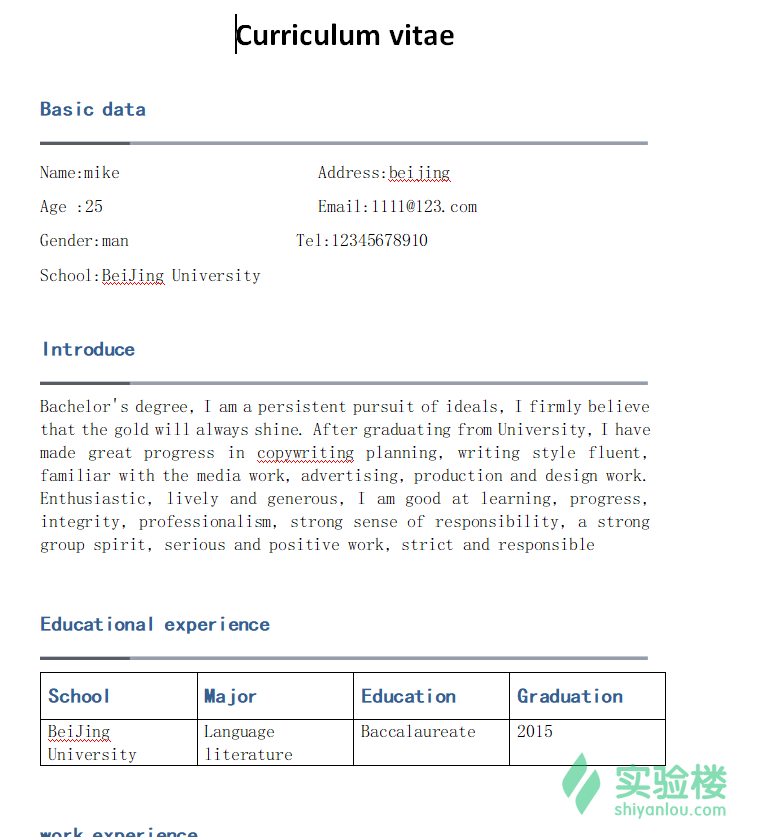
4.5 导出文档的截图
五、实验总结
在本次实验中,我们用 SSM 框架实现了用户登录、简历的录入,用 freemarker+ftl 模板文件生成了简历。在此过程中,能帮助大家提高对SSM框架整合的理解,也对 freemarker 操作文档有一定的了解。
正文到此结束
- 本文标签: bean classpath 解析 HashMap ip 软件 map lib EditPlus wget 时间 sqlsession db XML JDBC tar 总结 Word spring IDE Service 测试 HTML id tomcat SpringMVC sql build Security zip 代码 mapper remote Select equals 开发 http 目录 数据 Action 服务器 App MQ servlet list cat schema 监听器 update 管理 SqlSessionFactory tab parse ArrayList js 参数 W3C 在线生成 UI Property root CTO IO mail value 教育 dataSource 下载 ssh NSA ORM 源码 遍历 session https mybatis mysql 配置 src Freemarker web 注释 自动生成 eclipse key stream 数据库 企业 ACE java CSS
- 版权声明: 本文为互联网转载文章,出处已在文章中说明(部分除外)。如果侵权,请联系本站长删除,谢谢。
- 本文海报: 生成海报一 生成海报二
热门推荐


相关文章

近期评论
-
出现OpenClaw "device signature expired"。the Gateway rejects if Math.abs(Date.now() - signedAt) > 10 * 60 * 1000 (10 minutes)
-
-
想购买您这个站,我的联系方式QQ741756694微信同步 能卖联系
-
-
-
博主的博客用的什么技术栈,内容都是干货,赞
-
-
https://www.liuhaihua.cn/archives/40657.html 这篇博客中的图片打不开了
-
不会英语啊。
-
Loading...
![[HBLOG]公众号](https://www.liuhaihua.cn/img/qrcode_gzh.jpg)

