Spring Cloud Feign的两种使用姿势
Spring Cloud中声明式客户端 Feign的使用过程记录
概述
最近结合一些别人的开源项目来学习Spring Cloud,其中关于服务消费这方面的一个很便利的工具 Feign让我记忆颇深。虽然网上的Demo和例子不胜枚举,但大多比较分散,本文就来集中记录一下声明式客户端 Feign的一些使用姿势。
注:本文首发于 博客 CodeSheep · 程序羊 ,欢迎光临 小站 !
下文就结合例子来记录这一过程,代码在文尾处。
创建基于 Eureka的服务注册中心
三个步骤即可搞定:
- 建工程
创建一个名为 eureka_server 的 SpringBoot工程,并在pom.xml中添加好对应依赖
<dependency>
    <groupId>org.springframework.cloud</groupId>
    <artifactId>spring-cloud-starter-eureka-server</artifactId>
</dependency>
- 改主类
修改应用主类,添加 @EnableEurekaServer 注解
@EnableEurekaServer
@SpringBootApplication
public class EurekaServerApplication {

    public static void main(String[] args) {
        SpringApplication.run(EurekaServerApplication.class, args);
    }
}
- 加配置
配置 application.properties 文件如下所示:
spring.application.name=eureka-server
server.port=1111

eureka.instance.hostname=localhost

#默认设置下,服务注册中心自己也会将自己作为客户端来尝试注册它自己,所以我们需要禁用它的客户端注册行为
eureka.client.register-with-eureka=false
eureka.client.fetch-registry=false
- 启动服务注册中心
浏览器访问之:
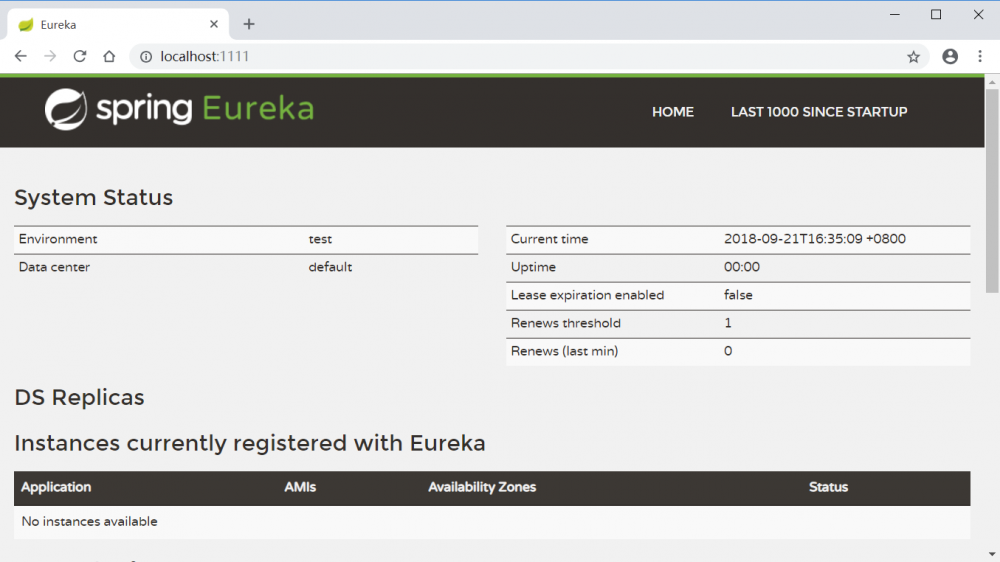
此时还没有任何服务注册上来。
创建服务提供者
- 建工程
创建一个名为 service_provider 的 SpringBoot工程,并在pom.xml中添加好对应依赖:
<dependencies>
    <dependency>
        <groupId>org.springframework.cloud</groupId>
        <artifactId>spring-cloud-starter-eureka</artifactId>
    </dependency>
    <dependency>
        <groupId>org.springframework.boot</groupId>
        <artifactId>spring-boot-starter-web</artifactId>
    </dependency>
</dependencies>
- 改主类
添加 @EnableDiscoveryClient 注解
@EnableDiscoveryClient
@SpringBootApplication
public class ServiceProviderApplication {

    public static void main(String[] args) {
        SpringApplication.run(ServiceProviderApplication.class, args);
    }
}
- 添加控制器
DateServiceController
提供一个Restful接口而已,该接口的作用是获取服务器上的时间并返回
@RestController
public class DateServiceController {

    @RequestMapping( value = "/test", method = RequestMethod.GET )
    public String test( @RequestParam String param ){
        return "hello " + param;
    }
}
- 配置 application.properties文件
spring.application.name=service_provider
server.port=1112
eureka.client.serviceUrl.defaultZone=http://localhost:1111/eureka/
- 启动工程
浏览器访问服务注册中心,我们发现服务提供者 service_provider 已经注册到 eureka_server 上:
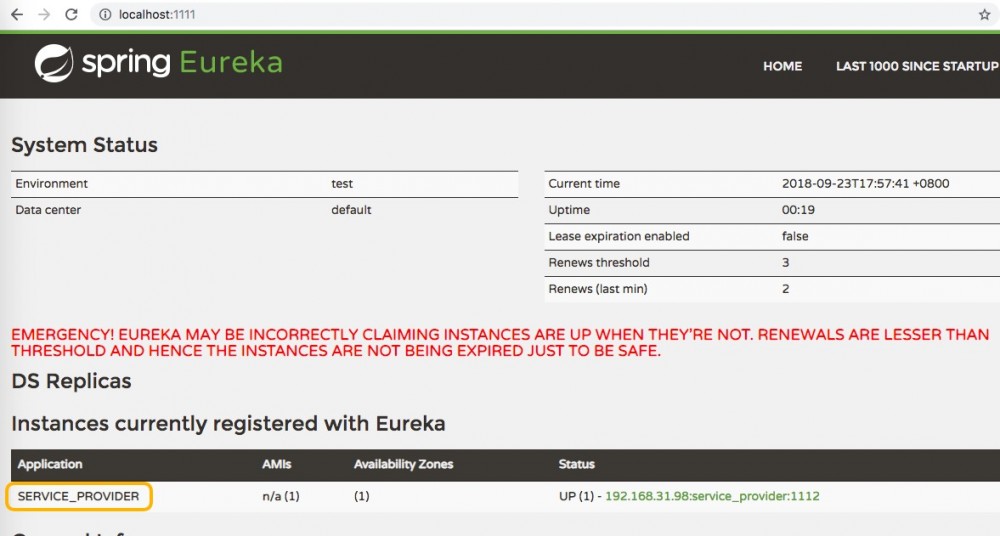
同时浏览器访问: http://localhost:1112/test?param=www.codesheep.cn ,可以测试服务提供 service_provider 提供的接口工作正常

接下来我们创建服务消费者,是 Feign该登场的时候了!
创建基于 Feign的服务消费者
- 创建一个名为
service_consumer的 SpringBoot工程,并在pom.xml中添加好对应依赖
<dependencies>
    <dependency>
        <groupId>org.springframework.boot</groupId>
        <artifactId>spring-boot-starter-web</artifactId>
    </dependency>
    <dependency>
        <groupId>org.springframework.cloud</groupId>
        <artifactId>spring-cloud-starter-eureka</artifactId>
    </dependency>
    <dependency>
        <groupId>org.springframework.cloud</groupId>
        <artifactId>spring-cloud-starter-feign</artifactId>
    </dependency>
    <dependency>
        <groupId>org.springframework.boot</groupId>
        <artifactId>spring-boot-starter-actuator</artifactId>
    </dependency>
    <dependency>
        <groupId>org.springframework.boot</groupId>
        <artifactId>spring-boot-starter-test</artifactId>
        <scope>test</scope>
    </dependency>
</dependencies>
- 修改应用主类
主要是添加有关 Feign客户端的一些注解而已
@EnableFeignClients
@EnableDiscoveryClient
@SpringBootApplication
public class ServiceConsumerApplication {

	public static void main(String[] args) {
		SpringApplication.run(ServiceConsumerApplication.class, args);
	}
}
- 创建一个 Feign客户端的接口:
DateServiceFeignClientInterface
很明显其内部用 @FeignClient( value = "service-provider" ) 声明的方式指向了 服务提供者,而接口方法则实现了对 服务提供者接口的实际调用
@FeignClient( value = "service-provider" )
public interface DateServiceFeignClientInterface {

    @GetMapping("/test")
    String consumer( @RequestParam("param") String param );
}
- 创建控制器:
DateServiceFeignController
注意,这是服务消费者提供的 Rest接口
@RestController
@RequestMapping("/consumer")
public class DateServiceFeignController {

    @Resource
    DateServiceFeignClientInterface dateServiceFeignClientInterface;

    @GetMapping("/date")
    public String getDate( @RequestParam String param ) {
        return dateServiceFeignClientInterface.consumer( param );
    }
}
- 配置
application.properties
spring.application.name=service-consumer
server.port=1113

eureka.client.serviceUrl.defaultZone=http://localhost:1111/eureka/
- 启动服务消费者
我们先去服务注册中心上看看,发现 服务消费者也注册上来了:
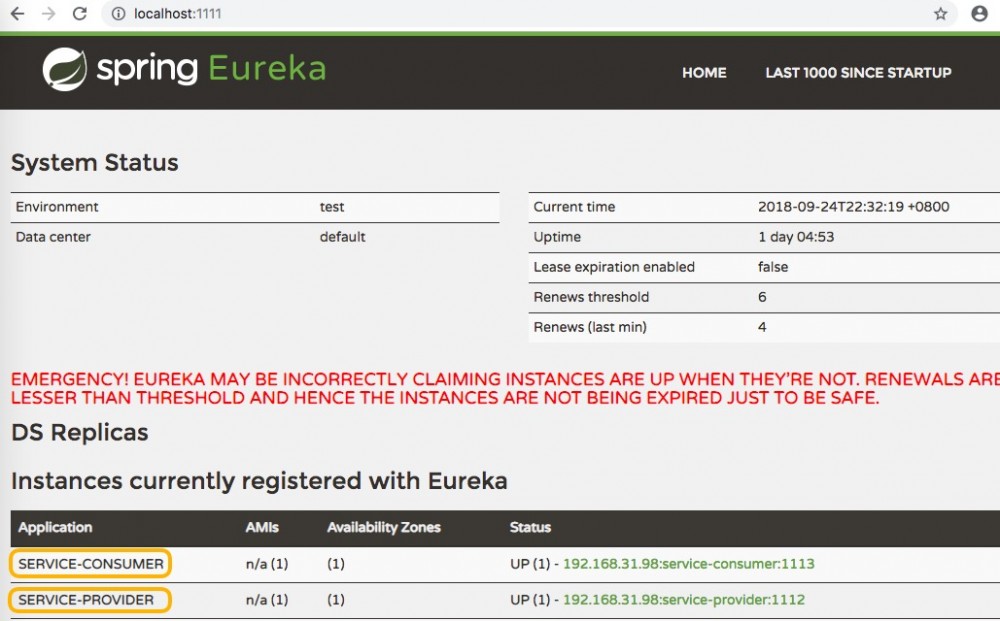
然后我们浏览器访问 服务消费者提供的Rest接口: http://localhost:1113/consumer/date?param=www.codesheep.cn
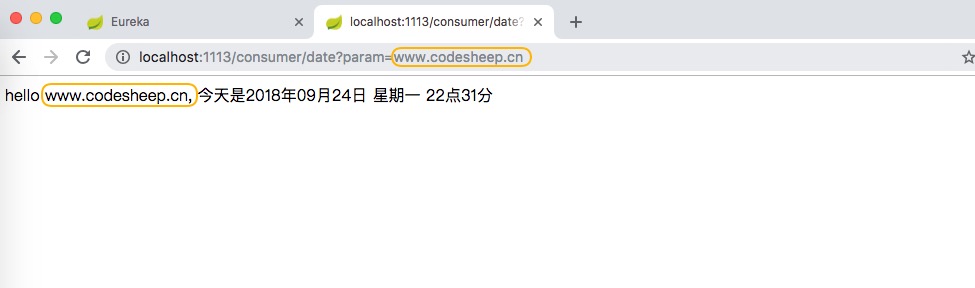
这样我们就通过 服务消费者的 Feign客户端 取到了服务提供者 给予的接口数据。
上面这就是声明式客户端 Feign的第一种使用姿势,也是常用的手法,常见于很多Demo
下面我们来实践一下关于 Feign的继承与实现机制 ,发现其使用 更加灵活 ( Feign支持接口继承方式快速生成客户端,颇有点RPC的意思(关于RPC的实践可以参考我的文章: 《RPC框架实践之:Google gRPC》 、 《RPC框架实践之:Apache Thrift》 ) )
抽象出一个公共的 API服务
-
创建一个普通 Maven项目:
service_provider_api -
创建一个公共接口:
DateService
public interface DateService {
    @GetMapping("/api/test")
    String consumer( @RequestParam("param") String param );
}
改造之前的 服务提供者 / 消费者项目
- 在服务消费者
service_consumer项目中添加一个新的Feign的客户端接口
@FeignClient( value = "service-provider" )
public interface DateServiceFeignClientInterface2 extends DateService {
}
- 并且在
service_consumer项目中添加一个新的控制器DateServiceFeignController2
@RestController
@RequestMapping("/consumer2")
public class DateServiceFeignController2 {

    @Resource
    DateServiceFeignClientInterface2 dateServiceFeignClientInterface2;

    @GetMapping("/date")
    public String getDate( @RequestParam String param ) {
        return dateServiceFeignClientInterface2.consumer( param );
    }
}
- 在服务提供者
service_provider项目中来实现我们在公共api项目service_provider_api中的DateService接口,赋予实际逻辑
@RestController
public class DateServiceController2 implements DateService {

    @Override
    public String consumer( @RequestParam String param) {
        Date now = new Date();
        SimpleDateFormat simpleDateFormat = new SimpleDateFormat("今天是"+"yyyy年MM月dd日 E kk点mm分" );
        String nowTime = simpleDateFormat.format( now );
        return "hello again " + param + ", " + nowTime;
    }
}
- 依次将
eureka_server、service_provider、service_consumer三个项目分别启动
浏览器访问: http://localhost:1113/consumer2/date?param=www.codesheep.cn
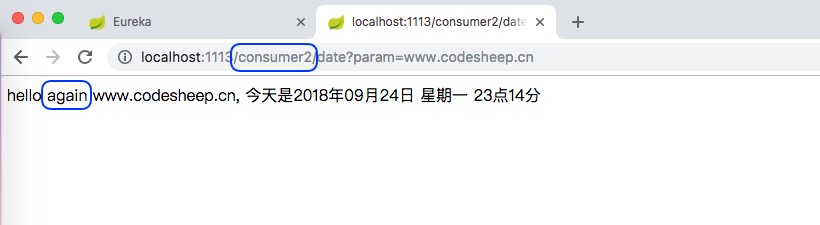
使用 feign的继承特性时,可以将服务接口的定义从服务消费者中剥离出去,形成独立的api项目从而可以很方便的实现接口定义和依赖的共享,不用再复制粘贴接口进行绑定,当然这种做法存在的问题就是可能会导致服务提供者和服务消费者间的耦合度增高,此时如果服务提供者修改了一个接口定义,服务消费者可能也得跟着变,进而带来一些坑。
后 记
由于能力有限,若有错误或者不当之处,还请大家批评指正,一起学习交流!
- My Personal Blog:CodeSheep 程序羊
- 我的半年技术博客之路
本文实验代码在此
可 长按 或 扫描 下面的 小心心 来订阅 CodeSheep ,获取更多 务实、能看懂、可复现的 原创文 ↓↓↓

正文到此结束
- 本文标签: UI springcloud App client ORM RESTful 服务注册 REST 服务器 ACE 配置 springboot 时间 consumer https Service 开源项目 注册中心 Eureka web 博客 map id 代码 provider pom kk IDE Feign value apache http cat MQ Google 开源 maven 文章 数据 Spring cloud XML spring src tar IO API dependencies 测试 1111
- 版权声明: 本文为互联网转载文章,出处已在文章中说明(部分除外)。如果侵权,请联系本站长删除,谢谢。
- 本文海报: 生成海报一 生成海报二
热门推荐


相关文章

近期评论
-
出现OpenClaw "device signature expired"。the Gateway rejects if Math.abs(Date.now() - signedAt) > 10 * 60 * 1000 (10 minutes)
-
-
想购买您这个站,我的联系方式QQ741756694微信同步 能卖联系
-
-
-
博主的博客用的什么技术栈,内容都是干货,赞
-
-
https://www.liuhaihua.cn/archives/40657.html 这篇博客中的图片打不开了
-
不会英语啊。
-
Loading...
![[HBLOG]公众号](https://www.liuhaihua.cn/img/qrcode_gzh.jpg)

